Ecommerce website prototype - jmugicagonz/google-cloud-product-discovery-demo GitHub Wiki
Prototype of an ecommerce website
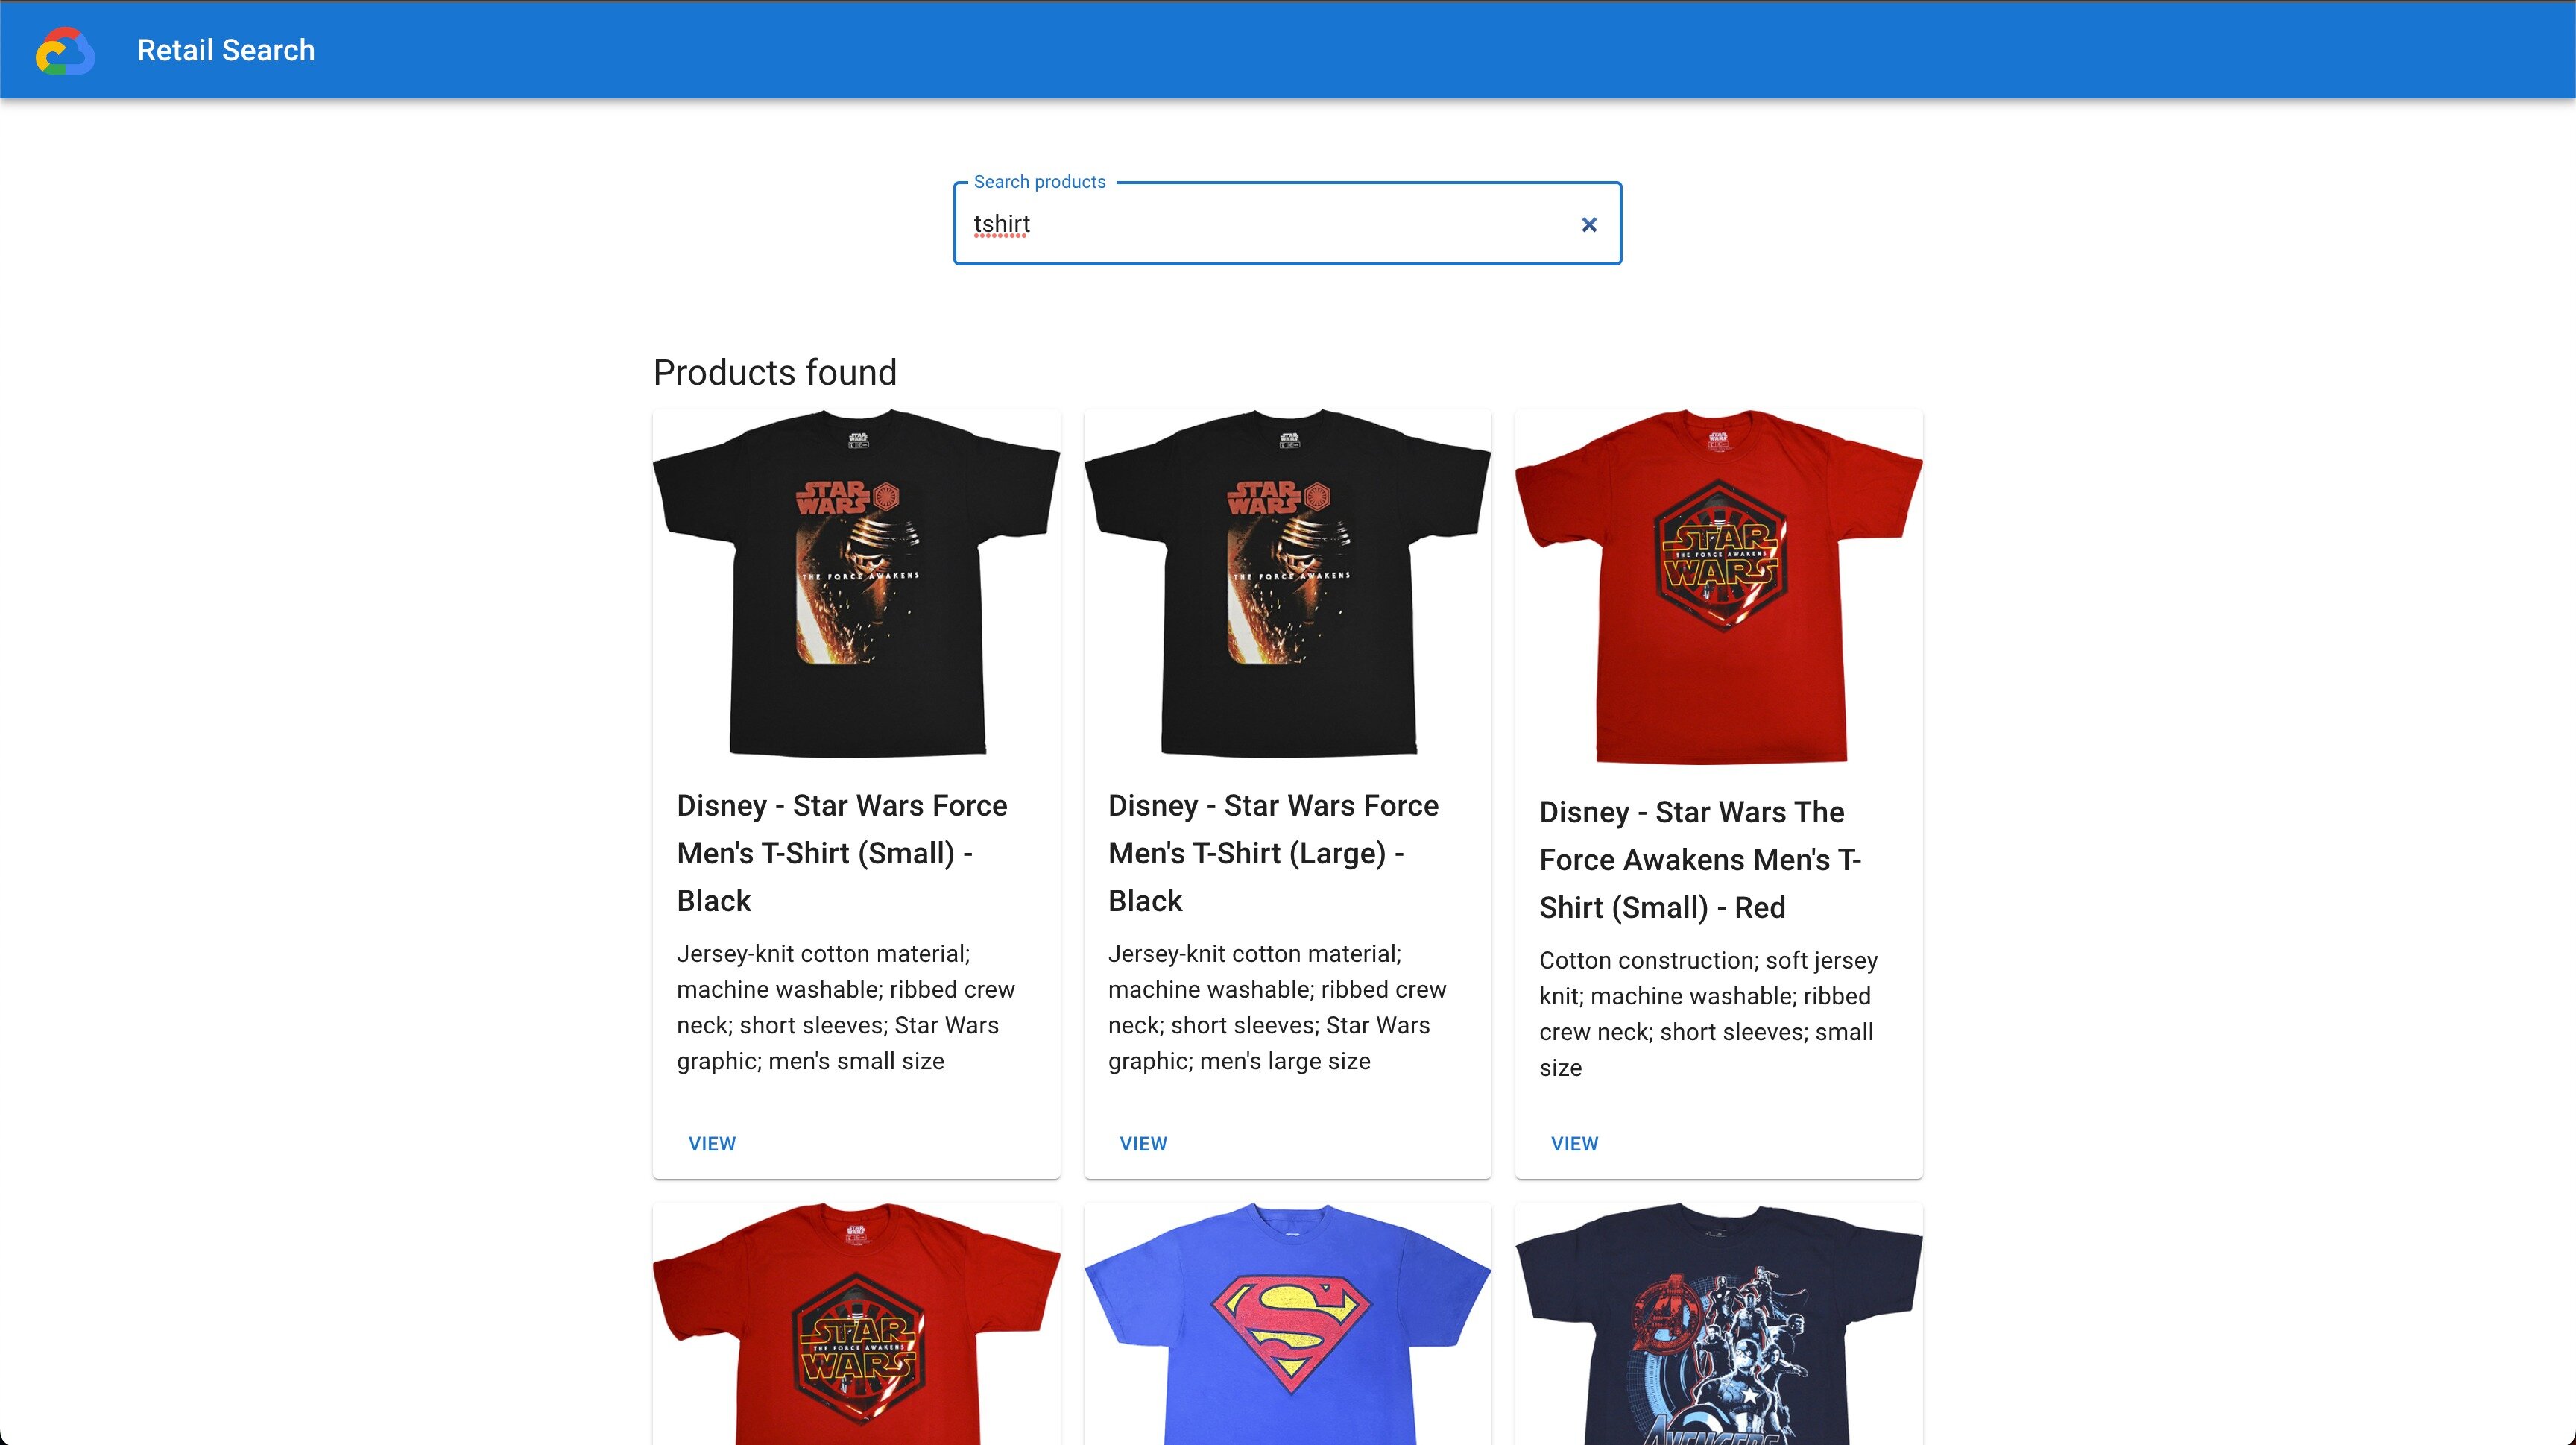
This demo shows how the Retail API can be implemented in an ecommerce website, connecting customers' custom front-end to Retail API as a back-end.
The following Google Cloud products are used in this demo:
Moreover, to containerise the application with Cloud Build, Docker is used.
In order to develop the demo website, the following technologies have been used:
How to use the prototype
This prototype contains the structure to demo the use of Retail Search (already included) and other Product Discovery products (Recommendations AI and Product Vision Search) or any other functionality you can imagine. Customising the front-end with Nextjs and MUI or other components and connecting it to Google Cloud or other backends, you have a structure ready to be containerised and deployed in Cloud Run to show and share you prototype.
You can either clone the repository and customise the code or contribute to this repo by adding new functionalities (e.g., Recommendations AI, Product Vision Search).
In order to use it, you need to have a catalog already uploaded to the Retail API inside your project. If you do not have a catalog to the Retail API, refer to the Catalog Ingestion Demo.
Once you have a catalog uploaded, you can deploy this demo, query for products in the search bar and check the results! More functions are to come, this is just the beginning but we wanted to provide a solid structure to build on top of it!
In order to use and deploy the prototype, follow these steps:
1. Install the gcloud CLI
You need to install the gcloud CLI with this guide to:
- Access the Google Cloud APIs.
- Use the
gcloudcommands to build and deploy the container in Cloud Run. Moreover, it will be necessary to get an authentication token if the first two authentication methods that we'll see don't work.
2a. How to deploy the demo website in a local server
First, run the development server:
npm run dev
Open http://localhost:3000 with your browser to see the result.
You can start editing the page by modifying pages/index.js. The page auto-updates as you edit the file.
You can also build the project and run it as a production server:
npm run build
npm start
Open http://localhost:3000 with your browser to see the result.
Authentication when using a local server
When deploying the website on a local server, the authentication with the Google Client Libraries is automatically handled by the Google Cloud CLI
2b. How to deploy the demo website in Cloud Run
In order to deploy to Cloud Run, an example of a Cloud Build file, cloudbuild.yaml, is provided. This file containerises the App using Docker, then pushes it to Artifact Registry, where a repo has been created. Finally, the image is deployed to Cloud Run.
Once the repository in Artifact Registry file has been created, the following command can be used to launch the cloudbuild.yaml(replacing values for project, region and _NAME_REPO_ART_REG):
gcloud builds submit --config=cloudbuild.yaml --region=_YOUR_DEFINED_REGION_ --project=_YOUR_PROJECT_ID_ --substitutions=_NAME_REPO_ART_REG=_YOUR_REPO_ARTIFACT_REGISTRY_
An example of this command is:
gcloud builds submit --config=cloudbuild.yaml --region="europe-west1" --project="pod-fr-retail" --substitutions=_NAME_REPO_ART_REG="ecommerceproductdiscovery"
For more information:
- There is an example provided by Google Cloud for inspiration to build the
cloudbuild.yamland theDockerfilefiles. - There is a Dockerfile used by Cloud Build to build the image. This file has been built inspired bu the oficial example provided by the Vercel team, as well as this blog post.
- There is also an guide on how to code the
cloudbuild.yamlbuild and deploy a container in Cloud Run. As that guide deploys the container to Container Registry (already deprecated), you can also use the format given in this other guide for the variable to make sure it is deployed to Artifact Registry. - The Dockerfile reference can help you understand better the Dockerfile.
Authentication when deploying in Cloud Run
Once the container has been deployed in Cloud Run, the authentication with the Google Cloud APIs is performed by the Service Identity. Make sure you attach a Service Account with enough privileges to communicate with the Google Cloud APIs.
On the other side, it is probable that you get a 403 - Forbidden error when you try to access the generated URL. We have identified three different ways to solve this.
a. Allow unauthenticated invocations: you can attempt to open the Cloud Run service, go to Security, and select Allow unauthenticated invocations. However, this might not ve valid as it will give AllUsers the Cloud Run Invoker IAM role. This is blocked by domain restriction policies in many organizations.
b. How to create public Cloud Run services when Domain Restricted Sharing is enforced: if the first method does not work, you can refer to this post and try the proposed strategy to bypass the restriction. However, you need to have some IAM permissions that you might not have.
c. Use the ModHeader extension: if any of the first two methods work, there is still a third one that should work.
To consume the service, we need to be authenticated. This can be achieved by injecting an Authorization field in the request headers.
We could use curl to test this, but then any additional presentation or logic from our application would be lost. Instead, we'll install a Chrome extension called ModHeader that will allow us to do this from the browser and in a friendly way.
So, go and install the extension. Once done, go back to your terminal and get identity token for your google account into your clipboard with gcloud:
gcloud auth print-identity-token | pbcopy
Then go back to ModHeader and add a new Request Header with the following values:
- Key:
Authorization - Value:
Bearer <paste your clipboard here>
The resulting header request should look like the following image:
We can now store this ModHeader configuration and give it a name, so every time it is active the header will be injected in our requests.