Fork the repository - jimmytwei/oneAPI-samples GitHub Wiki
All code sample contributions must go into the development branch where they will be reviewed. The master branch contains only code samples that work with the latest released version of the Intel® oneAPI Toolkits.
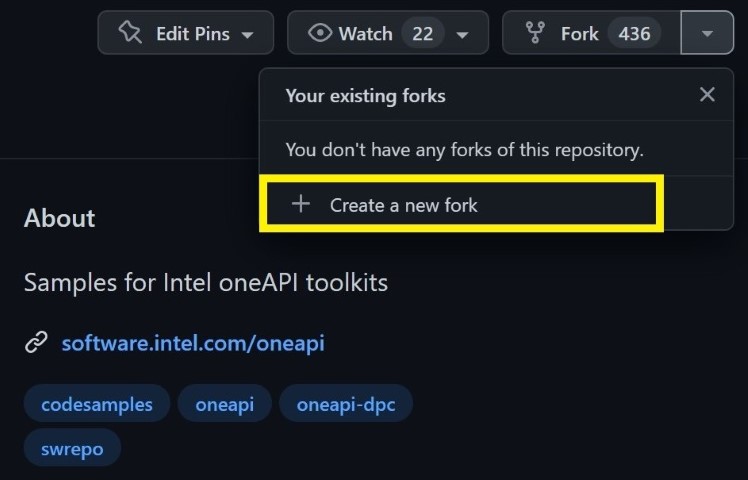
Before submitting a pull request, you must fork the oneAPI-samples repository. To fork the repo, click on the Fork icon and then select Create a new fork. It will take a few seconds for the fork to be created. If you previously forked the repo, continue here.
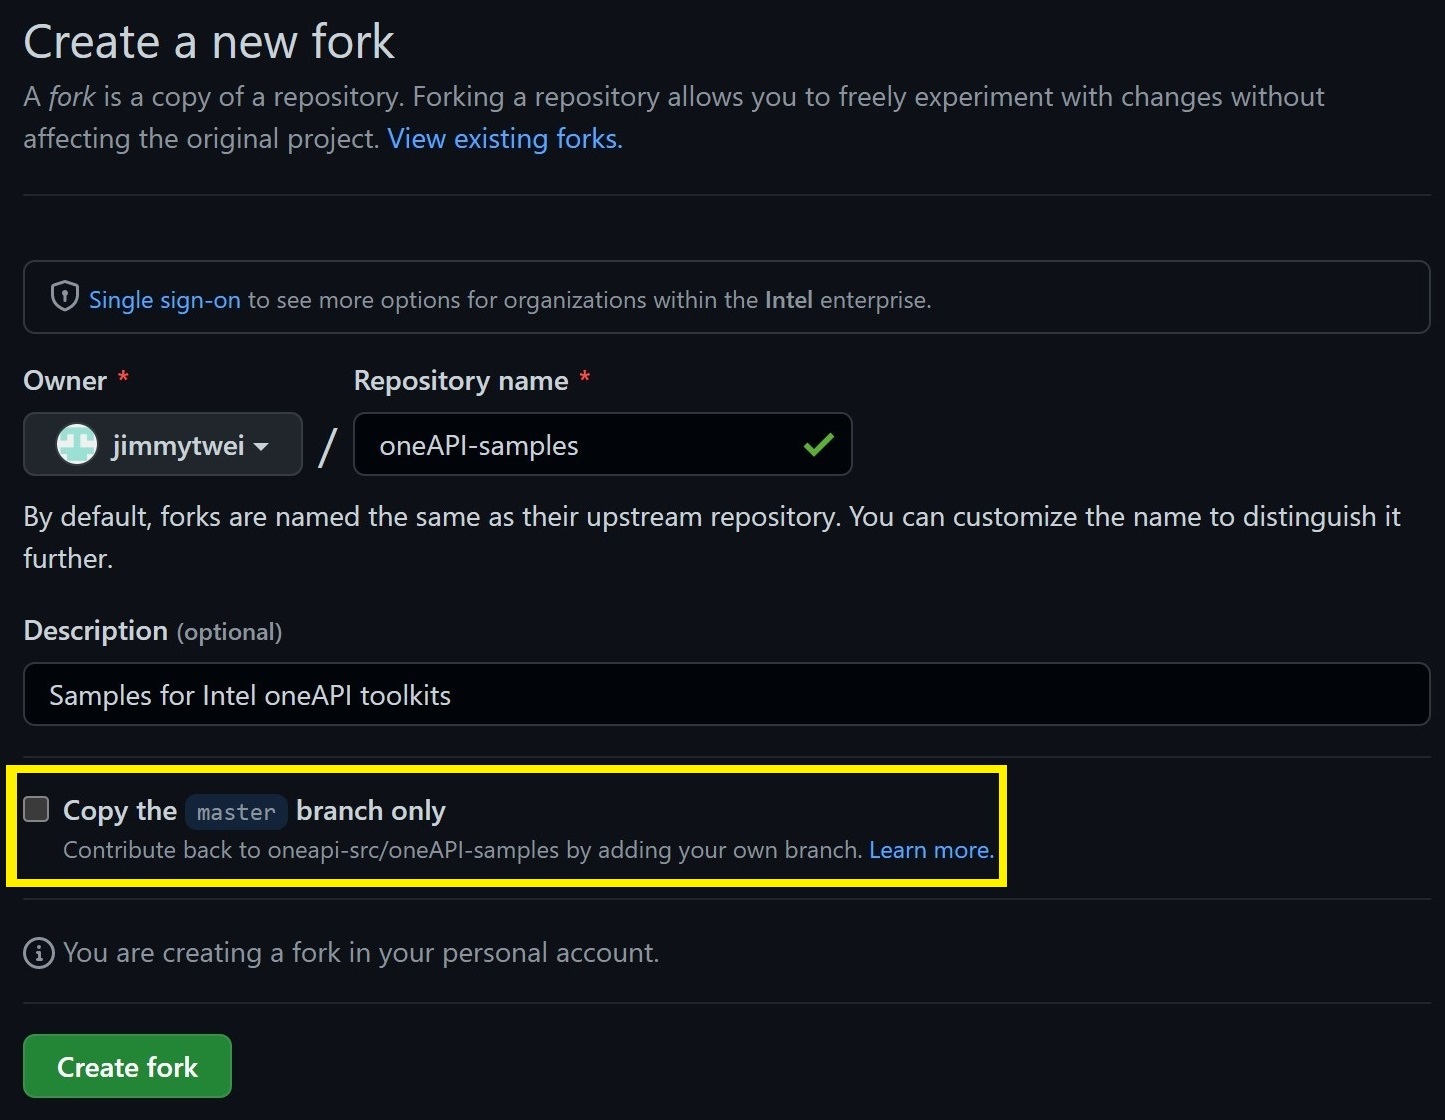
When creating a fork, make sure that the Copy the master branch only checkbox is unchecked before the Create fork button is clicked.
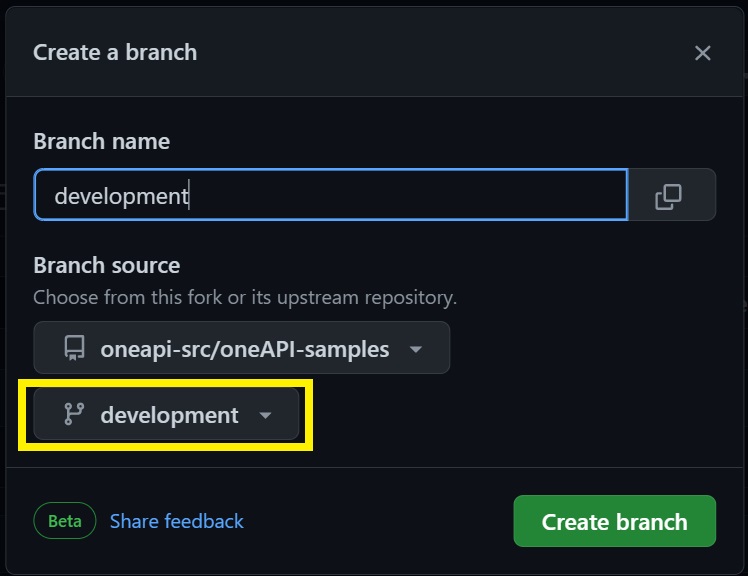
If you have an existing fork but do not have a development branch, create one by selecting the oneapi-src/oneAPI-samples development branch in the dropdown as the branch source.
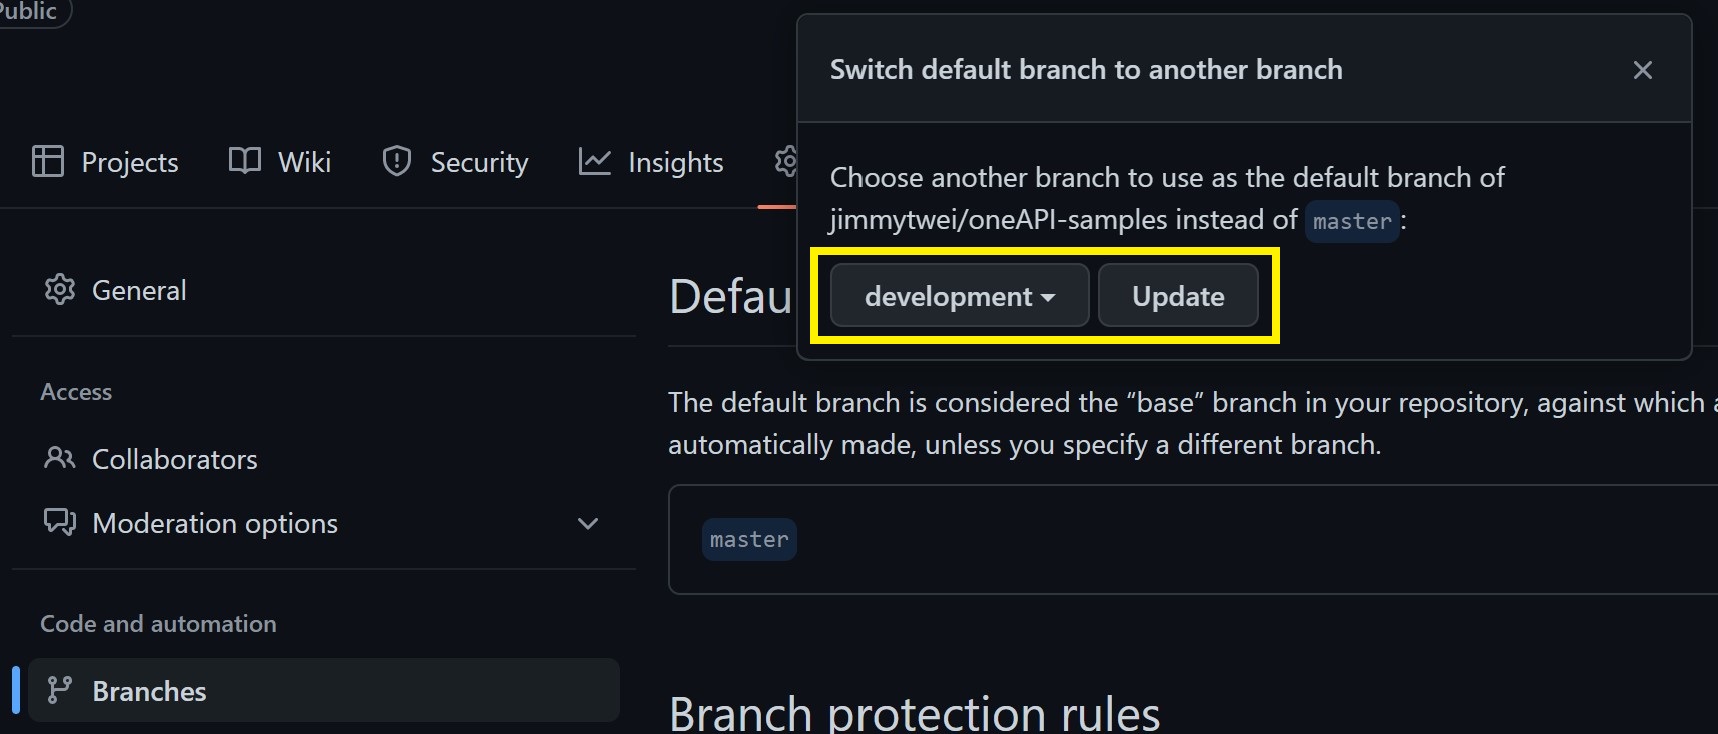
Once your fork has been created, go to the Settings icon and select Branches. Change the default branch to development in the dropdown and click on the Update button.
To create a new branch in your fork, make sure the development branch is selected from the dropdown and enter the name of your branch in the text field.
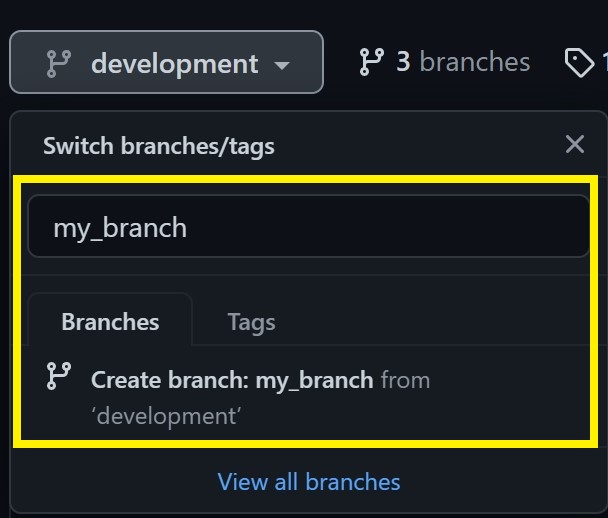
In the example above, my_branch is the name of the branch to be created. To clone the repo and checkout the branch that you just created, type:
git clone -b <your branch name> https://github.com/<your GitHub username>/<your repo name>.git
Once you are ready to commit your changes to your repo, type the following:
git add .
git commit -s -m "<insert commit reason here>"
git push origin