_SKU_SEN0302_VL53L1X_TOF_Laser ranging_sensor - jimaobian/DFRobotWikiCn GitHub Wiki

简介
VL53L1X激光测距传感器是一款基于时间飞行原理(TOF)设计的高精度测距传感器。与传统的技术不同,VL53L1X无论目标反射率如何,都能提供精确的距离测量,最高测量距离4米。 DF基于VL53L1X设计的传感器模块,采用Gravity-I2C接口,即插即用,支持3.3V~5V供电使用,兼容更多的主板,适应更多的应用场景。 相比同类型的VL53L0x测距模块,其测距距离更大,精度更高,达±0.5%,响应时间更快,大于或等于20ms。 VL53L1X的940nm垂直腔面发射激光器对人眼来说是完全不可见的,加上内部物理红外滤波器,可以实现更远的测距,更强的抗环境光的能力,以及更好的覆盖玻璃光学截面。 可以用该模块做避障机器人,距离探测,检测移动物体速度等应用。
技术规格
- 工作电压:3.3V-5.5V DC
- 激光波长:940nm
- 量程范围:10-4000mm
- 测距模式:
- 短距模式:1.3m
- 长距模式:4m
- 测距角度:27°
- 测距精度:±3%
- I2C地址: 0x29(默认)
- 工作温度:-20-70 ℃
- 接口类型:标准Gravity接口
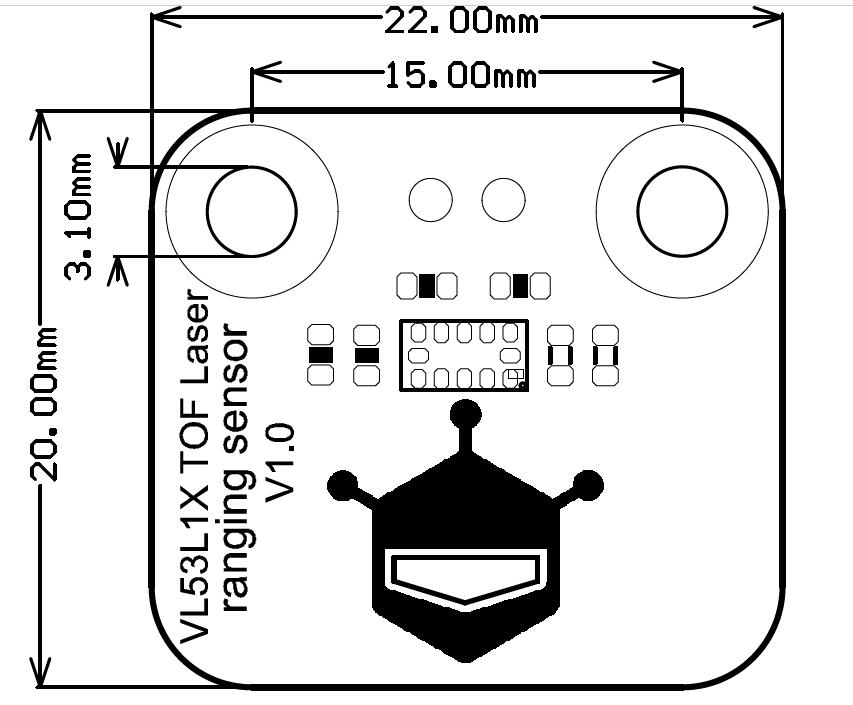
- 产品尺寸:20*22 mm
引脚说明
| | |
| ------------------------------------- | |
|
: | |
| |
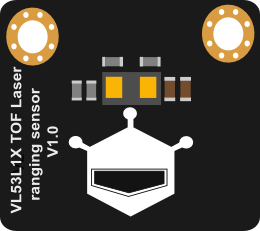
| 标号 | 名称 | 功能描述 |
| 1 绿线 | D | IIC数据线DATA |
| 2 蓝线 | C | IIC时钟线CLK |
| 3 黑线 | - | 电源负极GND |
| 4 红线 | + | 电源正极VCC |
引脚描述
- GPIO1:传感器中断输出引脚,用来指示数据是否准备好
- XSHUT:传感器关闭引脚,默认被拉高,当引脚被拉低时传感器进入关闭模式
使用教程
Arduino
准备
硬件
- Arduino UNO控制板 x1
- VL53L1X TOF Laser-ranging Sensor模块
软件
- Arduino IDE, 点击下载Arduino IDE
- [https://github.com/DFRobot/DFRobot_VL53L1X请先下载VL53L1x TOF Laser-ranging sensor库] 如何安装库文件,点击链接
连接图
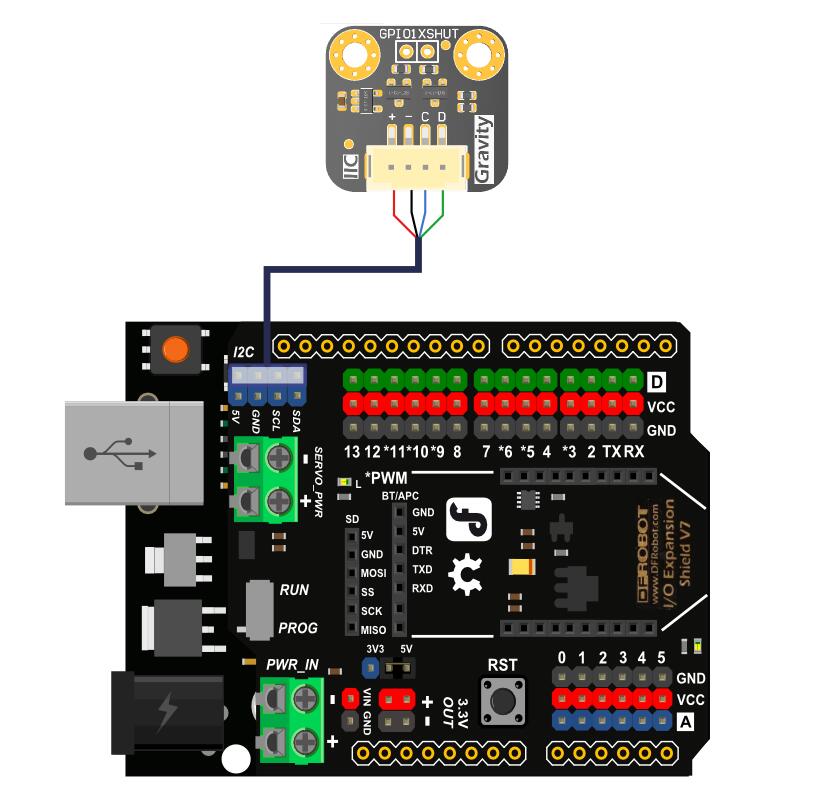
样例代码
- 测距
获取目标物体的距离。
/*!
   file getDistance.ino
   SEN0302 Distance Ranging Sensor
   The module is connected with Arduino Uno to read the distance
   This demo output the distance between sensor and target
   Copyright    [DFRobot](http://www.dfrobot.com), 2016
   Copyright    GNU Lesser General Public License
   version  V0.1
   date  2019-4-22
*/
#include "Arduino.h"
#include "Wire.h"
#include "DFRobot_VL53L1X.h"

DFRobot_VL53L1X sensor(&Wire);
uint16_t actDistance;

void setup(void)
{
  Wire.begin();
  Serial.begin(9600);

  while (sensor.begin() != true){
    Serial.println("Sensor init failed!");
    delay(1000);
  }
}

void loop(void)
{
  sensor.startRanging();
  uint16_t distance = sensor.getDistance();
  sensor.stopRanging();

  Serial.print("Distance(mm): ");
  Serial.println(distance);

  Serial.println();
  delay(1000);
}
程序功能:串口打印物体距传感器的距离。 
校准
| | | | | | ------------- | ------------- | ------------ | | | 校准命令表格 | | | | | 命令格式 | 命令描述 | 例子 | | | enter | 进入校准模式 | enter + 回车键 | | | offset:偏移值 | 偏移值校准,需用户自行计算 | offset: 20 | | | distance:实际距离 | 输入实际距离值,进行校准 | distance:300 | | | exit | 退出校准模式 | exit | |
step1:打开Arduino IDE,打开calibration.ino程序,编译并下载,代码如下所示:
/*!
file calibration.ino
SEN0302 Distance Ranging Sensor
The module is connected with Arduino Uno to read the distance
This demo can be used to calibrate the sensor(both of offset and cross talk)
This demo output the distance between sensor and target
Copyright [DFRobot](http://www.dfrobot.com), 2016
Copyright GNU Lesser General Public License
version V0.1
date 2019-4-22
*/
#include "Arduino.h"
#include "Wire.h"
#include "DFRobot_VL53L1X.h"
DFRobot_VL53L1X sensor(&Wire);
int16_t offset = 0;
void setup(void)
{
Wire.begin();
Serial.begin(9600);
while (sensor.begin() != true){//sensor initialization
Serial.println("Sensor init failed!");
delay(1000);
}
offset = sensor.getOffset();//get sensor's current offset value
Serial.print("Offset(mm): ");
Serial.println(offset);
Serial.println("offset = Actual Distance - Distance");// offset = targetDistance - sensorDistance
Serial.println("Please input enter to enter calibration mode!");
Serial.println();
}
void loop(void)
{
sensor.startRanging();//start to ranging
uint16_t distance = sensor.getDistance();//Get measurement distanc.
sensor.update();//Waiting for calibration
sensor.stopRanging();//stop to ranging
Serial.print("Distance(mm): ");
Serial.println(distance);
delay(1000);
}
程序功能:校准传感器,并打印校准后的测距结果,单位mm.
 |
|
| '注:当Offset值为0时,代表传感器没有被校准 |
step2:打开串口监视器,将串口配置为“换行符”或“NL或CR(回车换行)” 并将波特率设置为9600
step3:在串口输入行中输入命令“enter”,再按键盘的“回车键”,或电机串口编辑行后的“发送”按钮,进入校准模式:
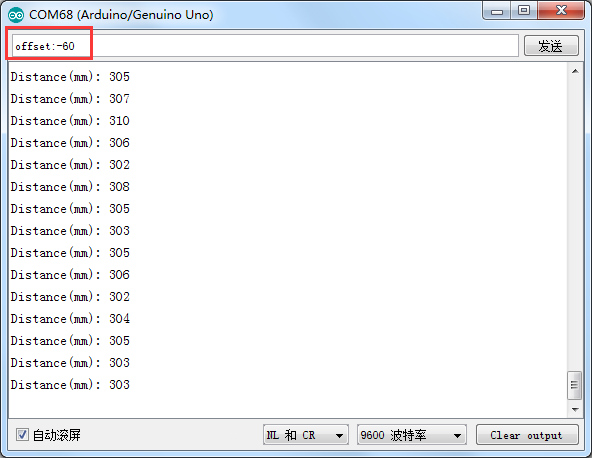
 step4:此时再输入命令“offset: 偏移值”或“distance: 实际距离”即可校准传感器,如下图所示:
 |
|
| 注:使用偏移值校准距离偏移值时,偏移值 = 传感器测量距离 - 实际距离, 参数offset范围为-1024~1023mm |
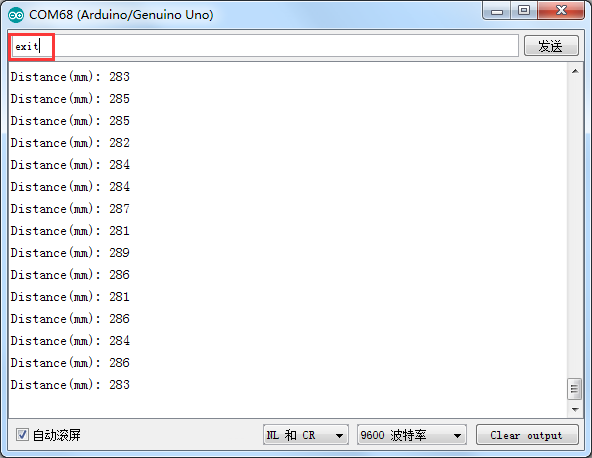
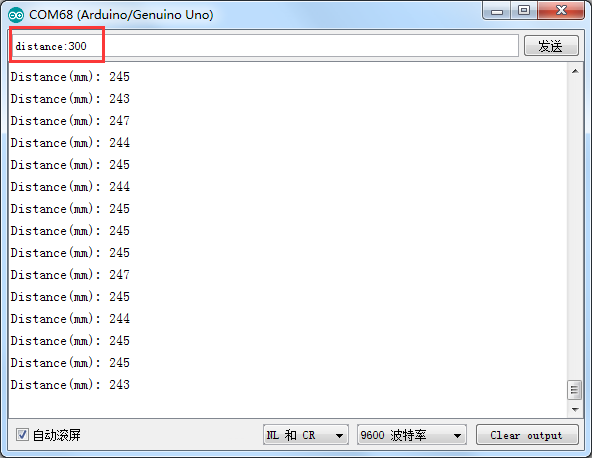 step5:校准成功后,即可输入命令“exit”退出校准模式,如下图所示:
产品尺寸
常见问题
| 1.超过最大测量量程(4m)后,测量出现65535以外的其他值? |
该测距传感器受光线影响,若在光线强的环境下测试,则容易出现数字乱跳情况,需在环境光线弱的条件下工作。
| 2.短距测量和长距测量有什么区别? |
短距测量距离最大1.3m,长距模式下可达4m,在短距模式下基本不受光线影响。
| 3.使用XSHUT引脚关闭传感器后,如何重启传感器? |
拉高XSHUT引脚,调用sensor.begin()函数重新初始化,再调用sensor.startRanging()函数重新开始测距。
| 更多问题及有趣的应用,可以 访问论坛 进行查阅或发帖。 |
