apc220_radio_data_module(sku_tel0005) - jimaobian/DFRobotWiki GitHub Wiki
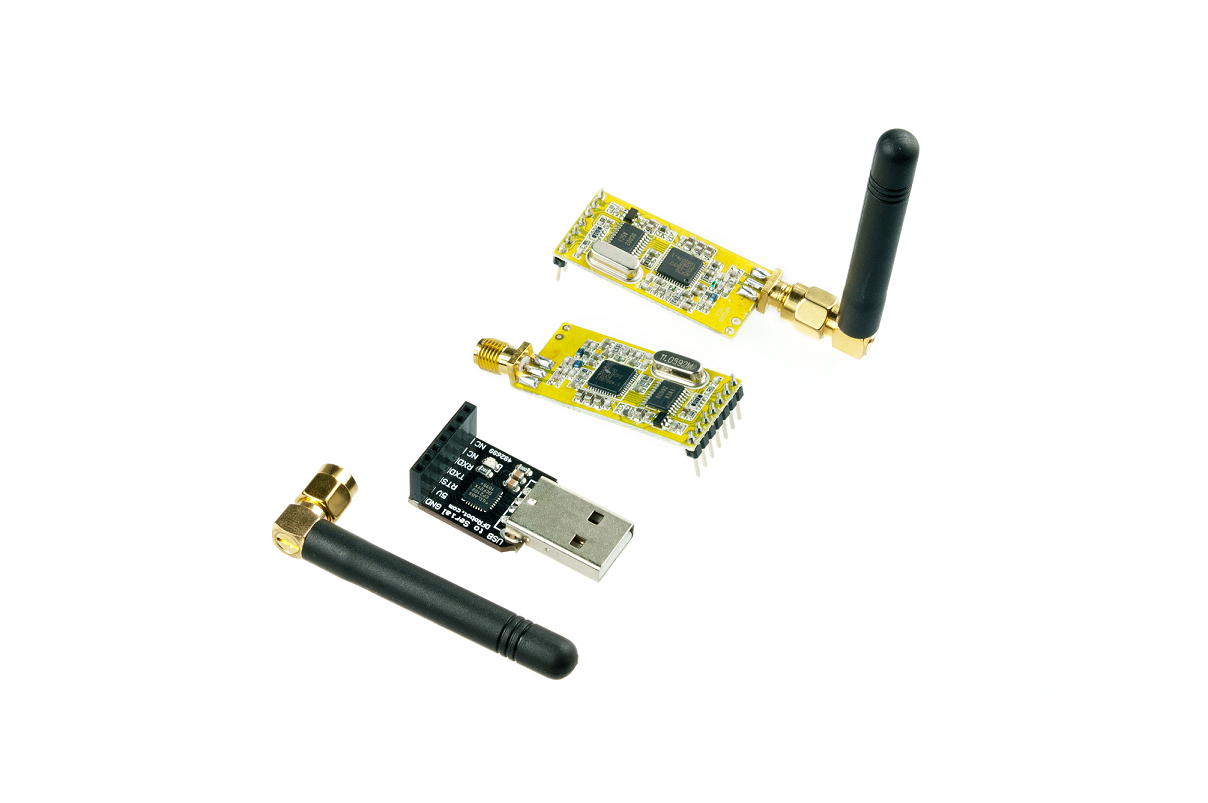
The APC220 is a highly versatile, low power radio solution that is easy to setup and integrate into any project that requires a wireless RF link. It is perfect for robotic applications if you need wireless control. You can connect one of these modules with your MCU through TTL interface, and connect to your PC with another APC220 module through a TTL/USB converter.
- Working frequency: 420 MHz to 450 MHz
- Power: 3.5-5.5V
- Current: <25-35mA
- Working temperature: -20℃~+70℃
- Range: 1200m line of sight (1200 bps)
- Interface: UART/TTL
- Baud rate: 1200-19200 bps
- Baud rate (air): 1200-19200 bps
- Receive Buffer: 256 bytes
- Size: 37mm × 17 mm × 6.6mm
- Weight: 30g
 |
                                                    |:-------:|:--------------:|:------------------------------------------------------------------:|
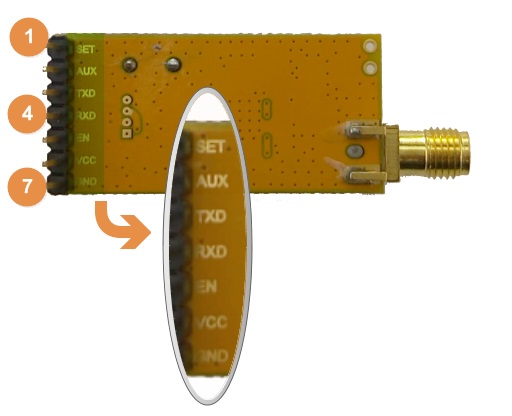
                                                    | **Pin** | **Definition** |                             **Detail**                             |
                                                    |    1    |       SET      |                        Set parameters (low)                        |
                                                    |    2    |       AUX      |             UART Signal- Receive (low) Transmit (high)             |
                                                    |    3    |       TXD      |                               UART TX                              |
                                                    |    4    |       RXD      |                               UART RX                              |
                                                    |    5    |       EN       |             -   Disable the device when apply <0.5V
                                                                                 -   Enable the device when leave it disconnected or apply >1.6V |
                                                    |    6    |       VCC      |                           3.3V-5.5V Power                          |
                                                    |    7    |       GND      |                              0V Ground                             |  |
image:APC220_3.png|Connect APC220 to PC via RS232-TTL converter
image:APC220_4.png|Connect APC220 to MCU
image:APC220_5.png|Connect PC to MCU via APC220 image:APC220_6.png|Connect PC to PC via APC220
This tutorial will guide you how to communicate between your PC and your Arduino Board wirelessly by two APC220.The PC will receive the message "Hello!" from the Arduino and print it on screen by serial monitor.
- Hardware
- APC220 module x2
- CP210 USB to UART Converter x1
- Arduino board x1
- USB Cable A-B for Arduino x1
- Software
- RF-magic Download RF-Magic Configure software.
- Arduino IDE 1.0.6 Click to Download Arduino IDE
- Serial Assistant: [https://www.baidu.com/link?url=lytaKUlmZ0YQFaJl-P0lkGSfEweGGP1VJOXUbaWeRSvLUJRajXXAqbpTnfb3wSJLrlCTdFt0rnQdHGbIsQSPLBglALg-VGVNUUMloC-U8xa&wd=&eqid=ef9fad6e0000280f0000000255d6edf1 Click to download Serial debugging assistant]
NOTE:
-
The Arduino board here we use is Romeo (Leonardo), which uses Serial1 instead of Serial in the code, if you use another Arduino, e.g. Uno, Mega, Bluno.., please rewrite the Serial1.println() to Serial.println().
-
Arduino IDE 1.6.5 cannot display the message at all, we recommend using Arduino 1.0.6 serial monitor or an alternative serial monitor
1 Screw in the antenna to the APC220 and plug it in to the USB-TTL converter, and then plug the converter in to your computer.
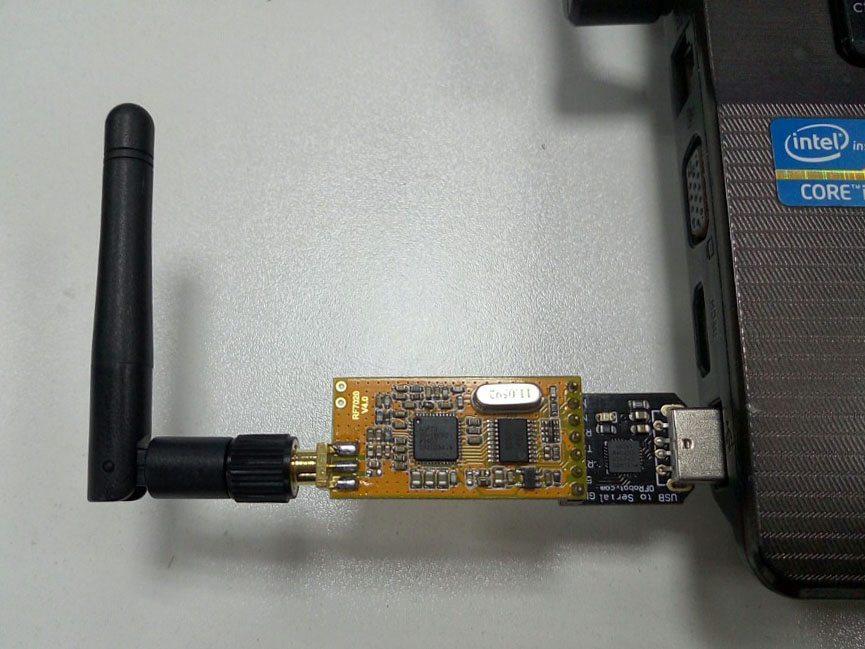
2 Download and install the driver for the USB-TTL converter.Go to Silicon Labs to download for your system
3 Check the serial port in the Device Manager if your driver was installed. Here, it's COM8.
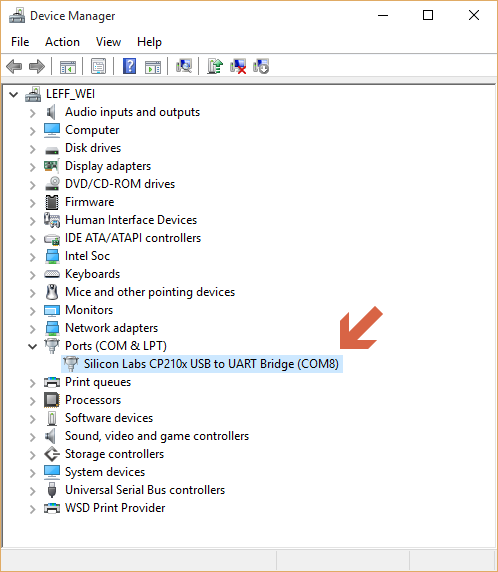
4 Run the APC22X_V12A.exe ( i.e. RF-magic ) as Administrator if your system is not Windows XP. How to avoid to Run as Administrator every time
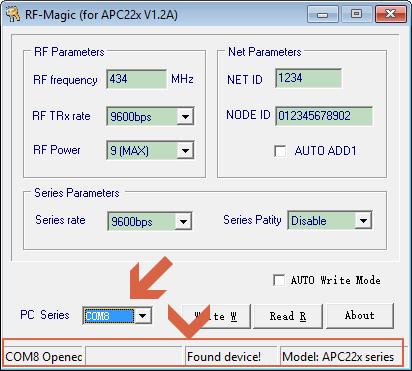
:: NOTE: The software will recognize the APC220 module and open the serial port COM8 automatically once opened. If it fails, please try to revise the COM port in the device manager to COM1 and restart the software.
5 Configure RF-magic as in the red square frame below (default setting) , and click Write W to write your setting, then click Read R to read the parameters you've set.
image:APC220 parameter_setting10.png|Configuration image:APC220 parameter_setting20.png|Write and Read setting
| - - Parameter** | - - Range** | - - Default** |
| RF frequency | Resolution 1KHz,Accuracy ±100Hz | 434MHz |
| RF TRx Rate | 1200,2400,4800,9600,19200bps | 9600bps |
| RF Power | 0-9 | 9 |
| Series Rate | 1200,2400,4800,9600,19200,38400,57600bps | 9600bps |
| NET ID | 0-65535(16 bit) | 12345 |
| NODE ID | 123456789012 | |
| Series Patity | Disable,Odd Patity,Even Patity | Disable |
6 Set the other APC220 module again in the same way, with the same parameter setting.
1 Plug one module in to your PC, and plug another one in to your Arduino.
image:APC220assemble.jpg|One on computer to receive “Hello” image:APC220assemble22.jpg|Another on computer to send “Hello”
2 Upload the code below to Arduino ( Leonardo here we use).
 NOTE: Please revise the Serial1 to Serial if your Arduino board is Uno, Bluno, Mega etc.
//The sketch is tested on: Romeo v2 (Leonardo)
void setup()
{
  Serial1.begin(9600);             //Set serial baud rate to 9600
}

void loop()
{
  Serial1.println("Hello!");           //print out hello string
  delay(1000);                  //1 second delay
}
3 Open COM8 by Serial Assistant or on the Arduino IDE serial monitor (Note Arduino IDE 1.6.5 works abnormally). You will see "Hello" appear on your screen every second.
image:APC220checkHello1.png|Arduino serial monitor on COM8( IDE 1.0.6) image:APC220checkHello2.png|Serial Assistant on COM8
| Q1. Why I can not connect the APC220 module after I opened the RF-magic software on my Window/Linux? |
A: If you are using Mac or Linux, please note:
- Linux: The current on the 'En' pin of adapter is different when using the USB-Serial board on Linux. The same issue happens on Mac. The solution is to not connect the En pin, using a cable, or a handmade breakout board.
- Windows (64-bit OS): You should set the RF-Magic program's compatibility to "windows XP (Service pack 3)" and "run this program as administrator"
| Q2. I tried to test communication between two Arduino boards, but failed, any suggestions or example are appreciated? |
A: Check the that baudrate setting in your code and the APC220 modules are all the same, e.g. they are all be set to 9600. Examples can be found here APC220 appliaction on DFRobot Forum.
| Q3. Driver issue on Windows, after I downloaded and installed the latest driver from Silicon Labs, it just can't be recognized by my computer properly, the USB-TTL adapter I use is a yellow one. |
A: The one with Yellow color but not Black is the old version, but the lastest driver should be compatible. Anyway, you could try this driver instead.
 For any question/advice/cool idea to share, please visit DFRobot Forum.
 shopping from dfrobot store or dfrobot distributor.
category:Product Manual category:TEL Series category:Wireless