Wirless_GamePad_V2.0_(SKU_DFR0182) - jimaobian/DFRobotWiki GitHub Wiki

Introduction
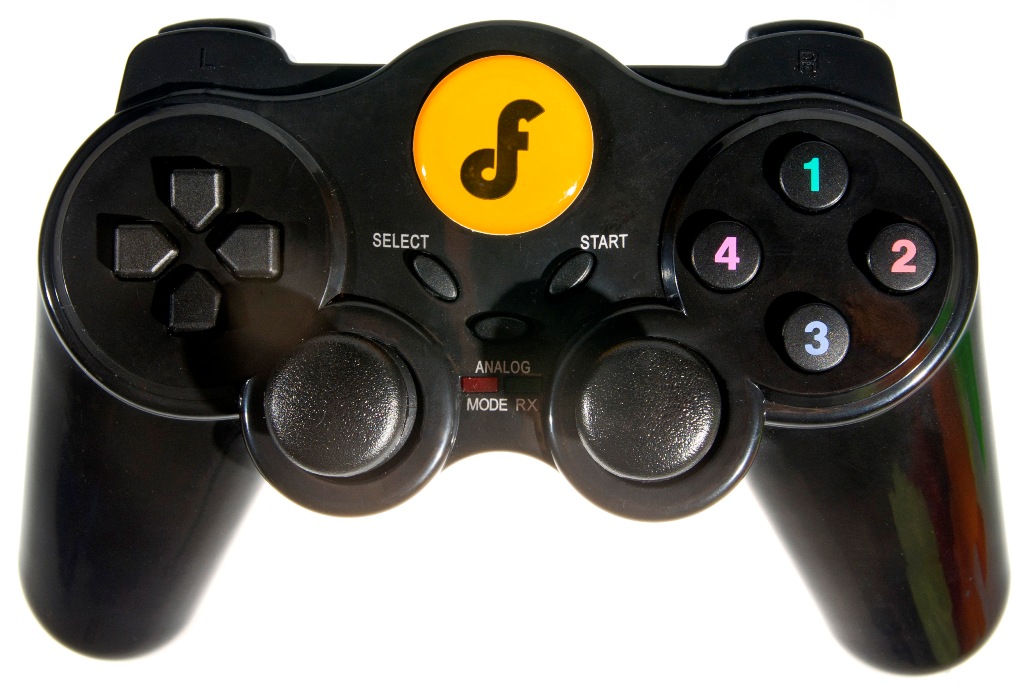
The Wireless Joystick v2 for Arduino is the first gamepad based on Arduino from DFRobot. It support Xbee, Bluetooth, RF and Wifi via the Xbee socket. Makes it possible to custom your own wireless communication for controlling your robots, mobile platforms, UAVs, etc.
Improvements of v2.0:
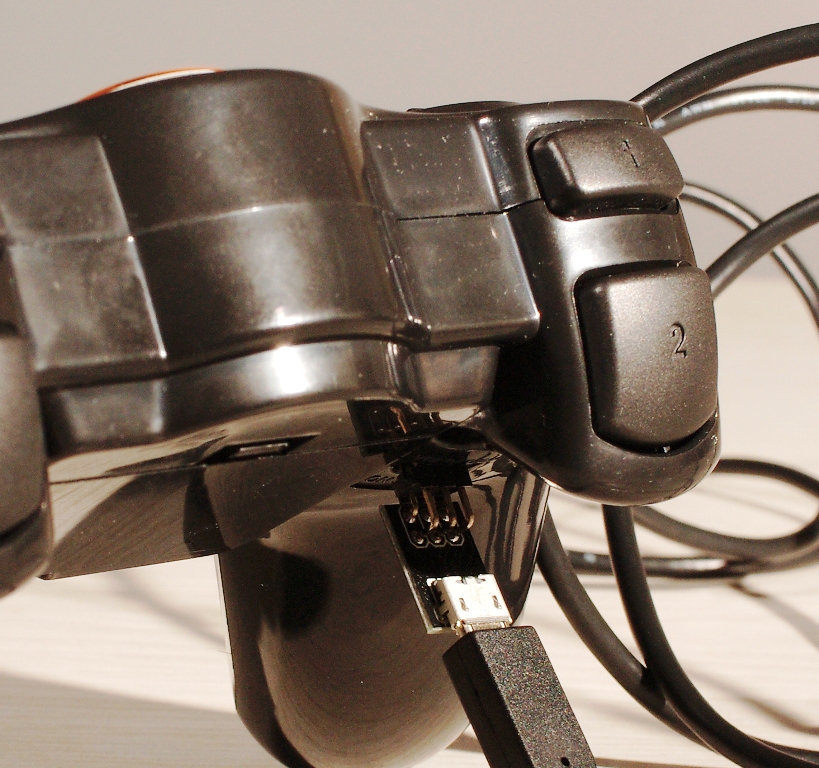
1.Wireless gamepad v2.0 is compatible with Arduino Leonardo.Compared with v1.1,you don't need to purchase a FTDI programmer for it anymore. Just plugin the Micro USB adapter and program it directly.
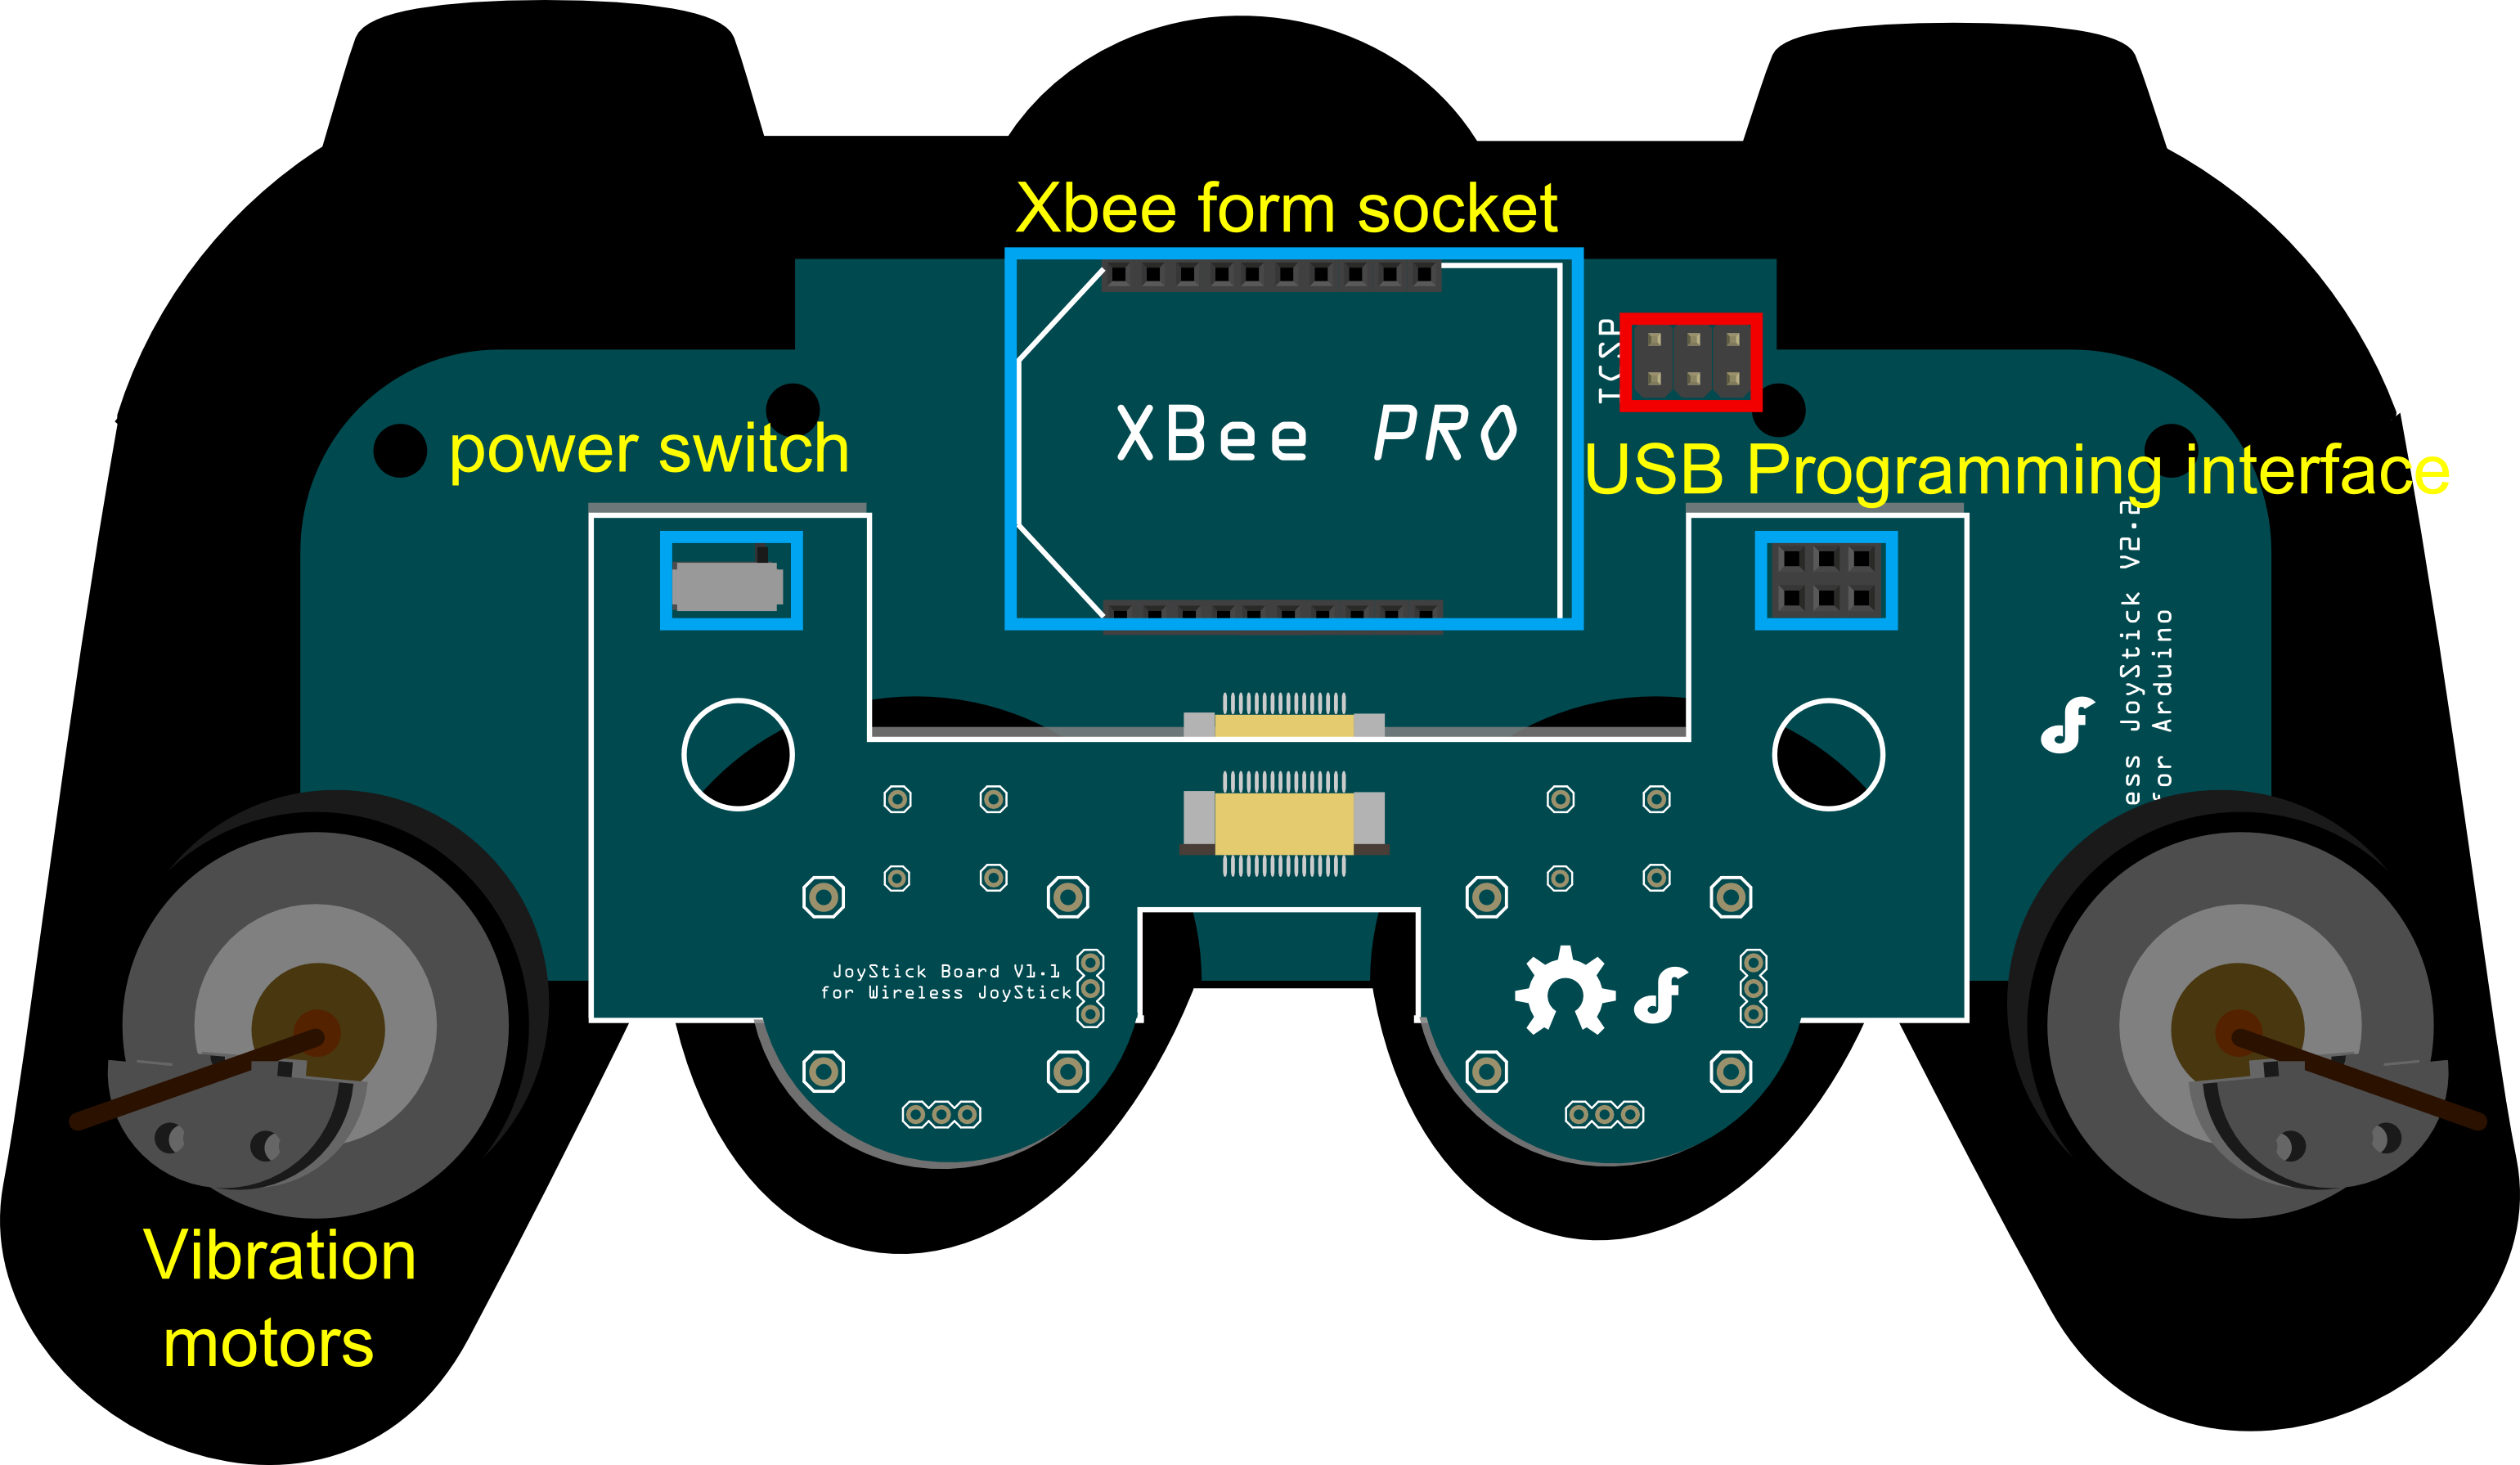
2.The v2.2 gamepad supports a new feature. It integrated two-way motor driver circuit and two vibration motors. Then it's available to program and enable the vibration function of your gamepad and get the feedback from your robots!
Specification
- Power supply: "AAA" Battery x3 or Micro USB
- Programmable inputs:
- 2 analog sticks
- one D-pad
- 10 buttons
- 2 joystick buttons
- Program interface: Micro USB via a small adapter included
- Bootloader: Arduino Leonardo
- Includes a Turbo button used to reset the controller
- Informational LEDs
- Red one: Power indicator
- Green one: RX indicator
- Integrate two-way motor driver
- Support vibration function
- Includes a Xbee socket
- Support Xbee series wireless modules,Bluetooth Bee,RF Bee and Wifi Bee
PinOut

Programming Connection

Pin mapping
Direction Buttons
- UP: D5
- LEFT: D6
- DOWN: D7
- RIGHT: D8
Surface Buttons
- SELECT:D3
- START: D4
Joystick Buttons
- Left Joystick: A0
- Right Joystick: A1
Joystick analog inputs
- Left Joystick X-axis: A4
- Left Joystick Y-axis: A5
- Right Joystick X-axis: A2
- Right Joystick Y-axis: A3
Z Buttons
- Left Z1: D15
- Left Z2: D16
- Right Z1: D13
- Right Z2: D14
Other functions
- Wireless communication(Serial1): D0(RX) & D1(TX)
- Vibration Motor driver pin: D2
- Rx LED: D17
Sample code
| NOTE: Please revise the Serial.****() to Serial1.****() when you use BLE link or Xbee module to communicate with other module wirelessly. |
/*
// #
// # Editor     : Tong Hui from DFRobot, based on Lauren from DFRobot v1.0 code
// # Date       : 12.24.2012

// # Product name: Wireless Joystick v2.2 for Arduino
// # Product SKU : DFR0182
// # Code Version: 2.0

// # Description:
// # The sketch for using the gamepad and print the button state and the analog values of the gamepad
// # to computer screen using serial monitor

*/

int buttonState[17];
int joystick[4];
int AnalogButton[2];

int inputCommand = 0;

#define shackMotorPin 2

void setup()
{
  Serial.begin(57600);  //Init the Serial baudrate
  InitIO();             // Initialize the inputs/outputs and the buffers
}

void InitIO(){
  for(int i = 0; i < 17; i++)
  pinMode(i, INPUT);
  pinMode(shackMotorPin,OUTPUT);
  digitalWrite(shackMotorPin,LOW);  // Stop shacking of the gamepad
}

unsigned long timer = 0;

void loop()
{
  if(millis() - timer > 500){  // manage the updating freq of all the controlling information
    DataUpdate();  //read the buttons and the joysticks data
    printData();   //print the datas and states
    timer = millis();
  }

  if(Serial.available()){
    char input = Serial.read();

    switch(input){
      case 's':
        Serial.println("Shack");
        inputCommand = input;
        digitalWrite(shackMotorPin,HIGH);
        break;

      case 'x':
        Serial.println("Stop");
        inputCommand = input;
        digitalWrite(shackMotorPin,LOW);
        break;

      default:
        break;
    }
  }
}

void DataUpdate(){

  for(int i = 3; i < 17; i++)  buttonState[i] = digitalRead(i);
  buttonState[0] = analogRead(0);
  buttonState[1] = analogRead(1);
  for(int i = 0; i < 4; i++)  joystick[i] = analogRead(i);
  for(int i = 4; i < 6; i++)  AnalogButton[i-4] = analogRead(i);

}

String Buttons[17] = {
  "J2","J1","","S2","S1","UP","LEFT","DOWN","RIGHT","1","4","2","3","RZ1","RZ2","LZ1","LZ2"};
  // Buttons Nmes

void printData(){
//  for(int i = 0; i < 17; i++)  Serial.print(buttonState[i]),Serial.print(" ");
//  for(int i = 0; i < 4; i++)  Serial.print(joystick[i]),Serial.print(" ");
//  for(int i = 0; i < 2; i++)  Serial.print(AnalogButton[i]),Serial.print(" ");
//  Serial.println("");
  Serial.print("Button Pressed:");
  for(int i = 0; i < 2; i++)  if(buttonState[i] < 100)  Serial.print(Buttons[i]),Serial.print(",");
  for(int i = 3; i < 17; i++)  if(buttonState[i] == 0)  Serial.print(Buttons[i]),Serial.print(",");
  Serial.println("");
  Serial.print("Analog Sticks:");
  for(int i = 0; i < 4; i++)  Serial.print(joystick[i]),Serial.print(",");
  for(int i = 0; i < 2; i++)  Serial.print(AnalogButton[i]),Serial.print(",");
  Serial.println("");
  Serial.println(inputCommand);
}
FAQ
| '''Q1. '''The joystick board does not respond and transmit properly. I have validated the XBee on another system and communication is no problem. I have also validated the code is working as expected. |
'''A. '''There are two possible reasons.
- The sample code is used to test the gamepad on your computer by a USB cable, but not to communicate wirelessly by Xbee, Bluetooth module, etc. If you want to use the code for the later purpose or write your own code, please change all serial.xxx() to serial1.xxx() since the board (leonardo) use its serial1 instead of serial to communicate with the wireless modules.
- Please check if you have inserted the wireless module onto the Xbee socket inversely.
| For any questions/advice/cool ideas to share, please visit DFRobot Forum. |
More
 shopping wireless gamepad v2.0 for arduino
category: Product Manual category: DFR Series category: MicroControllers category: Wireless category: Robots-kits category: Source category: Diagram category: DFRobot