Throbbing_Heart(For_markfairwhale)_SKU_DFR0286 - jimaobian/DFRobotWiki GitHub Wiki
Introduction
Encounter the girl you loved, but don't know how to express? Now don't worry about it! We launch a beating electronic heart specially designed for you. Nice heart with nature beat! It uses a ATmega32U4 chip,integrates an 8×8 red dot matrix and a lithium battery. With Mind+ graphical programming software, open programming features, and add your own imagination design, you can make your own surprise, so it is ideal as a small gift for your girlfriend,or a love toy for your kid. Now it seems all is not a problem, isn't it?
Specification
- MCU: ATmega32U4
- Operating Voltage: 5V
- Clock Frequency: 16M
- Interface: MicroUSB
- Dot-Matrix: 8x8 monochromatic dot matrix(Common Cathode)
- Size: 32mm*32mm*16mm
- Power Supply: MicroUSB power supply or internal 3.7V/140mAH lithium batteries
- Interactive Devices: touch button (analog ports A1), vibration switch (analog ports A0), power switch
- Programming Environments: Mind+ or Arduino IDE
- Bootloader: Arduino Leonardo
Function
1. USB Interface
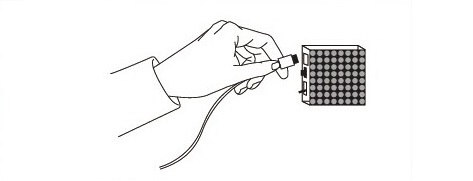 After plugging with the USB cable, it will automatically charge the battery (red light), automatically stop when charged done (green light), while lit LED dot matrix. At this time, you can also use Mind+ or Arduino IDE to program,for making your own personality patterns!
2. Touch Button
 Touch once to change the speed of the heartbeat. Press and hold to flash quickly from small to large.
3. Power Switch
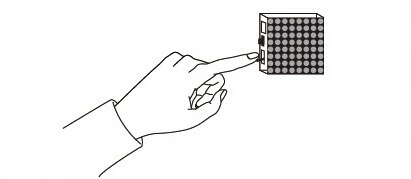 Dial it up, the power is turned on. Dial it down, the power is turned off.
4.Vibration Sensor
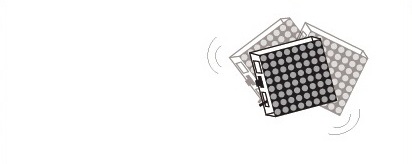 When shake the electronic heart intensely, the built-in vibration sensor will response and change the pattern from buttom to top.
Programming
This heart can use Mind+ graphical programming software or the Arduino IDE, so you can freely programmable, customize your creative mind!
===Mind+=== This section uses a very simple example of beating heart to describe the usage of Mind+ programming software.
Please download the software and install it. The download link:http://www.mindplus.cc/
When done, please connect the electronic heart to your computer with the USB cable.
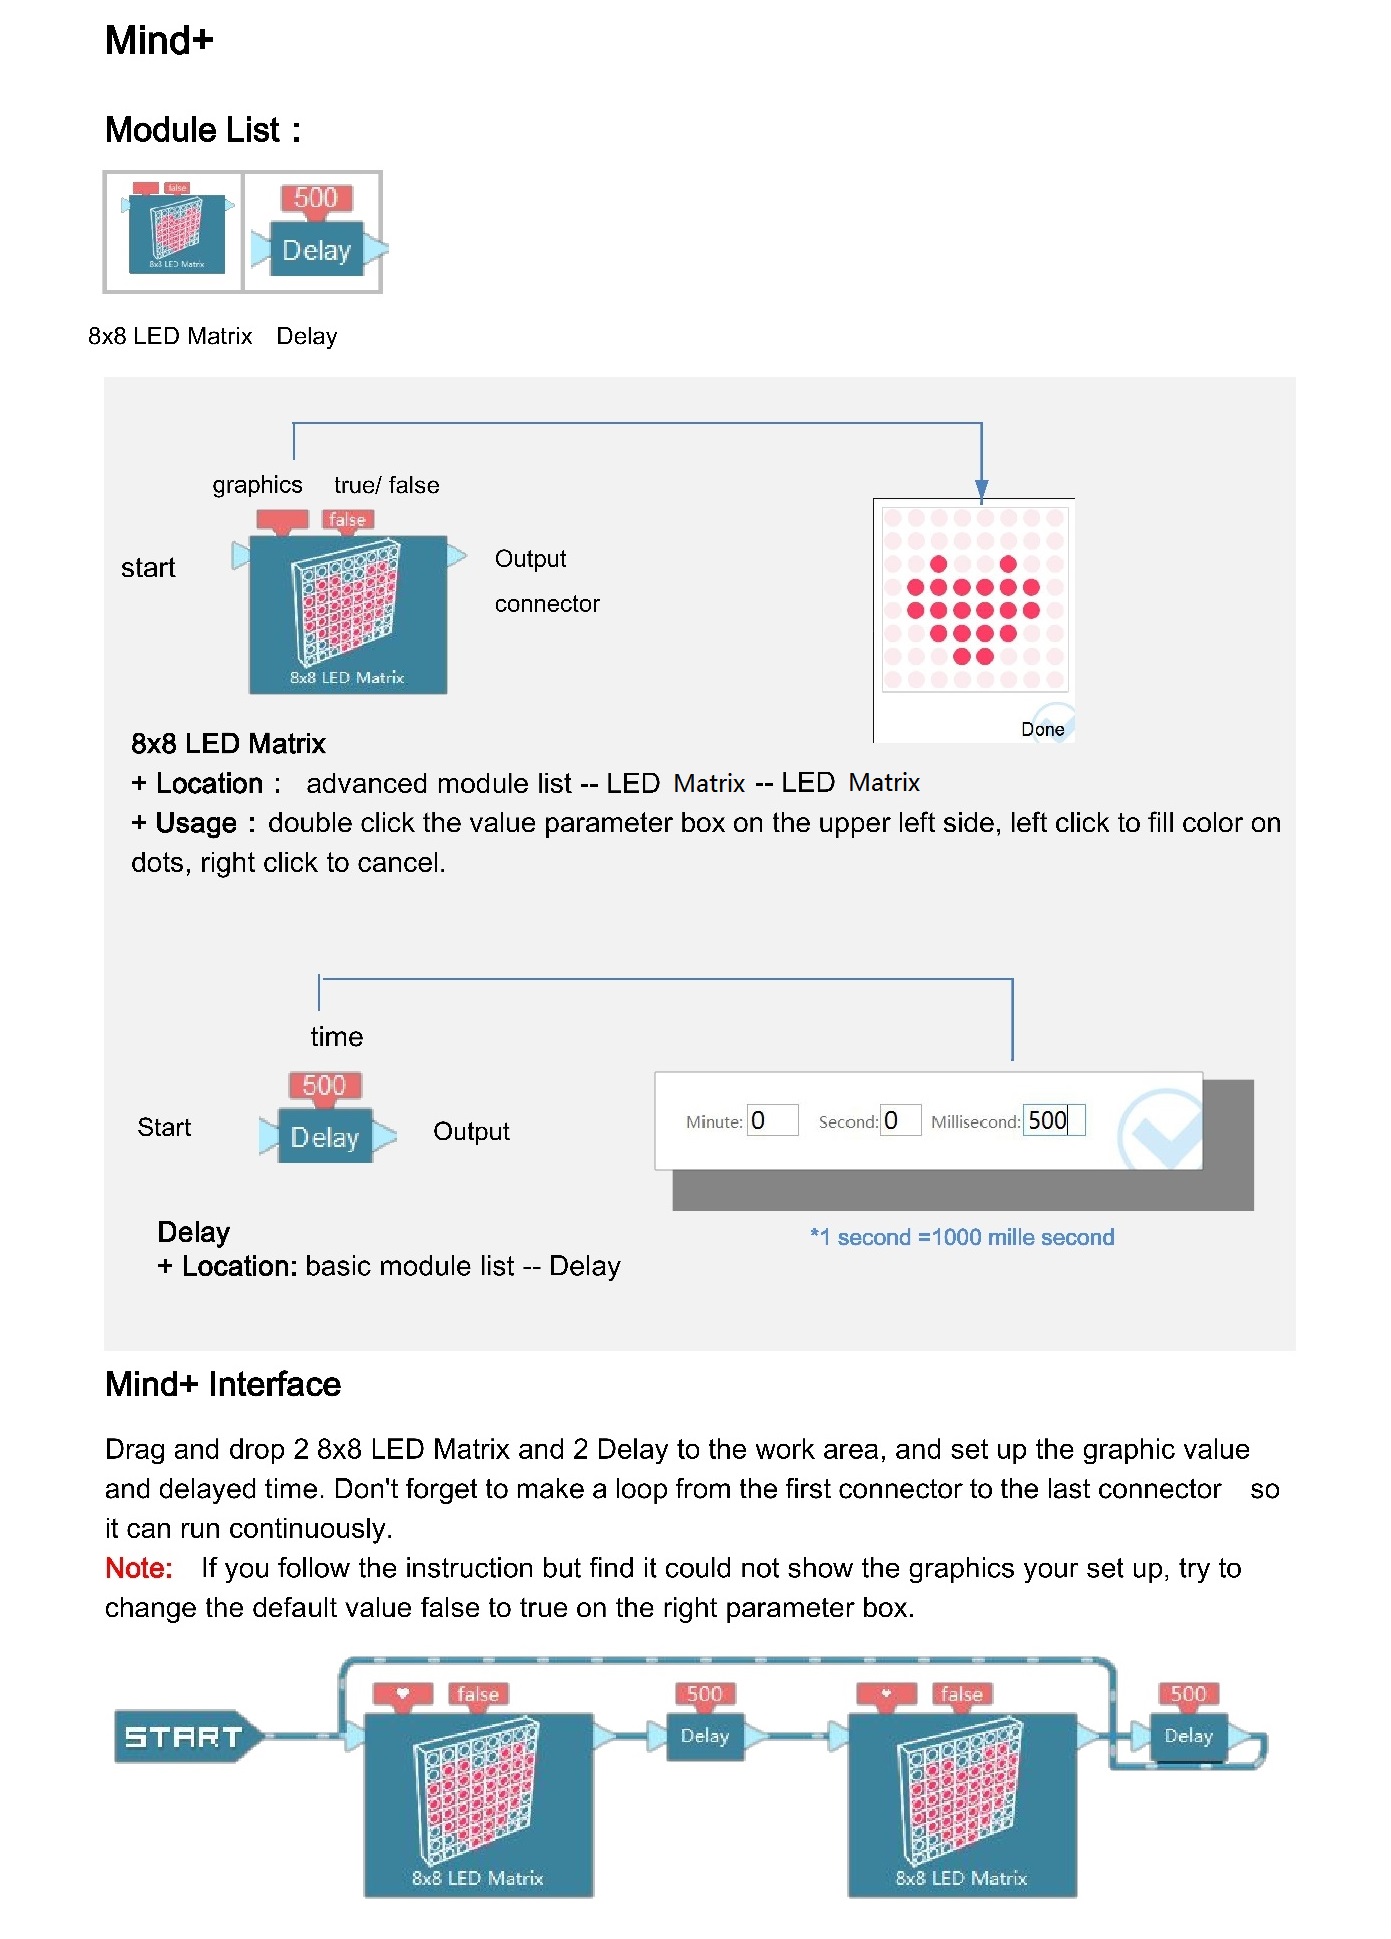
Basic knowledge of Mind+:
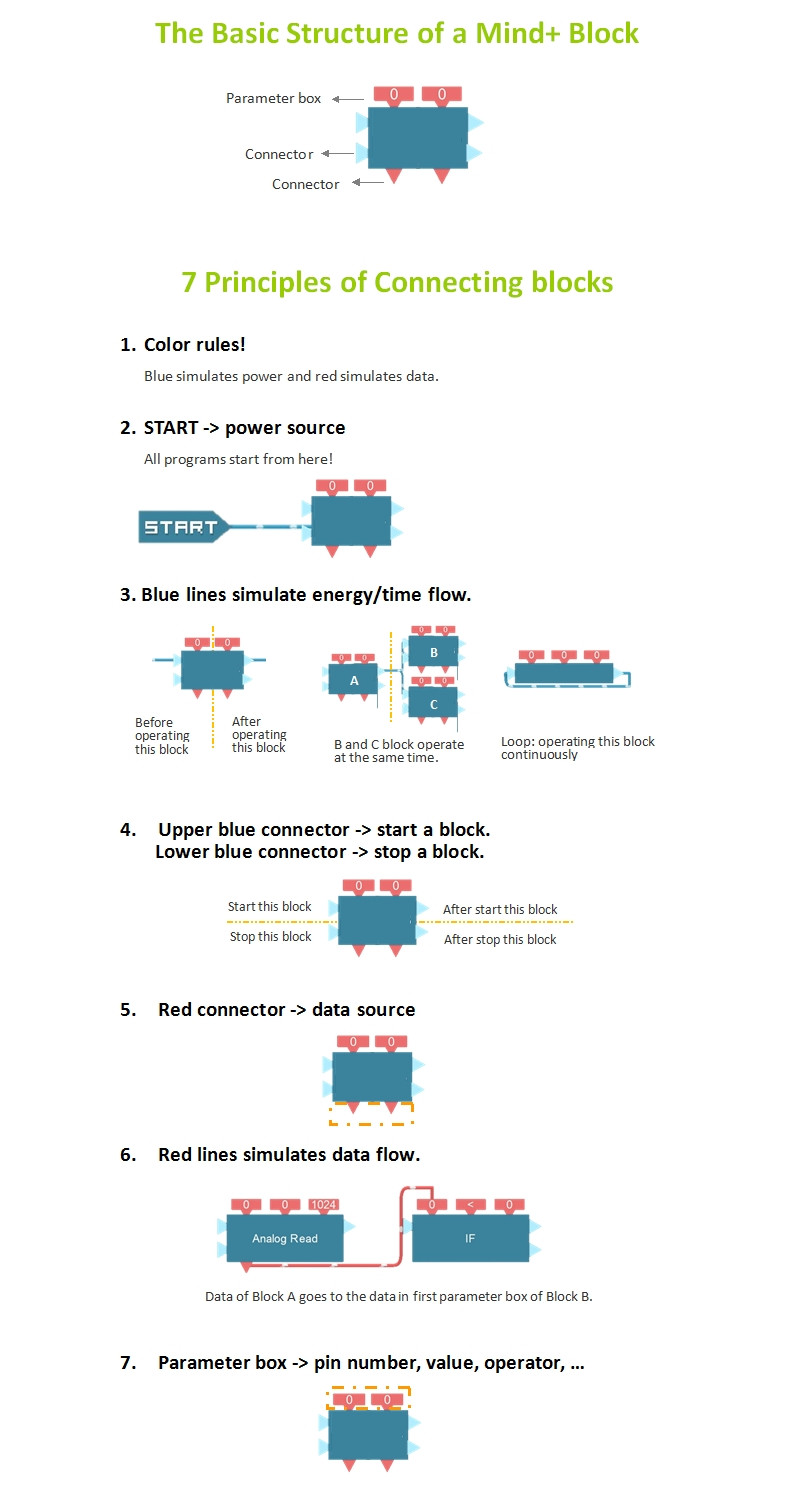 Programming steps of Mind+:
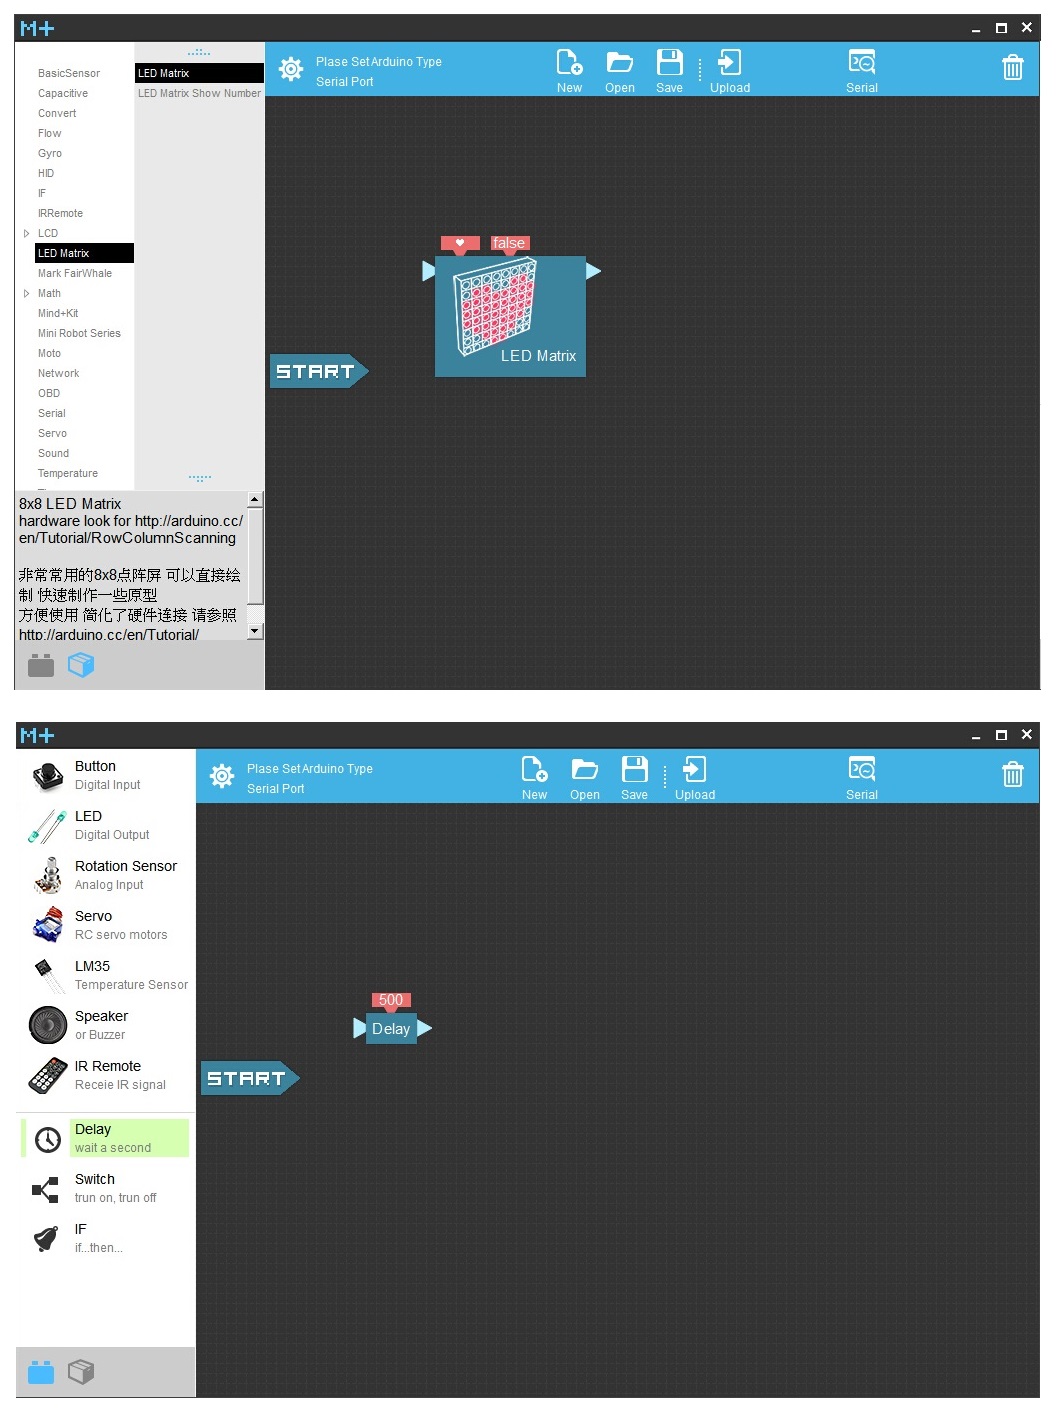
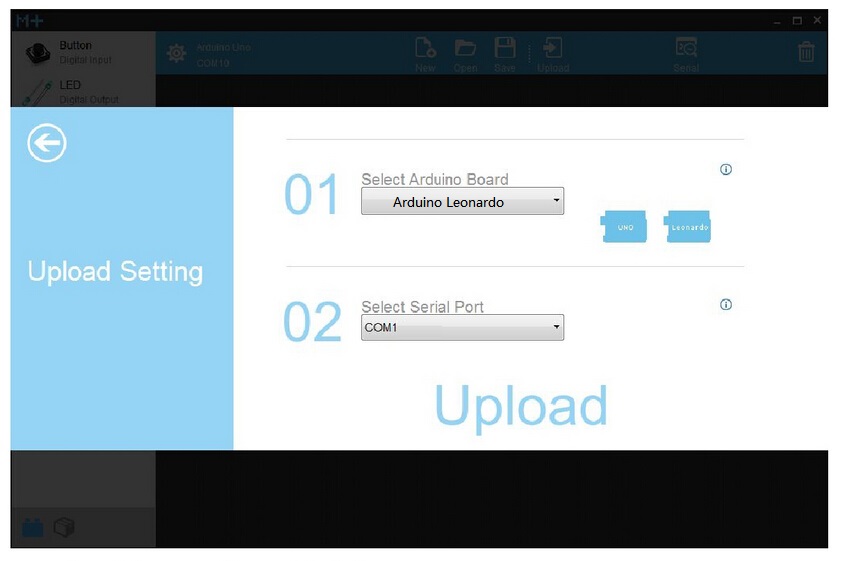
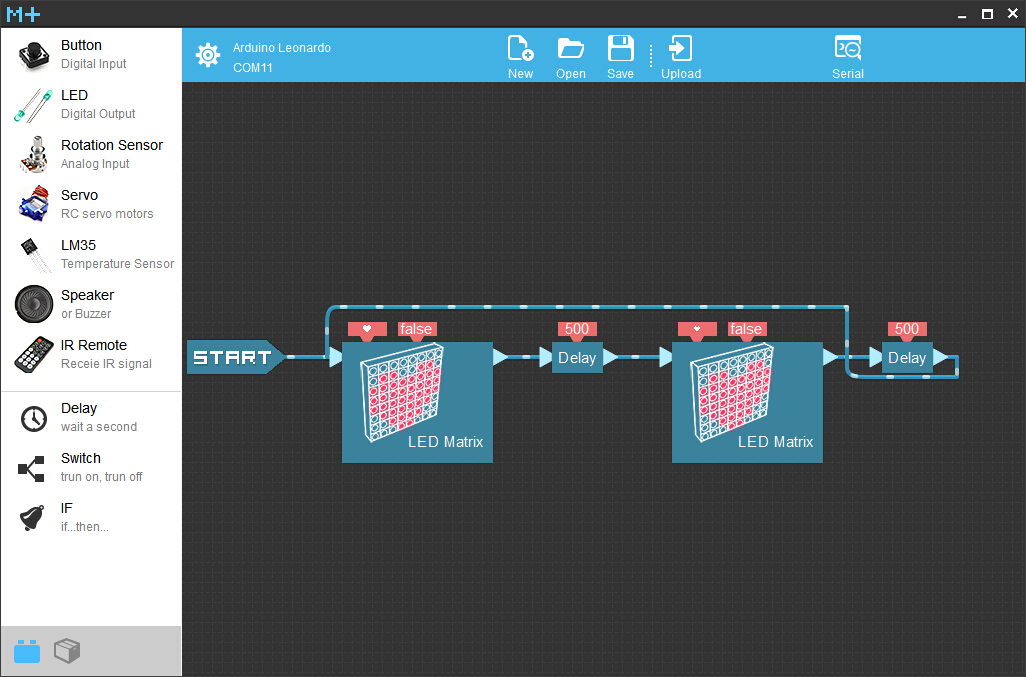 When finished the connection,click the gear on the top left of the workspace,choose the board Arduino Leonardo and the serial port, then click the Upload. You will see a beating heart.
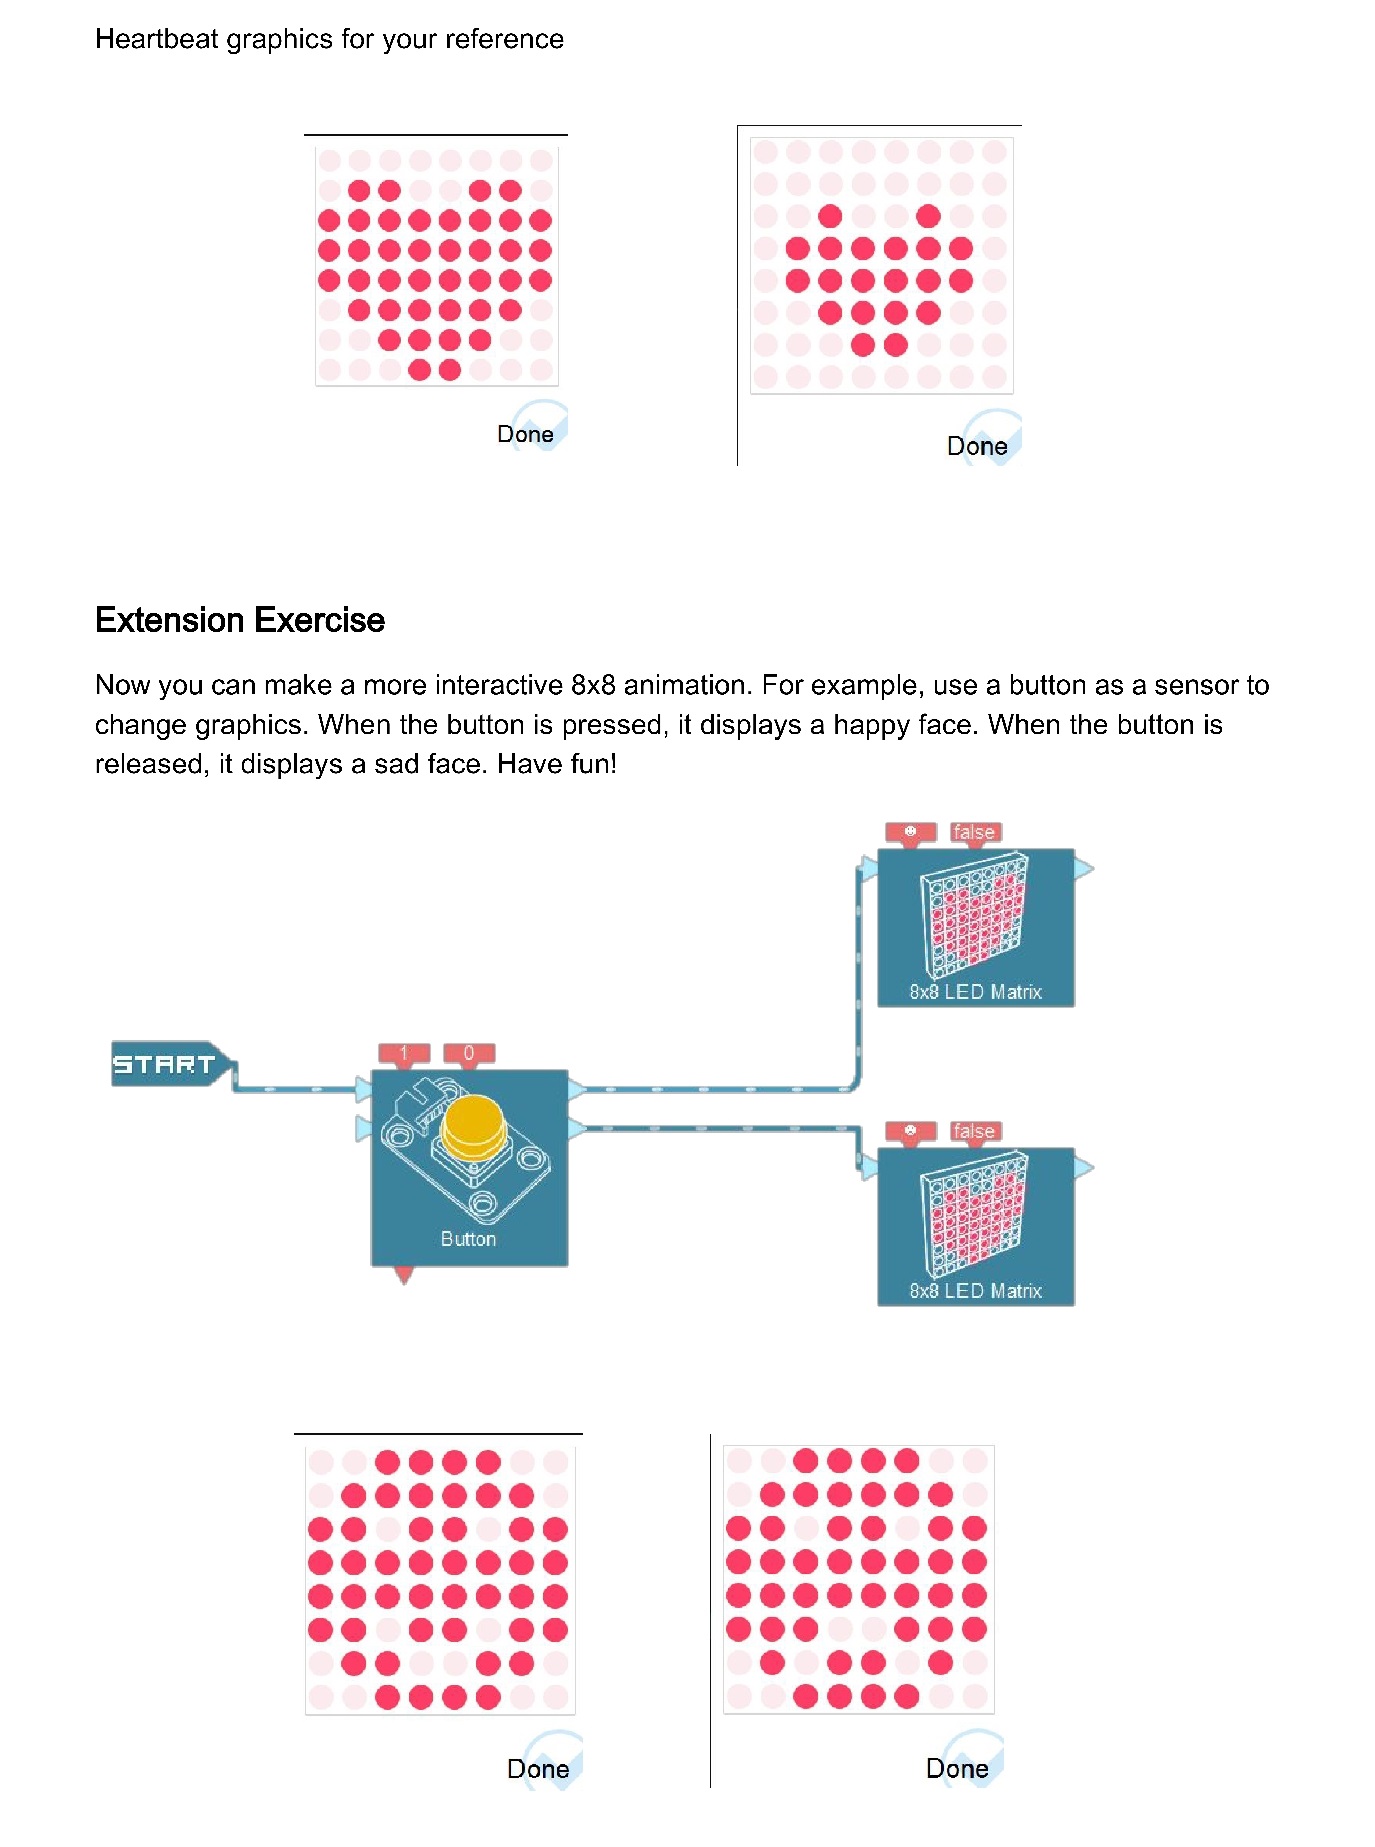 More interesting courses and details:http://www.mindplus.cc/?page_id=2233
Arduino IDE
This electronic heart is based on Arduino Leonardo, so you can achieve your creative mind by Arduino IDE. Here gives a simple example of beating heart to show how to program using the code.When uploaded to it, you will see a beating heart.
/*
# This sample code is for testing the Throbbing Heart. After uploaded the code, you will see a beating heart.
 # Platform : Arduino Leonardo
 # Editor   : YouYou
 # Date     : 2014.05.19
 # Ver      : 1.0
 # Product  : Throbbing Heart
 # SKU      : DFR0286
*/

const byte row[8] = {9, 8, 4, A3, 3, 10, 11, 6};
const byte col[8] = {2, 7, A5, 5, 13, A4, 12, A2};
const unsigned int interval = 500;
byte picture[16][8] PROGMEM =
{
    {0,0,0,0,0,0,0,0},//pattern 0
    {0,1,1,0,0,1,1,0},
    {1,1,1,1,1,1,1,1},
    {1,1,1,1,1,1,1,1},
    {1,1,1,1,1,1,1,1},
    {0,1,1,1,1,1,1,0},
    {0,0,1,1,1,1,0,0},
    {0,0,0,1,1,0,0,0},

    {0,0,0,0,0,0,0,0},//pattern 1
    {0,0,0,0,0,0,0,0},
    {0,0,1,0,0,1,0,0},
    {0,1,1,1,1,1,1,0},
    {0,1,1,1,1,1,1,0},
    {0,0,1,1,1,1,0,0},
    {0,0,0,1,1,0,0,0},
    {0,0,0,0,0,0,0,0},
};
void LED_Init(void)
{
    for (byte thisPin = 0; thisPin < 8; thisPin++)
    {
        pinMode(col[thisPin], OUTPUT);
        pinMode(row[thisPin], OUTPUT);
        digitalWrite(row[thisPin], LOW);
        digitalWrite(col[thisPin], HIGH);
    }
}
void Draw_Pic(const byte *pict PROGMEM,byte number)
{
    for (byte thisRow = 0; thisRow < 8; thisRow++)
    {
        pinMode(row[thisRow], OUTPUT);
        digitalWrite(row[thisRow], HIGH);
        for (byte thisCol = 0; thisCol < 8; thisCol++)
        {
          byte thisPixel= pgm_read_byte(pict+8*(thisRow+number*8)+thisCol);
             pinMode(col[thisCol], OUTPUT);
             digitalWrite(col[thisCol], !thisPixel);
             if (thisPixel == HIGH)
             {
                delayMicroseconds(80);
                digitalWrite(col[thisCol], HIGH);
             }
        }
        digitalWrite(row[thisRow], LOW);
    }
}
void setup(void)
{
  LED_Init();
}
void loop(void)
{
  static unsigned long time=millis();
  static byte picnum = 0x00;
  Draw_Pic((byte *)picture,picnum);
  if(millis()-time>=interval)
  {
    time=millis();
    picnum ^= 0x01;
  }
}