Stepper_Motor_Shield_For_Arduino_(SKU_DRI0023) - jimaobian/DFRobotWiki GitHub Wiki
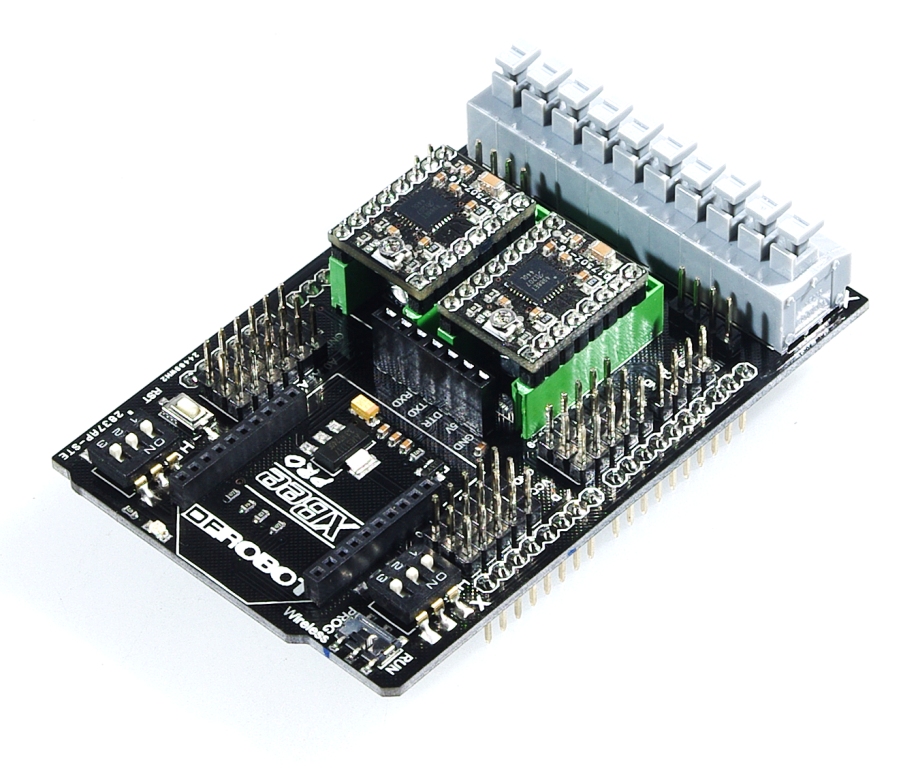
Introduction
Do you want to do some projects with stepper motors such as a drafting instrument, a 3D printer, an auto curtain, etc...? As we all know, regular stepper motors are hard to drive, but with this stepper motor shield, you can easily drive 2 stepper motors via just 4 digital I/O’s. This board is compatible with the Arduino UNO R3. Directly supports Xbee and Xbee form factor Wi-Fi, Bluetooth and RF modules. Easy connection of cables via screwless PC terminals. Each stepper motor has a code switch for adjusting driving modes, to obtain different rotational speeds. Interfaces of the board include extension 6 channel Analog I/O, 10 channel Digital I/O & I2C. Specification
- Input Voltage:8-35V DC(Just power the stepper motor driver)
- Press to connect cables, quick and easy
- Digital I/O:D4,D5,D6,D7
- 10 channel digital I/O&6 channel Analog I/O addition
- A4988 microstepping bipolar stepper motor driver
- Adjustable current limiting
- Up to 2 A output current per coil
- Five different microstep resolutions (down to 1/16-step)
Pin Out& Diagram
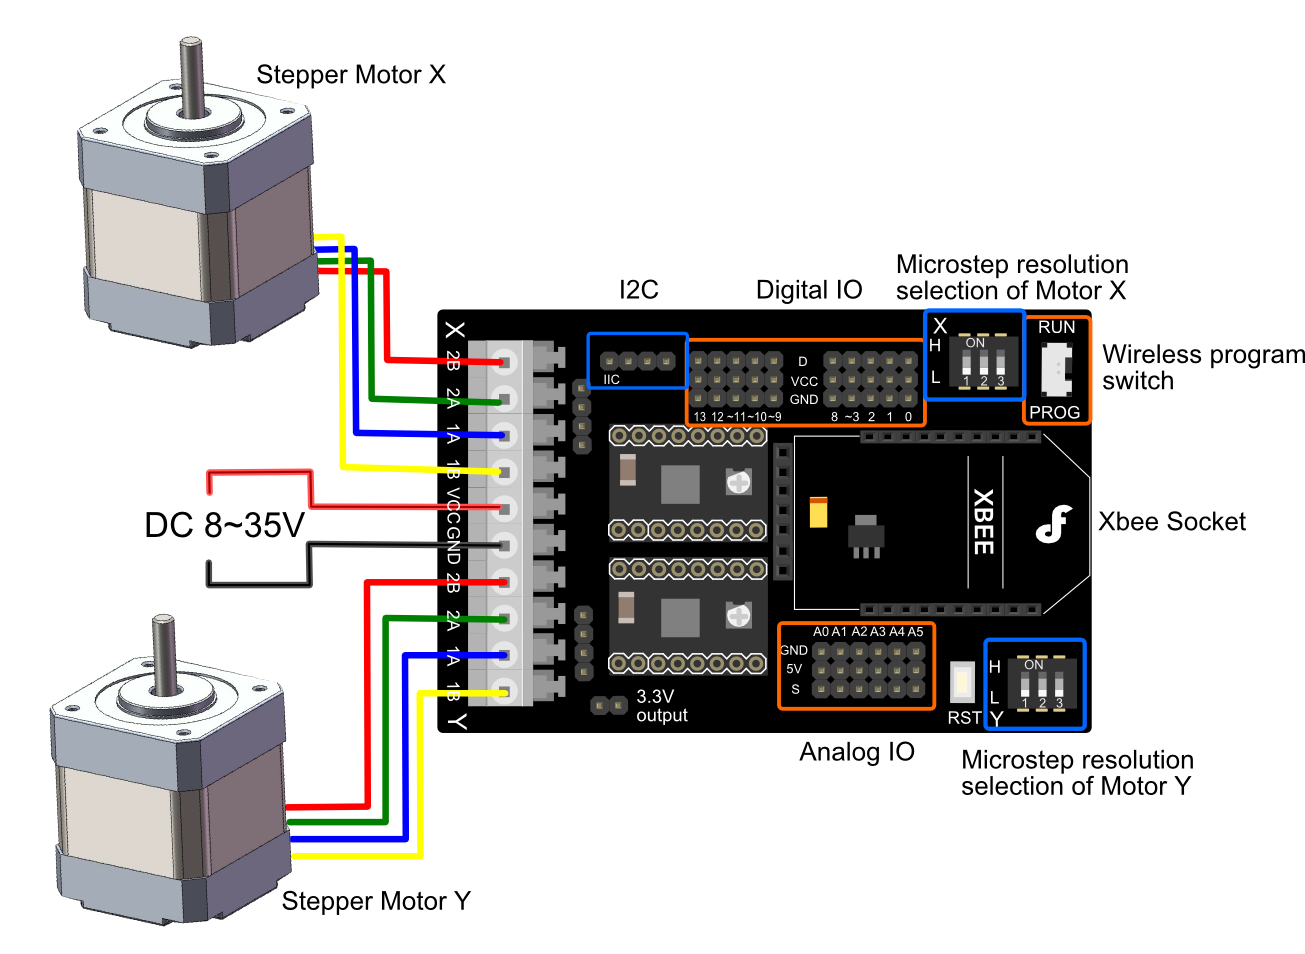 *Wireless program switch:
-
- **RUN:**Finish downloading code and running
- **PROG:**While downloade code and programming
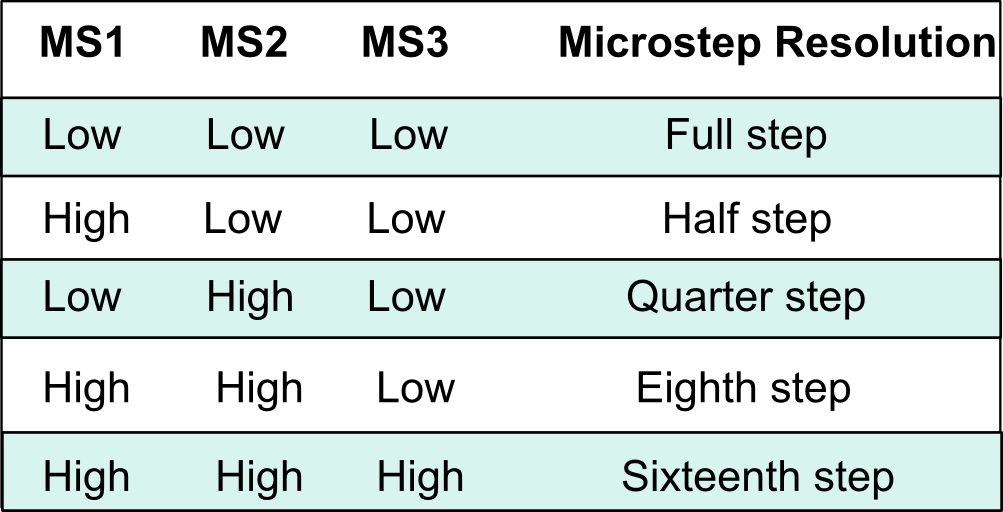
- Dip switch settings for Micro step resolution can be found on the back of the board. (Allows you to set different rotational speeds as per your requirement). See table below:
 ===Step (and microstep) size=== Stepper motors typically have a step size specification (e.g. 1.8° or 200 steps per revolution), which applies to full steps. A microstepping driver such as the A4988 allows higher resolutions by allowing intermediate step locations, which are achieved by energizing the coils with intermediate current levels. For instance, driving a motor in quarter-step mode will give the 200-step-per-revolution motor 800 microsteps per revolution by using four different current levels.
The resolution (step size) selector inputs (MS1, MS2, and MS3) enable selection from the five step resolutions according to the table below. MS1 and MS3 have internal 100kΩ pull-down resistors and MS2 has an internal 50kΩ pull-down resistor, so leaving these three microstep selection pins disconnected results in full-step mode. For the microstep modes to function correctly, the current limit must be set low enough (see below) so that current limiting gets engaged. Otherwise, the intermediate current levels will not be correctly maintained, and the motor will skip microsteps.
More details
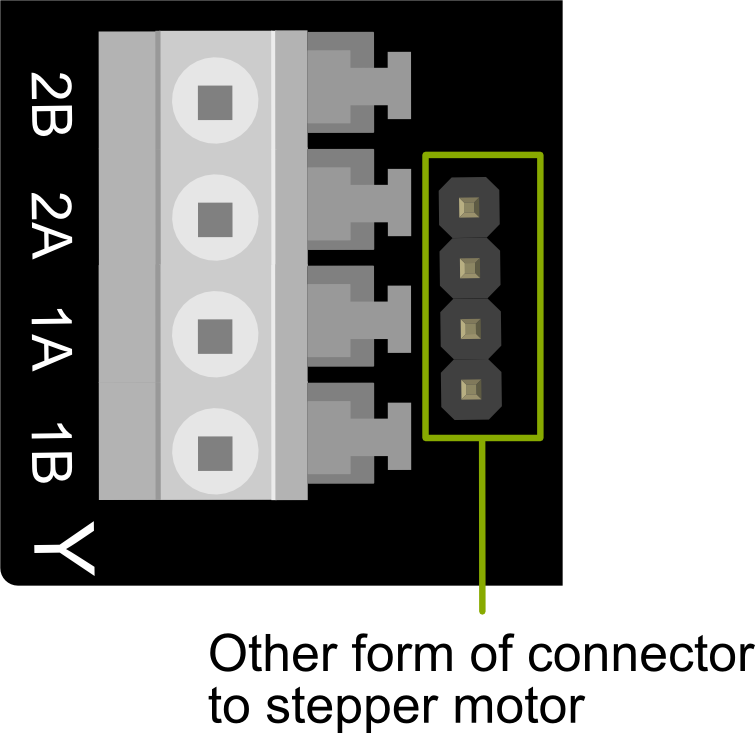
- screwless terminals to connect cables quickly & easily
- The other form of connector for JST2.54 or femable headers
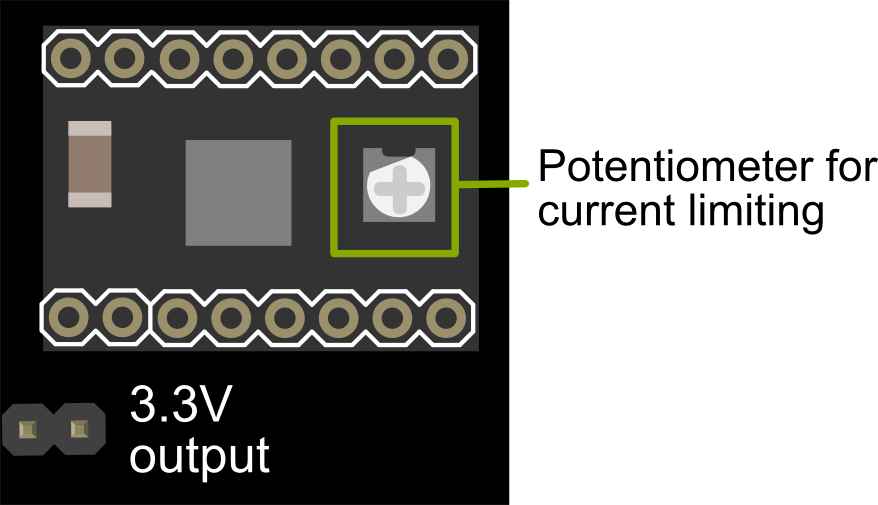 adjustable current control lets you set the maximum current output with a potentiometer, which lets you use voltages above your stepper motor’s rated voltage to achieve higher step rates. the a4988 supports such active current limiting, and the trimmer potentiometer on the board can be used to set the current limit. one way to set the current limit is to put the driver into full-step mode and to measure the current running through a single motor coil without clocking the step input. the measured current will be 0.7 times the current limit (since both coils are always on and limited to 70% of the current limit setting in full-step mode).
The A4988 driver IC has a maximum current rating of 2 A per coil, but the actual current you can deliver depends on how well you can keep the IC cool. The carrier’s printed circuit board is designed to draw heat out of the IC, but to supply more than approximately 1 A per coil, a heat sink or other cooling method is required.
Two small driver boards can get hot enough to burn you long before the chip overheats. Take care.
Sample code
/*
This sample code is for testing the 2 stepper motors
The rotation velocity can be adjusted by the code switch
Microcontroller: Arduino UNO
*/
int M1dirpin = 4;
int M1steppin = 5;
int M2dirpin = 7;
int M2steppin = 6;
void setup()
{
  pinMode(M1dirpin,OUTPUT);
  pinMode(M1steppin,OUTPUT);
  pinMode(M2dirpin,OUTPUT);
  pinMode(M2steppin,OUTPUT);
}
void loop()
{
  int j;
  delayMicroseconds(2);
  digitalWrite(M1dirpin,LOW);
  digitalWrite(M2dirpin,LOW);
  for(j=0;j<=5000;j++){
    digitalWrite(M1steppin,LOW);
    digitalWrite(M2steppin,LOW);
    delayMicroseconds(2);
    digitalWrite(M1steppin,HIGH);
    digitalWrite(M2steppin,HIGH);
    delay(1);
  }
}
 shopping dual bipolar stepper motor shield for arduino (a4988) (sku:dri0023)
category: Product Manual category: DRI Series category: Shield