Scanner_Module CCD_Camera_SKU_DFR0314 - jimaobian/DFRobotWiki GitHub Wiki
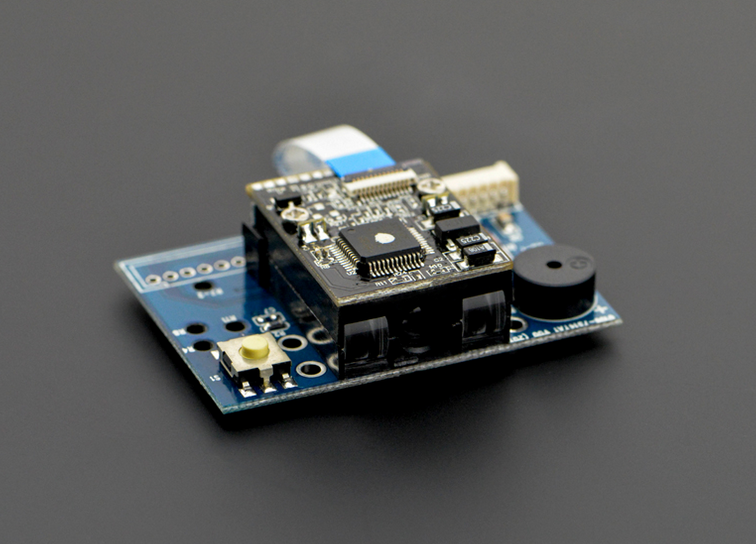
Introduction
This module brings the benefits of bar code scanning to a variety of OEM devices, it is light, small and low-power. Now kiosks, medical instruments, diagnostic equipment, lottery terminals, vending machines and countless other appliances can all be equipped with the leading-edge scanning technology and reliability. This module is a compact long-range CCD bar code scanning module with high sensitive liner image sensor and build in Auto-sense function, which can be used in your project to decode nearly any kind of 1D(striped) barcode.
 NOTE: This wiki is just a very simple guide for you to start to use it. For more info please go to Document Section to download the official documents.
Specification
- Light Source: Visible Red light 632nm LED
- Sensor: Linear CCD Sensor
- Reading Indicator: Beeper
- Output Voltage: -9V~+9V
- Stand-by Current: 50mA
- Working Current: 150mA
- Interface: RS232
- Working Frequency: 8MHz
- Working Temperature: 0 ℃ ~ 50 ℃ (32 ℉ to 122 ℉)
- Storage Temperature: -20 ℃ to 70 ℃ (-4 ℉ to 158 ℉)
- Detecting Angle(Test Conditions : Code 39, 10mil/0.25mm,PCS90%): Pitch Angle 5°~60° (±5°)
- Reading Distance: 500mm@20mil/0.5mm, PCS90%
- Scan Rate: 100 scans/sec ±10%
- Size: 46mm*32.5mm*11.5mm
- Weight: 80g
Pinout
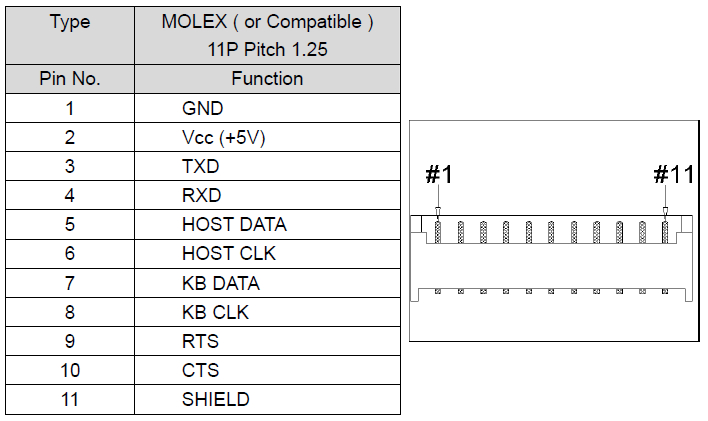
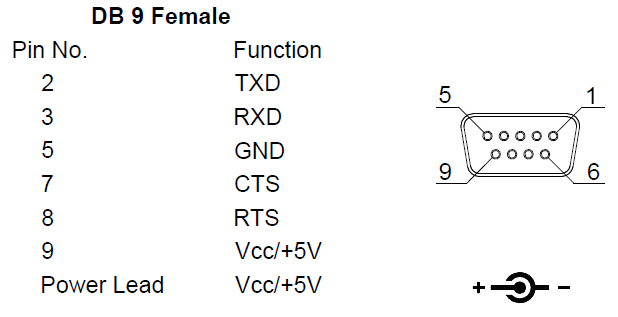
Trigger Button
When you press the Switch over 10us, it will read two-dimension code, until it reads success or you release the button.
Sample Code
/*
  description:
  The sample code is used to read the barcode value using RS232-TTL Converter
  This Module will transmit the barcode value in ASCⅡ and end up with 0D
  VCC -- VCC
  GND -- GND

*/
String code = "";           //initialize the output string
boolean endbit = 0;            //a flag to mark 0D received
char temp;

void setup() {
  Serial.begin(9600);       //initialize the Serial port
}

void loop() {
  if (Serial.available() > 0)     {
    temp = char( Serial.read());    //read the input data
    code += temp;
  }
  if (temp == 0x0D){           // Or temp == '\r'
    Serial.println(code);
    code = "";
    endbit = 0;
    temp = 0;
  }

}
Example
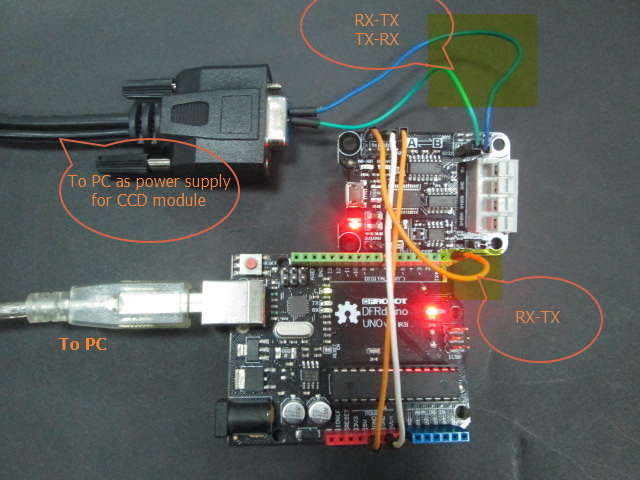
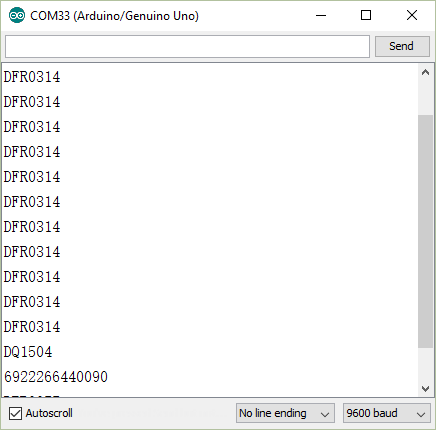
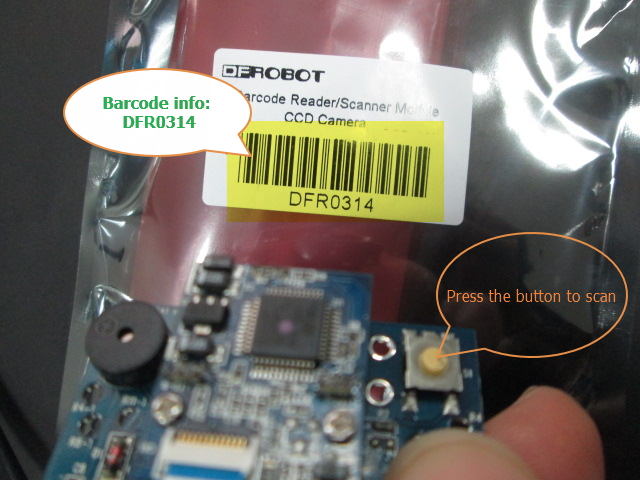 by using a rs232-ttl converter with the module and arduino, and please upload the sketch above to arduino card. then you can open your serial monitor, choosing 9600bps, and then scan a barcode, you will see the barcode info in the serial monitor.
Documents
- Quick Guide
- Barcode Reader/Scanner Module-CCD Camera Setting manual
- Barcode Reader/Scanner Module-CCD Camera Specifications
FAQ
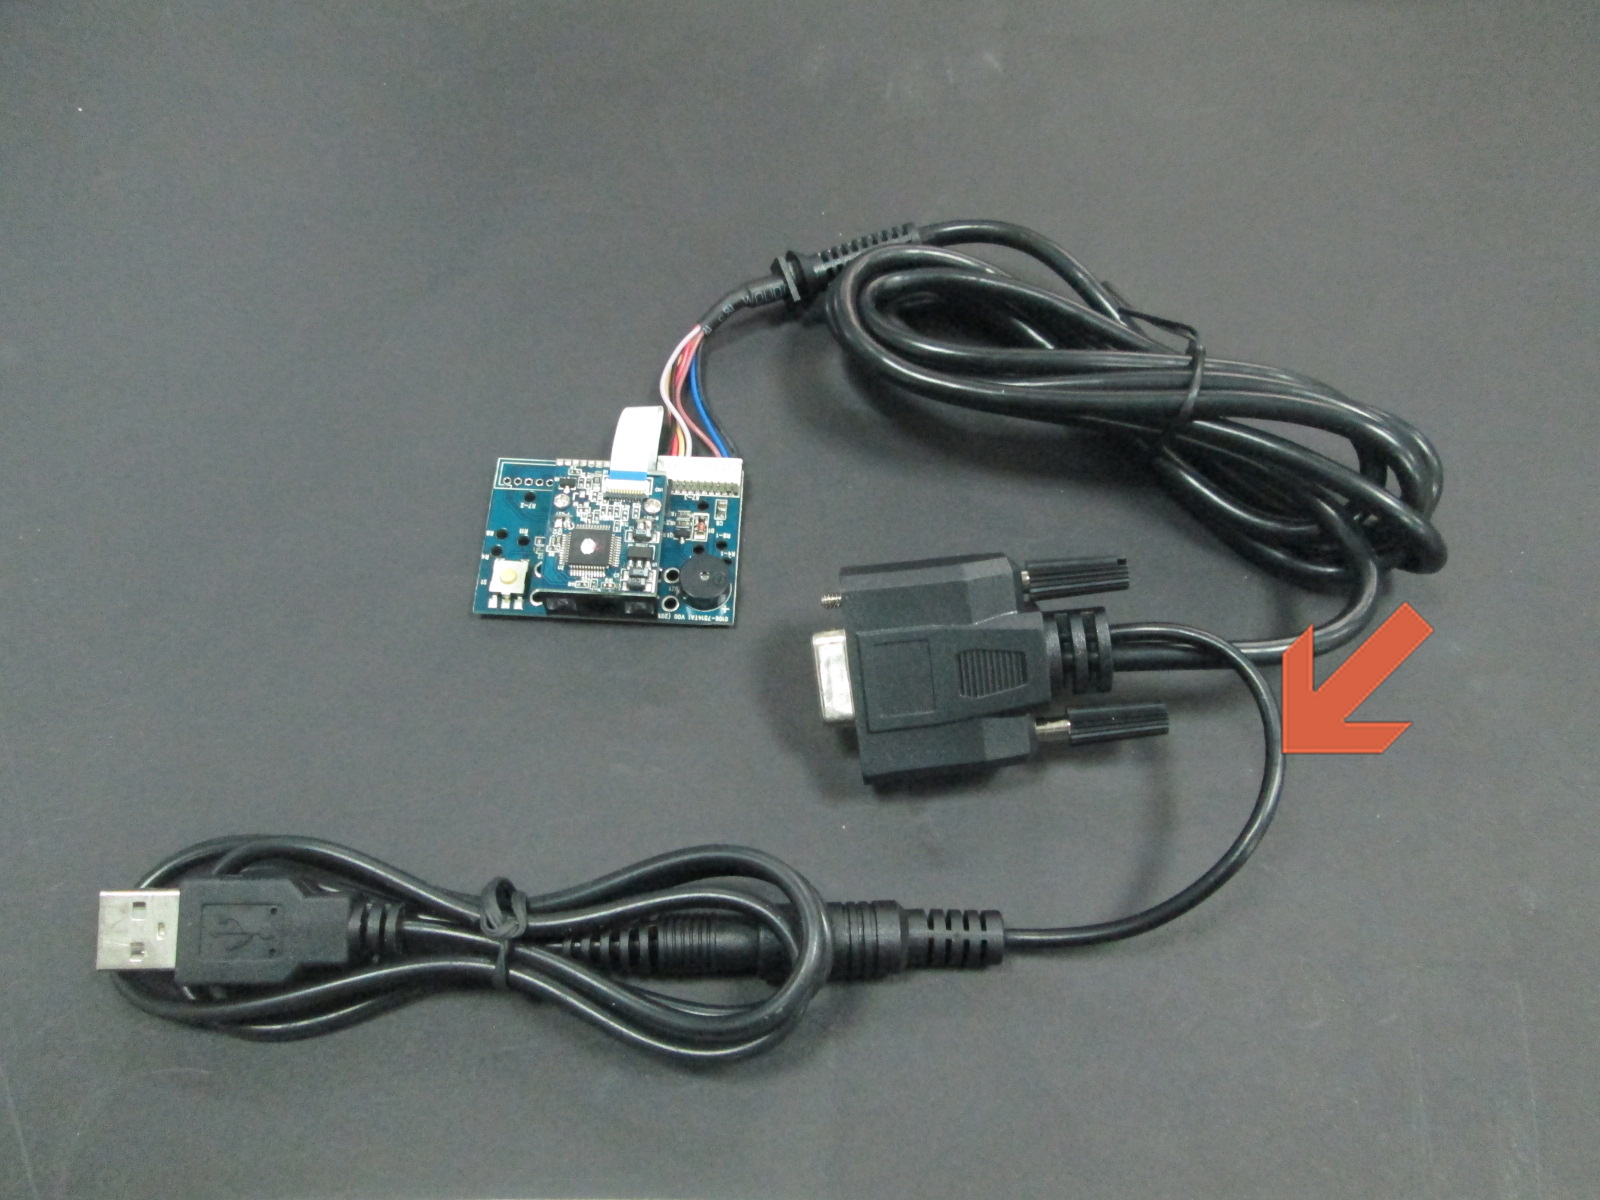
| '''Q1. '''The board looks like that it does not operate (no lights come on and it draws no current). |
'''A1. '''sorry that there was no LED as an power indicator on the module, but a buzzer which will make a sound when it gets powered on. And by pressing the yellow button, the camera will scan a barcode while making a sound and the camera will flash a red light.
 get it from dfrobot store or dfrobot distributor.
category: Product Manual category: SEN Series category: Sensors category: Light&Imaging