SRF02_Ultrasonic_sensor_(SKU_SEN0005) - jimaobian/DFRobotWiki GitHub Wiki

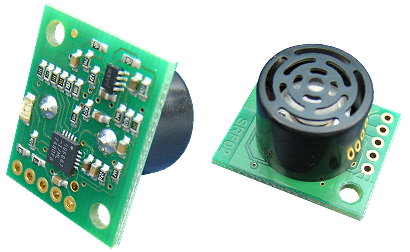
The SRF02 is a single transducer ultrasonic rangefinder in a small footprint PCB. It features both I2C and a Serial interfaces. The serial interface is a standard TTL level UART format at 9600 baud,1 start, 2 stop and no parity bits, and may be connected directly to the serial ports on any microcontroller. Up to 16 SRF02's may be connected together on a single bus, either I2C or Serial. New commands in the SRF02 include the ability to send an ultrasonic burst on its own without a reception cycle, and the ability to perform a reception cycle without the preceding burst. This has been as requested feature on our sonar's and the SRF02 is the first to see its implementation. Because the SRF02 uses a single transducer for both transmission and reception, the minimum range is higher than our other dual transducer rangers. The minimum measurement range varies from around 17-18cm (7 inches) on a warm day down to around 15-16cm (6 inches) on a cool day. Like all our rangefinders, the SRF02 can measure in uS, cm or inches. Reference Links: http://www.robot-electronics.co.uk/htm/srf02tech.htm
- Range: 16cm to 6m.
- Power: 5v, 4mA Typ.
- Frequency: 40KHz.
- Size: 24mm x 20mm x 17mm height.
- Analogue Gain: Automatic 64 step gain control
- Connection Modes: 1 - Standard I2C Bus 2 - Serial Bus(connects up to 16 devices to any uP or UART serial port)
- Full Automatic Tuning: No calibration, just power up and go
- Timing: Fully timed echo, freeing host controller of task.
- Units: Range reported in uS, mm or inches.
- Light Weight: 4.6gm
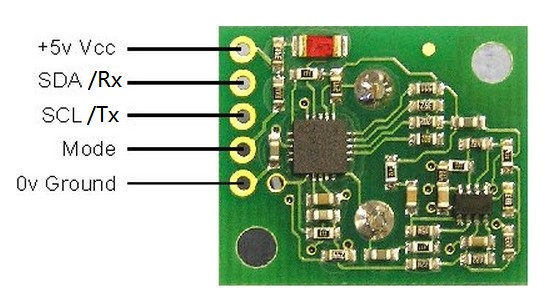
 "Mode" pin: Select the communication between MCU and SRF02 Ultrasonic sensor. It has an internal pull-up resistor.
When in IIC mode,the "Mode" pin should be left unconnected.
When in UART mode,it must be connected to GND.

/*
Sample code for test the SRF02 with the I2C mode based on Arduino UNO!
Command for reference:http://robot-electronics.co.uk/htm/srf02techI2C.htm
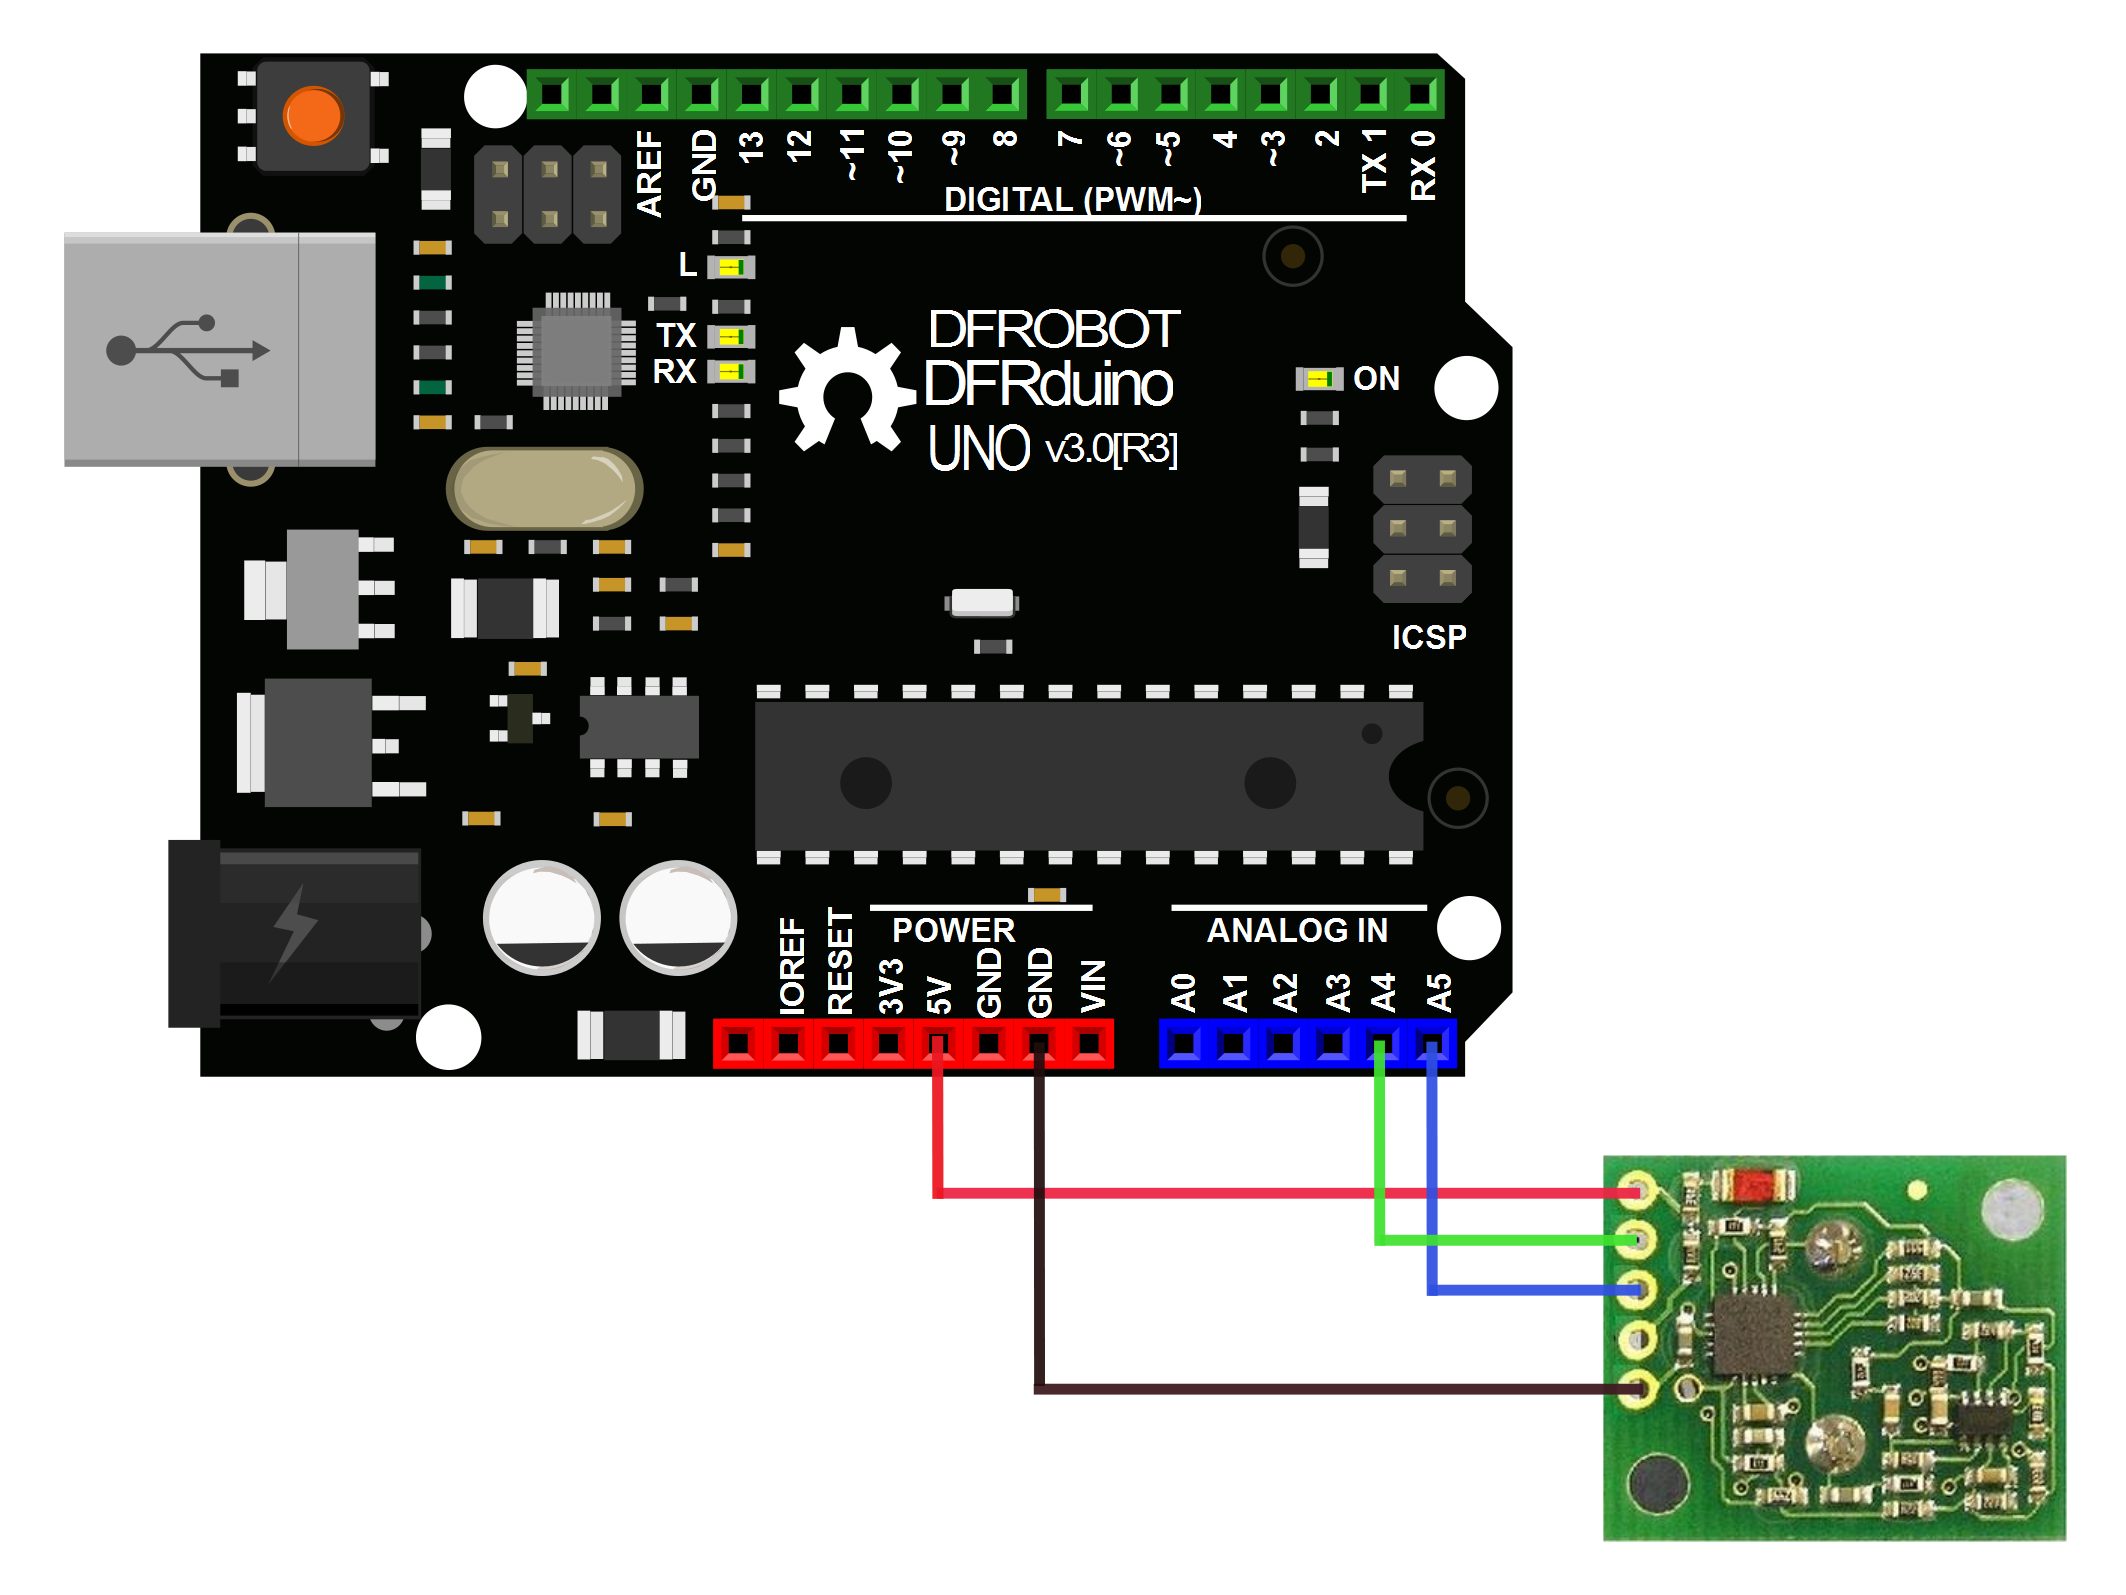
Connection:
SRF02       Arduino
5v Vcc    -> 5V
SDA       -> A4
SCL       -> A5
Mode      -> no connection
0v Ground -> GND
*/

#include <Wire.h>

void setup()
{
  Wire.begin();                // join i2c bus (address optional for master)
  Serial.begin(9600);          // start serial communication at 9600bps
}

int reading = 0;

void loop()
{
  // step 1: instruct sensor to read echoes
  Wire.beginTransmission(112); // transmit to device #112 (0x70)
  // the address specified in the datasheet is 224 (0xE0)
  // but i2c adressing uses the high 7 bits so it's 112
  Wire.write(byte(0x00));      // sets register pointer to the command register (0x00)
  Wire.write(byte(0x51));      // command sensor to measure in "centimeters" (0x51)
  // use 0x51 for centimeters
  // use 0x52 for ping microseconds
  Wire.endTransmission();      // stop transmitting

  // step 2: wait for readings to happen
  delay(70);                   // datasheet suggests at least 65 milliseconds

  // step 3: instruct sensor to return a particular echo reading
  Wire.beginTransmission(112); // transmit to device #112
  Wire.write(byte(0x02));      // sets register pointer to echo #1 register (0x02)
  Wire.endTransmission();      // stop transmitting

  // step 4: request reading from sensor
  Wire.requestFrom(112, 2);    // request 2 bytes from slave device #112

  // step 5: receive reading from sensor
  if (2 <= Wire.available())   // if two bytes were received
  {
    reading = Wire.read();  // receive high byte (overwrites previous reading)
    reading = reading << 8;    // shift high byte to be high 8 bits
    reading |= Wire.read(); // receive low byte as lower 8 bits
    Serial.print(reading);   // print the reading
    Serial.println("cm");
  }

  delay(250);                  // wait a bit since people have to read the output :)
}

/*
Sample code for test the SRF02 with the UART mode based on Leonardo!
Command for reference:http://robot-electronics.co.uk/htm/srf02techSer.htm
Connection:
SRF02       Arduino
5v Vcc    -> 5V
Rx        -> 1(TX)
Tx        -> 0(RX)
Mode      -> GND
0v Ground -> GND
*/

void SendCmd(unsigned char address,unsigned char cmd)
{
  Serial1.write(address);//set the address of SRF02(factory default is 0)
  delayMicroseconds(100);//serial data is fixed at 9600,N,8,2,so we need some time to creat the sencond stop bit
  Serial1.write(cmd);//send the command to SRF02
  delayMicroseconds(100);//serial data is fixed at 9600,N,8,2,so we need some time to creat the sencond stop bit
}
void setup(void)
{
  Serial.begin(9600);
  Serial1.begin(9600);
  Serial.println("SRF02 TEST!");
}
void loop(void)
{
  unsigned int reading;
  SendCmd(0x00,0x51);//Real Ranging Mode - Result in centimeters
  delay(70);//time for SRF02 to measure the range
  SendCmd(0x00,0x5E);//Get Range, returns two bytes (high byte first) from the most recent ranging.
  delay(10);//wait for some time,let the Arduino receive 2 bytes data from the TX pin of SRF02
  if(Serial1.available()>=2)//if two bytes were received
  {
    reading = Serial1.read()<<8;//receive high byte (overwrites previous reading) and shift high byte to be high 8 bits
    reading |= Serial1.read(); // receive low byte as lower 8 bits
    Serial.print(reading); // print the reading
    Serial.println("cm");
  }
  delay(250); // wait a bit since people have to read the output :)
}
Of course,if you don't have a Leonardo board, you can also use the Arduino UNO by the software serial. Just change "Serial1" into "mySerial" and add these sentence:
#include <SoftwareSerial.h>  <br>
SoftwareSerial mySerial(10, 11); // RX, TX
Change your connection according to your software serial pin defination. I tested OK.
SRF02 Ultrasonic sensor user manual
[http://www.robot-electronics.co.uk/htm/arduino_examples.htm#SRF02, SRF08, SRF10, SRF235 sample usage]
 shopping srf02 ultrasonic sensor (sku:sen0005)
category: Product Manual category: SEN Series category: Sensors