Positioning_ir_camera - jimaobian/DFRobotWiki GitHub Wiki

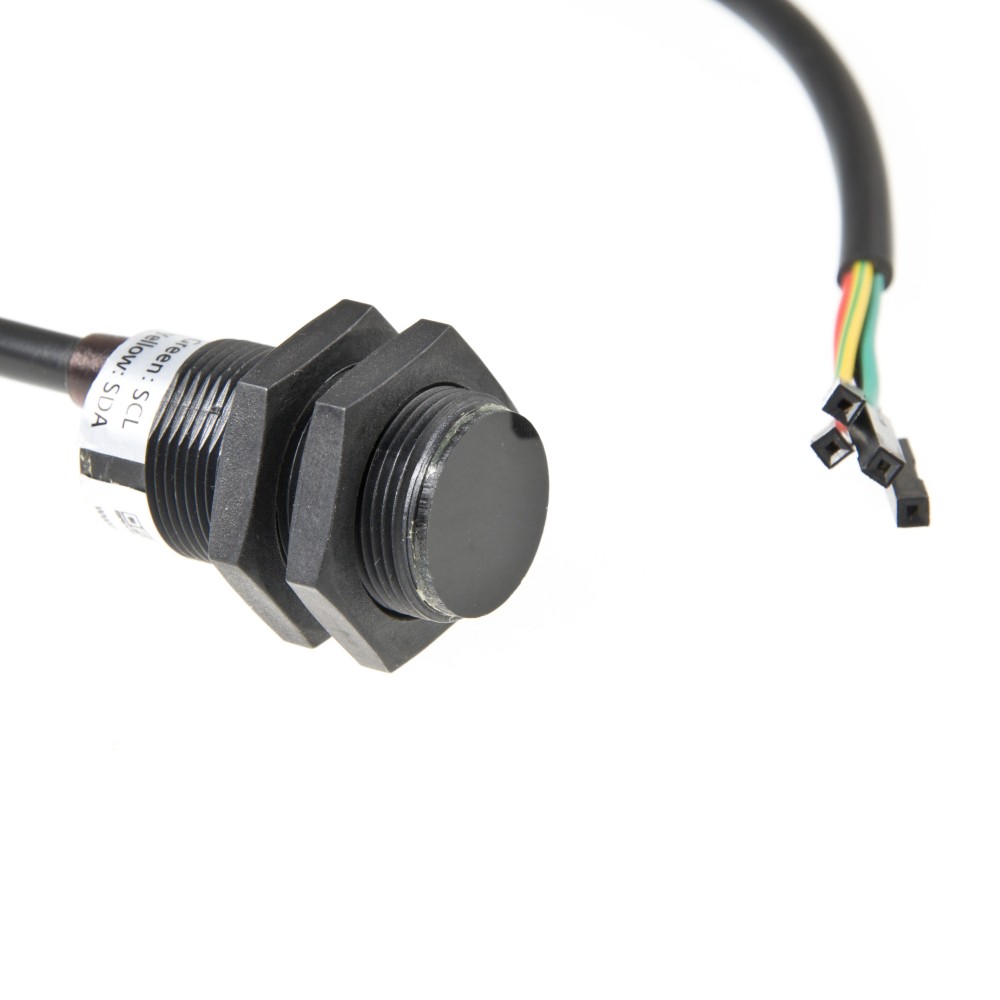
This camera is a small form positioning IR camera, which could track 4 IR objects at the same time. The applications are very various and goes from tracking of robots with IR transmitters for navigation to light barriers, determine the direction where the object is going to. It is also a flame sensor, which could track heat sources. It will be a very useful sensor to detect the flame position. Easy to install and to connect. Just four wires, two for power supply and two for I2C.
- Power consumption requirements: 3.3V/44mA, 5V/48mA
- Detecting distance: 0~3m
- Communication protocol: I2C
- Horizontal detecting angle: 33 degrees
- Vertical detecting angel: 23 degrees
- Resolution is 128x96 pixel, with hardware image processing, which can track four objects (IR emitting or reflecting objects)
- Dimensions: 32 x 16 (cylinder shape)
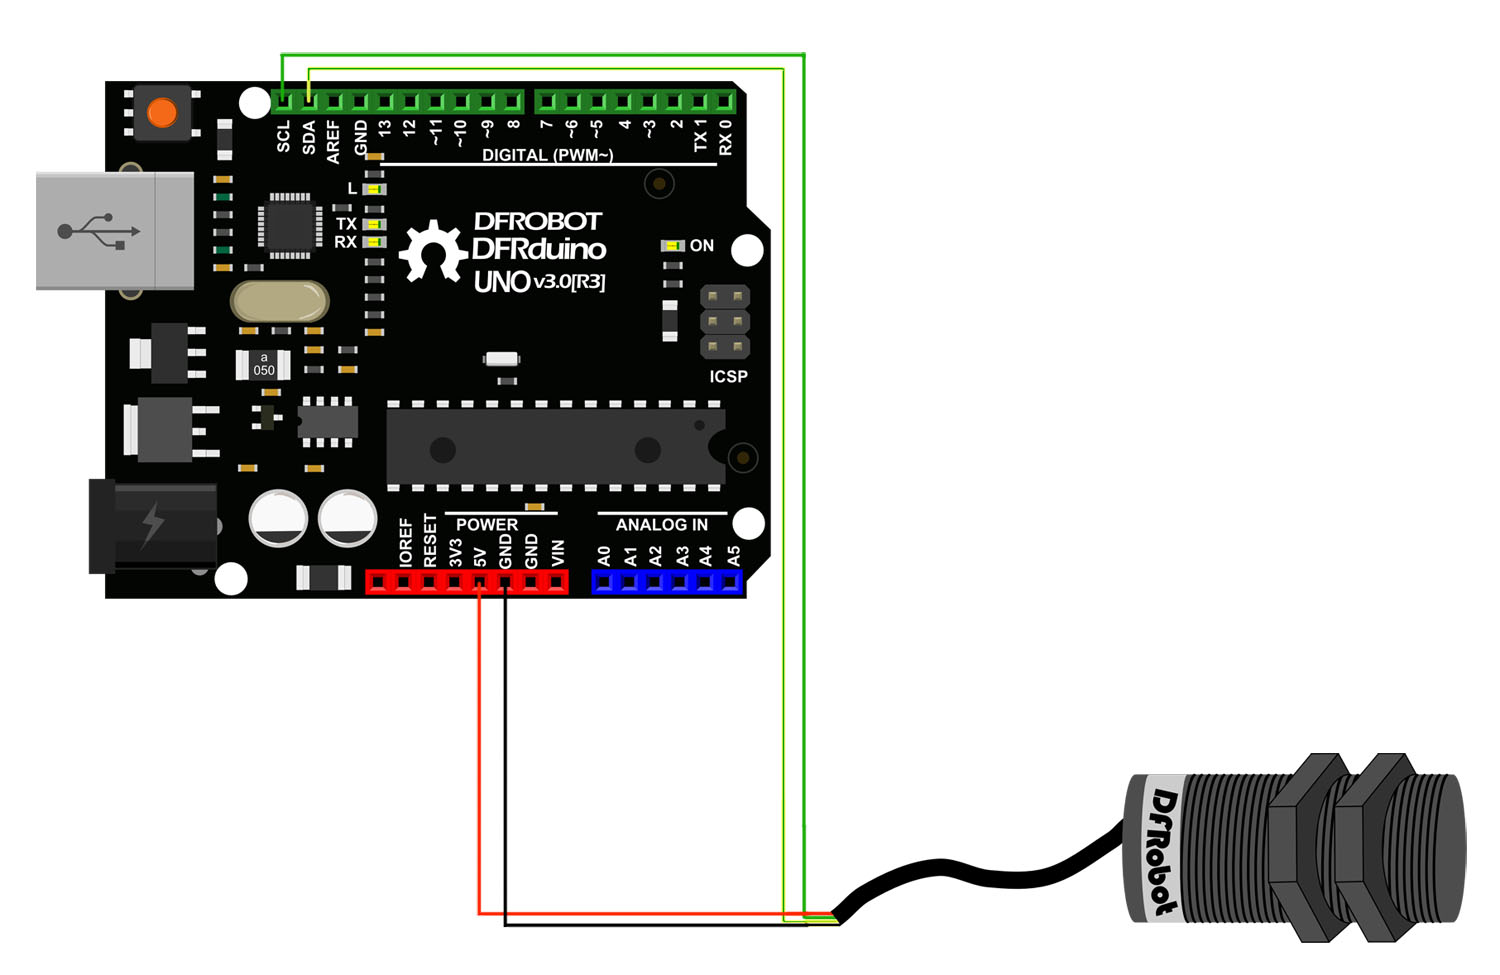
- Red - VCC+
- Yellow - SDA
- Green - SCL
- Black - GND

Once the camera detects a signal, it will display its coordinates on the first position. And others will be empty(returns 1023,1023). If the camera detects several objects, it will arrange them according to the detecting order. If one of them is out of the view, that position will be empty(return 1023,1023). It only supports 4 objects at the same time.
// Wii Remote IR sensor  test sample code  by kako http://www.kako.com
// modified output for Wii-BlobTrack program by RobotFreak http://www.letsmakerobots.com/user/1433
// modified for http://DFRobot.com by Lumi, Jan. 2014

#include <Wire.h>

int IRsensorAddress = 0xB0;
//int IRsensorAddress = 0x58;
int slaveAddress;
int ledPin = 13;
boolean ledState = false;
byte data_buf[16];
int i;

int Ix[4];
int Iy[4];
int s;

void Write_2bytes(byte d1, byte d2)
{
    Wire.beginTransmission(slaveAddress);
    Wire.write(d1); Wire.write(d2);
    Wire.endTransmission();
}

void setup()
{
    slaveAddress = IRsensorAddress >> 1;   // This results in 0x21 as the address to pass to TWI
    Serial.begin(19200);
    pinMode(ledPin, OUTPUT);      // Set the LED pin as output
    Wire.begin();
    // IR sensor initialize
    Write_2bytes(0x30,0x01); delay(10);
    Write_2bytes(0x30,0x08); delay(10);
    Write_2bytes(0x06,0x90); delay(10);
    Write_2bytes(0x08,0xC0); delay(10);
    Write_2bytes(0x1A,0x40); delay(10);
    Write_2bytes(0x33,0x33); delay(10);
    delay(100);
}
void loop()
{
    ledState = !ledState;
    if (ledState) { digitalWrite(ledPin,HIGH); } else { digitalWrite(ledPin,LOW); }

    //IR sensor read
    Wire.beginTransmission(slaveAddress);
    Wire.write(0x36);
    Wire.endTransmission();

    Wire.requestFrom(slaveAddress, 16);        // Request the 2 byte heading (MSB comes first)
    for (i=0;i<16;i++) { data_buf[i]=0; }
    i=0;
    while(Wire.available() && i < 16) {
        data_buf[i] = Wire.read();
        i++;
    }

    Ix[0] = data_buf[1];
    Iy[0] = data_buf[2];
    s   = data_buf[3];
    Ix[0] += (s & 0x30) <<4;
    Iy[0] += (s & 0xC0) <<2;

    Ix[1] = data_buf[4];
    Iy[1] = data_buf[5];
    s   = data_buf[6];
    Ix[1] += (s & 0x30) <<4;
    Iy[1] += (s & 0xC0) <<2;

    Ix[2] = data_buf[7];
    Iy[2] = data_buf[8];
    s   = data_buf[9];
    Ix[2] += (s & 0x30) <<4;
    Iy[2] += (s & 0xC0) <<2;

    Ix[3] = data_buf[10];
    Iy[3] = data_buf[11];
    s   = data_buf[12];
    Ix[3] += (s & 0x30) <<4;
    Iy[3] += (s & 0xC0) <<2;

    for(i=0; i<4; i++)
    {
      if (Ix[i] < 1000)
        Serial.print("");
      if (Ix[i] < 100)
        Serial.print("");
      if (Ix[i] < 10)
        Serial.print("");
      Serial.print( int(Ix[i]) );
      Serial.print(",");
      if (Iy[i] < 1000)
        Serial.print("");
      if (Iy[i] < 100)
        Serial.print("");
      if (Iy[i] < 10)
        Serial.print("");
      Serial.print( int(Iy[i]) );
      if (i<3)
        Serial.print(",");
    }
    Serial.println("");
    delay(15);
}// Example by Tom Igoe
// Modified for http://www.DFRobot.com by Lumi, Jan. 2014
/*
This code should show one colored blob for each detected IR source (max four) at the relative position to the camera.
*/
import processing.serial.*;
int lf = 10; // Linefeed in ASCII
String myString = null;
Serial myPort; // The serial port
void setup() {
// List all the available serial ports
println(Serial.list());
// Open the port you are using at the rate you want:
myPort = new Serial(this, Serial.list()[0], 19200);
myPort.clear();
// Throw out the first reading, in case we started reading
// in the middle of a string from the sender.
myString = myPort.readStringUntil(lf);
myString = null;
size(800,800);
//frameRate(30);
}
void draw() {
background(77);
//while (myPort.available() > 0) {
myString = myPort.readStringUntil(lf);
if (myString != null) {
int[] output = int (split(myString, ','));
println(myString); // display the incoming string
int xx = output[0];
int yy = output[1];
int ww = output[2];
int zz = output[3];
int xxx = output[4];
int yyy = output[5];
int www = output[6];
int zzz = output[7];
ellipseMode(RADIUS); // Set ellipseMode to RADIUS
fill(255, 0, 0); // Set fill to white
ellipse(xx, yy, 20, 20);
ellipseMode(RADIUS); // Set ellipseMode to RADIUS
fill(0, 255, 0); // Set fill to white
ellipse(ww, zz, 20, 20);
ellipseMode(RADIUS); // Set ellipseMode to RADIUS
fill(0, 0, 255); // Set fill to white
ellipse(xxx, yyy, 20, 20);
ellipseMode(RADIUS); // Set ellipseMode to RADIUS
fill(255); // Set fill to white
ellipse(www, zzz, 20, 20);
}
}| '''Q1. '''What is the thread size on the SEN0158 part? |
'''A. '''M18 it is.
| '''Q2. '''In the manual, it mentions that the horizontal detecting angle is 33 degrees, while the vertical detecting angle is 23 degrees. How do I differentiate which is horizontal and which is vertical? |
'''A. '''Please read more here, Wiimote/Pointing > Finding the Sensor Bar.
| For any questions/advice/cool ideas to share, please visit DFRobot Forum. |
 shopping positioning ir camera (sku:sen0158)
category: Product Manual category: SEN Series category: Sensors category: Source category: Diagram