Heart_Rate_Monitor_Sensor_SKU__SEN0213 - jimaobian/DFRobotWiki GitHub Wiki
Introduction
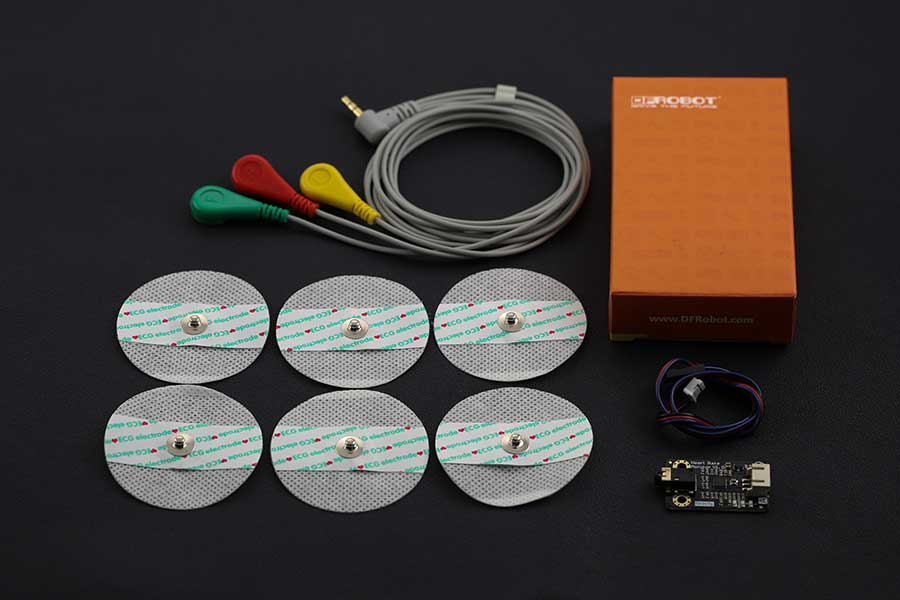
The DFRobot Heart Rate Monitor Sensor is used to measure the electrical activity of the heart. This electrical activity can be charted as an ECG and output as an analog reading. An ECG signal can be extremely noisy so we have included an AD8232 chip on the PCB which will provide a clear signal from the PR and QT Intervals. Using the Arduino IDE "Serial Plotter" feature you are also able to view plotted ECG output on your PC!
 please note: this product is not a medical device and is not intended to be used as such or as an accessory to such nor diagnose or treat any conditions.
Specification
- Input Voltage: 3.3 - 6V (5V recommended)
- Output Voltage: 0 - 3.3V
- Operating current: <10mA
- Dimension: 35 x 22(mm), 1.378" x 0.866"(in)
- Interface Type: PH2.0-3P
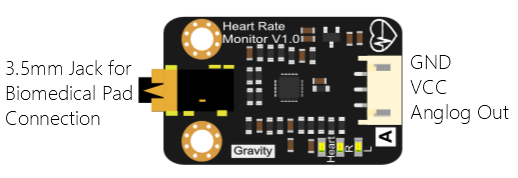
Board Overview
Tutorial
Requirements
- Hardware
- DFRduino UNO (or similar) x 1
- Heart Rate Monitor Sensor x 1
- Sensor cable - Electrode Pads (3 connectors) x 1
- Biomedical Sensor Pad x 1
- Jumper wires
- Software
- Arduino IDE V1.6.6 or above, Click to Download Arduino IDE from Arduino®
Connection Diagram
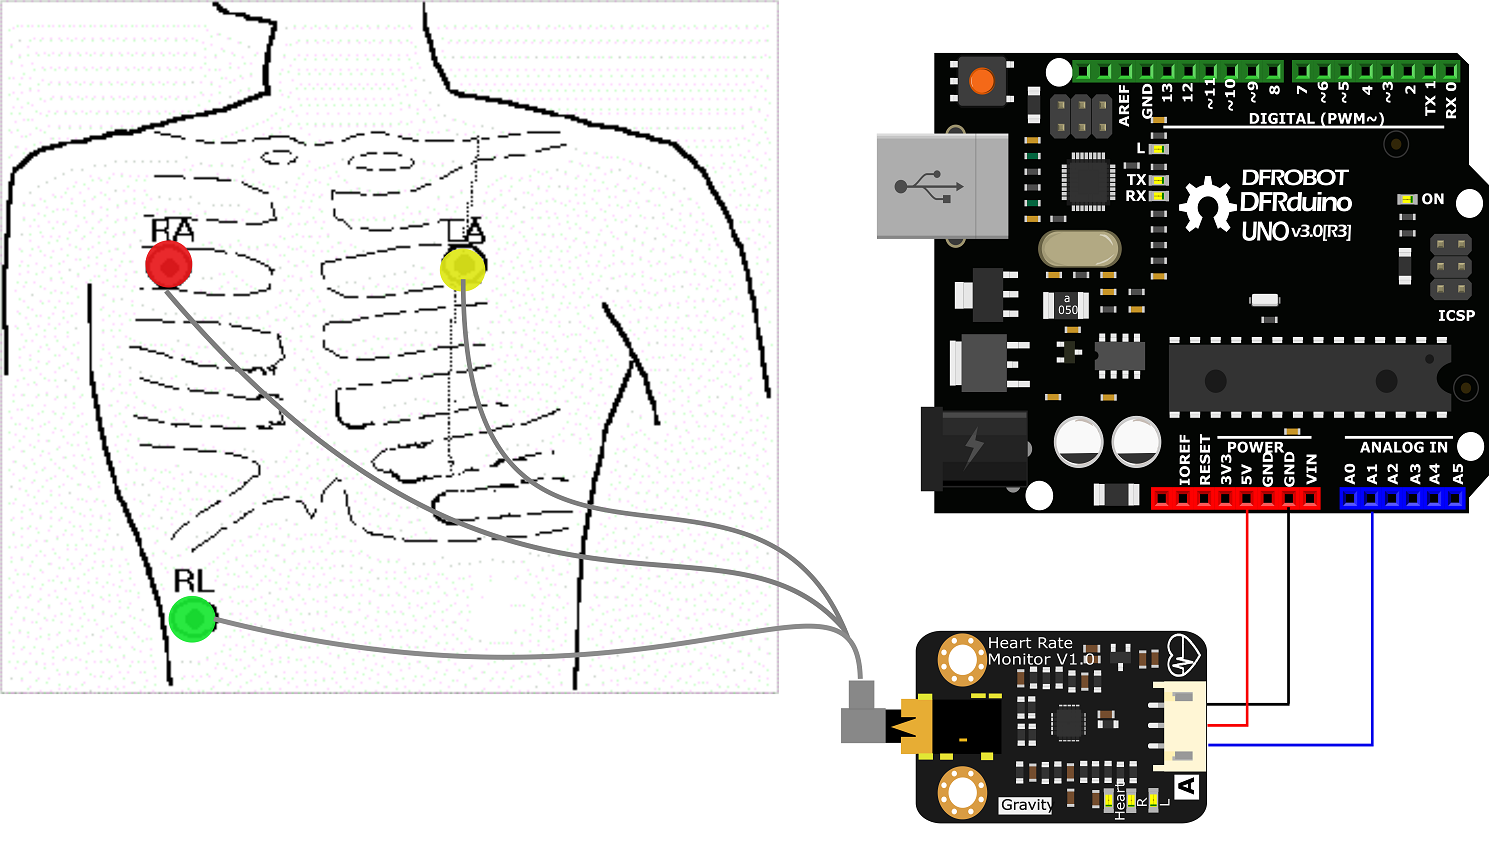
 NOTE: An ECG signal can be quite noisy because of muscle activity. The further sensor pads are from the heart, the more muscle noise you will see. To improve the signal quality, follow these simple tips:
- Keep sensor pads as close to the heart as you can
- Make sure the RA and LA sensor pads are on correct sides of the heart
- Try not to move too much while taking a measurement
- Try to use fresh pads for each measurement. The pads loose the ability to pass signals with multiple applications
- Prepare and clean the area you plan to stick pads. This will help make a good connection (hair is not a good conductor)
- You may have to adjust sensor placement for different individuals
Sample Code
/*!
* @file HeartRateMonitor.ino
* @brief HeartRateMonitor.ino  Sampling and ECG output
*
*  Real-time sampling and ECG output
*
* @author linfeng([email protected])
* @version  V1.0
* @date  2016-4-5
*/
const int heartPin = A1;
void setup() {
  Serial.begin(115200);
}
void loop() {
int heartValue = analogRead(heartPin);
Serial.println(heartValue);
delay(5);
}
Expected Result
- Open the Arduino IDE 1.6.6 (or above) "Serial Plotter";
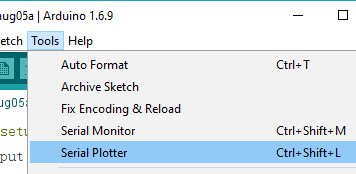
- Then you could see the output signal from the microcontroller - A1 port, the ECG.
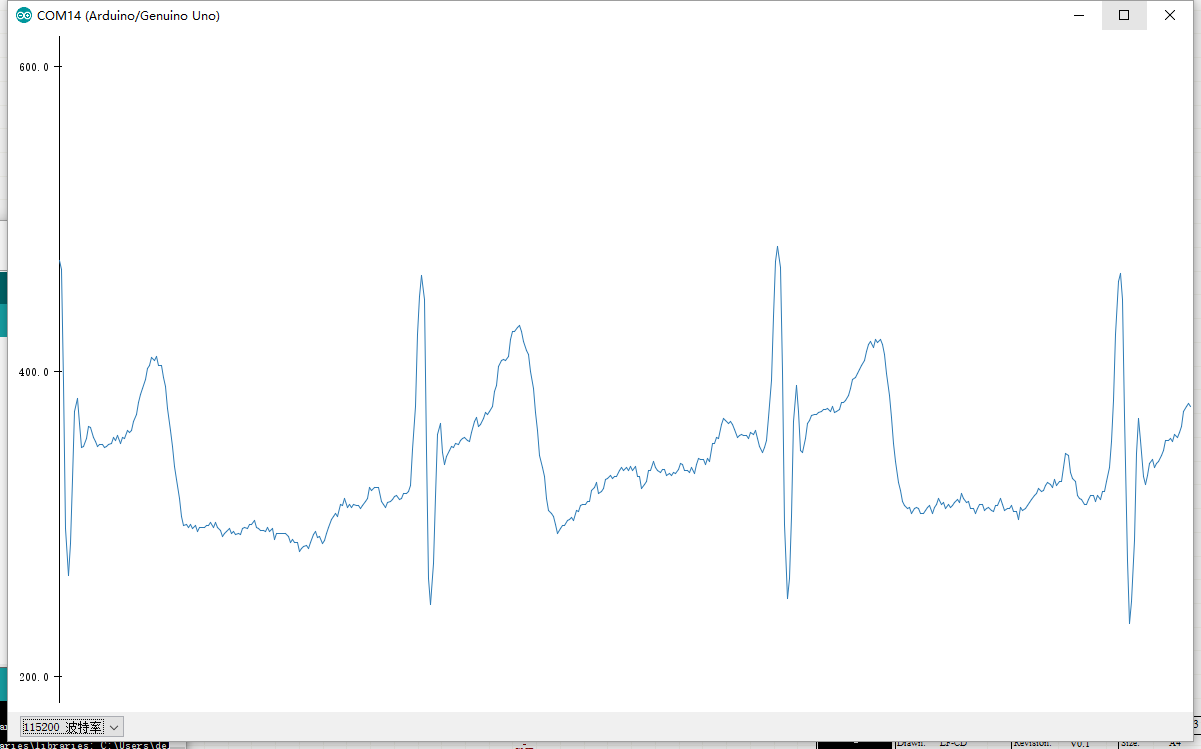
 NOTE: If you found there was a lot of jamming waveforms, they may come from the body's static electricity. Touch something metal to discharge any static electricity. More read on WikiHow.
FAQ
| '''Q1. '''Some general Arduino Problems/ FAQ/ Tips, very good to know. |
'''A1. '''Click the topic link on DFRobot Forum.
 For any questions, advice or cool ideas to share, please visit DFRobot Forum.
More
 shopping from dfrobot store or dfrobot distributor.