FIT0421_3 Phase_Brushless_Moto(12V_150RPM) - jimaobian/DFRobotWiki GitHub Wiki

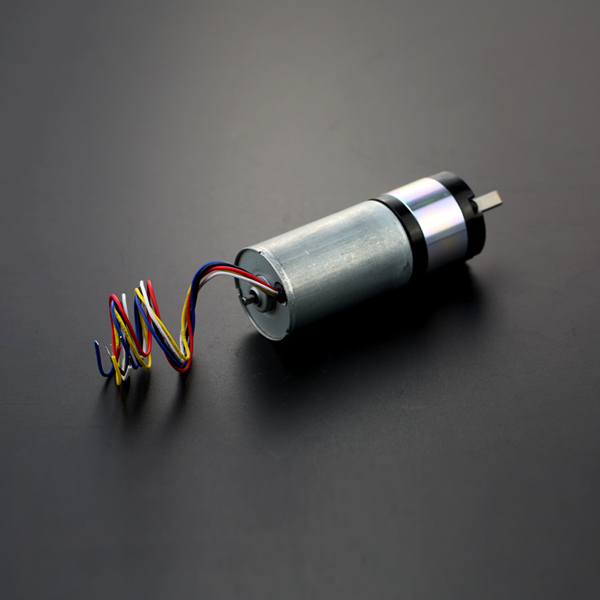
This is a motor revolution. It is time to get rid of motor driver now. Here is a new DC brushless motor with built-in motor driver. So it doesn't need any external motor driver. You could connect it to Arduino directly. The motor comes with direction control, PWM rotational speed control and frequency feedback output. It is suitable for medium-sized mobile robotic platform. With the motor speed feedback signal, it does well in cyclic control system.
- Operating Voltage: 12V
- Motor rated speed: 3700 rpm
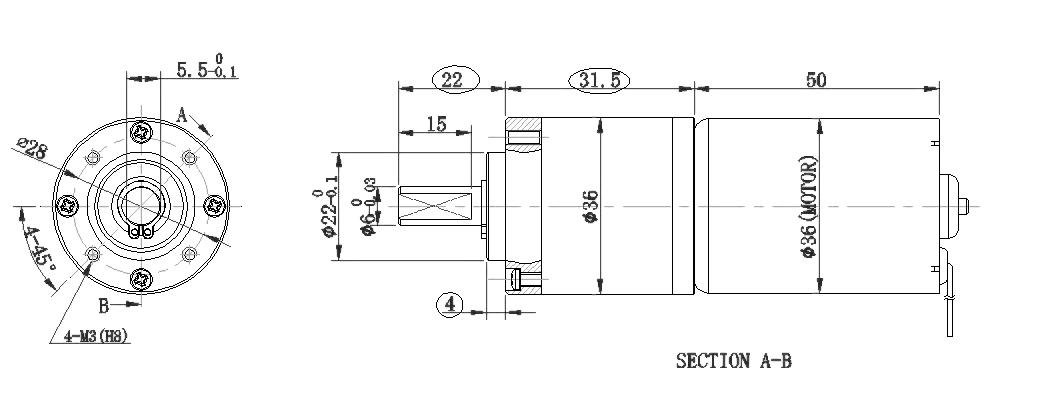
- Motor diameter: 36mm
- Gearbox: planetary gear reducer
- Speed: about 150 rpm/s.
- Shaft length: 20mm
- Reduction ratio: 27:1
- Signal cycle pulse number: 2*27
- Control mode:
- PWM speed control
- Direction control
- Feedback pulse output

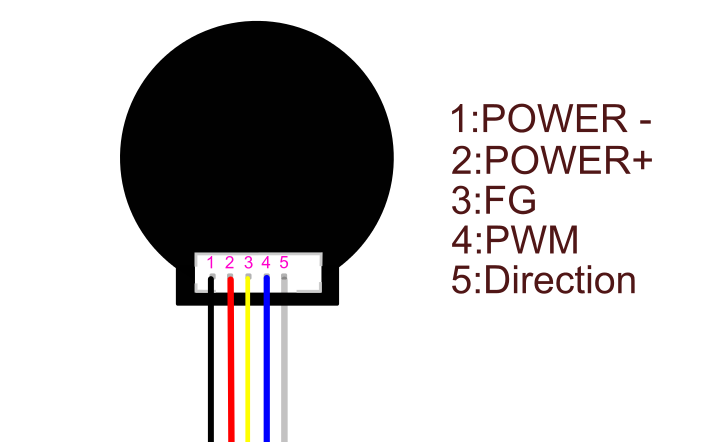
 |
Label |
Name |
Description |
1 |
black |
POWER- |
2 |
red |
POWER+ |
3 |
yellow |
FG frequency feedback output (Require 1k pull-up resister) |
4 |
blue |
PWM Control, 0-5V |
5 |
white |
Direction Pin: |
Here is a example how to use this motor, Just follow the guide, and you will get it work.
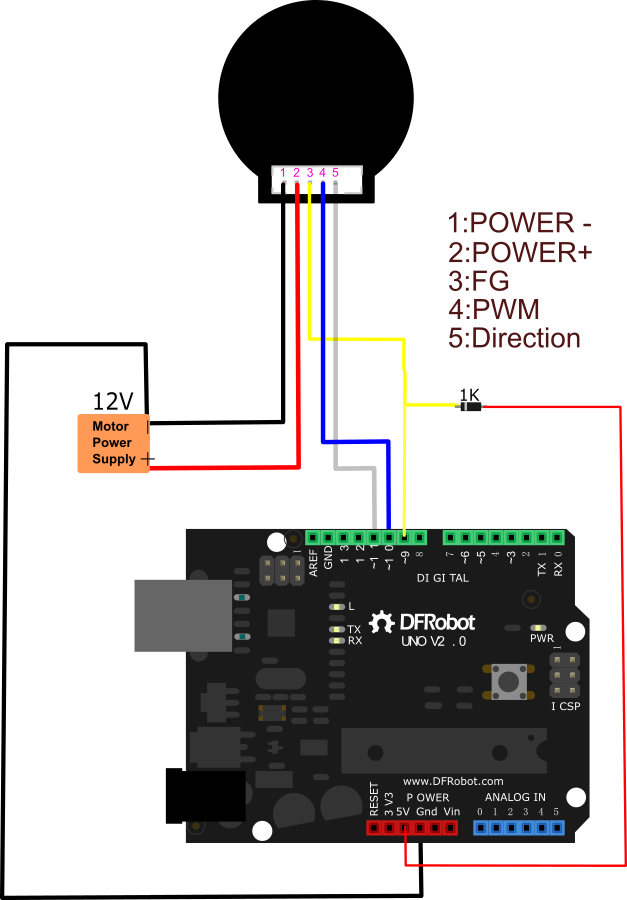
| ATTENTION:The yellow signal cable is frequency feedback output. It requires a 1k pull-up resister when you connect it to Arduino. |
| ### Requirements |
First, prepare the following hardware and software.
-
Hardware
- UNO x1
- Motor x1
- 1K resistance x1
- DuPont line xN
-
Software
- Arduino IDE V1.6.5 Click to Download Arduino IDE
| ### Connection Diagram |
After the hardware, the module is connected with the UNO in the following diagram.

After the hardware connection has been finished, we'll do the software part. Open your Arduino IDE, copy the following code to the IDE window. Then select the right serial port and the board (UNO) and click the download button. Done!
int i = 0;
unsigned long time = 0;
bool flag = HIGH;
void setup() {
  // put your setup code here, to run once:
  Serial.begin(115200);
  pinMode(10, OUTPUT); //PWM PIN 10  with blue line
  pinMode(11, OUTPUT);//direction control PIN 11 with white line
}

void loop() {
  // put your main code here, to run repeatedly:
  if (millis() - time > 5000)
  {
    flag = !flag;
    digitalWrite(11, flag);
    time = millis();
  }
  if (Serial.available())
  {
    analogWrite(10, Serial.parseInt());
    //     delay(2000);
  }
  i = pulseIn(9, HIGH, 500000); //SIGNAL OUTPUT PIN 9 with  white line,cycle = 2*i,1s = 1000000us,Signal cycle pulse number:27*2

  Serial.println(555555 / i); //speed   r/min  (60*1000000/(27*2*2*i))
}
Open the serial monitor, and enter a number between 0 and 255. Now the motor changes its rotating direction alternately each 5 seconds. And you also could manually change its direction via changing the "Direction" polarity. For example UNO's "5V" and "GND".
| Any question and more cool ideas to share, please visit DFRobot Forum |
 buy from dfrobot store or dfrobot distributor list