DFRduino_Player_(SKU_DFR0112) - jimaobian/DFRobotWiki GitHub Wiki
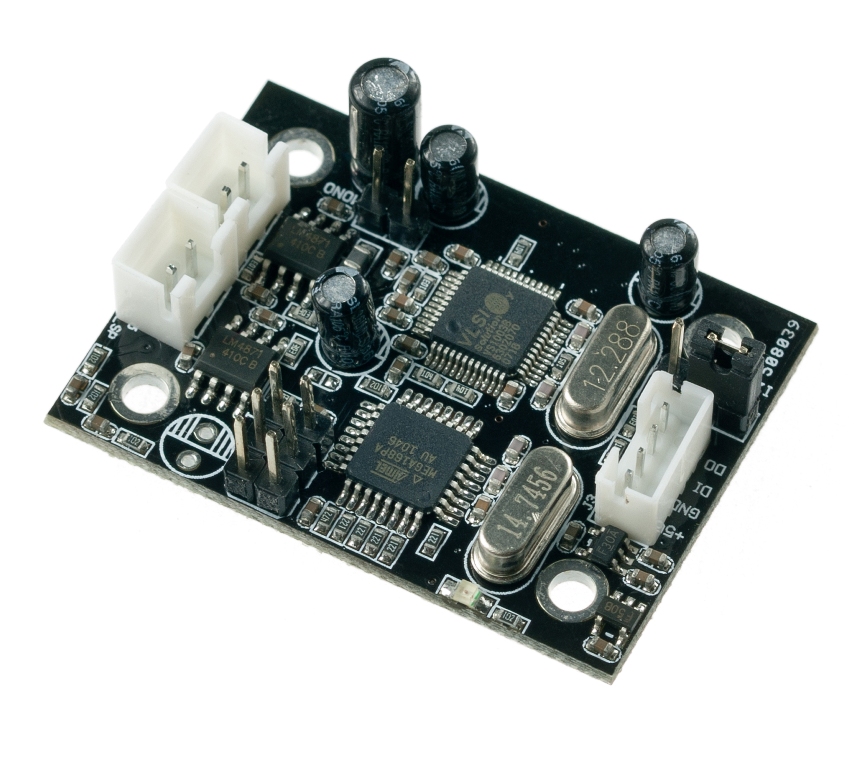 the player is able to play mp3/wav/midi sound track on sd card. it supports two interface UART/I2C which lets other microcontroller to talk to the player.
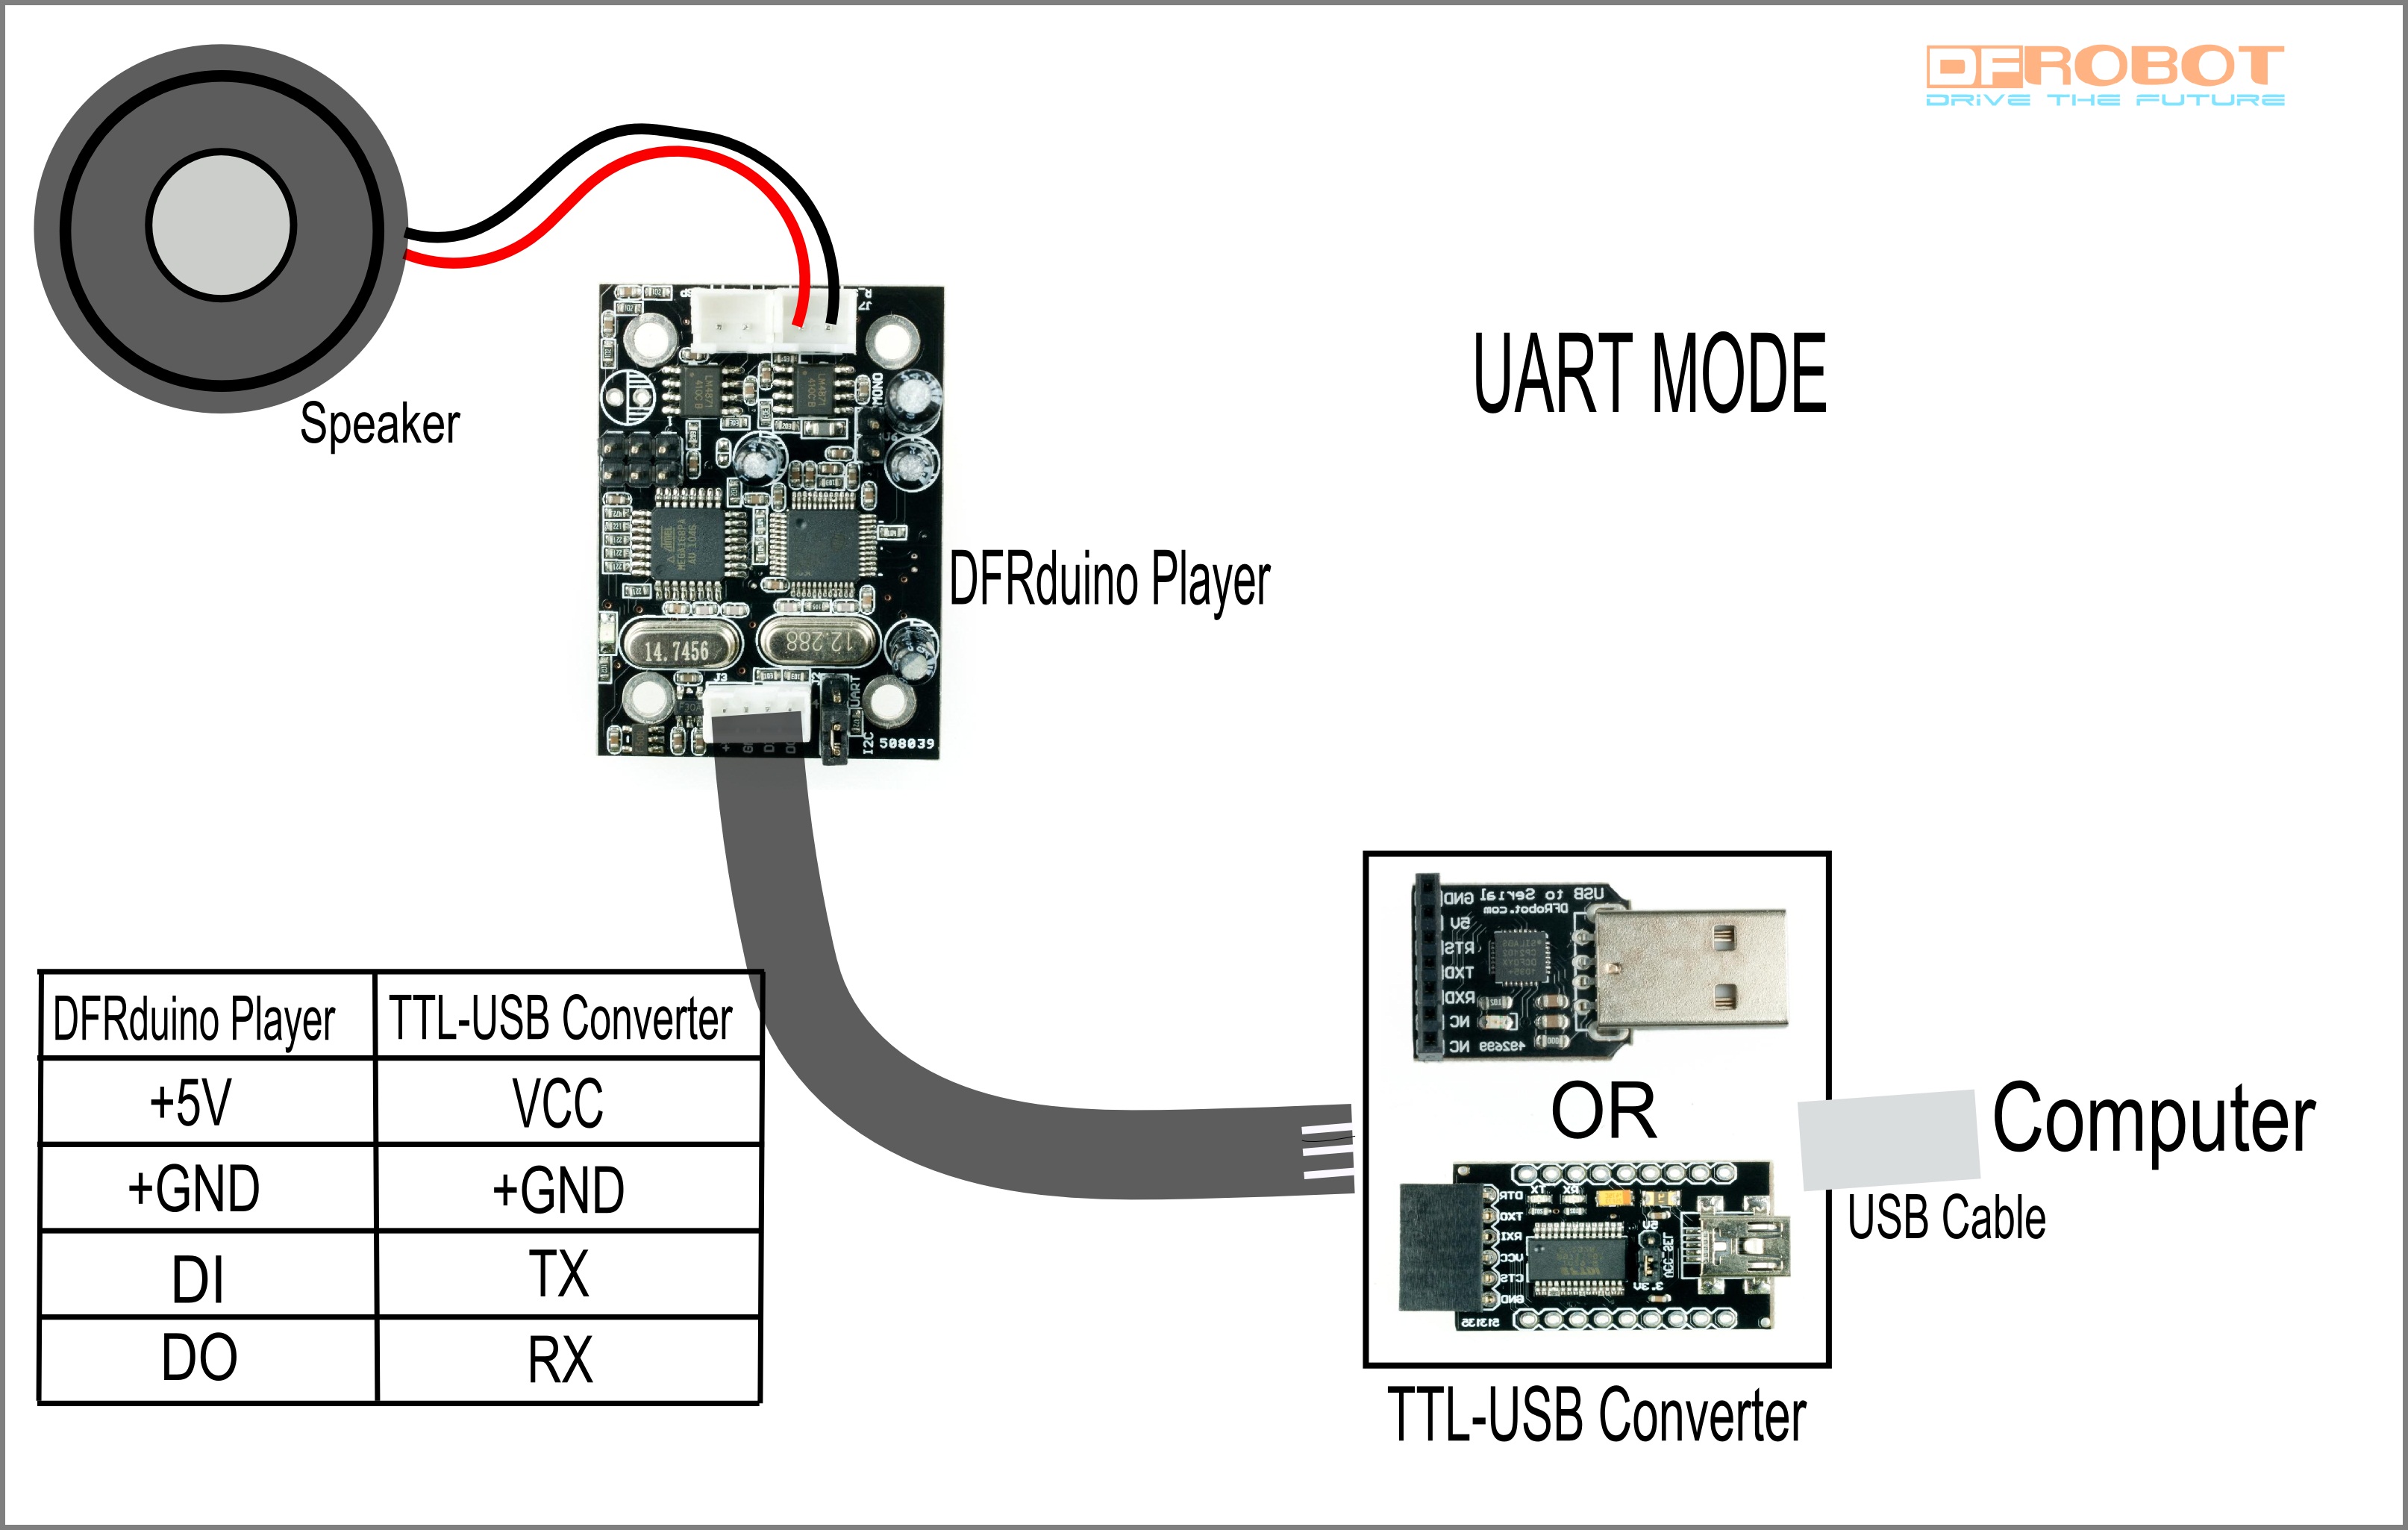
The player support both I2C and UART interface (via jumper). The play is thus able to controled by PC. A TTL/USB converter is required.
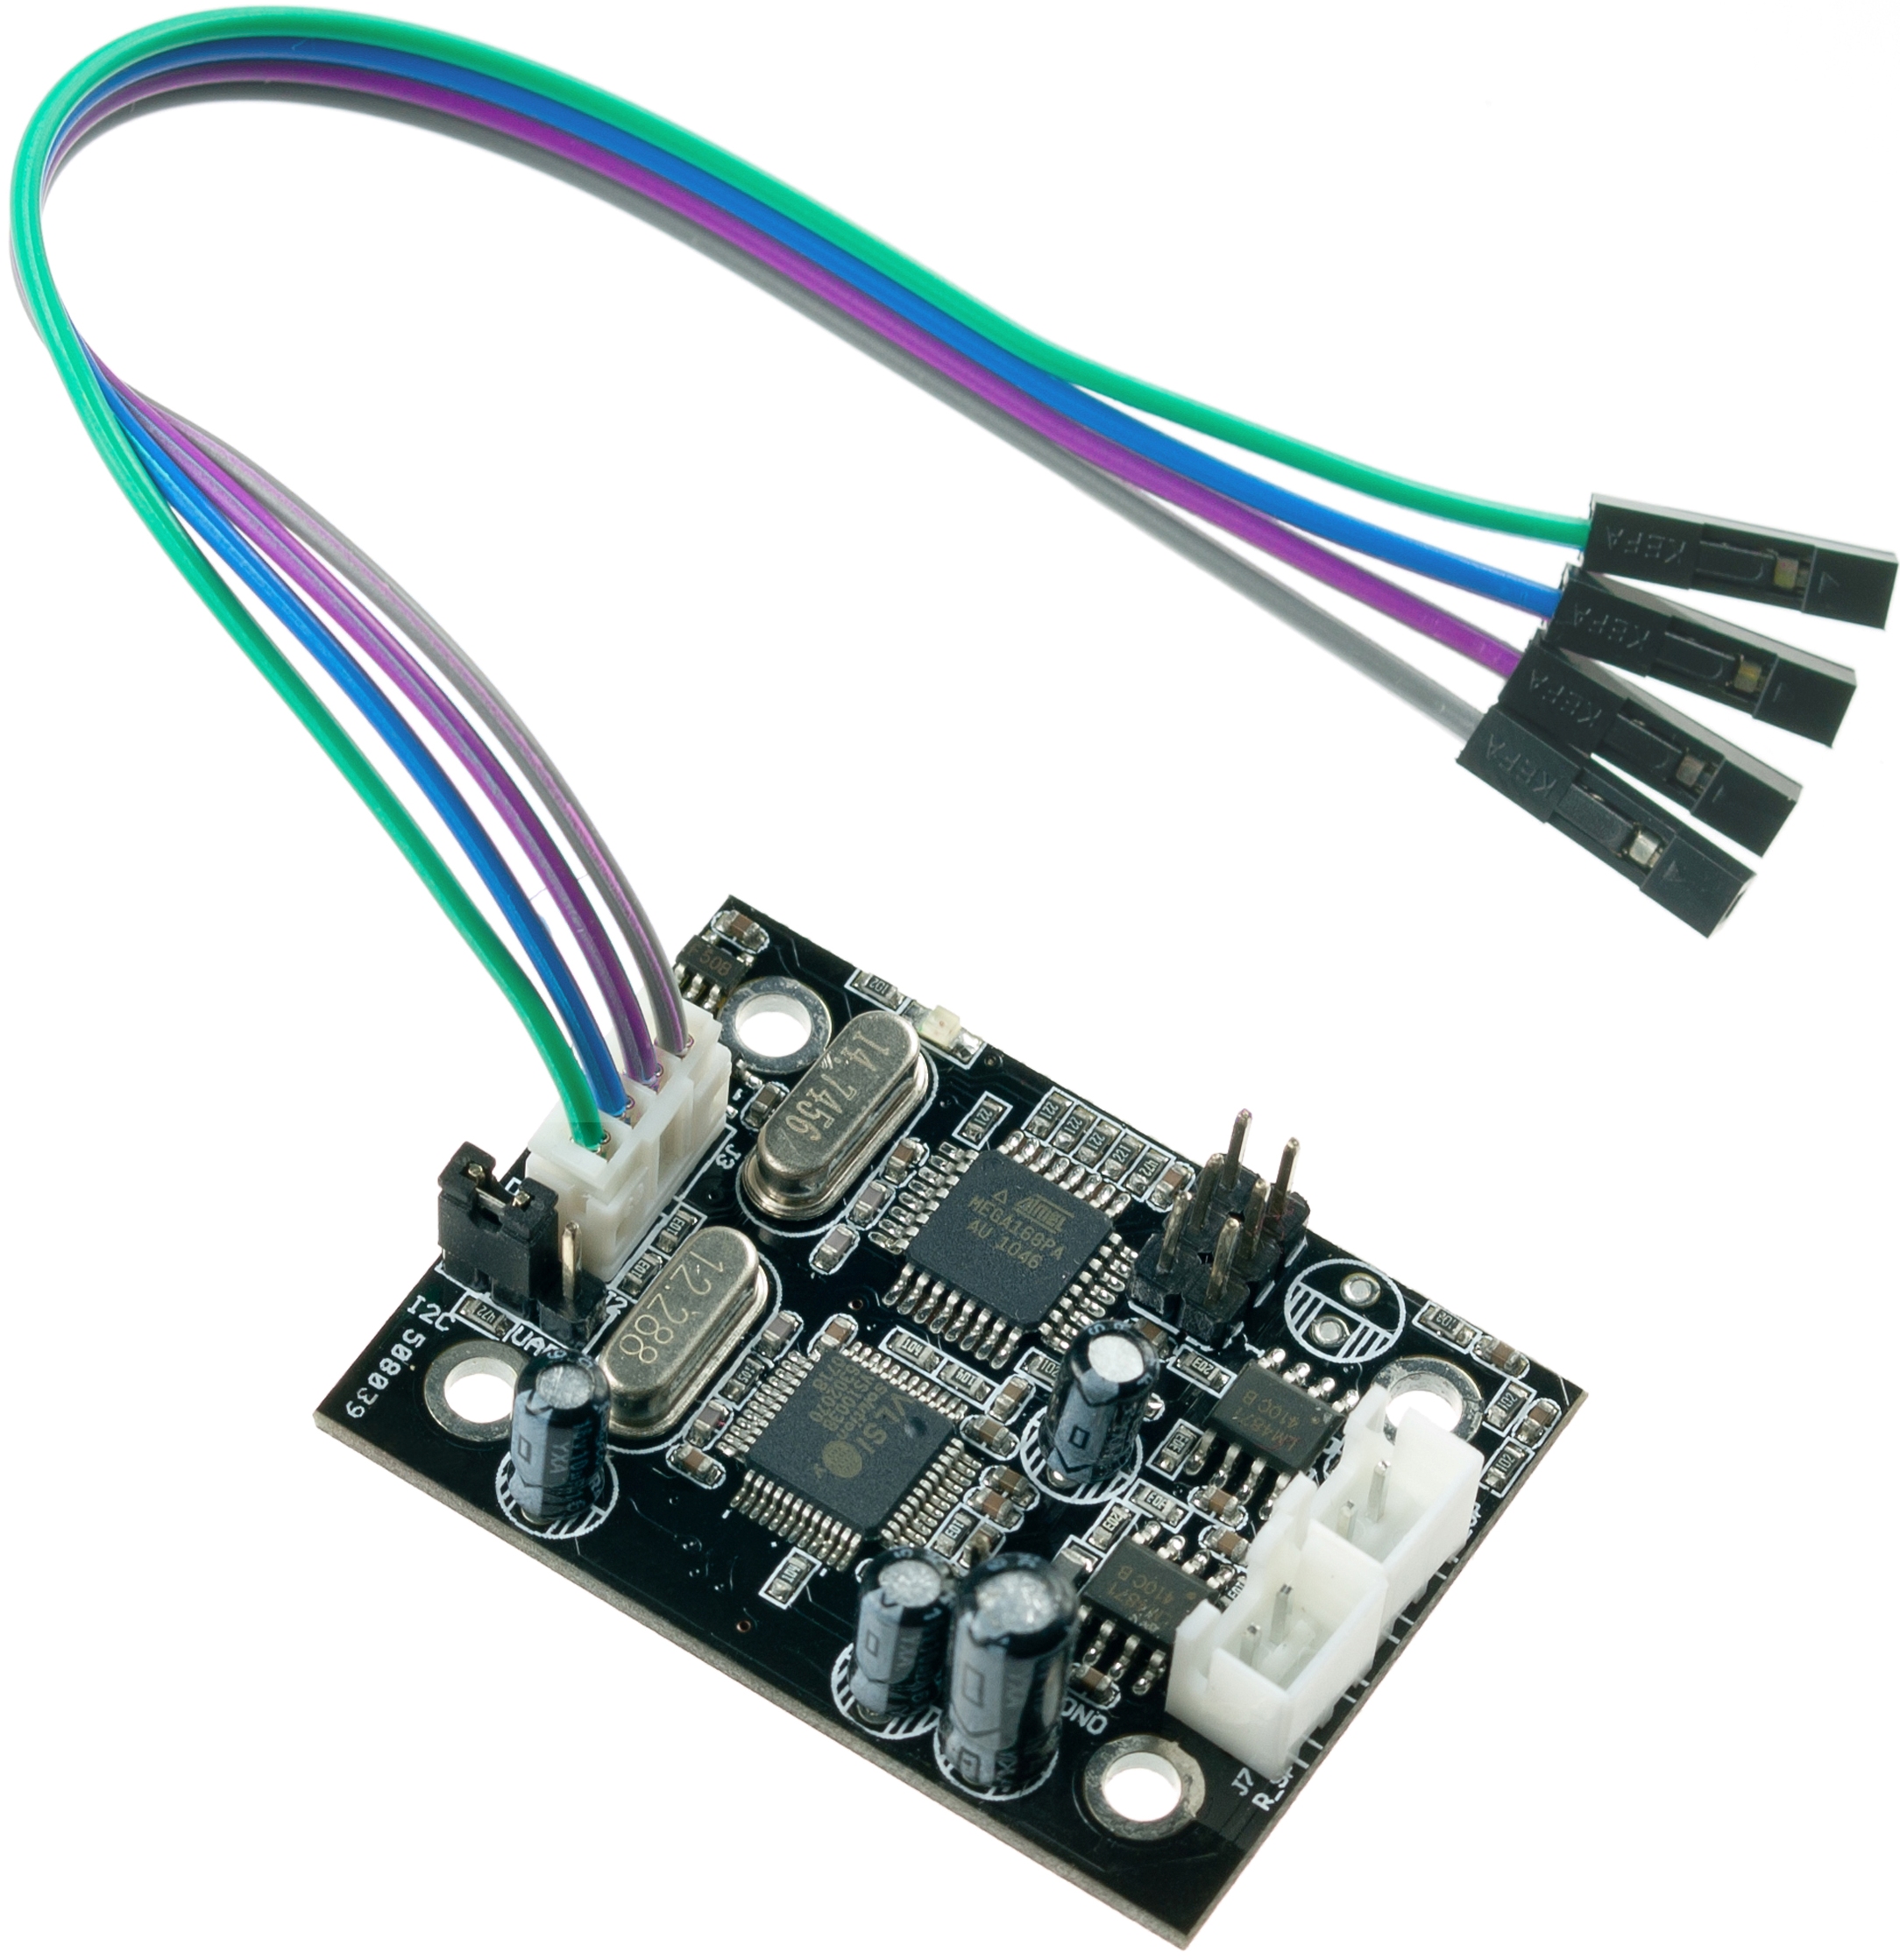
- Supply Voltage:5V
- Current:1000mA
- CPU:Atmega 328P
- MP3 Chip:VS1003
- Interface:I2C/UART
- UART:19200/8/N/1 (TTL level)
- I2C Address:0x35
- Output Power:2x3W
- Support Media:MP3,WAV,MIDI
- Support Meida Card:1 GB Micro Card
- Support command: Pause/Next Sound/Previoud Sound/Play Sound/ Volume Control
.jpg) The interface mode of Player can be switched via the jumper.
The interface mode of Player can be switched via the jumper.
The green led will flash once which means the player is under UART(Serial) mode when the player startup. The green led will flash twice which means the player is under I2C mode. Once the Player is ready the green LED will stay lit
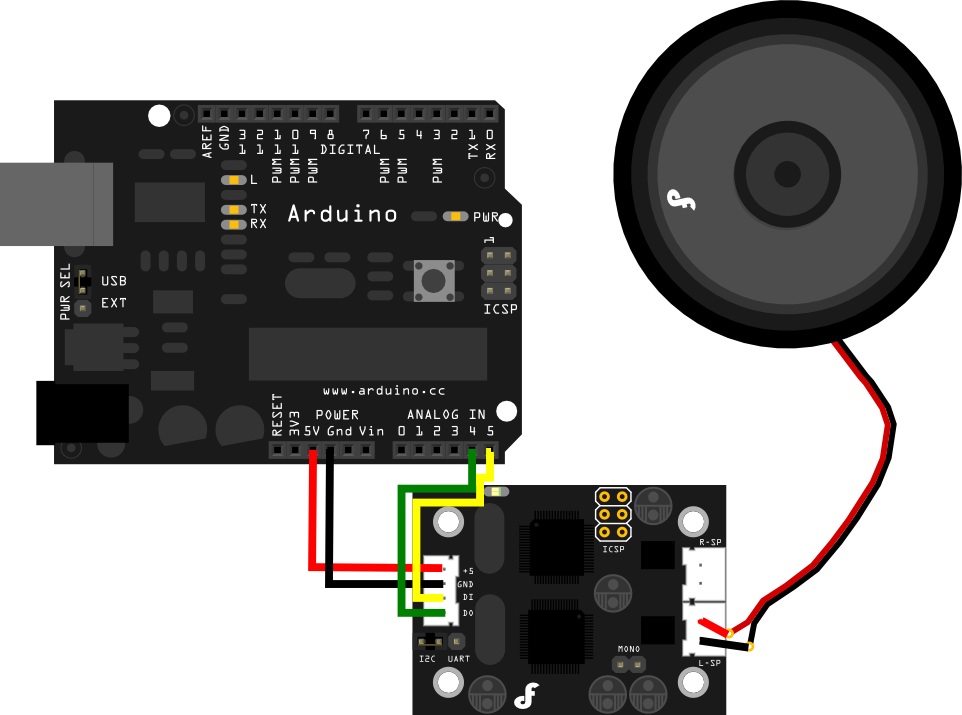
I2C pin connection:
Analog Pin4 (SDA) goes to DO
Analog Pin5 (SCL) goes to DI
The player has been tested with micro SD card (1G).
The SD card must be formatted at FAT format, not FAT32.
If the green led is flashing all the time which means the SD card is not ready, either not supported or not correctly formatted. And string "\Plese check micro SD card\r\n" will be returned in UART mode.
the player will only work if:
- there is a directory named "sound" in the root of the card
- that directory contains files ending in "wma", "wav", "mid" or "mp3"
the blinking light signals not only problems reading the card, but it will also blink if there is no "\sound" directory or if there are no playable files in that directory.
If the green led do not flash, it means the SD card is working properly.
- Pause Play "\:p\r\n" Return "pause\r\n" if success
- Continoue Play "\:s\r\n" Return "start\r\n" if success
- Play next "\:n\r\n" Return "next\r\n" if success,Return "false\r\n" if failed
- Play previous "\:u\r\n" Return "key up\r\n"
- Set the volume "\:v 255\r\n",set the volume, from 0 (minimum)-255 (maximum), Return "vol set ok" if success
- The sd card must be formated at FAT format.
- YOU MUST Create a "sound" directory
- put mp3/wav/midi files under the SD card
- make sure the length of file name do not exceed 8 letters.
Put jumper to IIC mode. Connect the player to Arduino board via IIC. Burn the sample code to the board. Open the serial monitor of Arduino and send commands: p--pause s--continue n--next song u--previous song m--play song named"yes" Note that no return except "OK" is returned under IIC mode.
#include <Wire.h>
#include <stdlib.h>

#define ArduinoPlayer_address 0x35  //ArduinoPlayer I2C address 0x35 (default)

void TwiSend(const char  *cmd)  //I2C Command
{
  char len = 0;
  len = strlen(cmd); //Calculate the length of the command
  Wire.beginTransmission(ArduinoPlayer_address); // ArduinoPlayer I2C address
  while(len--)
  {
    Wire.send(*(cmd++));
  }
  Wire.endTransmission();    // stop transmitting
}
void setup()
{
  Wire.begin(); // join i2c bus (address optional for master)
  Serial.begin(9600);
  delay(2000);//Wait for 2 seconds
  Serial.println("Ready");
  TwiSend("\\:v 255\r\n");    // set the volume, from 0 (minimum)-255 (maximum)
}

//Receive control command from serial
void loop()
{
  int val;
  if(Serial.available() > 0)
  {
    val=Serial.read();
    switch(val)
    {
    case 'p':      // Pause
      TwiSend("\\:p\r\n");
      Serial.println("OK");
      break;
    case 's':     // Continoue to play
      TwiSend("\\:s\r\n");
      Serial.println("OK");
      break;
    case  'n':
      TwiSend("\\:n\r\n");  // Play next
      Serial.println("OK");
      break;
    case 'u':
      TwiSend("\\:u\r\n"); // Play previous
      Serial.println("OK");
      break;
    case  'm':      //Play
      //The volume must be set before playing the sound
      TwiSend("\\:v 250\r\n");    // set the volume, from 0 (minimum)-255 (maximum)
      TwiSend("\\yes\r\n");
      Serial.println("OK");
      break;
    default:
      break;
    }
  }
}Put jumper to IIC mode. Connect the player directly to computer via TTL-USB converter. We can use any serial communication assistant to send commands, or use Arduino serial monitor. The baud of communication is 19200 if not changed.
*serial communication assistant:
Considering the correctness of data, we recommend to send controls in ASCII HEX code.
Next song: 5C 3A 6E 0D 0A
Previous song: 5C 3A 75 0D 0A
pause: 5C 3A 70 0D 0A
Start: 5C 3A 73 0D 0A
Volume set: 5C 3A 76 20 (32 35 35) 0D 0A
Change the volume as your wish. (Notation: 32 35 35 is ASCII HEX code of "255", you can change it from 0-255. However, we suggest range from 200 to 255 since the sound is quite low under 200.) Song choice mode: 5C (...) 0D 0A.
We can play any song in SD card if you know the song name.(...) should be replaced by HEX code of song name. For example, if the song name is 'sky', (...) can be replaced by 73 6B 79.)
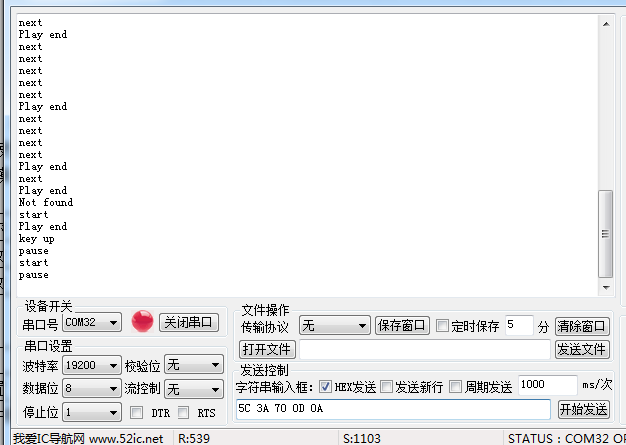 *Arduino serial monitor:
Next song: \:n
Previous song: \:u
pause: \:p
Start: \:s
Volume set: \:v 255 (200-255 is preferred.)
Song choice mode: \xxxxxxx (xxxxxxx is the song name.)
Note: You must choose the "Both NL & CR" choice in the Serial monitor(the drop-down menu beside the baudrate choice menu)。 After this step you command will be transmitted with "\r\n"(The new line command bytes).
Warning: We provide the source code for those of you with advanced coding skills. It is provided as is and with no support. DOWNLOAD AND PLAY AT YOUR OWN RISK!
This is a link to a VB.Net GUI for the DFRduino player.
Player GUI -contributed by user: mtrethowan

shopping dfrduino player
category: Product Manual category: DFR Series category: Modules category: source category: Diagram