Auto_flower_watering_kit_(SKU__KIT0003) - jimaobian/DFRobotWiki GitHub Wiki

EcoDuino is designed by DFRobot to help you grow plants. By using a series of microcontrollers, sensors and actuators, the EcoDuino system can make your eeforts to grow plants much easier. In this system, sensors are used to collect data which can show you plant conditions like temperature,humidity,light intensity, etc... If you want, EcoDuino can message you and tell you how your plants are doing through wireless communications. It will also water your plants automatically when they are thirsty, or at a pre-determined interval. The only thing you may need to do is manage your EcoDuino system through a PC with a graphic user interface. The cool thing about the EcoDuino is that it is developed based on Arduino which means you can not only program EcoDuino in Arduino IDE environment but also use any Arduino compatible hardware in your EcoDuino system.
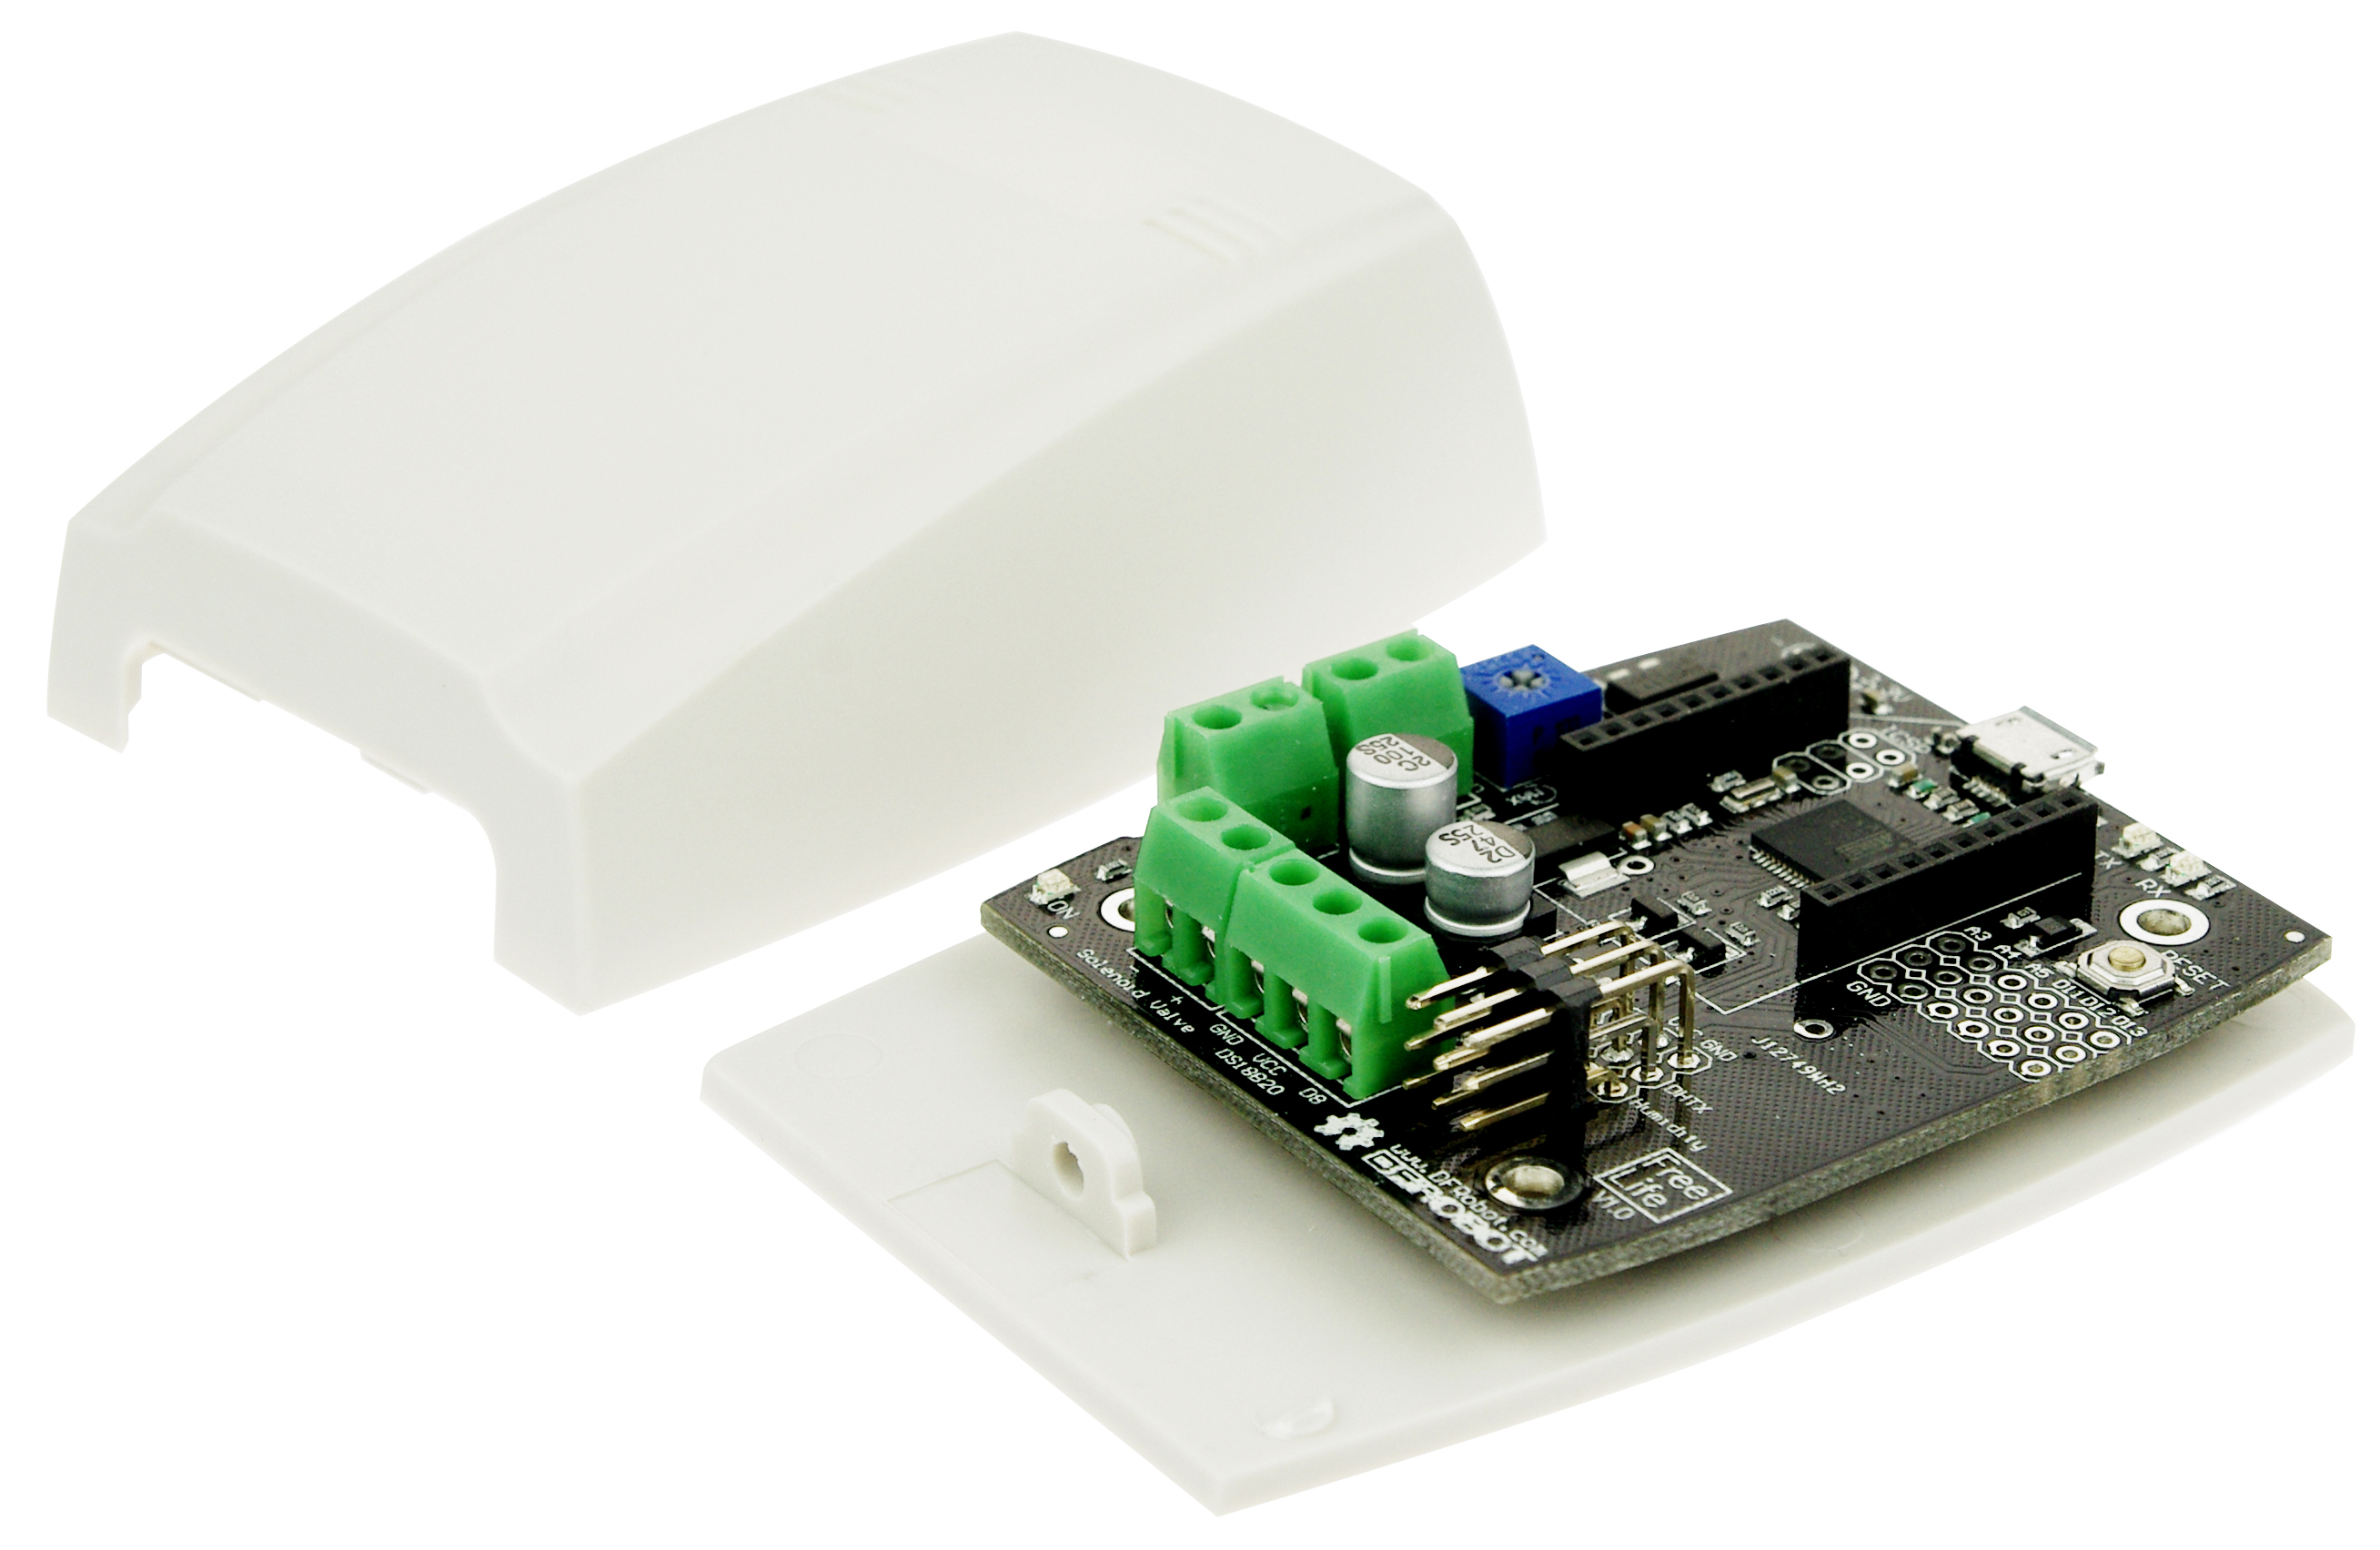
Now the EcoDuino has an enclosure. It is protected from water splashes, so it is safe to use beside your plants.
The Ecoduino now sports a Atmega32U4 so you can use Mirco USB to program your own sketches. The board's bootload is Leonado.
DS18B20 can be directly connected to the Waterproof DS18B20 Digital temperature sensor.
Note:The cables packaged with the sensors is not correct,we suggest you use the orange cables attached.
- Board power supply: 6~12V DC
- Micro controller: Atmega32U4
- Terminal for interfacing a carbon rod(Soil moisture sensor)
- Terminal for interfacing a motor or a solenoid valve
- Potentiometer to set the threshold soil moisture value of watering
- 4 analog I/O ports, 5 digital I/O ports
- Xbee slot
- Mirco USB
- 3.5mm screw terminal
- Board dimensions: 70 x 60mm
- Board weight: 15g
- Diving pump power supply: 3.5~12V DC
- Pumping head: 200cm
- Flow capacity: 100-350L/H
- Power range: 0.5W-5W
- Pump dimensions: 38x38x29mm
- Pump weight: 125g
Please install the libraries before you testing the sample codes

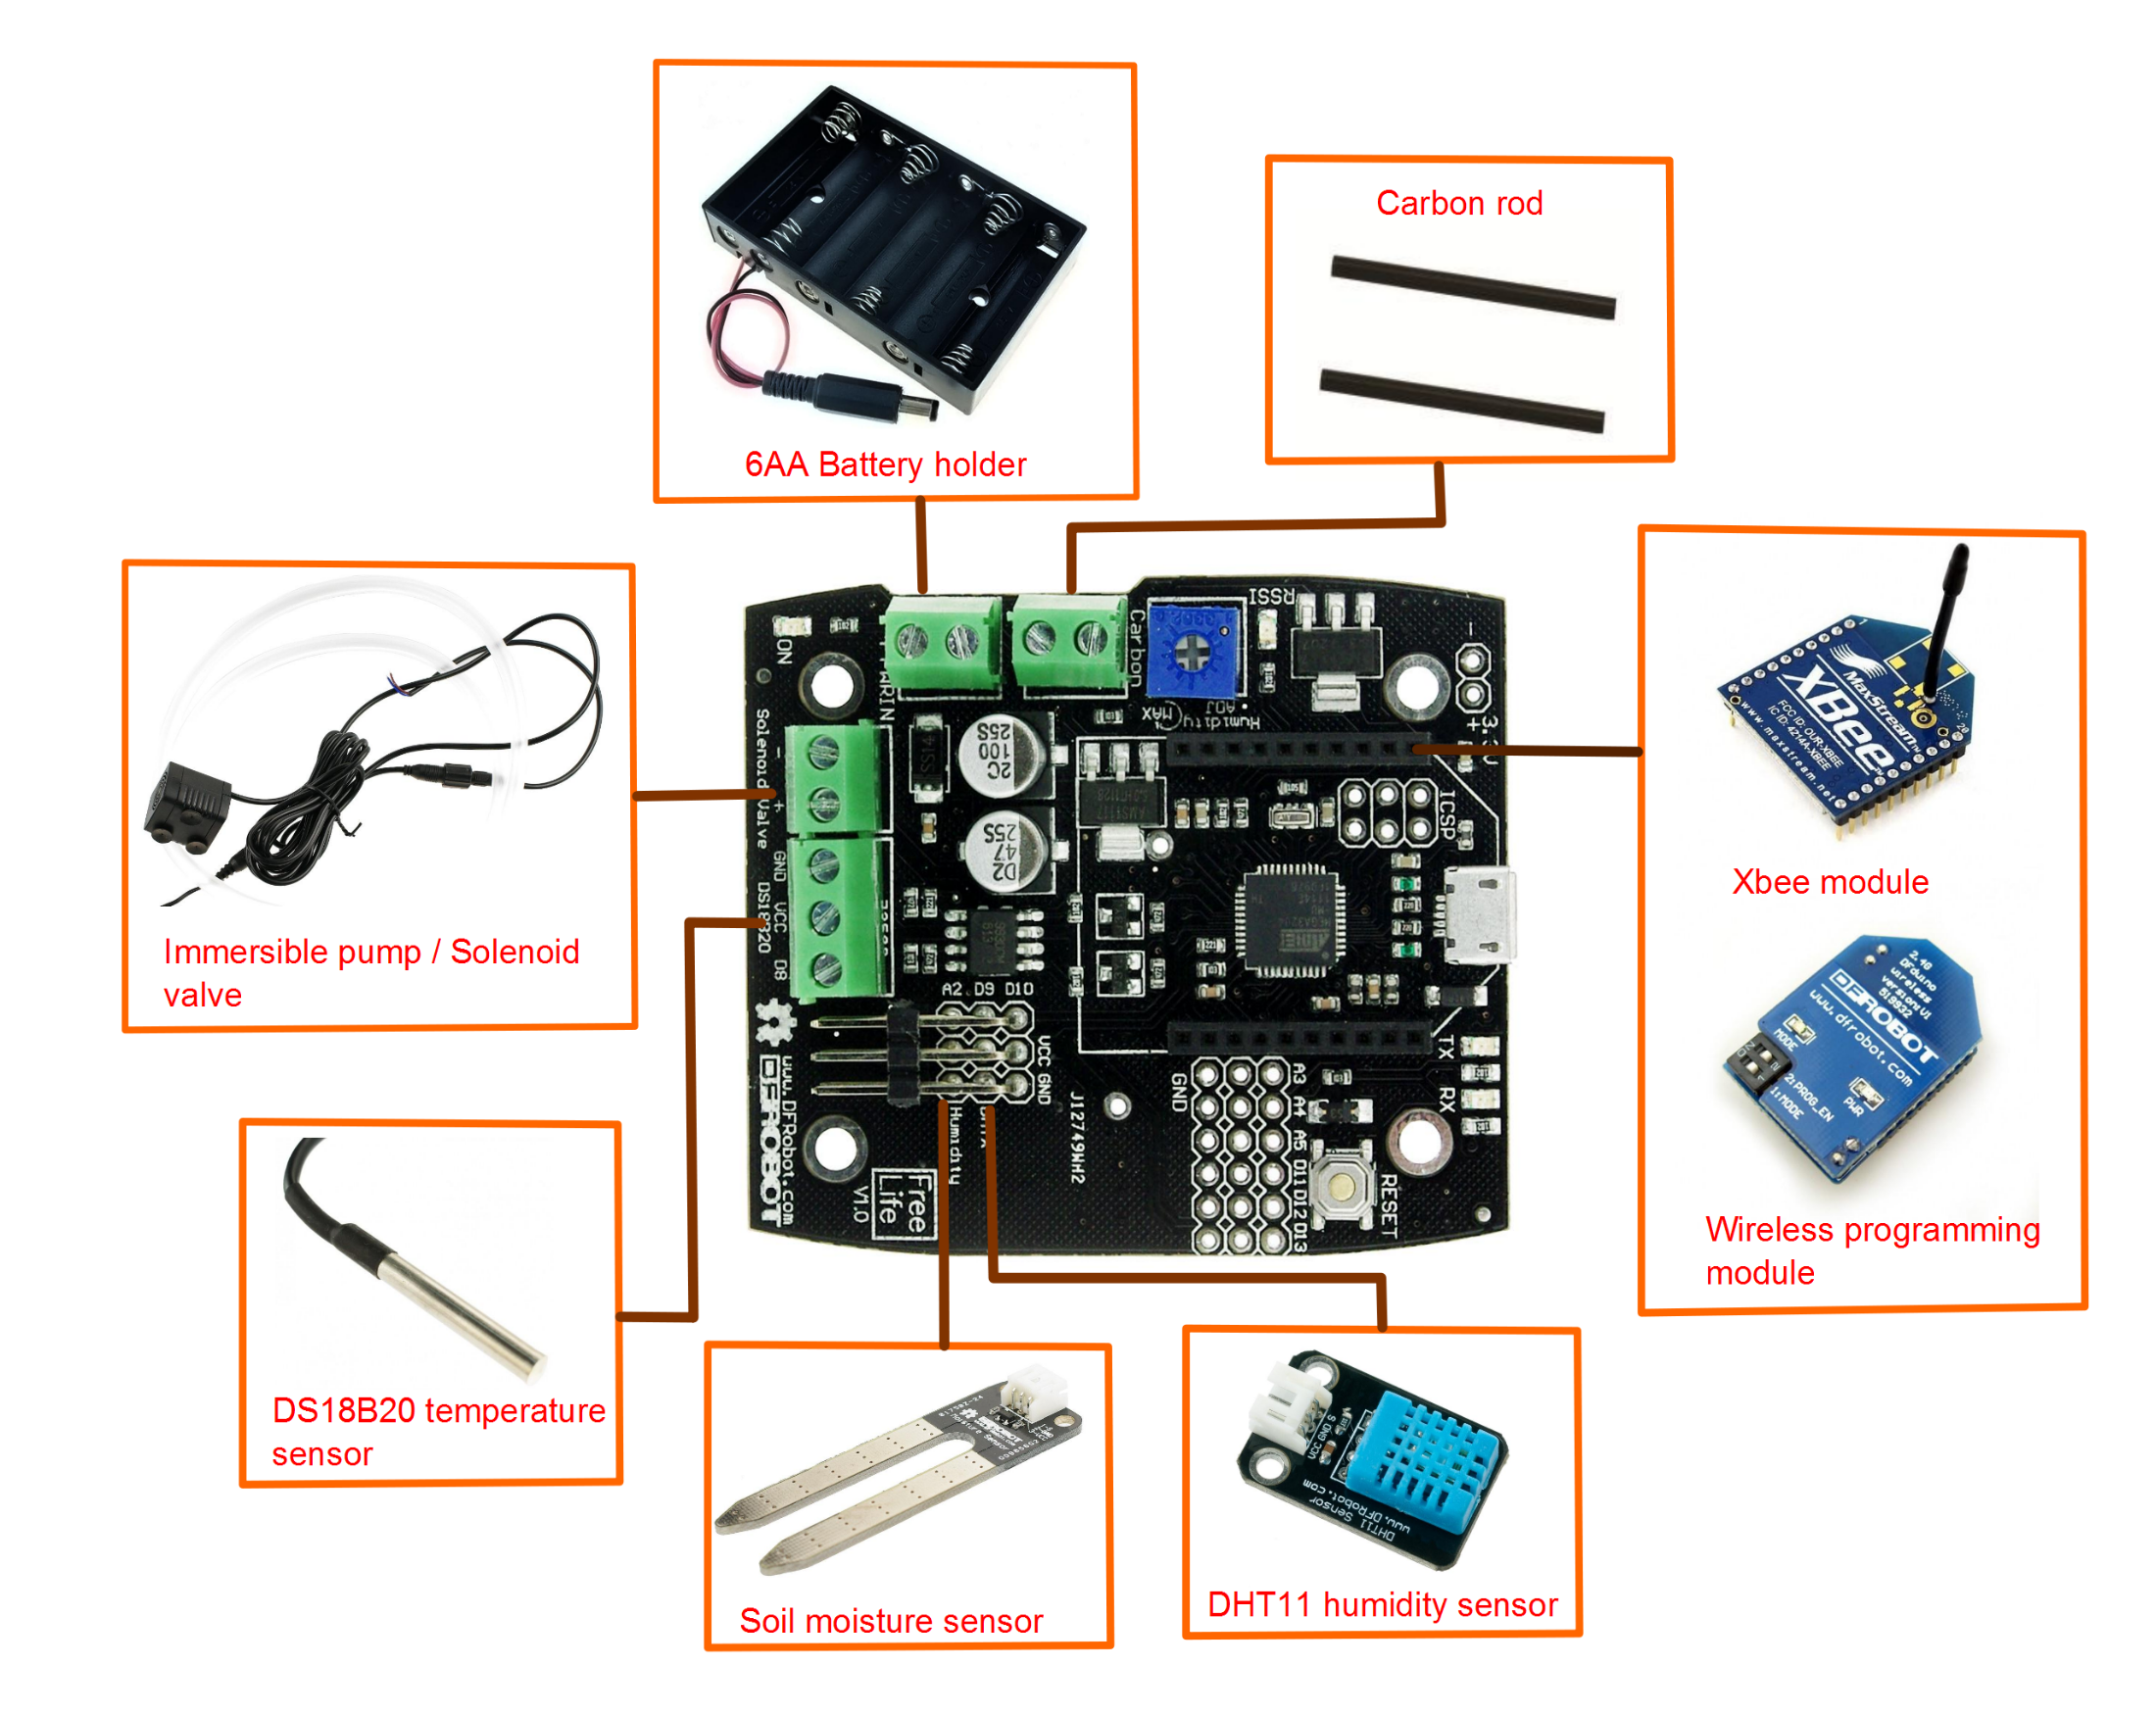
- Soil moisture sensor:orange wire(A2),red wire(VCC),black wire(GND)
- DHT11 humidity sensor:orange wire(D9),red wire(VCC),black wire(GND)
- DS18B20 temperature sensor(option):yellow wire(data),red wire(VCC),black wire(GND)
- Pump:brown wire(+),blue wire(-)
- Battery holder:red wire(+),black wire(-)

/*
 # This Sample code is for testing the Auto flower watering kit.
 # Product: EcoDuino - An auto plant kit
 # SKU    : KIT0003

 # Library:AutoWatering
   Library Functions:
   1.Power a pump to water flowers according to the humidity and temperature
   2.Use the DHT11 Sensor to test the ambient humidity and temperature
   3.Use the Moisture Sensor to test the moisture of the soil

 # Hardwares:
 1. Auto flower watering control board
 2. DHT11 Teaperature and Humidity Sensor
 3. Moisture Sensor
 4. Immersible pump

 # Connection:
 1.DHT11 & Free Life v1.0 board
    S      ---   Digital Pin9
   VCC     ---   VCC
   GND     ---   GND

 2.Moisture Sensor(Humidity) & Free Life v1.0 board
    1S      ---   Analog Pin2
   2GND     ---   GND
   3VCC     ---   VCC
*/

#include <AutoWatering.h>
#include <DHT.h>
#define MaxTemprature 40  //The Maximum Value of the Temperature
#define Sensor 1
#define Carbon 0

AutoWatering flower;

int temperature;
int moisture_dat;
int humidity;

void setup()
{
  flower.Initialization();//Initialization for the watering kit
  Serial.begin(115200);//Buad Rate is set as 115200bps
}
void loop()
{
  //Obtain the Temperasture from DHT11 Sensor
  temperature = flower.getTemperature();
  Serial.print("Temperature is:" );
  Serial.println(temperature);

 //Obtain the Humidity from DHT11 Sensor
  humidity = flower.getHumidity();
  Serial.print("Humidity is:" );
  Serial.println(humidity);

 //Obtain the Soil Moisture from the Moisture Sensor
  moisture_dat = flower.MoistureSensor();
  Serial.print("Soil Moisture is:" );
  Serial.println(moisture_dat);

  Serial.println();
  Serial.println();
  delay(1500);
}
/*
# Library:AutoWatering
Library Functions:
1.Power a pump to water flowers according to the humidity and temperature
2.Use the DHT11 Sensor to test the ambient humidity and temperature
3.Use the Moisture Sensor to test the moisture of the soil
# Hardwares:
1. Auto flower watering control board
2. DHT11 Teaperature and Humidity Sensor
3. Moisture Sensor
4. Immersible pump
# Connection:
1.DHT11 & Free Life v1.0 board
S --- Digital Pin9
VCC --- VCC
GND --- GND
2.Moisture Sensor(Humidity) & Free Life v1.0 board
1S --- Analog Pin2
2GND --- GND
3VCC --- VCC
*/
#include <AutoWatering.h>
#include <DHT.h>
#define MaxTemprature 100 //The Maximum Value of the Temperature
#define SensorTest 1
#define CarbonTest 0
AutoWatering flower;
void setup()
{
flower.Initialization();//Initialization for the watering kit
Serial.begin(115200);//Buad Rate is set as 115200bps
}
void loop()
{
//Power on the pump according to the ambient temperature and humidity
pumpOn(SensorTest,CarbonTest,MaxTemprature);
//Power on the pump for testing whether the pump can work properly
//flower.pumpTestOn();
delay(2000);
flower.pumpOff();
delay(2000);
Serial.println();
}
//Power on the pump according to the ambient temperature and humidity
void pumpOn(int MoiSensor, int Carbon, int Temperature_max)
{
int humidity;
int humidity_max;
float dht_t;
//Choose to use the Moisture Sensor or the Carbon
//to test the soil moisture
if(MoiSensor==1&&Carbon==0)
{
humidity = flower.MoistureSensor();
}else if(MoiSensor==0&&Carbon==1)
{
humidity = flower.CarbonRod();
}else{
humidity = 0;
}
Serial.print("Soil Moisture is :");
Serial.println(humidity);
humidity_max = flower.ADJ_humMax();
dht_t = flower.getTemperature();
Serial.print("Temperature is :");
Serial.println(dht_t);
digitalWrite(6,LOW);
digitalWrite(5,LOW);
digitalWrite(7,LOW);
digitalWrite(4,LOW);
if(humidity<=humidity_max&&dht_t<=Temperature_max)
{
digitalWrite(6,HIGH);
digitalWrite(5,HIGH);
}
else
{
digitalWrite(6,LOW);
digitalWrite(5,LOW);
}
Serial.println("Pump is on!");
}| '''Q.What could we do when the pump do not run? ''' |
'''A.Update the above test procedures into the board '''
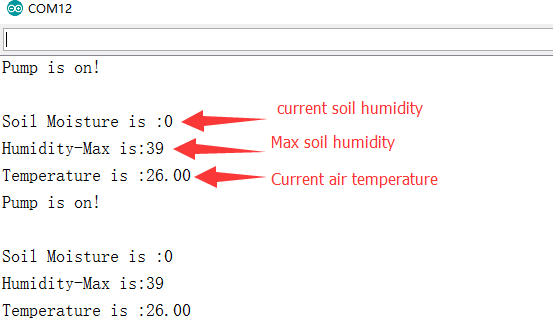
| '''Q.What the datas mean in serial monitor ? ''' |
'''A. '''
'''
 shopping auto flower watering kit v2 (sku:kit0003)
category: Product Manual category: DFR Series category: Module