Start editing your course - jhudsl/OTTR_Template GitHub Wiki
For any OTTR Questions we suggest joining the OTTR Google Group and adding a discussion there about the problems you are encountering or questions you have.
Table of Contents generated with DocToc
Now you have a course repository on GitHub and you're ready to start editing files.
For any set of file changes, its recommended you file a pull request (which the section below will guide you on if you are unfamiliar). Filing a pull request initiates a series of checks done automatically by GitHub actions which will help you as you add content to your course (If you commit directly to the main branch, you will not reap the full benefit of these automatic checks).
These checks will do important things like:
- Check that the all the urls actually take learners somewhere (
check-urls) - Check that the code is styled using the
stylerpackage (style-and-sp-check) - Check that the spelling is correct using the
spellingpackage (style-and-sp-check) - Create previews of the rendered versions of the course (
render-preview) - Check the formatting of any quizzes (
check-quizzes)
You can adjust what checks are run by editing the config_automation.yml file. This is further discussed in this section about the GitHub Actions.
These are a list of changes you'll want to make to get you started. This same list of changes is printed in an issue automatically on your repository for you to follow.
-
README.md- Fill in all the{ }and delete the first part of the README that is referring to the OTTR_Template. -
index.Rmd-title:should be updated. -
01-intro.Rmd- replace the information there with information pertinent to this new course. -
02-chapter_of_course.Rmd- This Rmd has examples of how to set things up, if you don't need it as a reference, it can be deleted.
-
_bookdown.yml- The list of Rmd files that need to be rendered needs to be updated. See instructions. -
book.bib- any citations need to be added. See instructions.
- If your course will require additional packages,
docker/Dockerfileneeds to have the new package added so it will be installed. See instructions for more on this.
See more about customizing style on this page in the guide. By default this course template will use the jhudsl data science lab style. However, you can customize and switch this to another style set.
Read more about the style sets here.
- On a new branch, copy the
style-sets/<set-name>/index.Rmdandstyle-sets/<set-name>/_output.ymlto the top of the repository to overwrite the defaultindex.Rmdand_output.yml. - Copy over all the files in the
style-sets/<set-name>/copy-to-assetsto theassetsfolder in the top of the repository. - Create a pull request with these changes, and double check the rendered preview to make sure that the style is what you are looking for.
If you do not have a method of working with Git already it is recommended you use a git client to help you manage your branches more easily. Install GitKraken for a handy way to manage your course locally. These steps shown here will show you the GitKraken way of handling files.
It's ideal to work on your course from your computer (you do not need to install any other software besides git if you don't want to). To get going, you will need to clone the course repository it to your own computer. Cloning is just making a remote copy of the project local.
So to get started, you will need to clone your course's repository you created that we will be using for the duration of this course.
To clone a GitHub repository, using GitKraken. First, click Clone a repo. Then, choose where you’d like the repository to be on your computer using the Browse button. You will need to Copy + Paste your new repository's url to where it says URL.
Navigate to your repository on GitHub to copy the URL. Copying and pasting is advisable because any little typo will inhibit cloning.
Now you are ready to click Clone the repository! It will ask you if you'd like to Open Now, click that.
Handling branches is where you unleash the real benefit of GitHub, but it's also the confusing part to get a hang of.
The best way to get a grasp on what the branches represent is to create one and start using it.
In GitKraken we can create a new branch; this will be your working copy. First, click the Branch button. Next, type in a branch name in the box that the cursor is blinking in. In our example, we are calling it a-new-branch. Now click Enter! Now you have a new branch!
Now we can edit our files and code however we normally would. Go ahead and make an edit to some of the files listed in the above section.
If you've made a change to any file in your repository, it will appear in GitKraken and you can click on it to see the differences.
If we want to add these file changes to our current branch, we need to commit them.
Now that we have changes committed to our branch we are ready to also add them to the remote, internet copy! To do this, we will need to push our branch.
To push means to add changes that are on your new branch to the remote branch (internet version). The word origin just refers to where your branch is stored on the internet. Choose your origin in the dropdown menu and click Submit.
After a variable number of commits, your branch, called a-new-branch is a different version of the original code base that may have a nifty improvement to it. But our main goal is to add that nifty improvement to the main branch. To start this process of bringing in new changes to the main curated repository, we will create a pull request.
From GitHub:
Pull requests let you tell others about changes you've pushed to a GitHub repository. Once a pull request is sent, interested parties can review the set of changes, discuss potential modifications, and even push follow-up commits if necessary.
Pull Requests are the meat of how code changes and improvements get reviewed and incorporated! A vast majority of the benefits of incorporating GitHub into your workflow centers around fully utilizing the power of pull requests!
Now we can open up a pull request if we go to our GitHub repository on GitHub.
After you click on Compare & pull request you'll be taken to a screen where you can add information about your changes. After you are done writing your description, click Create Pull Request! (If you don't have your pull request description perfect don't worry about it, you can always edit it later).
Congrats! You've just opened a pull request!
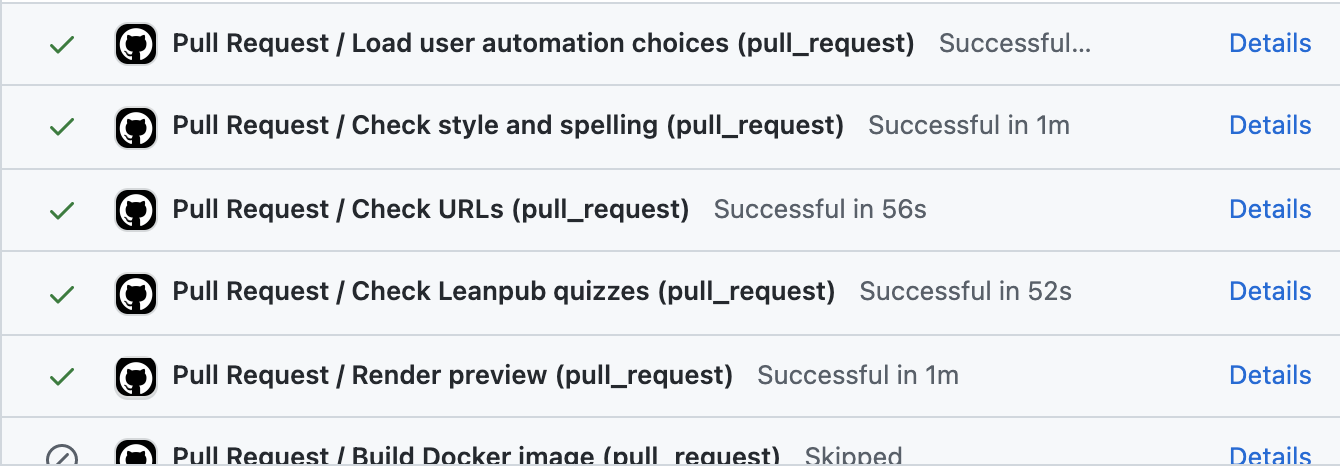
With your pull request open, the series of OTTR GitHub actions checks will commence! They will print out reports in comments on your pull request.
Read those comments to begin addressing the problems with more commits to your branch.
You can adjust what checks are run by editing the config_automation.yml file. This is further discussed in this section about the GitHub Actions.
If you need more information on failed GitHub actions you can scroll to the bottom of your pull request where the status of the checks are shown and click on Details for more information. If you are unsure what the error message means and have trouble addressing it, please file an issue on the OTTR_Template repository to get help.
To summarize, this is what this workflow looks like:
For more on what to put in a pull request's description you can read this chapter
For more on how to review a pull request, see this chapter