Ryan Laley Minimap Part I - jgoffeney/Cesium4Unreal GitHub Wiki
The goal is to use a texture and update it based on the player's position.
This tutorial uses an in-game screen capture to take a picture of the level as the base for the minimap. I am not doing this but it could be useful in the future.
- Add a Screen Capture 2D object to the scene.
- Edit it to be at the X/Y origin and point downwards.
- Also under Projection->Projection Type set it to Orthographic.
- Add a Render Target object from Materials and Textures.
- In the Screen Capture 2D details under Screen Capture->Texture Target drag the Render Target to it.
- Under Projection->Ortho Width adjust the value under the value until the Screen Capture->Texture Target thumbnail displays the entire level.
- Go to your Render Target object in the Content browser and right click to select Asset Actions->Export which will bring up a file browser to save the image.
- In a Third Party application edit the image to how you want the map to appear.
- First take the base image and convert it into a material.
- Right click on image and select Create Material.
- Open up the material in the Material editor.
- Under details set Material->Material Domain to User Interface. This breaks the graph so just connect the RGB pin to Final Color.
- Go back to the main window and add a Material Parameter Collection.
- Select Add/Import->Materials & Textures/Material Parameter Collection. This is a collection of parameters that can be used across a game.
- Open the Material Parameter Collection and create the following parameters.
- Scalar Parameters
- X, default 0
- Y, default 0
- Zoom, default 0.5
- Dimensions, default 0
- Scalar Parameters
- Return to the material editor
- Add a node as Parameters->CollectionParameter
- Under the node details General->Collection select the name of the Material Parameter Collection (Minimap_Parameters).
- Under General->Parameter Name select Zoom (the label of the Collection node will display Zoom).
- In the graph add a Texture Coordinate node.
- Add a Multiply node and connect the outputs of the Texture Coordinate and the Collection node to A and B. This scales the uv coordinates from a range of 0 to 1 to 0 to 0.5.
- Add another node to the output of the Zoom collection as a Divide which by default divides by 2.
- Then from the Divide node add a Subtract but plug the output into B. Under details set Const A to 0.5.
- Add CollectionParameter nodes for the minimap X, Y and Dimensions parameter. The purpose of this is to convert player coordinates to texture and position the texture so the minimap is centered on wherever the player is.
- For the X and Y nodes create Divide nodes connected to input A and then connect the Dimensions output as B for each.
- From the Subtract node create two Add nodes to connect the outputs of the Divide nodes.
- Create a vector by adding an Append Vector node with the graph path from Y connected to the A input and X to the B input. This is the new UV coordinate.
- From the Multiply node create an Add node and add the Append Vector node output.
- Then create a Clamp node to ensure the UV values are between 0 and 1.

- Go back to the main window, select the minimap material and right click to select Create Material Instance.
- Go back to the main window and create a User Interface->Widget Blueprint.
- Delete the Canvas component since this will be a subwidget.
- Add an Image component.
- Under Appearance->Brush->Image select the minimap material instance.
- Open the editor and graph for the widget
- Delete the default events.
- Add the following variables all set to Instance Editable and Expose on Spawn:
- Dimension, type float
- Zoom, type float, default 0.5
- Image, type Texture
- Add an Event Construct node to the graph.
- Create a Set Scalar Parameter Value node for Dimensions
- Set Collection to the minimap parameter collection
- Set Parameter Name to Dimensions
- Drag in Dimensions variable and connect to Parameter Value
- From the node output create another Set Scalar Parameter Value node for Zoom and repeat the setting for Zoom.
- Create a Set Scalar Parameter Value node for Dimensions
- Add an Event Tick node to the graph
- Create and connect Set Scalar Parameter Value nodes as above for X, Y and Zoom.
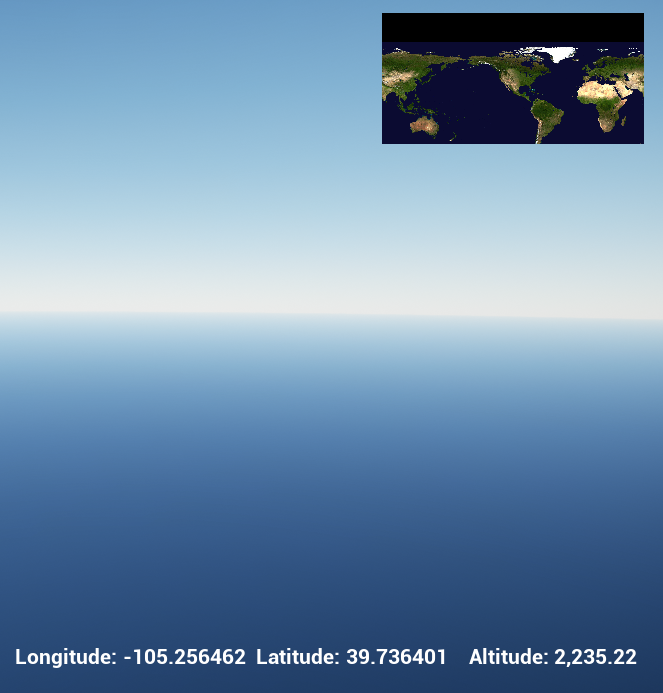
As a source I am using a copy of the Blue Marble dataset to which added black bands to the top and bottom to make it square. As the geospatial location is updated the world image is moved to keep the "player" location at the center of the minimap.
Rather than player coordinates the map needs to update from geospatial coordinates. The lon / lat divided by 360.0 and 180.0 puts them into UV space.
The general idea is the TexCoord[0] node is generating UV coordinates with values 0 to 1 mapping to the region of the source texture to read. Since my widget and the region of interest on my image have an aspect ratio of 2:1 then I need my V coordinates to have a range size of 0.5 to read the section I need. The image below shows the UV coordinates to compute for different latitude values. I flipped the V coordinates below to match the upper left image source origin.

The general formulas for transforming the coordinates are as follows where aspect = 2:
UT = U0 + ((Longitude + 180)/360) + 0.5
VT = (V0 / aspect) + ((-Latitude + 180)/360) - (0.5 / aspect)
The general transformation involves scaling the original coordinates and then translating them. The formulas are similar but for latitude the geospatial input is flipped and scaled by the aspect ratio.

The section below allows the minimap image to be changed outside of the widget.
- Open the Minimap Widget and we are going to replace the Image component.
- Go back to the Minimap Material event graph:
- Delete the Texture Sample node and replace it with a TextureSampleParameter2D and give it a name like MapMaterial.
- Open the Material Instance we created earlier and now under Parameter Groups->Global Texture Parameter Values the TextureSampleParameter2D is accessible.
- Go to the Minimap Widget event graph
- In the Event Construct graph, drag in your Image Widget variable and create a GetDynamicMaterial node (hook it to the previous exec pin).
- From the Return Value pin create a node by dragging and selecting Promote To Variable. This creates a new Set node and you can give the variable a name like Map Instance.
- From the return pin create a SetTextureParameterValue node.
- For the Parameter Name set the name supplied to the TextureSampleParameter2D above.
- For the Value drag in the Image texture variable and connect it.
The following graph is from the Minimap Widget from my project. The Event Construct path sets the initial value of the parameter Zoom and then sets the Map material texture parameter is set to the Image value. The Event Tick path gets the current Longitude, Latitude and Zoom values.

The next section describes how to make a circular minimap with a colored border.