Installing IBM PC XENIX 1.0 using 86Box - jaylogue/retro-fuse GitHub Wiki
The following instructions show how to install IBM PC XENIX 1.0 using the 86Box IBM PC Emulator (v3.7.1, build 4032). IBM PC XENIX 1.0 was a port of Xenix 3.0 created by Microsoft and IBM in 1984 for the IBM PC/AT model 5170.
A NOTE ABOUT XENIX VERSIONS : Xenix version numbering can be quite confusing to the uninitiated. The instructions given here apply specifically to IBM PC XENIX 1.0, which was a variant of Xenix 3.0 based on AT&T UNIX System III that ran only on the IBM PC/AT. Sometime after this version was released, SCO produced a series of follow-on Xenix releases that were based on AT&T UNIX System V. These releases, which ran on 8086, 286 and 386 systems, were titled XENIX System V. Confusingly, the later XENIX System V releases had version numbers which overlapped the numbers used by earlier releases. For example, SCO XENIX System V version 2.1.3 for 8086, was released after SCO XENIX 3.0 for the IBM PC. These intstructions do not apply to the later XENIX System V releases.
Being very old software, IBM PC XENIX 1.0 places a number of limits on the type and configuration of the hardware it can be installed on. Specifically:
-
IBM PC XENIX 1.0 must be installed on a true IBM PC/AT compatible machine containing a 80286 processor. It will not work on original PC or XT systems (8088) or on later 386 systems.
-
The machine must be configured with an MDA video card (IBM or compatible), or a CGA video card in 80 column mode. The Xenix kernel will hang if used with an EGA adapter or a CGA card in 40-column mode.
-
The machine must be configured with at least one 1.2MB 5-1/4" floppy drive connected to the standard IBM PC/AT floppy controller.
-
The PC/AT BIOS must be configured with the correct floppy and hard drive types prior to installation.
-
A copy of the 86Box IBM PC Emulator
-
A copy of the BIOS ROM set for an IBM PC/AT computer (see the 86Box Getting Started instructions for how to install this).
-
A copy of Diagnostics for the IBM Personal Computer AT floppy image.
-
Copies of the IBM PC XENIX 1.0 floppy images. These consist of:
-
The bootable installation disk (typically labeled 'inst' or 'Installation')
-
3 OS files disks (typically labeled 'baseN' or simply 'N of 3')
-
-
Start 86box using a dedicated configuration file
# 86box ibm-pc-xenix-1.0.cfg-
Choose Tools > Settings and configure the emulated machine as follows:
-
Machine Type: 80286
-
Machine: [ISA] IBM AT
-
Memory: 512 KB (or up to 1MB)
-
Time synchronization: Disabled
-
Display Video: [ISA] MDA (or [ISA] Hercules)
-
Storage Controllers / HD Controller: [ISA16] WD1003 AT MFM/RLL Controller
-
Storage Controllers / FD Controller: Internal controller
-
Floppy Drives / Floppy Drive #1: 5.25” 1.2M (Turbo: Off, Check BPB: On)
-
Floppy Drives / Floppy Drive #2 thru #4: None
-
-
Under Settings / Hard Disks, select New and add a hard disk with the following configuration:
-
File name: ibm-pc-xenix-1.0-sys.img
-
Type: 20MB (CHS 615, 4, 17)
-
Bus: MFM/RLL
-
Channel: 0:0
-
Image Format: Raw image (.img)
-
-
Exit the Settings dialog and save the settings
-
Choose Media > Floppy 1 > Existing Image… and mount the IBM PC/AT Diagnostics floppy image.
-
Reboot the system and use the diagnostics software to configure the BIOS settings as follows (see here for instructions on using the IBM diagnostics disk):
-
Diskette Drive A - High Capacity(1.2MB)
-
Diskette Drive B - Not Installed
-
Fixed Disk Drive C - Type 2
-
Fixed Disk Drive D - Not Installed
-
Base memory size - 512KB
-
Expansion memory size - 0KB
-
Primary display is attached to: Monochrome Display Adapter
-
-
Choose Media > Floppy 1 > Existing Image… and mount the IBM Xenix Installation floppy image. Reboot the system.
-
When the installation floppy boots, the system should show the Xenix boot loader screen:

-
At the boot loader prompt, run the
/etc/badtrackprogram to initialize the bad track table on the system drive. When prompted to start the program, press ENTER. When prompted to enter additional bad tracks, press ENTER. Whenbadtrackfinishes, reboot the system.
: fd /etc/badtrack-
At the boot program prompt, start the Xenix installation process by loading the installation kernel. When prompted to start the program, press ENTER.
: fd /xenix.fd-
Once the installation kernel has booted, the system should show the installer shell screen:
-
Run the
hdinitprogram to initialize the system disk. After the initial warning message, press ENTER. When prompted ‘Are you ready to continue?’, press Y and ENTER.
# hdinit-
When prompted to ‘Enter the desired partition option’, choose option 1.
-
When prompted to ‘Enter printer option’, choose option 1.
-
When prompted to ‘Enter timezone’, choose the appropriate timezone name for your location.
-
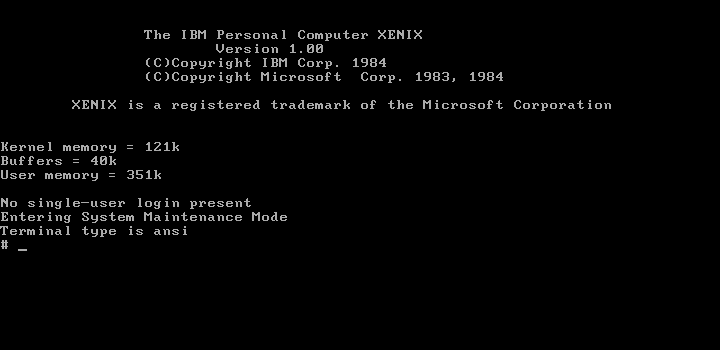
Once the initial root filesystem has been constructed, the system will display the message 'XENIX SYSTEM INSTALLATION COMPLETE'
-
At the installer shell prompt (#), run the
haltsysprogram to halt the system.
# haltsys-
Choose Media > Floppy 1 > Eject to remove the Installation disk and reboot the system.
-
At the boot loader prompt (:), press ENTER to boot Xenix from the system drive.
-
At the shell prompt (#), run the
xinstallprogram (argument:base) to install the remainder of the operating system files.
# xinstall base-
When prompted for the ‘First diskette’, use the Media > Floppy 1 > Existing Image… option to mount the first OS files floppy image (base1) and then press Y and ENTER.
-
When prompted for the ‘Next diskette’, mount the sencond OS files floppy and press Y and ENTER. Do the same for the third floppy when prompted.
-
Once the third floppy has been installed, press N and ENTER to complete the installation process.
-
Choose Media > Floppy 1 > Eject to remove the final floppy image.
-
At the shell prompt (#), run the
passwdprogram (argument:root) to set the root user password.
# passwd root-
Run
haltsysto reboot the system. -
If desired, choose Settings > Machine / Time synchronization: Enabled to enable automatic time synchornization with the host system. Note however that this option may result in an error if the system is booted with the IBM PC/AT Diagnostics floppy again.