CI CD in Microsoft Fabric with Azure DevOps: Branching, Commits, Pull Requests, and Merge to Main - ivinnyaraujo/dataengineer-datascience-python GitHub Wiki
Introduction
Implementing Continuous Integration and Continuous Deployment (CI/CD) in Microsoft Fabric ensures consistent, secure, and controlled development across multiple environments. By integrating Azure DevOps Git repositories with Fabric workspaces, teams can version-control all Fabric artifacts and collaborate effectively through pull requests (PRs).
A Fabric workspace is a shared environment that provides live access to datasets, reports, notebooks, and other items. Because changes made directly in a shared workspace are immediately visible to all users, they can inadvertently overwrite others’ work. To avoid conflicts and maintain code integrity, Git best practices recommend developing in isolation rather than directly in a shared workspace.
For this demonstration, we’ll focus on the approach of creating a separate Fabric workspace for development. This method allows us to showcase the full CI/CD process end-to-end within a workspace.
Source: https://learn.microsoft.com/en-us/fabric/cicd/git-integration/manage-branches?tabs=azure-devops
This guide demonstrates how to:
- Connect Microsoft Fabric workspaces to an Azure DevOps Git repository
- Branch out from the main workspace for isolated development
- Commit and sync changes between Fabric and Azure DevOps
- Create and review pull requests (PRs)
- Sync merged changes back into Fabric workspace for continuous integration
Step-by-Step Setup and Workflow
Connect Fabric Workspace to Azure DevOps
- In your Fabric workspace, go to Workspace settings → Git integration.
- Select Connect to Azure DevOps repository.
- Choose the repository and branch (typically main for the primary workspace).
- Confirm the connection: Fabric will now sync artifacts with the Git repo.
Branch Out from the Main Workspace
- From the main Fabric workspace, select "Source Control" > Branch out to workspace.
- Choose an existing branch or create a new feature branch in Azure DevOps.
- Use a consistent naming convention, for example, a JIRA ticket ID like feature/JIRA-1234-update-report.
- The workspace syncs with your feature branch and becomes an isolated environment (separated workspace) to work in.
Make and Sync Changes
- Create or modify Fabric items within your branched workspace.
- Uncommitted items will appear under Source Control → Uncommitted.
- Review the changes and commit them to your branch in Azure DevOps directly from Fabric.
- In Azure DevOps, verify that the commit appears in your feature branch.
Create a Pull Request (PR)
- In Azure DevOps, create a Pull Request from your feature branch to main.
- Add reviewers to ensure peer validation.
- Reviewers can comment, request changes, or approve the PR.
- Once approved, merge the PR into the main branch.
Sync Merged Changes Back to Main Workspace
After the PR is merged into main:
- Open the main workspace in Fabric.
- A banner will appear:
You have pending updates from Git. We recommend you update the incoming changes and then continue working.
- Go to Source Control → Update All. This will sync the latest merged changes from Azure DevOps into the main branch/workspace, ensuring all artifacts are up to date.
Final Notes
- After syncing, it is recommended to delete your feature branch from Azure DevOps to keep the repository tidy and reduce clutter.
- Keep branch names clear and tied to work items for traceability (e.g., JIRA or Azure Boards tickets).
- Always sync changes in Fabric before continuing work to prevent conflicts.
- This guide focuses on committing changes back to the main workspace for version control and peer review. Deployments between workspaces can occur via Fabric Deployment Pipelines (typically when promoting changes between Bronze, Silver, and Gold workspaces).
See Video Demo
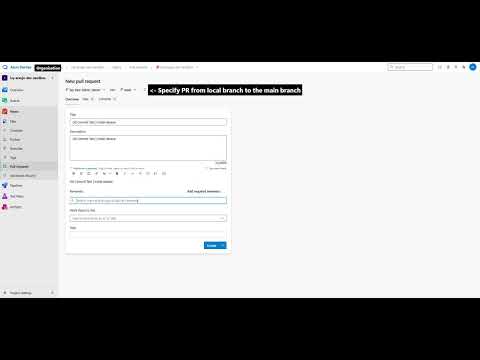
Click in the image to watch the video on YouTube.