Custom Components - ianharrigan/haxeui GitHub Wiki
Custom components are easily created by extending Component class or any of its subclasses : Button, Scroll, ListView, VBox, etc..
import haxe.ui.toolkit.core.Component;

class CustomComponent extends Component {
    public function new() {
         super();
    }
}
The component is now ready to be added.
To add the component via XML, register it using ClassManager:
ClassManager.instance.registerComponentClass(CustomComponent, "customcomponent");
Toolkit.init();
The first argument is the newly created class, the second is the XML tag name to be associated with the component.
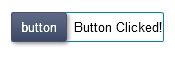
A slightly more complex example of a custom component. This time contains a textfield and a button, when the button is clicked the textfield text changes.
import flash.events.MouseEvent;
import haxe.ui.toolkit.containers.HBox;
import haxe.ui.toolkit.controls.Button;
import haxe.ui.toolkit.controls.Text;

class CustomComponent extends HBox {

	var label: Text;
	var button: Button;

	public function new() {
		super();

		style.borderColor = 0x0080C0;
		style.borderSize = 1;

		button = new Button();
		button.text = "button";
		button.onClick = onClickButton;
		addChild(button);

		label = new Text();
		label.text = "Default Text";
		addChild(label);

	}

	private function onClickButton(e:UIEvent):Void {
		label.text = "Button Clicked!";
	}

}
After registering the component like shown before, it can be added using xml:
<?xml version="1.0" encoding="utf-8" ?>
<vbox >
	<customcomponent/>
</vbox>
And the result:
For more complex widgets, it is preferable to use XML for the layout and normal code for the behavior.
The following example is the same as before but this time using XML to layout the component.
class CustomComponent extends HBox {

	var label: Text;
	var button: Button;

	public function new() {
		super();
	}

	override private function initialize():Void {
		super.initialize();

		// children may not be ready before initialize()
		button = findChild("button", Button);
		button.onClick = onClickButton;

		label = findChild("label", Text);
	}

	private function onClickButton(e:UIEvent):Void {
		label.text = "Button Clicked!";
	}
}
and the xml:
<?xml version="1.0" encoding="utf-8" ?>
<vbox >
	<customcomponent style="borderSize:1;borderColor:0080C0">
		<button id="button" text="Button"/>
		<text id="label" text="Default Text"/>
	</customcomponent>
</vbox>It may be useful to assign an independent xml file for a complex component or set of components and then load it to the main XML file. This example shows how to do that for the previous component:
The main XML file:
<?xml version="1.0" encoding="utf-8" ?>
<vbox >
	<import resource="assets/customComponent.xml" />
</vbox>
The newly added customComponent.xml file:
<?xml version="1.0" encoding="utf-8" ?>
<customcomponent style="borderSize:1;borderColor:0080C0">
	<button id="button" text="Button"/>
	<text id="label" text="Default Text"/>
</customcomponent>