3. XBee - iangohy/SUTDoggo GitHub Wiki
Learn more about XBee by reading through this tutorial.
-
Download and install X-CTU. Detailed instructions for each platform can be found here.
On Ubuntu, user needs to be part of dialout group.
sudo usermod -a -G dialout <user>To install .run files, add executable permission before executing file.
chmod +x <filename>.run ./<filename>.run -
Follow the tutorial (
Quick and Easy Testonwards) to define your unique network (CH, ID, DH, DL and MY). -
Done! You can proceed to connect one XBee to your master computer and the other XBee to the Teensy.
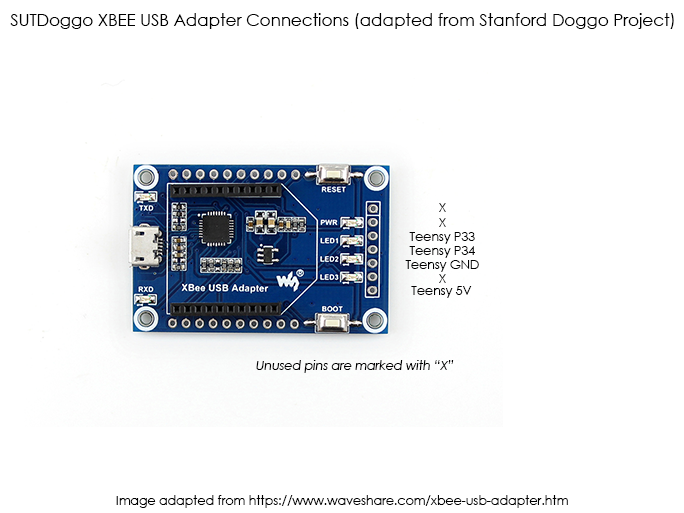
Connect XBee to Teensy Serial 5.

Configuration of XBee can be done in .../Doggo/src/config.h.
Ensure that line 28 (#define USE_XBEE) is not commented out.
- // #define USE_XBEE
+ #define USE_XBEE
Comment out line 28 (#define USE_XBEE).
- #define USE_XBEE
+ // #define USE_XBEE
This can be done to test the motors through USB when the XBee is not configured/connected yet.
When using XCTU console to send commands to the teensy, use ; to simulate a line break to send commands.