4주차 Bluetooth RGB LED 제어 - hyunwoo14/SmartDevice GitHub Wiki
- Bluetooth란?
- Bluetooth 정의
- Arduino와 스마트폰 블루투스 통신하기
- 예제
- 코드
- 통신 실습
- Bluetooth RGB LED 제어
- 회로도
- 코드
- 코드 설명
- 실습 사진
- 후기
Bluetooth는 휴대폰, 노트북, 이어폰, 헤드폰 등의 휴대기기를 서로 연결해 정보를 교환하는 근거리 무선 기술 표준을 뜻하며 주로 10m 안팎의 초 단거리에서 저전력 무선 연결이 필요할 때 사용된다.
블루투스 기기를 서로 연결하는 것을 '페어링(Pairing)이라고 한다.
먼저, 블루투스 기능을 지원하는 마스터 기기와 슬레이브 기기를 준비한다.
- 마스터(master)기기 하나 이상의 다른 장치나 프로세스를 제어하는 장치나 프로세스
- 슬레이브(slave)기기 다른 장치나 프로세스에 의해 제어되는 장치나 프로세스
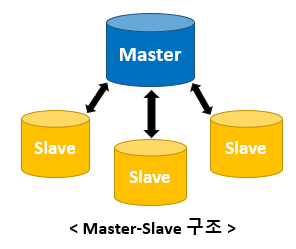
예를 들어 스마트폰과 무선 이어폰을 연결한다면, 스마트폰이 마스터가 되고 이어폰이 슬레이브가 된다. 마스터 기기인 스마트폰에서 주변 모든 블루투스 기기를 탐색하고, 탐색해서 나온 여러 기기 중에 연결을 원하는 슬레이브 기기인 이어폰을 선택하면 연결 되는 방식이다.
File -> Examples -> BluetoothSerial -> SerialToSerialBT 예제를 연다.

#include "BluetoothSerial.h"


const char *pin = "1234";

String device_name = "ESP32-BT-Slave-hw";

#if !defined(CONFIG_BT_ENABLED) || !defined(CONFIG_BLUEDROID_ENABLED)
#error Bluetooth is not enabled! Please run `make menuconfig` to and enable it
#endif

#if !defined(CONFIG_BT_SPP_ENABLED)
#error Serial Bluetooth not available or not enabled. It is only available for the ESP32 chip.
#endif

BluetoothSerial SerialBT;

void setup() {
  Serial.begin(115200);
  SerialBT.begin(device_name);
  Serial.printf("The device with name \"%s\" is started.\nNow you can pair it with Bluetooth!\n", device_name.c_str());

  #ifdef USE_PIN
    SerialBT.setPin(pin);
    Serial.println("Using PIN");
  #endif
}

void loop() {
  if (Serial.available()) {
    SerialBT.write(Serial.read());
  }
  if (SerialBT.available()) {
    Serial.write(SerialBT.read());
  }
  delay(20);
}
안드로이드 앱 "Serial Bluetooth Terminal"을 설치한다.

스마트폰의 블루투스 설정에서 "ESP-BT-Slave-hw"를 찾아 등록한다.


Arduino에서 시리얼 모니터를 열고 서로 메세지를 보낸다.
default.mp4

휴대폰과 컴퓨터 간의 블루투스가 연결되어 메세지를 주고받는다.

#define RED_PIN 4
#define GREEN_PIN 15
#define BLUE_PIN 2

void setup() {
  pinMode(RED_PIN, OUTPUT);
  pinMode(GREEN_PIN, OUTPUT);
  pinMode(BLUE_PIN, OUTPUT);

  digitalWrite(RED_PIN, HIGH);
  digitalWrite(GREEN_PIN, HIGH);
  digitalWrite(BLUE_PIN, HIGH);
}

void loop() {
  analogWrite(RED_PIN, 0);
  analogWrite(GREEN_PIN, 255);
  analogWrite(BLUE_PIN, 255);
  delay(1000);
}
4번 핀에 R을, 2번 핀에 B를, 15번 핀에 G를 연결하였으므로, 각각 핀을 지정하고 모든 핀을 HIGH로 설정하여 LED를 꺼진 상태로 초기화한다. 각 색상 핀을 0으로 설정하면 해당 색상이 켜지고, 255로 설정하면 해당 색상이 꺼진다.


위와 같이 핀을 0으로 설정한 색상의 색이 LED에 켜진다.

빨간색과 초록색 핀 둘 다 0으로 설정하면 위와 같이 노란 색이 켜진다.

다른 주제보다 우리가 평소에 많이 접하고 사용하는 친숙한 주제인 블루투스에 대해 배웠다. 블루투스가 도달 거리와 전송 속도가 점점 증가하고 있다는 것도 알게 되었고, 안드로이드 앱을 통해 아두이노 예제로 통신을 하여 메세지를 주고 받으면서 블루투스의 기본 원리에 대해서도 조금은 알게 되었고, 마스터, 슬레이브 기기의 정의도 명확하게 알 수 있게 되었다.