Getting Started with HydraBus and STM32CubeIDE - hydrabus/hydrafw GitHub Wiki
Getting Started with HydraBus and STM32CubeIDE
The aim of this page is to explain How to Build / Flash and Debug HydraBus firmware with STM32CubeIDE on Windows & Linux.
1) Hardware requirements
- HydraBus v1
- STLINK-V3SET (Programmer/Debugger)
- 10x high quality Dupont Wire 2.54mm female to female with min length 8cm (do not exceed 10cm if possible especially to reach maximum speed with SWD 24MHz...)
- Only 9x "Dupont Wire 2.54mm female to female" are required but it is always better to have more/spare ...
2) Connect STLINK-V3SET (Programmer/Debugger) to HydraBus v1
2-1) Connect STLINK-V3SET SWD to HydraBus v1 SWD (for basic debugging)
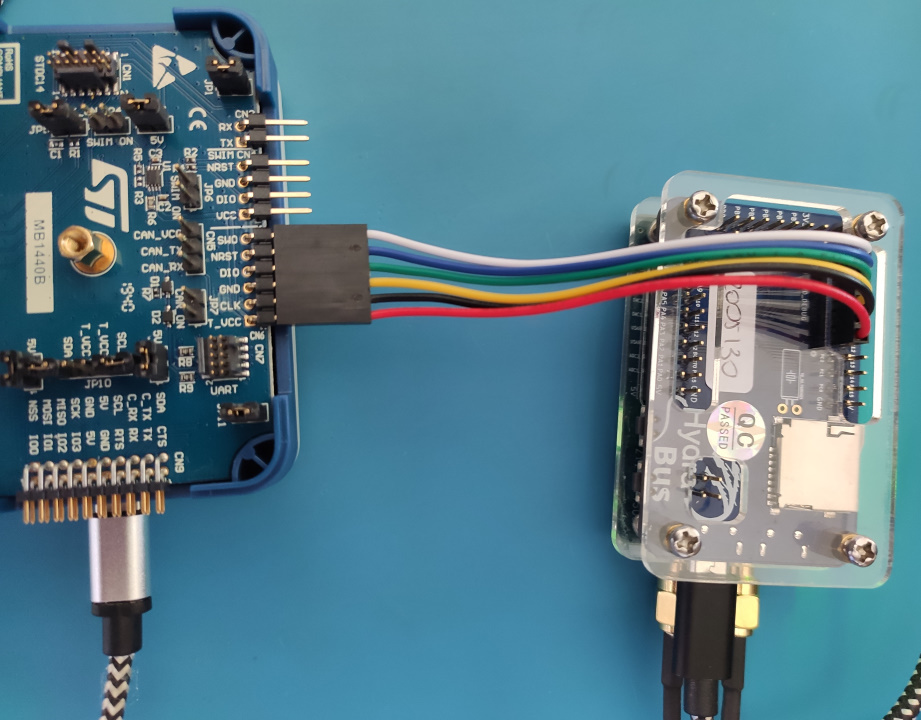
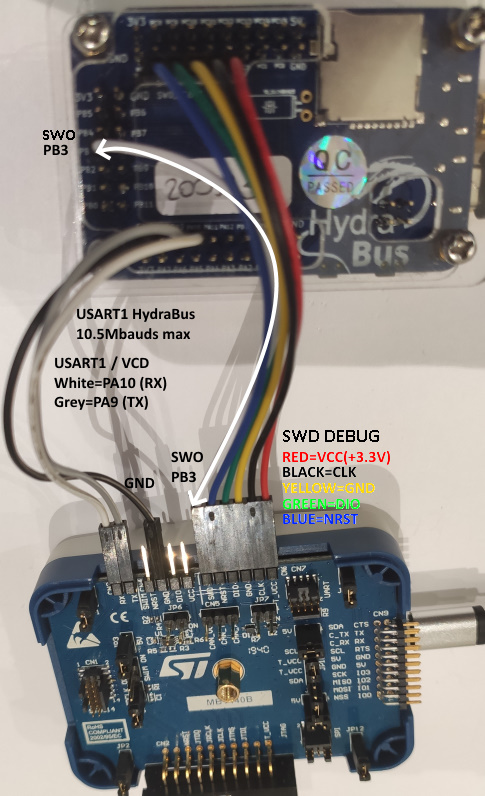
2-2) Connect STLINK-V3SET SWD / SWO & USART1(TX/RX) to HydraBus v1 (for advanced debugging/traces):
Support HydraBus v1 UART1(PA10/USART1_RX & PA9/USART1_TX) up to 10.5Mbaud
3) Software requirements
3-1) Install STM32CubeIDE v1.4 or more
- Download and install STM32CubeIDE v1.4 or more for Linux or Windows
- Note1: STM32CubeIDE is free but it requires a registration on ST website to download it
- Note2: All steps in this page have been validated with STM32CubeIDE v1.4.2 and using firmware https://github.com/hydrabus/hydrafw/commit/0099a031d02c396ab06968420faf9eb08ecd2348
- Note3: STM32CubeIDE v1.4.x is officially supported since firmware release HydraFW v0.10
3-2) Install developer tools and clone project repository
3-2-1) For Windows
3-2-1-1) Prerequisites for Windows
- Install git from http://msysgit.github.io
- Install Python 3.x see https://www.python.org/downloads/windows
- Default Install Example:
C:\Python3\ - Add in environment variable
PATHthe path to Default Install:C:\Python3\ - Open a Command Prompt window (
cmd.exe) and type following commands:
git clone https://github.com/hydrabus/hydrafw.git hydrafw --recursive
cd hydrafw/
cd ./scripts
python get-pip.py
python -m pip install GitPython --upgrade
python -m pip install intelhex --upgrade
Note: For get-pip.py if you need a proxy for internet access set following variables before to launch python get-pip.py:
set http_proxy=http://proxy.myproxy.com
set https_proxy=https://proxy.myproxy.com
3-2-1) For Linux
3-2-1-1) Prerequisites for Linux
cd ~
sudo apt-get install git dfu-util python putty
wget https://launchpad.net/gcc-arm-embedded/4.9/4.9-2015-q3-update/+download/gcc-arm-none-eabi-4_9-2015q3-20150921-linux.tar.bz2
tar xjf gcc-arm-none-eabi-4_9-2015q3-20150921-linux.tar.bz2
echo 'PATH=$PATH:~/gcc-arm-none-eabi-4_9-2015q3/bin' >> ~/.bashrc
source ~/.bashrc
git clone https://github.com/hydrabus/hydrafw.git hydrafw --recursive
cd ~/hydrafw
cd ./scripts
sudo python get-pip.py
sudo python -m pip install GitPython --upgrade
sudo python -m pip install intelhex --allow-external intelhex --allow-unverified intelhex
cd ..
- For Debian / Ubuntu on 64bits/amd64 system see https://wiki.debian.org/Multiarch/HOWTO in order to enable multi architecture for i386 support.
- When multiarch is enabled you shall also install libc6-i686:i386 (Debian) or libc6:i386 (Ubuntu)
Note: For get-pip.py if you need a proxy for internet access set following variables before to launch python get-pip.py:
export http_proxy=http://proxy.myproxy.com
export https_proxy=https://proxy.myproxy.com
sudo -E python get-pip.py
4) Start STM32CubeIDE v1.4 and Import project
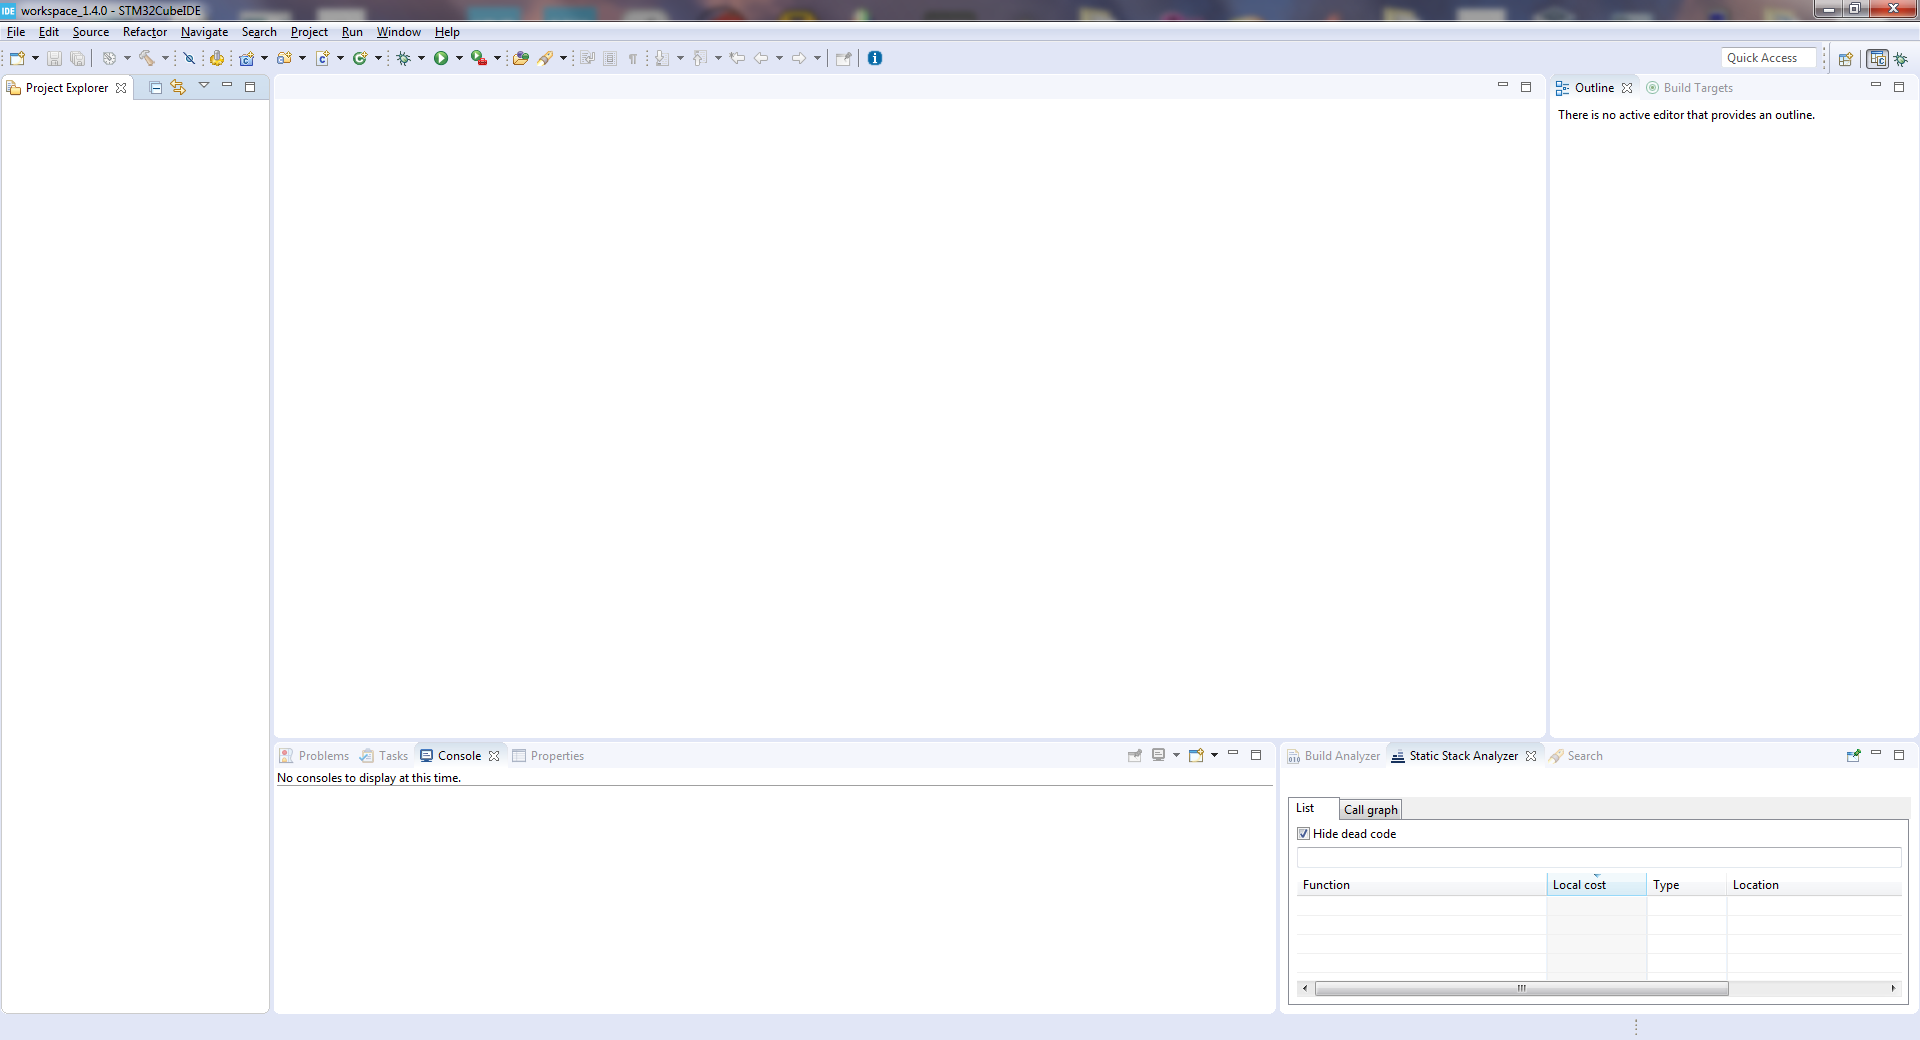
4-1) Start STM32CubeIDE v1.4
4-2) Import the project
- Select menu
File -> Import...-
Select
General -> Existing Projects into Workspace -
Click on
Next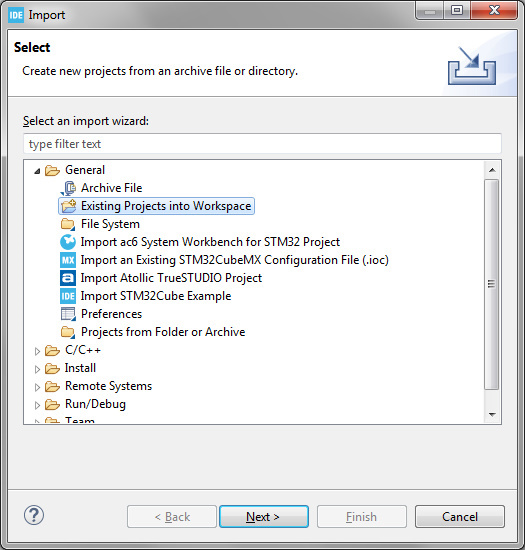
-
Unselect Option
Search for nested projects -
Now only
hydrafwproject is displayed -
Click on
Finish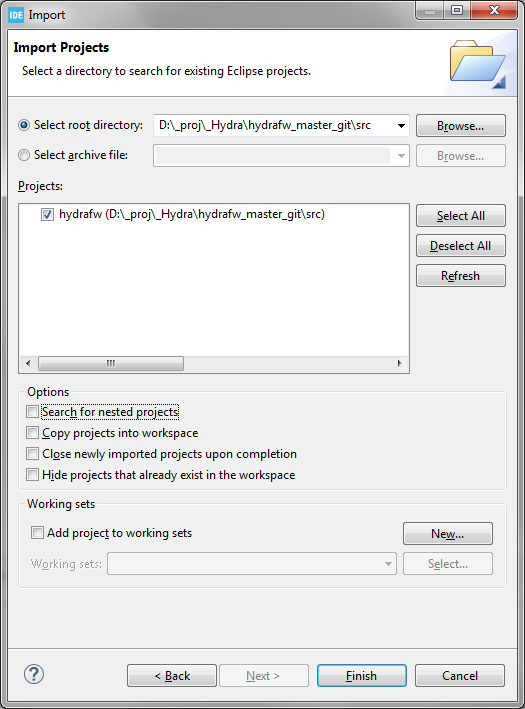
-
4-3) Enable HYDRAFW_DEBUG option on the project Debug configuration
-
Select
hydrafwproject (click on project with right mouse button)- A contextual menu appears, select
Properties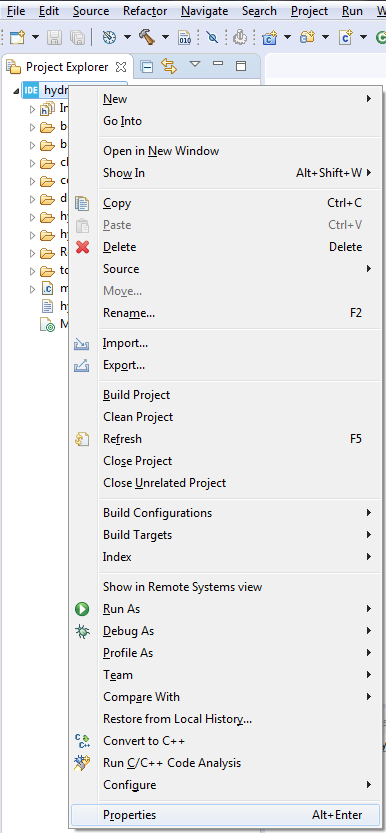
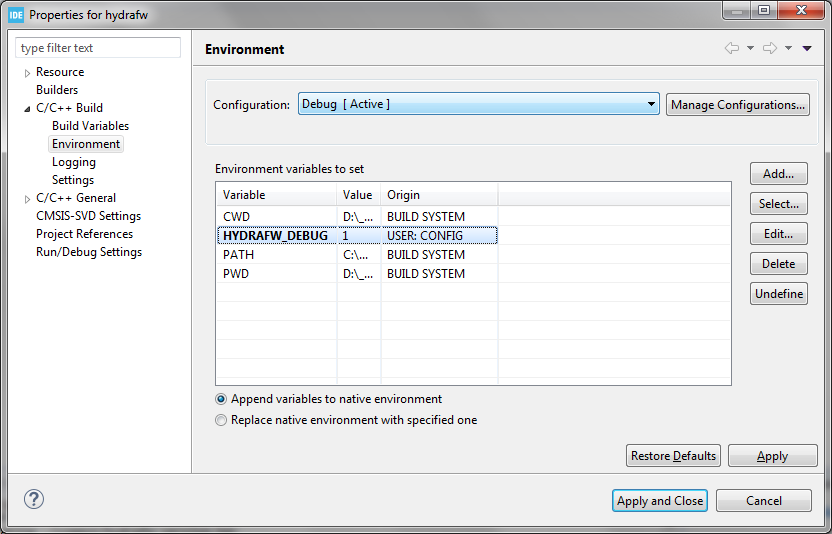
- Click on
C/C++ Build=>Environmentand select configurationDebug - Add Variable
HYDRAFW_DEBUGwith value1
- A contextual menu appears, select
5) Clean the project
- Select
hydrafwproject (click on project with right mouse button)-
A contextual menu appears, select
Clean Project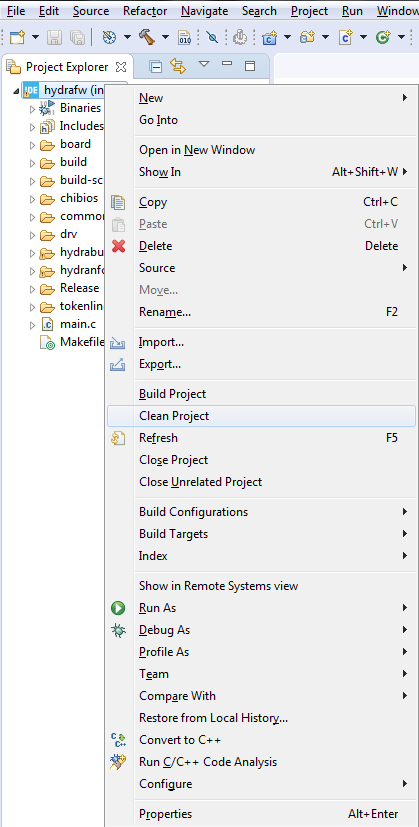
-
Clean shall display in Console
Build Finished. 0 errors, 0 warnings.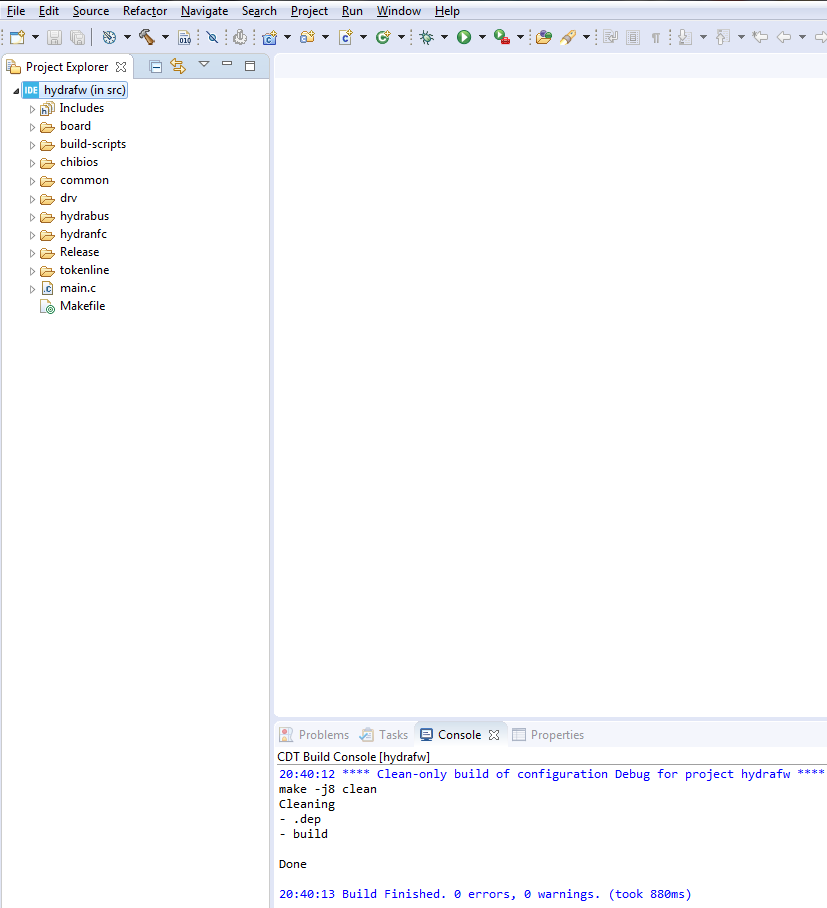
-
6) Build the project
- Select
hydrafwproject (click on project with right mouse button)- A contextual menu appears, select
Build Project - Build shall display in Console
Build Finished. 0 errors
- A contextual menu appears, select
7) Flash & Debug the project
- Select
hydrafwproject (click on project with right mouse button)- A contextual menu appears, select
Debug As -> Debug Configurations...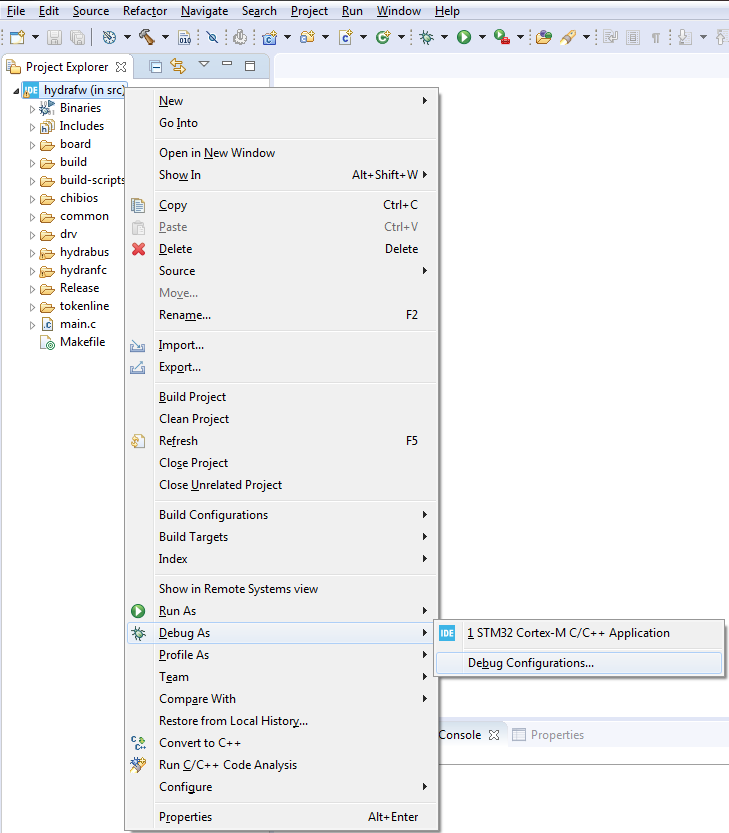
- Debug Configuration view appears, double click on
STM32 Cortex-M C/C++ Application- The entry
hydrafw Debugis automatically created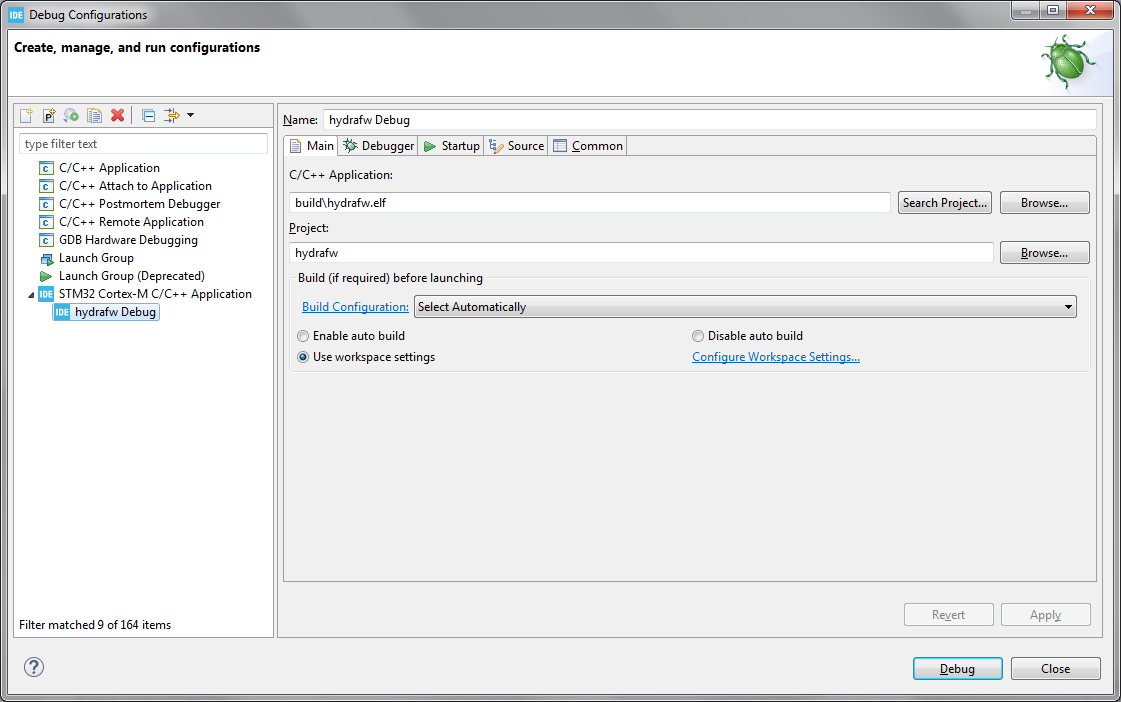
- The entry
- A contextual menu appears, select
- Select
DebuggerTab and configure it like in picture- When all is configured click on
Debugbutton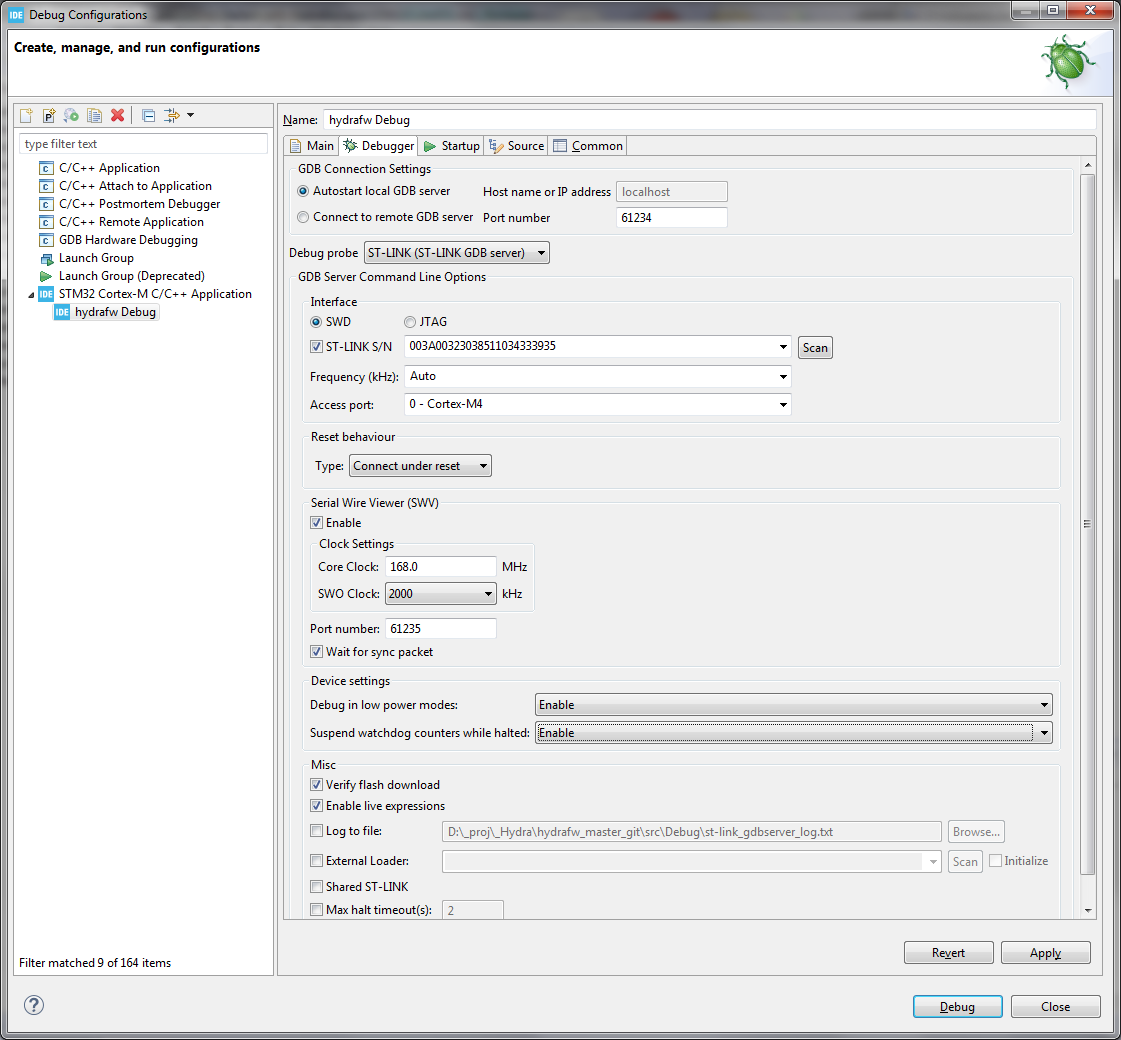
- When all is configured click on
- Debug session is started and program is stopped in start of main() code (you can click on
Resume (F8)to resume execution of code)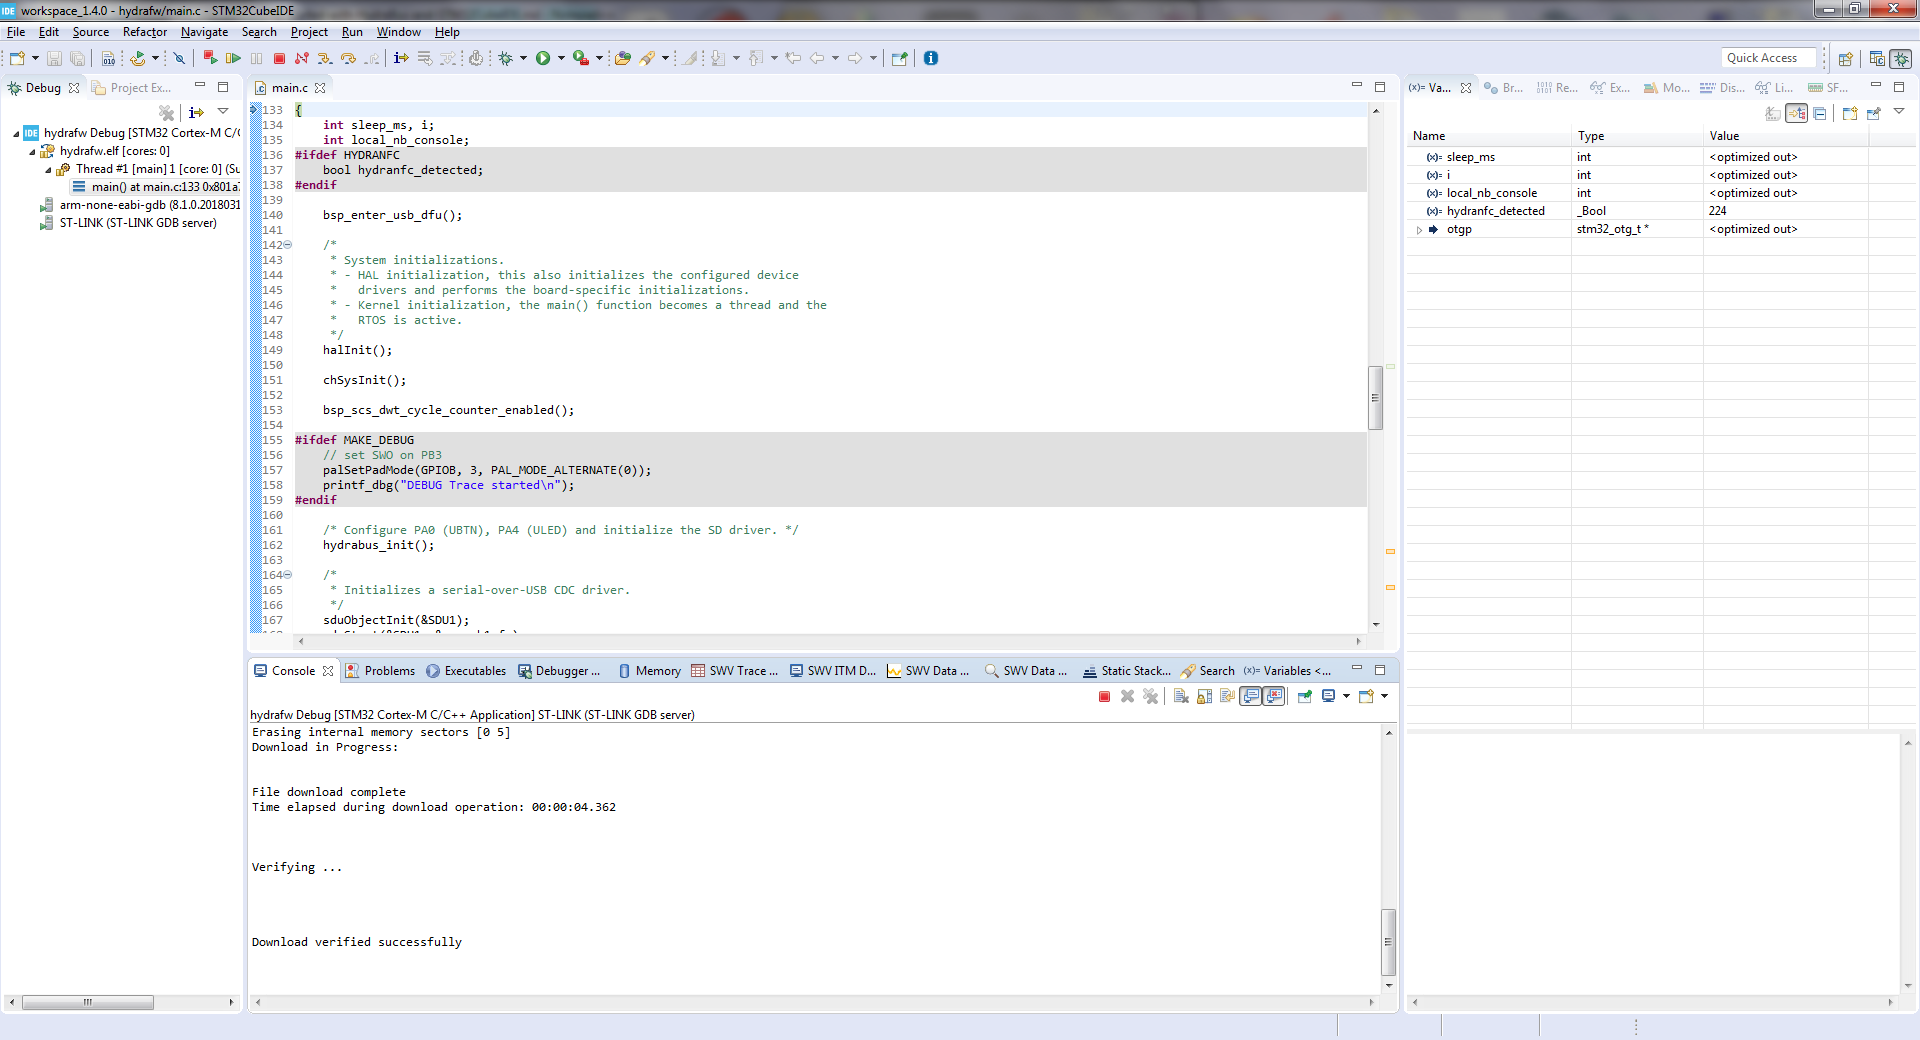
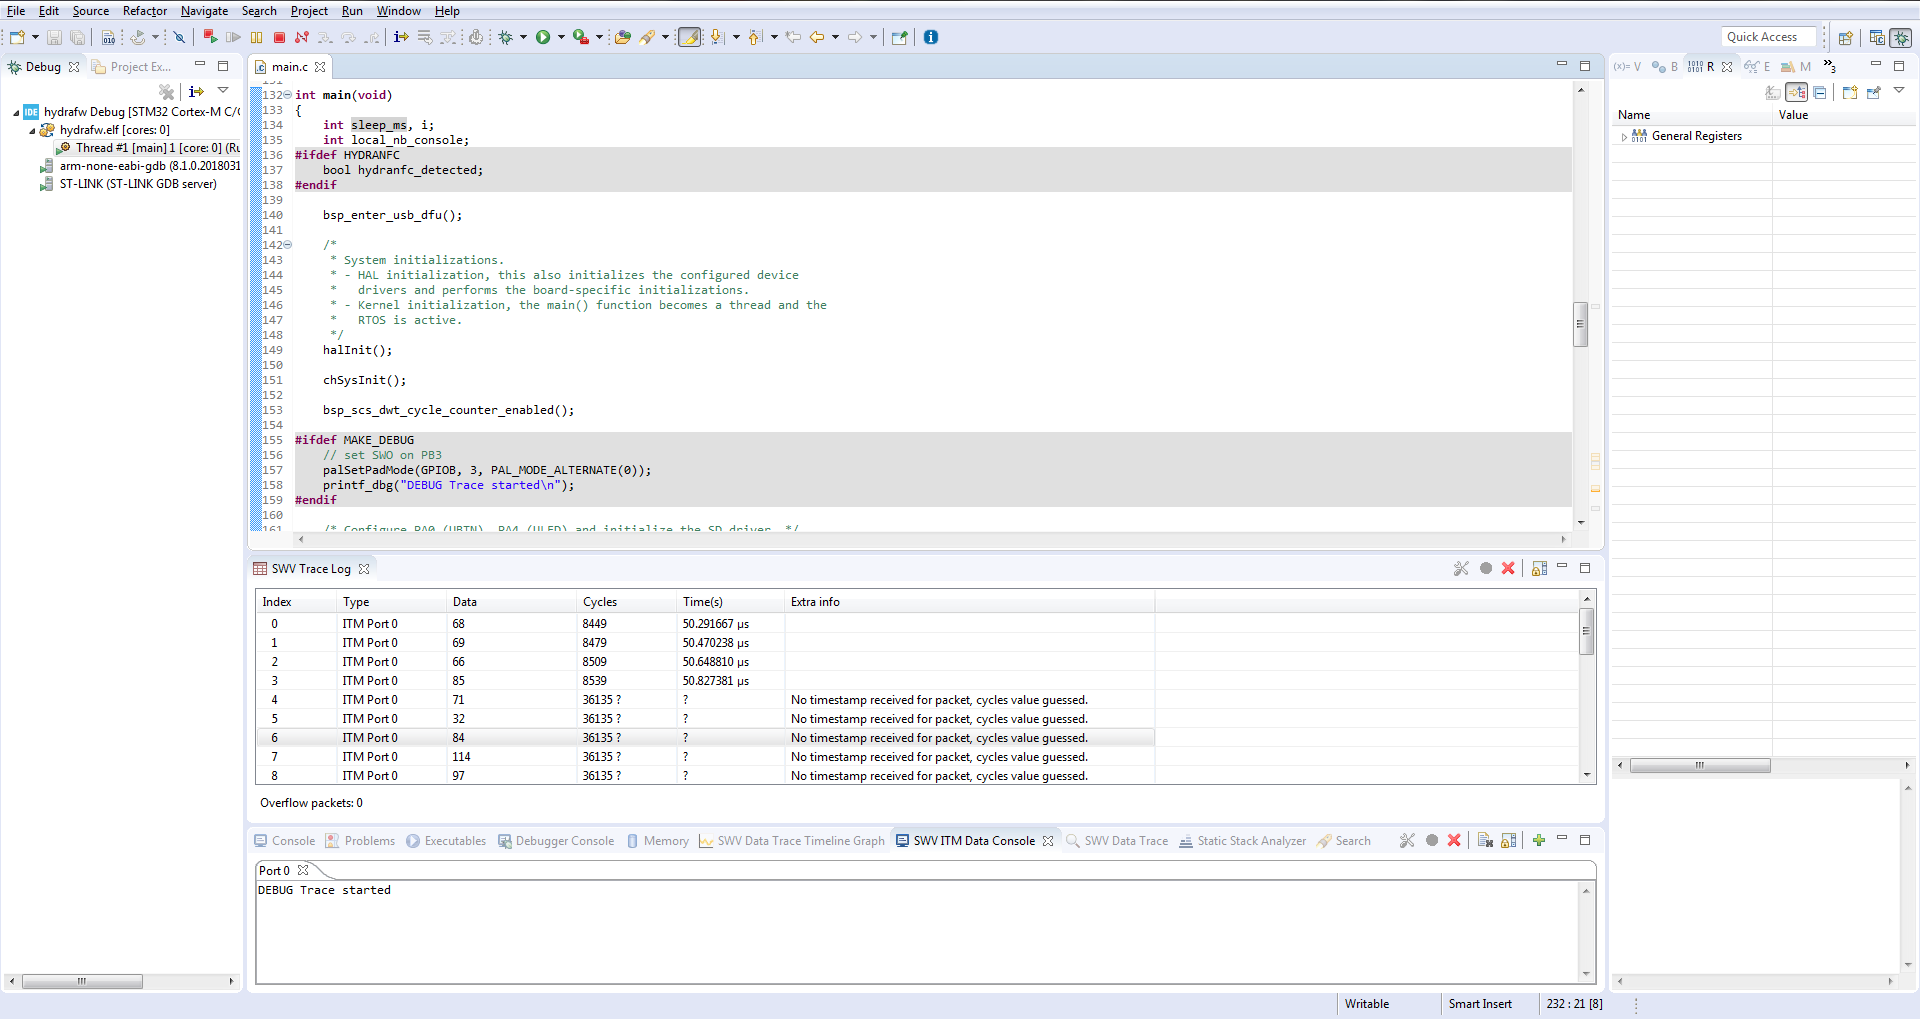
8) Advanced debugging with SWO and STM32CubeIDE Serial Wire Viewer(SWV)
- Select menu
Window -> Show View -> Other... -> SVWto add all different Serial Wire Viewer features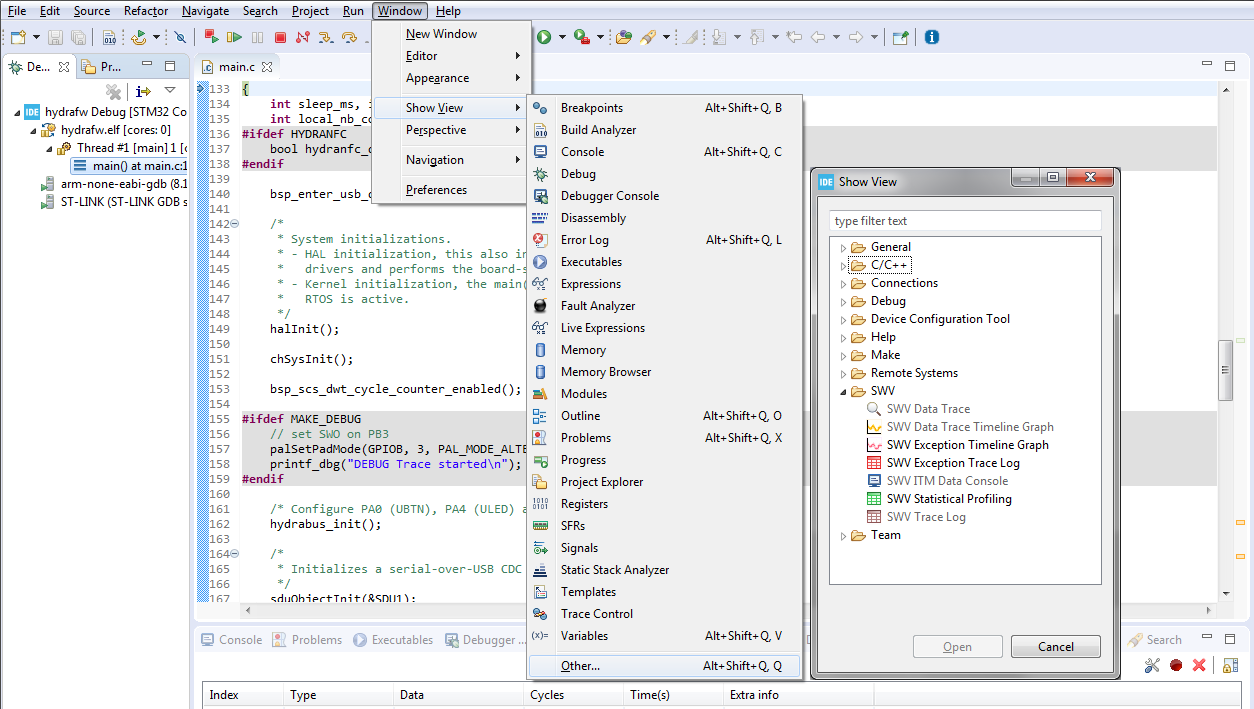
- Add
SWV TraceLog,SWV ITM Data ConsoleandSWV Data Trace Timeline Graph - Then select
SWV TraceLogand click onConfigure traceicon to configure SWV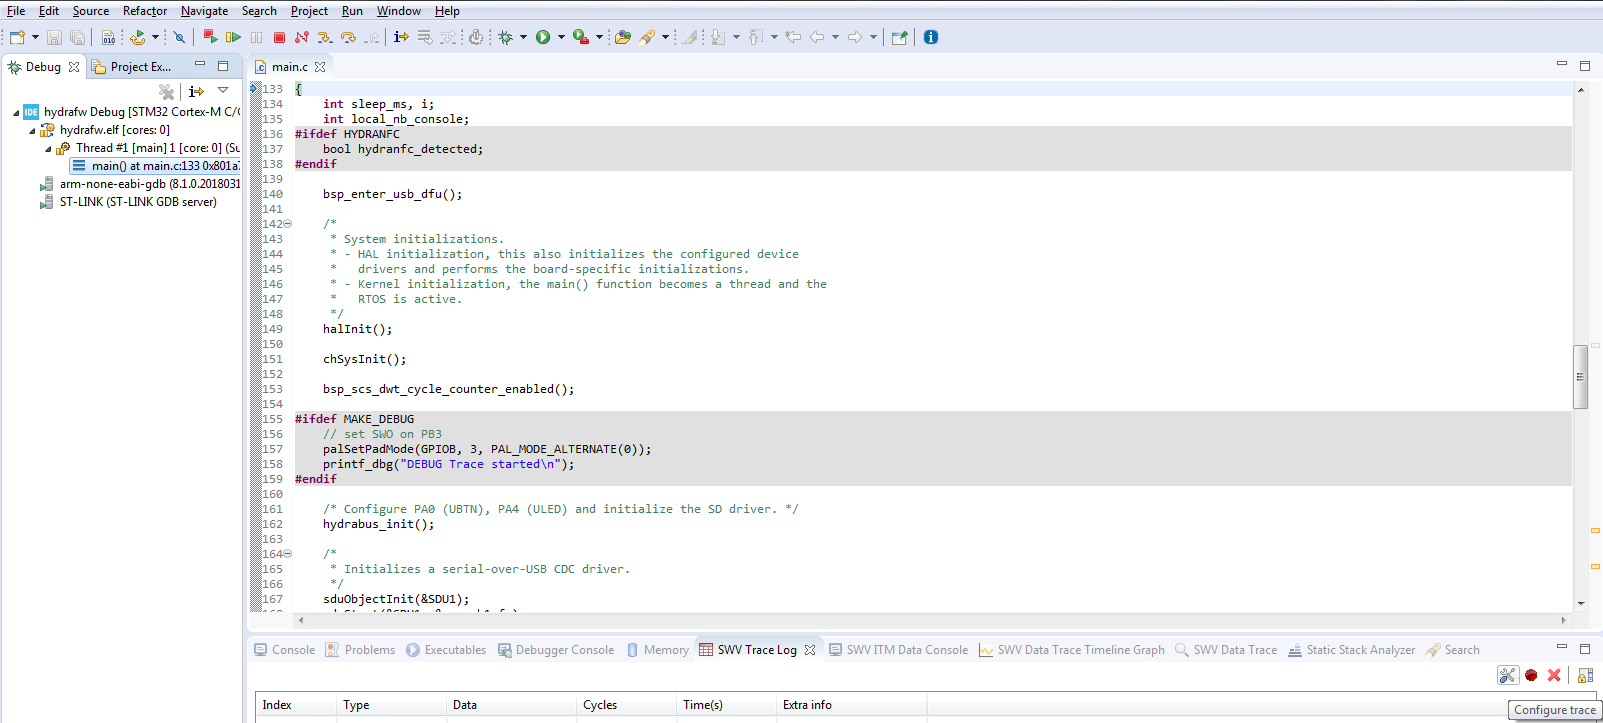
- Interesting things to configure are mainly to enable
TimestampsandITM Sitmulus Ports 0(for SWO/SWV ITM Data Console especially for debug trace and crash/exception details)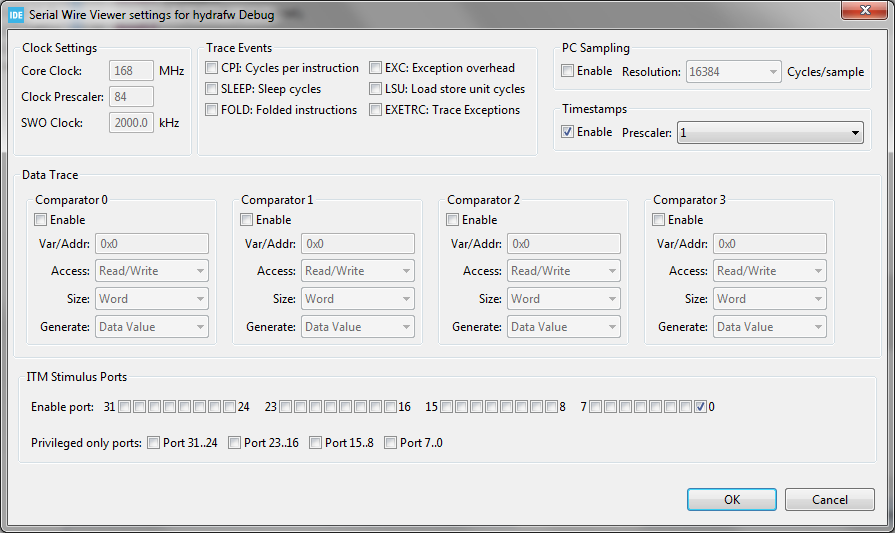
- Then click on
OKbutton - Last step is to start the Trace(using Serial Wire Viewer settings) by clicking on
Start Tracebutton and finally click onResume (F8)button to see the trace and data in live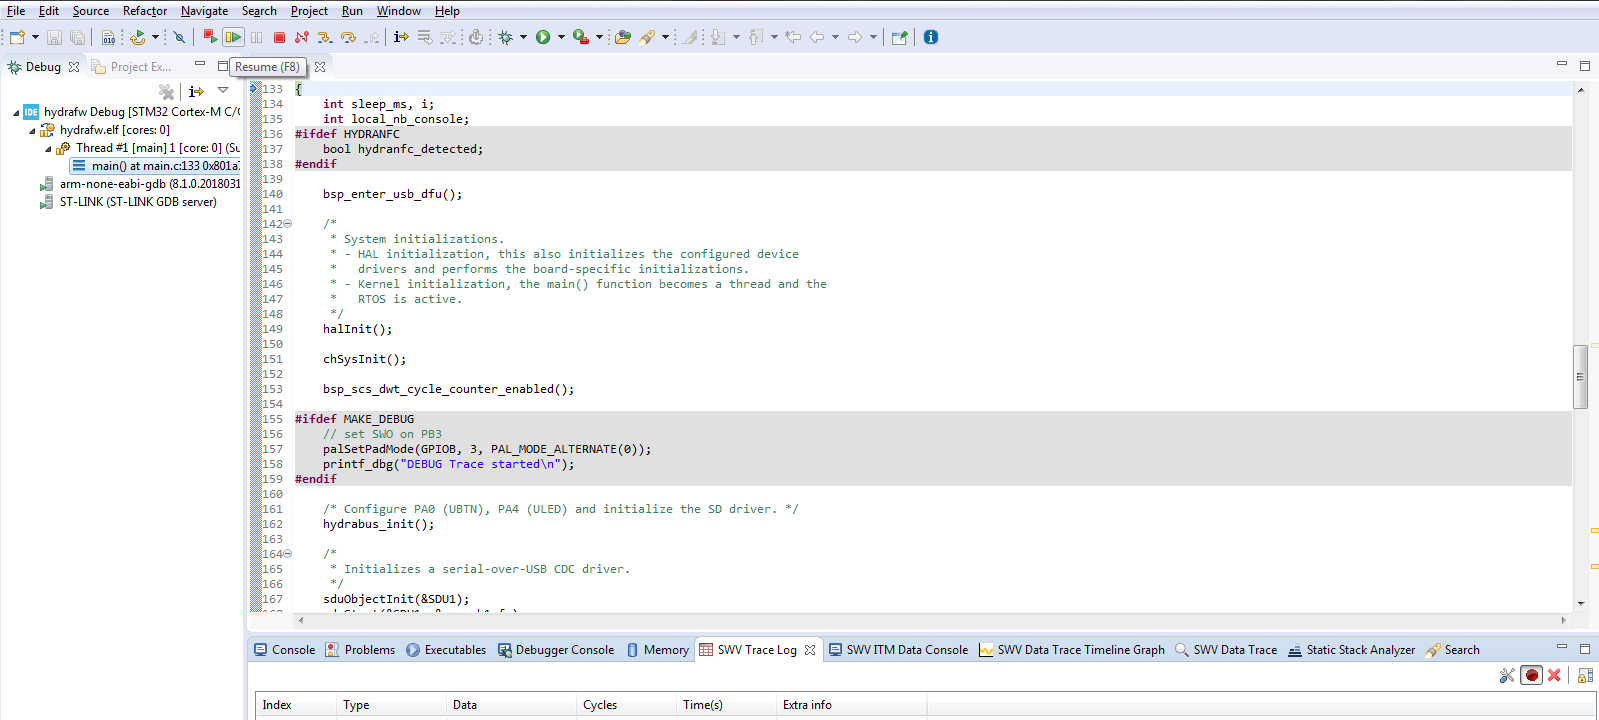
- Add
We can see in real-time the different trace and console data during execution of code