Finance Float Transfers - hmislk/hmis GitHub Wiki
Float Transfers
Introduction
A float transfer is the formal movement of cash from one cashier's drawer to another. Float transfers are used to top up a cashier who is running low on change, consolidate cash at shift end, or move funds between counters. Each transfer is recorded with denominations and must be formally accepted by the recipient.
Navigation
Main Menu → Financial Transaction Manager → Float Management tab
Issuing a Float Transfer
Privilege required: IssueFundTransfer
- In the Float Management tab, click Float Transfer.
- In Transfer To, search for and select the recipient cashier.
- In Add Cash to Transfer, enter the Cash Amount (and optionally fill the denomination breakdown). Negative denomination quantities are not allowed.
- Click + Add — the amount appears in the Cash to Transfer list and the running Total updates.
- Enter a Comment (required) describing the transfer. The comment appears in the recipient's view and on the handover.
- Click Transfer Float Out. A float transfer is created and the Float Transfer Note print opens.
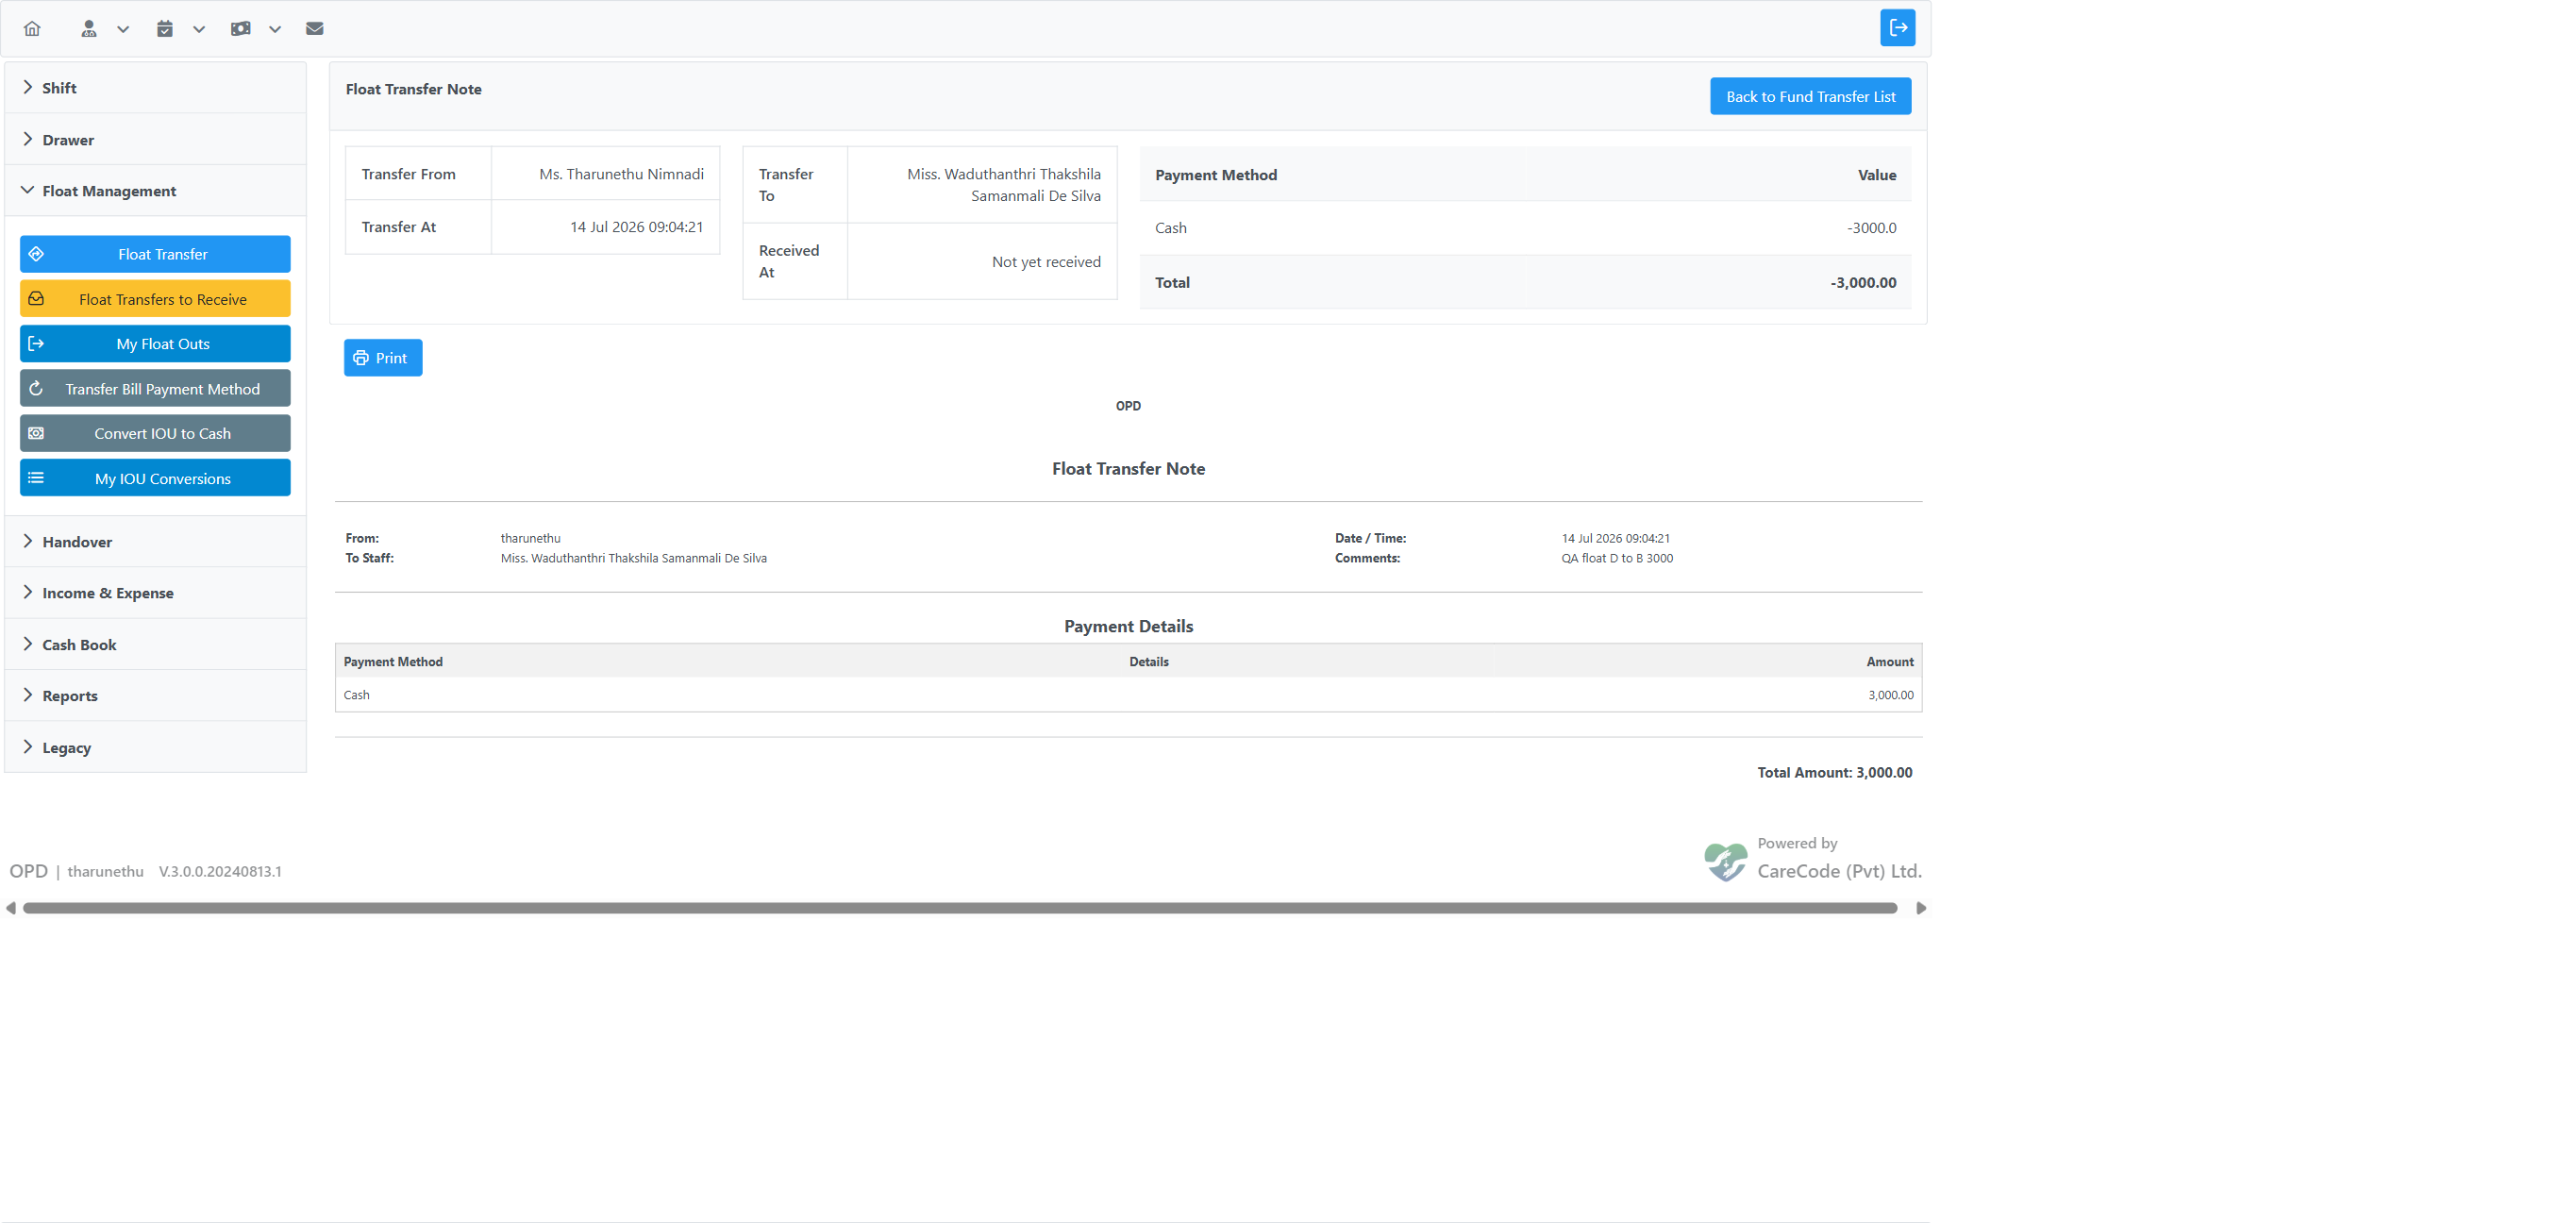
On the printed Float Transfer Note, the Transfer To / To Staff field shows the recipient cashier's name, and Received At shows "Not yet received" until the recipient accepts the transfer.
Fields on the Float Transfer Page
| Field | Description |
|---|---|
| Recipient | Cashier receiving the float |
| Amount | Total amount to transfer |
| Payment Method | Usually Cash |
| Denomination breakdown | Quantities per note/coin type |
| Comment | Optional note visible in handover |
Receiving a Float Transfer
Privilege required: ReceiveFundTransfer
- In the Float Management tab, click Float Transfers to Receive.
- The Incoming Float Transfers list appears, showing each transfer's sender (Transferred From), Transfer Date/Time, Payments (e.g. Cash amount), and Net Total.
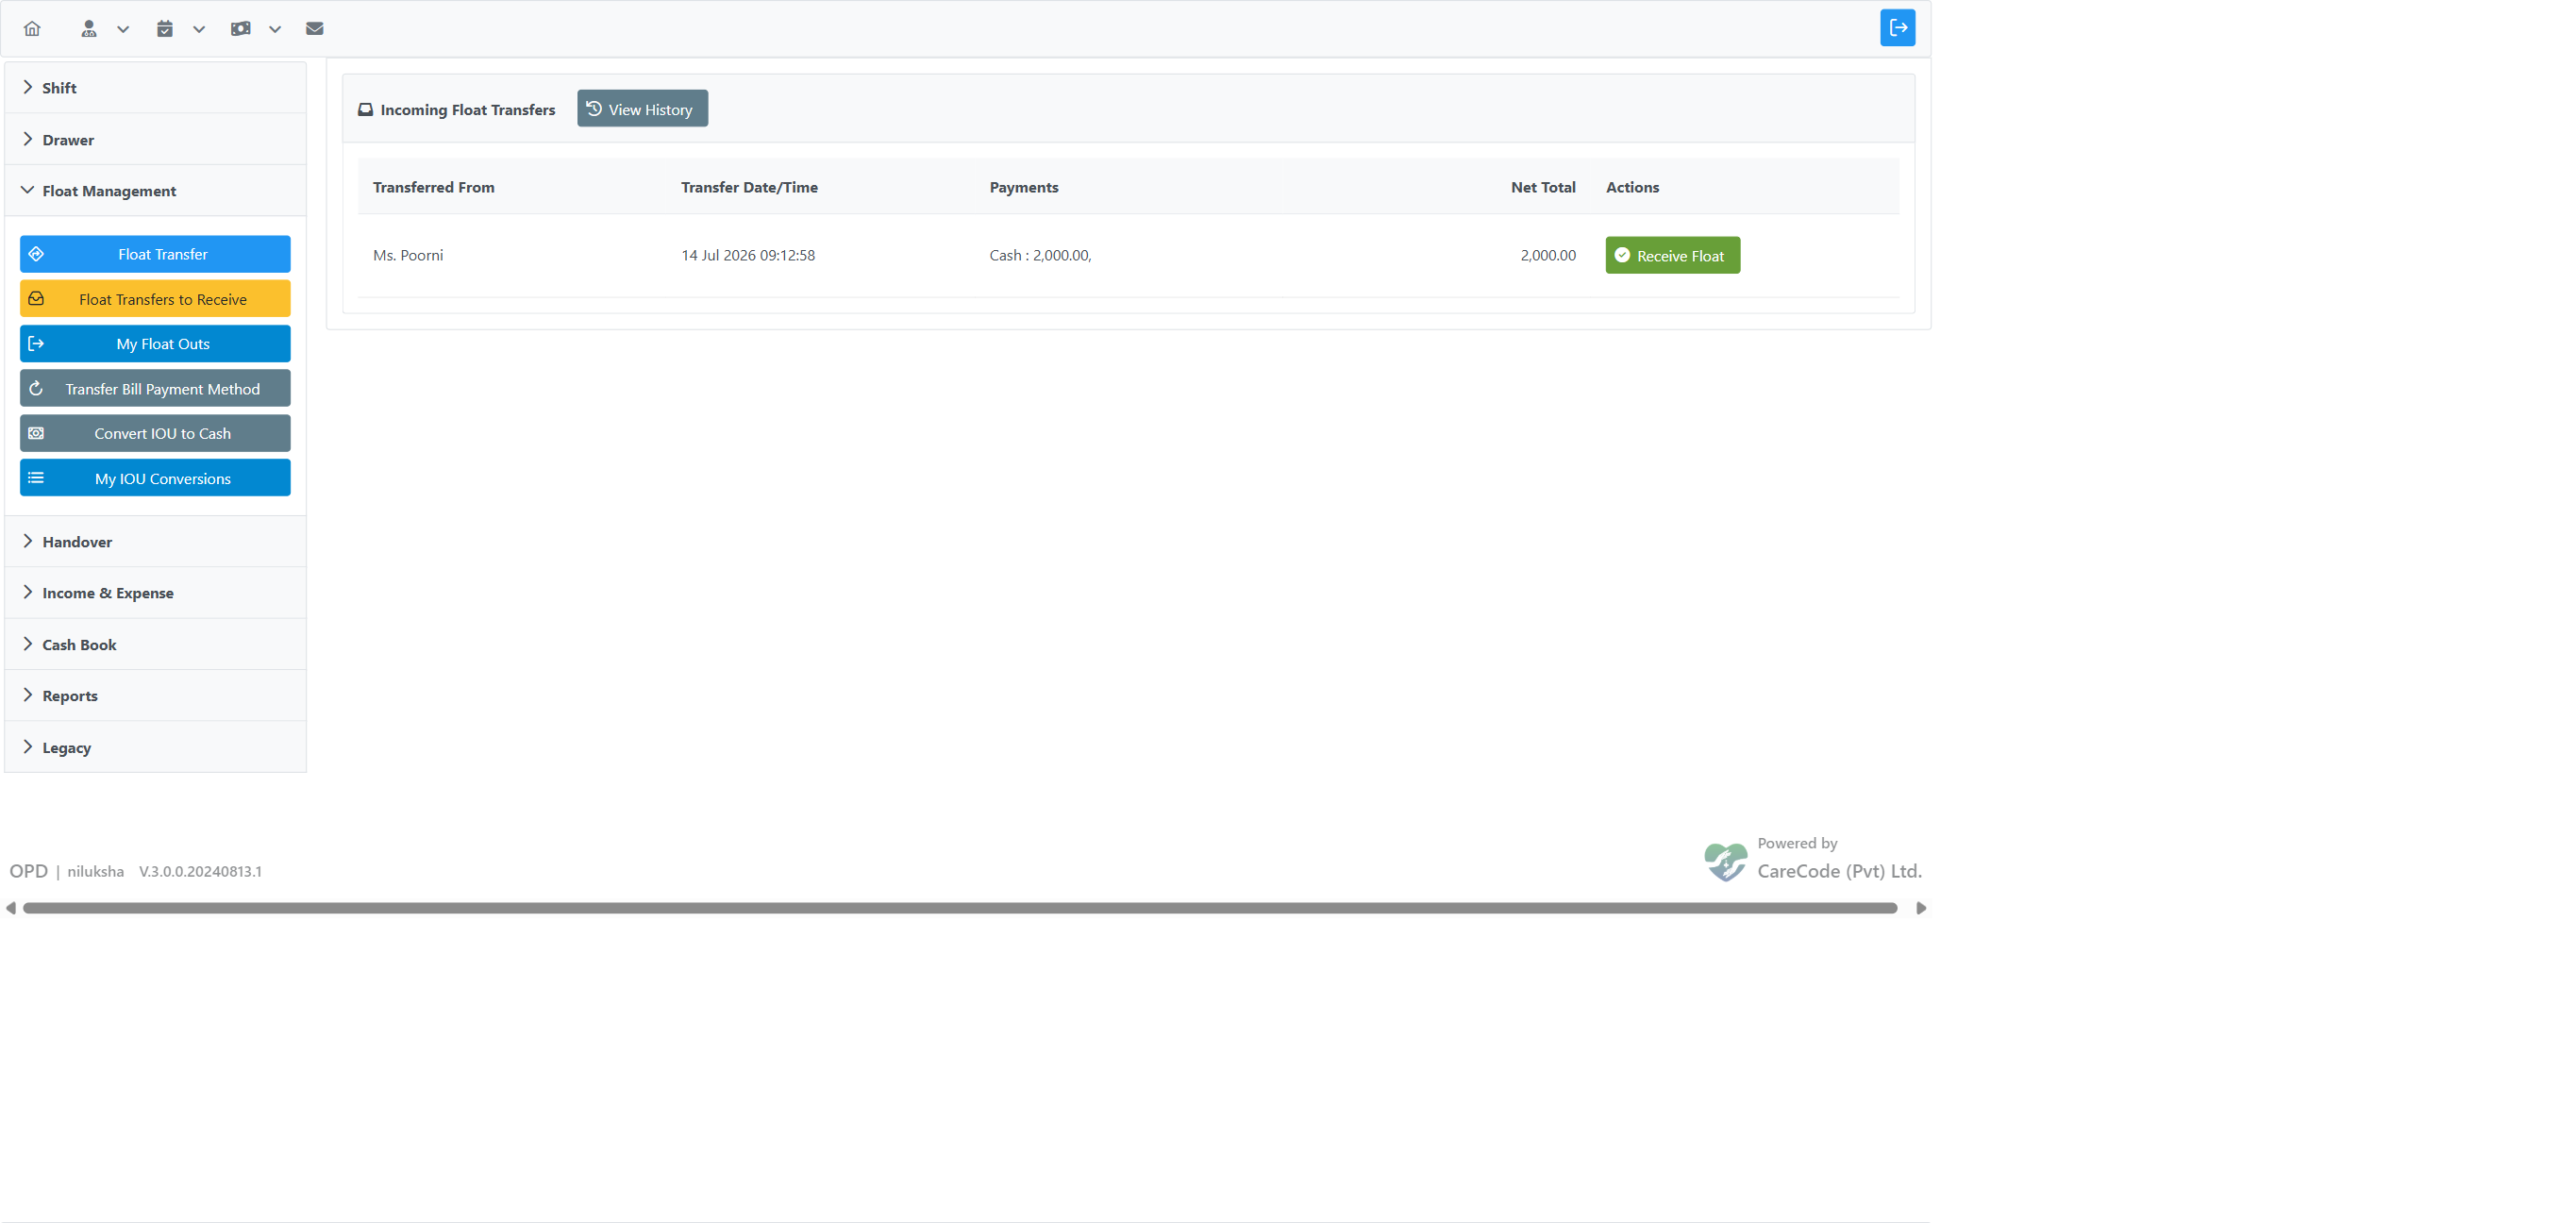
- For the transfer you want, click Receive Float.
- On the Receive Float Transfer page, review the amount, enter a Comment (required), and click Receive Float.
- Confirm the dialog "Are you sure you want to receive float?". Your drawer balance increases by the received amount and the received receipt print opens.
Cancelling a Float Transfer
The issuer can cancel a transfer that has not yet been accepted:
- Navigate to My Float Outs.
- Find the pending transfer and click Cancel.
- Confirm on
cashier/fund_transfer_bill_cancel.xhtml. - Print the cancellation from
cashier/fund_transfer_bill_cancel_print.xhtml.
Float History
| View | Navigation |
|---|---|
| My Float Outs | Float Management tab → My Float Outs |
| My Float Transfer Report | Reports tab → My Float Transfer Report (cashier/my_float_transfer_report.xhtml) |
Net Float in Handover
All float transfers during the shift are summarised as Net Float in the handover document (renamed from "Float Received" in PR #20798). The handover accept page shows full detail: Bill No, Date, Type, and Value (PR #20797).
Technical Reference
| Item | Detail |
|---|---|
| Controller | FinancialTransactionController |
| Issue transfer | navigateToFundTransferBill() |
| Receive list | navigateToReceiveFundTransferBillsForMe() |
| Accept specific | navigateToReceiveFloatTransferForMe(Bill) |
| Cancel | navigateToFundTransferBillCancel(Bill) |
| Decline | navigateToFundTransferBillDecline(Bill) |
| My float outs | navigateToMyFundTransferBillsOut() |
| Privilege: issue | IssueFundTransfer |
| Privilege: receive | ReceiveFundTransfer |
| PR references | #20664 (denomination prefill), #20798 (net float label), #20808 (no negatives), #20815 (comments) |