Use Win32DiskImager to write image file to disk - henrikstengaard/hstwb-installer GitHub Wiki
This tutorial describes step by step how to write an HDF image to a CF/SD card using Win32DiskImager, which can be connected to eg. A1200 or A600 internal IDE port using a CF/SD to IDE adapter.
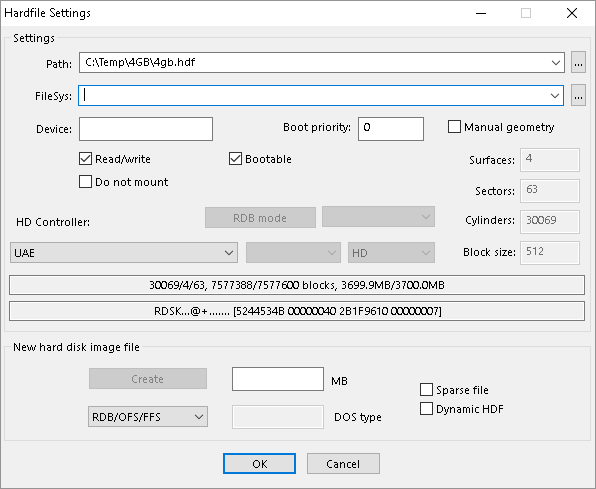
Only RDB images will work, when written to a CF/SD card. If unsure about RDB, use WinUAE to check if HDF is in RDB mode with following steps:
- Start WinUAE.
- Click "CD & Hard drives".
- Click "Add hardfile...".
- Click "..." next to path and select HDF file.
- If "RDB mode" button is grayed out and it says "RDSK...@+......." in the textbox grayed out in the middle, then the HDF is in RDB mode.
If HDF is in RDB mode, then proceed.
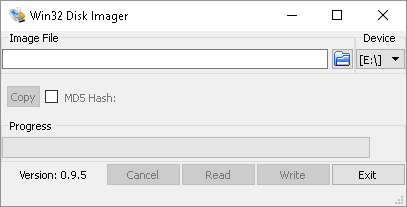
1. Start Win32DiskImager.
Click folder icon to select HDF file.
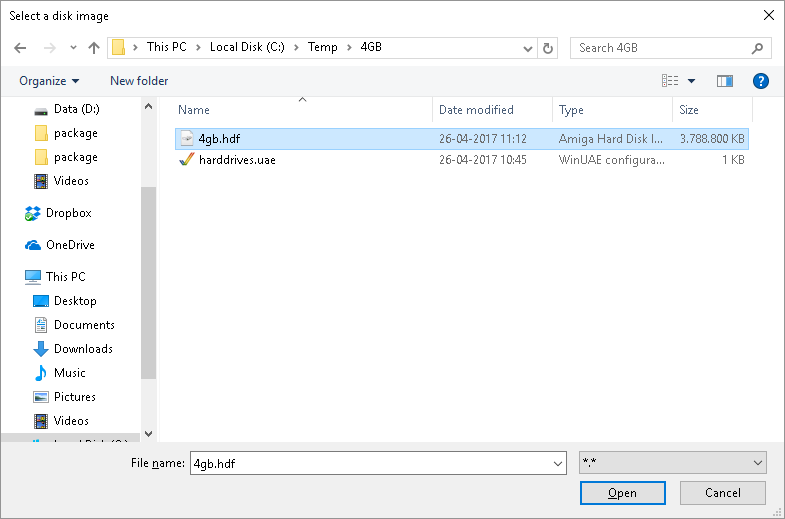
2. Select HDF file to write.
Change file type to "*.*" from the dropdown menu above "Open" button.
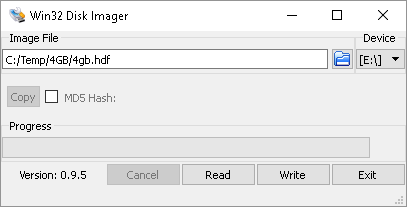
Select HDF file to write eg. "C:\Temp\4GB\4gb.hdf".
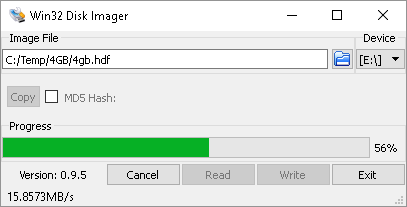
3. Select device and write
Select device to write HDF file to from device dropdown menu matching the CF/SD card to write to.
Click "Write" button to start writing image to device.
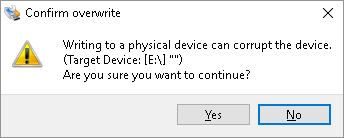
4. Confirm overwriting selected device
Double check you have selected the correct device to write to as it will overwrite and destroy it's current content.
Click "Yes" to confirm writing to device, if correct device is selected.
5. Wait for write to finish
HDF file is being written to device, which can take 10-30 minutes depending on USB and CF/SD card performance.
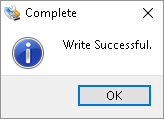
6. Write completed
Writing HDF file to device completed succesfully and Win32DiskImager can be closed.
Remember to properly remove the device from Windows to avoid corrupting the device, before unplugging it from the computer.
CF/SD card can now be used either in emulator or on real Amiga.