How to create issues - hackforla/website GitHub Wiki
Hello everyone! This guide is all about issue creation. As a member of the Hack For LA team, you need to know how to create issues for other members of the team to work on. Issue creation is a valuable skill. It trains you to communicate tasks in an effective manner and keep the team running. So without further ado, let us jump straight to the steps required to make a new issue.
- Introduction
-
Steps to making your first issue
- Step 1: Find the issue creation button
- Step 2: Choose the right template.
- Step 3: Give a good overview
- Step 4: Write good action items
- Step 4-1: Additional Action Items for Issues Involving HfLA Website Admin Drive
- Step 5: Give further instructions and resources
- Step 6: Add the right labels to the issue
- Step 7: Move the issue into the project board
- Step 8: Move the issue into the project board (no dependency)
- Step 8: Move the issue into the project board (dependency)
- Step 9: Add
ready for [ROLE] leadlabel (no dependency) - Step 10: Add the Ready for Prioritization label (team leads only)
- Sample Issues
- Frequently Asked Questions
To create your first issue, you need to locate the issue creation button! To find it just click on the issues tab, and then look for the new issue button to the right of the screen. Click on that, and you can get started!
First click the issues tab...

...then click the new issue button

At Hack For LA, we have several templates to choose from, but regardless of which one you choose, this guide can still be followed. Read the description in each of the templates and click on the one that fits your purpose the most. If all else fails, please pick the Blank Issue Template, which is flexible enough to fulfill any purposes.
Click the blank issue template if no other template applies
The Overview is the first part of any issue. It serves as a two sentence summary of what the issue is about. The goal is for anyone--developers, designers, and project managers--reading it to immediately understand the issue. Remember, to keep it at two sentences, because anything too long should be placed further down in the Resources/Instruction sections instead. Below is a good two sentence fill-in-the-blank that you can use to quickly summarize an issue.
We need to do X for Y reason
-
Example: We need to change the alt text for an element on the Wins page so that the website is WCAG compliant.
-
Special note: If the sentence in the Overview is not enough to understand the issue, add a Details section and write a longer summary there. Do not repeat the information in the title, or the Overview, or the Action Items below. The Details section should be there if it's required, but used sparingly.
### Details
Do not worry too much about getting this right, as you will only get better with practice!
Action items can be thought of as a checklist of items. This checklist is occasionally an ordered list, but often times, the checklist is organized in a way that sounds ordered, but can be completed in any order.
The usual trend for action items is to write them specific to the size of the issue. Issues of a smaller size tend to have clearer items, such as, "locate the line that says, 'font-size: 16px', and change it to, 'font-size: 12px'. However, as issues grow larger, the item might be less clear, such as, "change the font size for all titles to 12px", or "look at the Figma file for the font size, and change the font to match". When writing these action items, it is helpful to think of the size so that it guides your writing.
What do you do when you are unsure of what to write? For example, feasibility issues have a clear end product in mind, but no real action items. In cases like this, we encourage you to try your best, and to look up some of our past issues to see how they were written. If all else fails, consulting the senior members of the team is always an option. Just like when asking for help with blockers on your issue, be sure to ask specific questions, and communicate effectively.
Lastly, when writing action items, it is also perfectly fine to just write down whatever comes to mind! You can always come back and edit things later! What is worse than a messy issue, is getting an issue lost because it is undocumented! Since all new issues go through an approval process, it does not matter if it is messy, as someone else will review it with you.
If you are writing an issue that requires access to the HfLA Website Admin Google Drive, please include the following as the last action items in the issue:
#### Technical Lead, Merge Team Member, or Product Manager
The Technical Lead, Merge Team Member, or Product Manager completing the action items below need to have the following: 1) a 1Password account with Hack for LA, 2) access to the “Hackforla.org website” vault in 1Password, and 3) Manager level access in the _HfLA Website Admin_ Google Drive.
- [ ] Once this issue is completed,
  - [ ] Remove the developer from the _HfLA Website Admin_ Google Drive
  - [ ] Update the ElizabethHonest token and key following the instructions in the [How to Update Elizabeth Honest Bot Token section of the Wins Form Admin Guide](https://docs.google.com/document/d/1j1JTX5XzotgVCVZ91ImvenedPN5-IVjdSKDukq1B9iE/edit#heading=h.cy11pkunr7d9).
The Resources/Instruction section is there to provide information that neither fits the overview, nor can be considered as part of the action items checklist. The most common information provided are links that lead to supplementary material. For example, if the issues involved changing the homepage, it would be courteous to link the actual homepage, or the link to the file that should be changed.
Just like with the action items, the amount of information provided in the Resources/Instruction section should reflect the issue's size. If the issue is considered medium or large, there is no need to give specific links to files or pages as locating it should not be difficult. Rather, it might help to link to outside articles or documentation that relates to the issue. For example, if the issue involves changing the color palette, an article about color contrast might help prove useful in completing this issue.
When making issues, there always need to be at minimum, 3 labels. These labels are:
- 1 from the
roleseries - 2 from the
sizeseries (one of the sizes is t-shirt and the other is points). T-shirt is really complexity and will be changing in the future. - 1 from the
Featureseries orP-Featureseries
More information about what each of these labels mean can be found in our wiki on labels.
Note that the minimum is 3 labels, but there is no maximum. An issue can have as many labels as GitHub would allow. That does not mean labels should be placed without thought. The purpose of labels is to convey accurate information about an issue with as few labels as possible. When adding a fourth or fifth label, think about whether the label applies to this issue. For example, if an issue requires some other issue's completion before this one can begin, then the dependency label is needed. Likewise, if an issue involves a heavy amount of work that should be done as a group, then the collaborative work label is needed. Otherwise, omit those labels entirely.
If this is your first time making issues, we do not expect you to have encyclopedic knowledge of every label we use. As a matter of fact, we prefer new members to stick with minimum 3 to start off. That said, if you are unable to place all three, feel free to leave it alone, or communicate with us your troubles. The team is always ready to coach you, and would love to help answer any questions you may have!
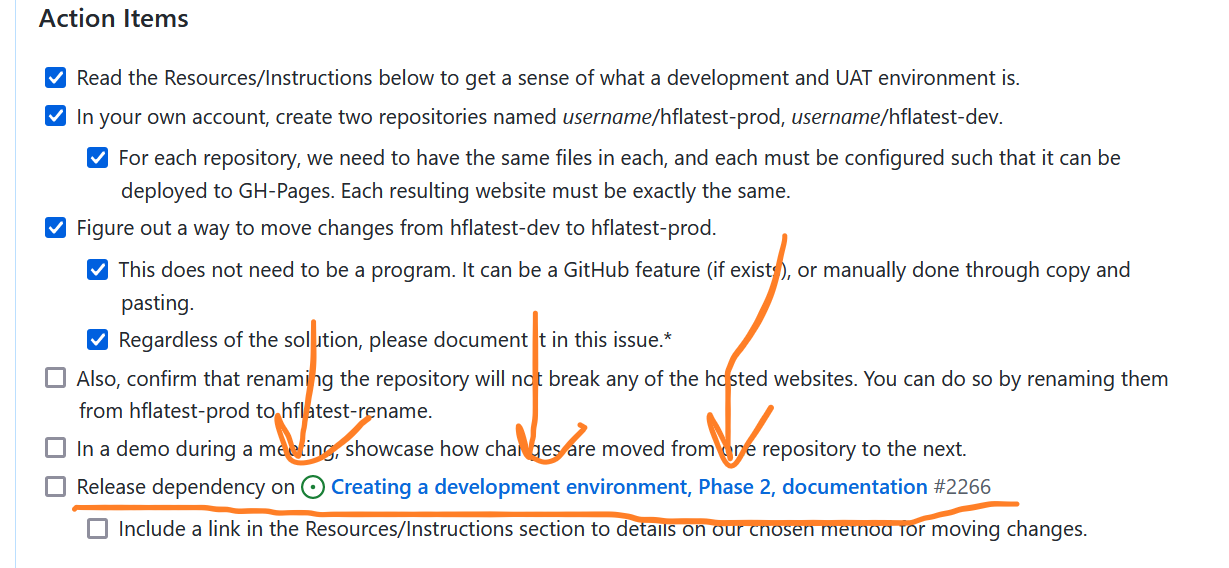
A dependency is a condition that must be fulfilled before work on an issue can begin. A dependency can take many forms, but it is often another issue. When adding dependencies to an issue, be sure to add a section called Dependency, and add the dependency as a checkbox (see below for an example). If the dependency is an issue, it is also customary to go to that issue and put "release the dependency" as an action item. For example, if #1911 is dependent upon the completion of #1823, then #1911 will have a Dependency section. On #1823, the last action item should be, "release dependency on #1911". This makes sure that there is ample follow up so issues do not become lost.
Do note that a dependency is optional. In fact, most issues do not have dependencies at all. If you are unsure whether your issues has a dependency or not, assume that there is not one, and skip this step.
Issue with a dependency

Releasing a dependency
Note: SKIP to below if the issue has a dependency.
After filling out the issues and adding the labels, the last step is to add the issue to the project board. We do have automation that partially does this already, but it is always good to double check. To check, simply locate the projects section, and check that the project box is there.
Click the blank issue template

If the issue is not already in the Project Board, then click the gear symbol, and choose Project Board. Then, below the green bar, click the dropdown, and place the issue into "New Issue Approval".
Note: Only do this if the issue has a dependency.
Issues with a dependency typically goes into the "Ice Box" column rather than "New Issue Approval" column. To do that, follow the Step 8 from above, and rather than place the issue into "New Issue Approval", click the dropdown and pick "Ice Box" instead.
If the issue does not have a dependency and it has a role: front end and/or role: back end/devOps, add a ready for merge team label. For all other issues that does not have a dependency, make sure to put a ready for [ROLE] lead, where [ROLE] is dev, design, research, etc. For example, if you are writing an issue for designers, put a ready for design lead label, so that a design lead can review the issue.
This also applies to leads writing issues for other teams. For example, if you are a dev lead writing an issue for design, please add the ready for design lead label.
Note: Only do this if you are a team lead.
The Ready for Prioritization label indicates that an issue is ready to be placed into the prioritized backlog. Every issue are grouped into different project goal categories. These categories represents the goals of the project, and is important for administrators and project managers to keep track of the project's progress. The Ready for Prioritization label is added to issues in the "New Issue Approval" column, and indicates that an issue is ready for a project manager to judge its importance for the project. This prevents frivolous issues from being made, or prioritized over project critical issues.
If an issue is ready for a project manager to add a milestone, add a Ready for Prioritization label. Then, if there is a ready for [ROLE] lead label (where [ROLE] is dev, design, research, product, etc), remove the ready for [ROLE] lead label.
[TODO, put a curated list of good issues to look at, organized by size]
When the dependency is met, the issue will then go into the "New Issue Approval" column. For example, if an issue has #23 as a dependency, then once #23 is completed, the issue can move into the "New Issue Approval" column.
Why do we not pre-approve it first? Issues with dependencies are liable to change over time. For example, while the issue sits in the "Ice Box" column, the action items might change due to changes to site architecture. Therefore, when it moves out of the "Ice Box" we need to reexamine the issue and ensure that the text is still accurate and applicable to the project.
Yes! An issue that is not ready to be worked is referred to as, "having a dependency". For an issue like this, make sure to put a dependency section and a dependency label. Place the issue in the "Ice Box" column.
To release a dependency means to move an issue with a dependency back into the new issue approval from the "Ice Box" column. The dependency label should also be removed from the issue.
Yes, you absolutely should! Because we rely on asynchronous communication, putting things in writing is the best way to make sure work happens.
Consider this, if you do not make an issue, what other options do you have? You can create a card for someone of X role to follow up on, but it is often too brief. You can also message someone of X role, but this is liable to be forgotten. The boon of creating an issue and writing down some notes is that it gives a space to follow up on and ask questions.
When you are done writing the issue, make sure to put a ready for [ROLE] lead, where [ROLE] is dev, design, research, etc. For example, if you are writing an issue for developers, put a ready for dev lead label.