How to Use Git GUI (Graphical user Interface) in Visual Studios Code - hackforla/website GitHub Wiki
You should never blindly add all files that have been changed using git add .. That being said, you should always double-check the files changed and make sure those are the intentional changes you planned on. You can do this using the Git GUI.
- Check if the Git GUI is visible in your left sidebar. If not you can right-click on the sidebar and confirm that Source Control is checked.

-
Click on the source control icon.
-
Click on the file you made changes on and confirm they are the correct changes.
-
If they are the correct changes you can hover over the file and click on the
+sign to stage your changes.

- If you happen to make a mistake and added the wrong file or no longer want to add it you can hit the
-sign to remove it.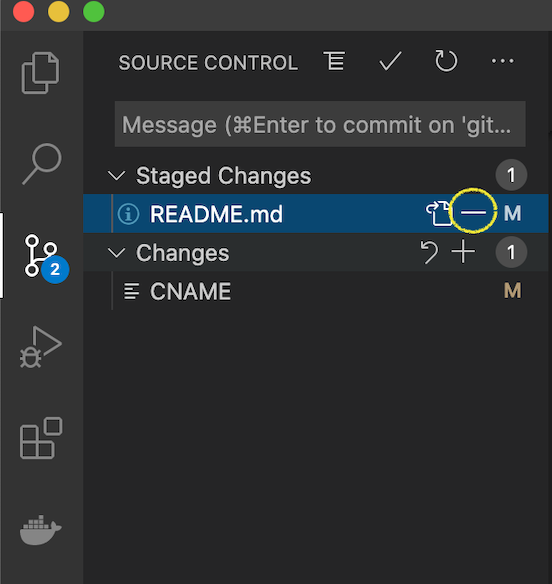

- If desired you can also discard all the changes made to the file altogether by hovering over the file and clicking on the return arrow once it has been removed from the staged changes.

-
After checking and adding all the files you would like, you can double-check all files that are staged by using the command
git statusor looking at the Staged Changes header in the Git GUI sidebar. -
You can now proceed with the regular process and use the commands
git commit -m "changes made",git fetch upstream, andgit pushoutlined in the contributing wiki
