3. Deploying Code to Azure Function - great-lakes/lean-iot GitHub Wiki
Deploying Code to Azure Function
The goal of this lab is to get code deployed on to your MXChip so that it may send flight telemetry data to your IoT Hub and then your Azure Function will send that data to the Flight Simulation App
Prerequisites
The following are required to complete this lab:
- An MXChip IoT DevKit
- A computer
- An active Microsoft Azure subscription. If you don't have one, sign up for a free trial
- An available WiFi connection or mobile hotspot. Note that the WiFi connection can (and should) be secure, but it must be ungated (i.e. no intermediate login page is required. Gated WiFi is common in public venues and hotels).
Exercises
This lab includes the following exercises:
Estimated time to complete this lab: 30 minutes.
Exercise 1: Create JavaScript function
You have already created your Azure function. In this lab you will set it up and deploy code to it. We will be coding in JavaScript !
-
In the Azure portal, select the resource group you created in the past lab and then select your Azure function.

Select Azure function in your resource group
-
Once the Function screen appears, hover over the Functions dropdown in the left side menu. A '+' sign should pop up. Press on it! Ignore the initial screen, scroll down and select Custom Function

-
Now you should see several options as a trigger for your function. A trigger will cause your function to run, every time it is set to true.
Scroll until you see IoT Hub(Event Hub) and select it.

- Another window should open once you have selected the IoT Hub(Event Hub) trigger. In the Language field, select JavaScript. In the Name field, put "flysim(YOUR_INITIALS)". For Event Hub connection, select new.

In the connection popup, select your IoT Hub from the previous lab in the IoT hub field, select Events (built-in endpoint) for the Endpoints field and press Select. Once the Endpoint connection fields are populated, press Create.

Exercise 2: Inserting JavaScript code
- Once you have finished the configurations for your function, and the original screen is back, select your function from the far left menu and you should see some dummy code.

Next you will erase all of that code and copy in the code found here
- Once the code is pasted in, press Save at the top and then select the View Files tab on far right. Once you open this up select the Add button and then name the new file package.json.


Erase the dummy code and copy in the code found here
There will be a break to give a quick explanation of the code. If the break has not happened, you may continue and come back to this when the code is being discussed
- Set the Node Version to the latest LTS version using Application Settings (environment variables)
Follow the steps below to access your Application settings:

Scroll to close to the bottom of the newly opened tab, until you see WEBSITE_NODE_DEFAULT_VERSION, and change the value from 6.5.0 to 8.9.4 (like shown below)

- Next, select the function name again in the left side menu, then at the top select Platform features.

Select Console under the Development Tools section

Once the console opens, type in the following command:
cd [name_of_your_function] i.e. flysimgac (if you cant find the name of your function, it is at the top of the command console)
And then run this command as well:
npm install
You should see this:

You can exit out of the console and move forward.
- In the functions menu, select the Integrate button.

You should see a Triggers column, Inputs column and Output column. Under the outputs column, select New Output

When the output options pop up, select Azure Event Hubs. Once the Azure Event Hubs output screen loads, for Event parameter name input 'sharedOutputMessage', for Event Hub name input 'flysimin' and lastly for Event Hub connection select the new button to the right. Select Custom tab. For Key input 'flysimin' and for Value input the code found here.
Select Save


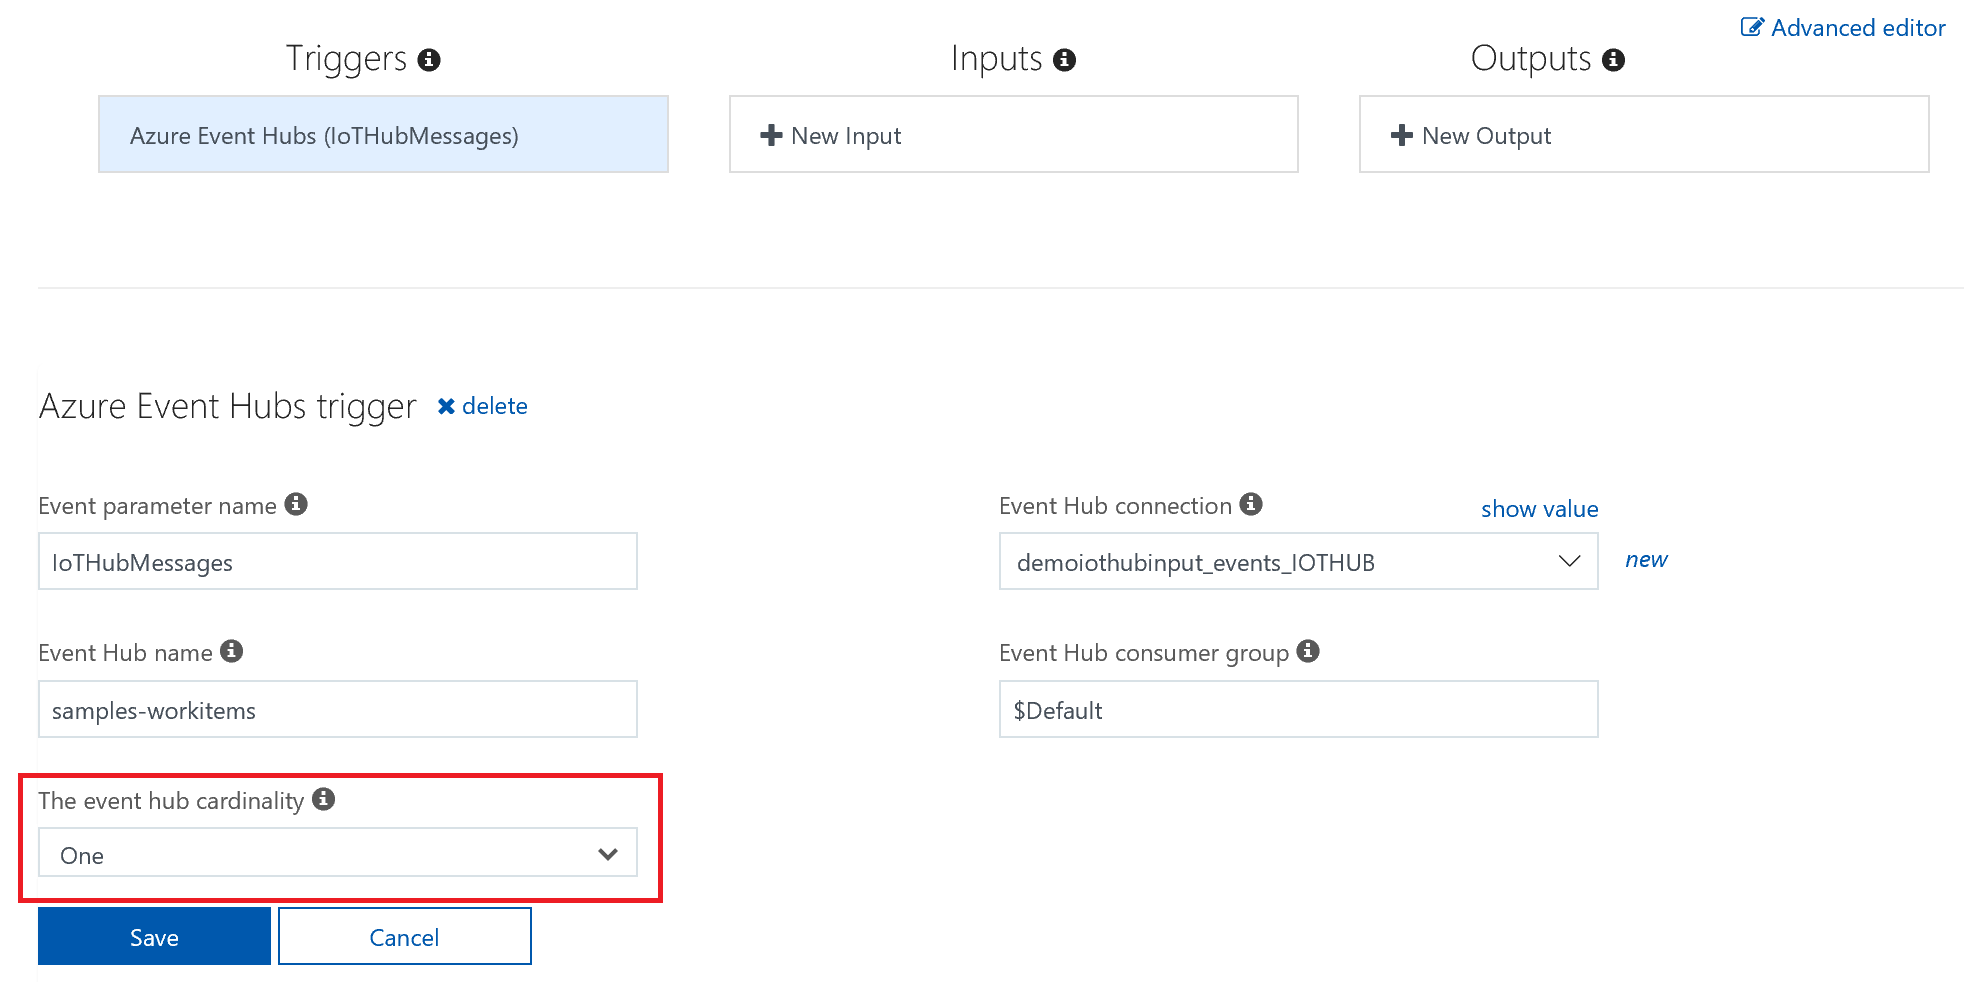
Go to "Triggers", and change cardinality value from "Many" to "One" (like below)
- Finally, go back to the function code and press Save then Run

Summary
In this lab, you have set up your function in the cloud. This function will allow your data from your MXChip to send it to the flying app.