Getting Started with 4.x
If you're using a release older than 4.x, it's strongly recommended to upgrade, as previous versions are not developed or supported anymore. Being an OSS project, everyone is free to fork it to make backports, maintain them and provide support.
Add this to your build.gradle dependencies:
def uploadServiceVersion = "x.y.z"

implementation "net.gotev:uploadservice:$uploadServiceVersion"
And sync your project. Replace x.y.z with

Initialize the library in your Application subclass:
class App : Application() {

    companion object {
        // ID of the notification channel used by upload service. This is needed by Android API 26+
        // but you have to always specify it even if targeting lower versions, because it's handled
        // by AndroidX AppCompat library automatically
        const val notificationChannelID = "TestChannel"
    }

    // Customize the notification channel as you wish. This is only for a bare minimum example
    private fun createNotificationChannel() {
        if (Build.VERSION.SDK_INT >= 26) {
            val channel = NotificationChannel(
                notificationChannelID,
                "TestApp Channel",
                NotificationManager.IMPORTANCE_LOW
            )
            val manager = getSystemService(Context.NOTIFICATION_SERVICE) as NotificationManager
            manager.createNotificationChannel(channel)
        }
    }

    override fun onCreate() {
        super.onCreate()

        createNotificationChannel()

        UploadServiceConfig.initialize(
            context = this,
            defaultNotificationChannel = notificationChannelID,
            debug = BuildConfig.DEBUG
        )
    }
}
Don't forget to register it in the manifest (otherwise it won't work):
<application
    android:name=".App"
    ...
    >
and the first step is over, let's make an upload!
This is a basic four step tutorial, covering only the most basic features of the library. Sources are available here: https://github.com/gotev/android-upload-service/tree/master/examples/SimpleMultipartUpload
To make an upload you need a server. In this example we'll use the free Post Test Server (https://ptsv2.com/).
- Open https://ptsv2.com/ in your browser and click on
New Random Toilet - Right click on the POST Url and copy link address. You will get something like:
https://ptsv2.com/t/irntp-1234567890/post - Keep your browser open, we'll return back to it later
In this example we'll use a simple Activity with a button, which when tapped will show the system file picker. Once you choose a file, it will be uploaded. I'll skip the xml layout part to keep it short.
class MainActivity : AppCompatActivity() {
    override fun onCreate(savedInstanceState: Bundle?) {
        super.onCreate(savedInstanceState)
        setContentView(R.layout.activity_main)

        findViewById<Button>(R.id.uploadButton).setOnClickListener {

        }
    }
}To pick a file we'll use the system file picker, which needs a little bit of boilerplate. You can, of course, pick the files to upload in the most suitable way for your scenario.
class MainActivity : AppCompatActivity() {

    companion object {
        // Every intent for result needs a unique ID in your app.
        // Choose the number which is good for you, here I'll use a random one.
        const val pickFileRequestCode = 42
    }

    override fun onCreate(savedInstanceState: Bundle?) {
        super.onCreate(savedInstanceState)
        setContentView(R.layout.activity_main)

        findViewById<Button>(R.id.uploadButton).setOnClickListener {
            pickFile()
        }
    }

    // Pick a file with a content provider
    fun pickFile() {
        val intent = Intent(Intent.ACTION_OPEN_DOCUMENT).apply {
            // Filter to only show results that can be "opened", such as files
            addCategory(Intent.CATEGORY_OPENABLE)
            // search for all documents available via installed storage providers
            type = "*/*"
            // obtain permission to read and persistable permission
            flags = (Intent.FLAG_GRANT_READ_URI_PERMISSION or Intent.FLAG_GRANT_PERSISTABLE_URI_PERMISSION)
        }
        startActivityForResult(intent, pickFileRequestCode)
    }

    override fun onActivityResult(requestCode: Int, resultCode: Int, data: Intent?) {
        // The ACTION_OPEN_DOCUMENT intent was sent with the request code
        // READ_REQUEST_CODE. If the request code seen here doesn't match, it's the
        // response to some other intent, and the code below shouldn't run at all.
        if (requestCode == pickFileRequestCode && resultCode == Activity.RESULT_OK) {
            data?.let {
                onFilePicked(it.data.toString())
            }
        } else {
            super.onActivityResult(requestCode, resultCode, data)
        }
    }

    fun onFilePicked(filePath: String) {
        // Here we'll invoke the actual upload with Upload Service
    }
}To make the actual upload this is what we need:
fun onFilePicked(filePath: String) {
    MultipartUploadRequest(this, serverUrl = "The POST Url you got in the first step")
        .setMethod("POST")
        .addFileToUpload(
            filePath = filePath,
            parameterName = "myFile"
        ).startUpload()
}Run the application, hit on the button, select the file to upload and enjoy! The upload will run even if you abandon the activity, the device is idle, a phone call comes in or you switch to another app.
In my case, running the demo on an Android 10 Pixel 2, this is what I see:

Get back to your browser and refresh the page. You should see that the upload arrived to its destination:
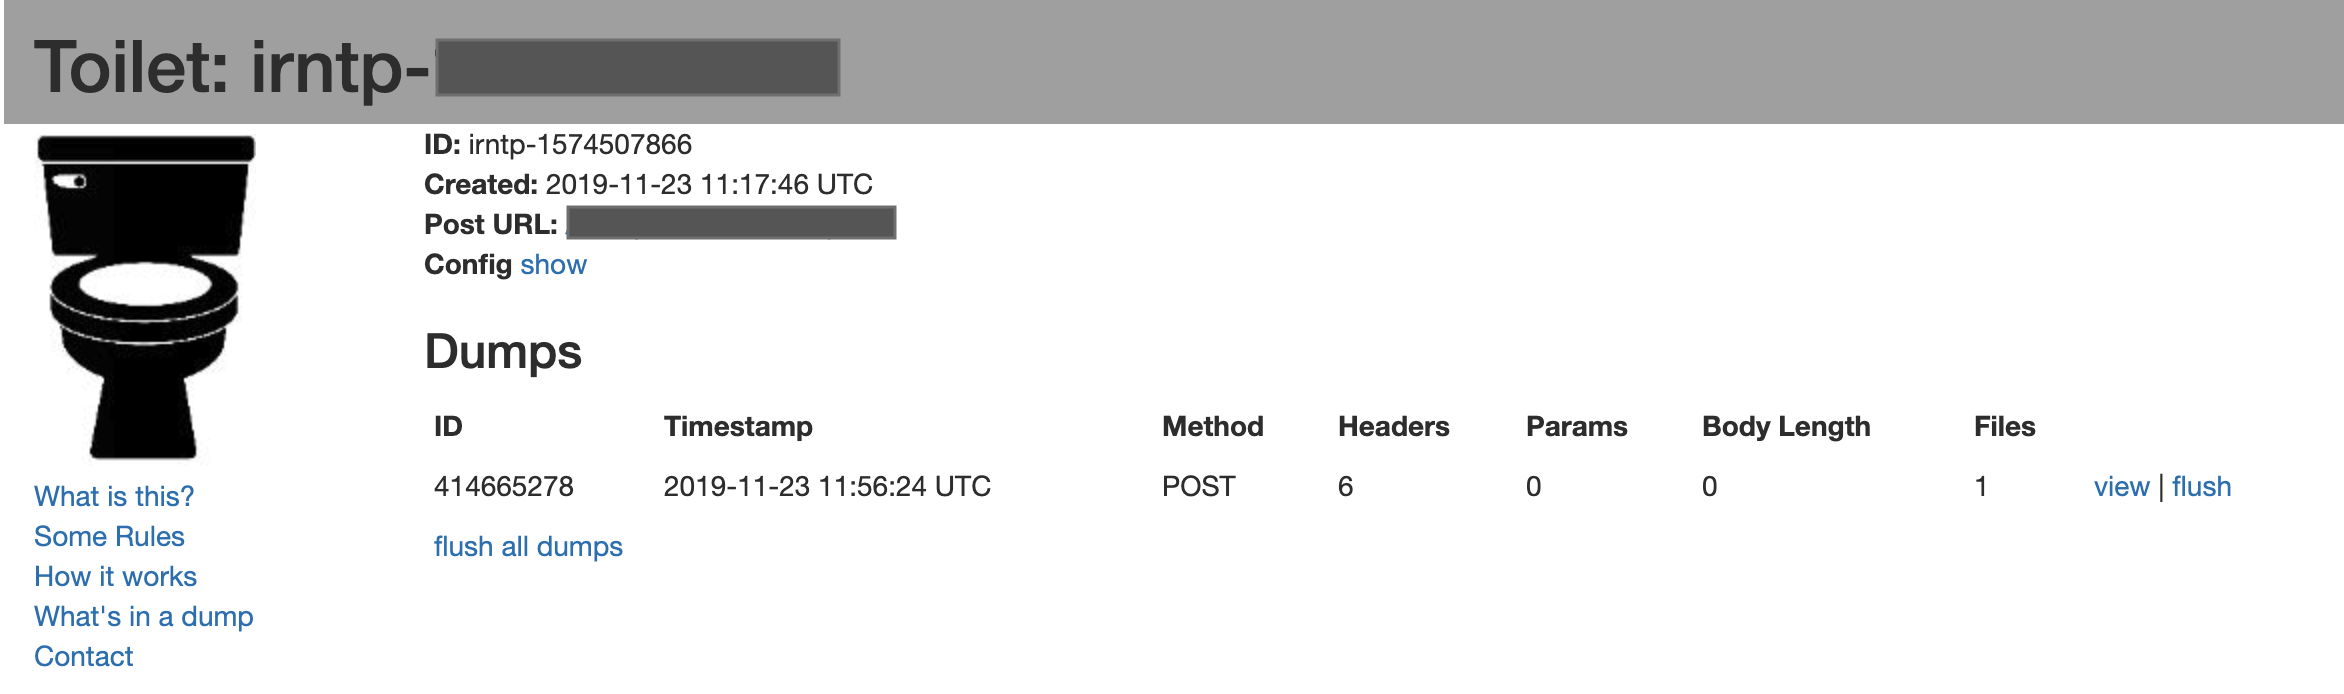
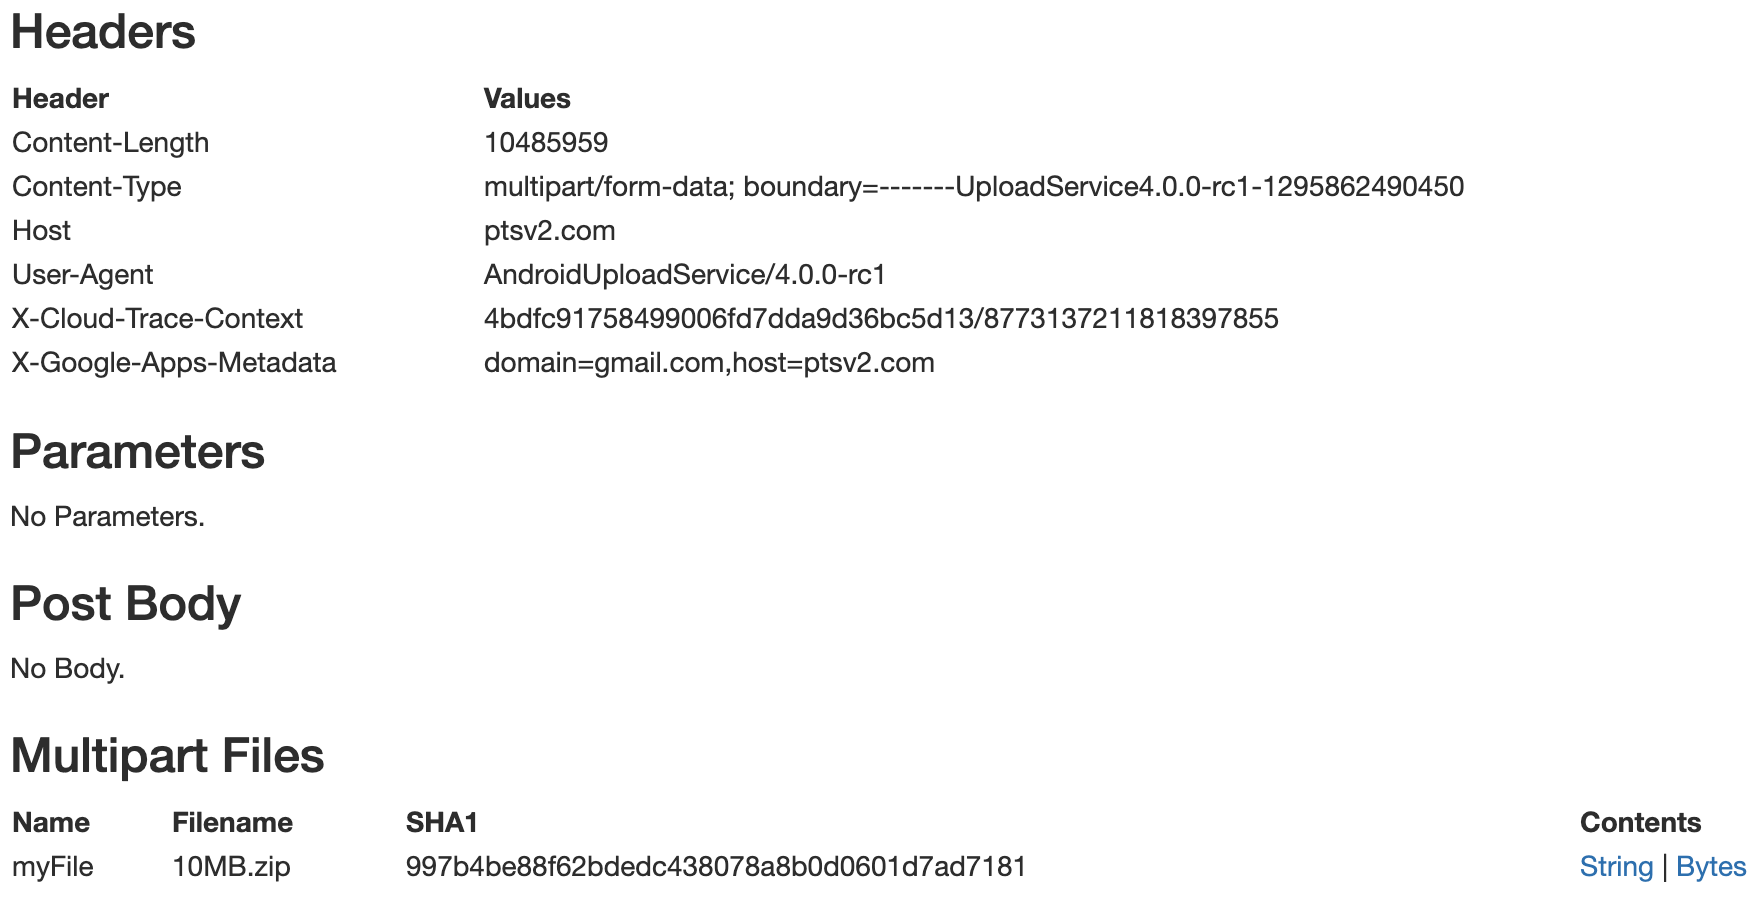
By clicking on view you can see also upload details.
Be aware that PTSv2 is a public service accessible by anyone, so don't upload personal, sensitive or copyrighted materials! Also, when you finish your testing, remember to click on flush all dumps. Read PTS rules to be a good citizen.
That's it for the basic example! You have a working upload now, but almost surely you want to tune in settings, customize the notifications, add upload headers, parameters and so on. For that, check the menu on the right.