EVSE 2 by rbeebe - gorawen/open_evse GitHub Wiki
Introduction
I have another page describing building an OpenEVSE for my Ford C-MAX Energi. I recently leased a Smart ED (Electric Drive) and needed a place to plug it in. Since the first OpenEVSE was fun to put together and less expensive than the commercial EVSE's I decided to buy and build another one.
Since this is my second build I felt more comfortable with the process so I opted for an OpenEVSE kit. I'm glad that Chris is now selling the kit with all the ancillary parts to save hunting for them. And I ordered the same 25 foot Leviton cable and J1772 plug. I had a Hammond waterproof box to put it in but before I finished it the OpenEVSE Custom Enclosure became available so I ordered that. The charge station combo kit I list now includes the enclosure and all the other parts you need. That would have saved me some money and some time.
High Voltage Schematic
http://open-evse.googlecode.com/files/EVSEwAdvanced_Power_supply.pdf
Parts List
| Total | | $509.73 | |:------|:|:--------|
Notes:
- The total is approximate. I haven't added in some tax and shipping.
Collect the parts
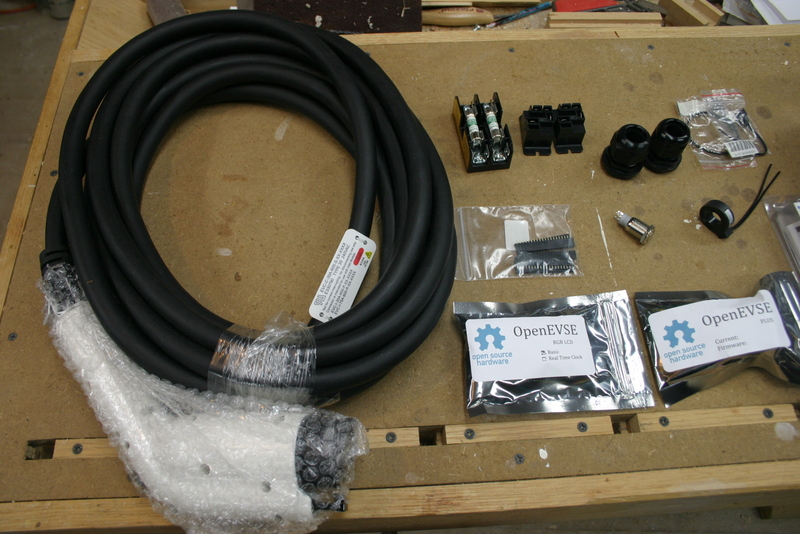
The first step was gathering all the materials. A Leviton 30-amp charge cable is on the left. Most of the rest of the parts are from the OpenEVSE kit. A fuse holder with fuses, two 30-amp relays, gland nuts, current sensor, the OpenEVSE RGB LCD display and the OpenEVSE kit. On the upper right is a 2 piece power connector from Adafruit. The plans call for soldering the current sensor to the pins on the OpenEVSE but they wires aren't long enough and I wanted to make it removable. Next to the current sensor is an illuminated button from Adafruit.
Because Diversified Stage stopped making their OpenEVSE enclosure, Chris decided to source one for the OpenEVSE store. Since he did all the hard work I decided to buy one.

This is what comes with it. There's an optional seal kit if you're going to be mounting it outdoors.

Assemble the kit
I elected to get the quickbuild kit which did mean some soldering. It's pretty easy, however, and all the difficult parts are already soldered on the board. Here's what the kit looks like.

All the parts mount nicely on the back panel of the enclosure. It's made of white plastic and has all the holes pre-drilled. I used different stand-offs to mount the OpenEVSE itself so I had to modify the holes slightly. Otherwise it's plug and play.

The box is considerably smaller than the Diversified Stage one I used before. That makes it nice mounted on the wall but it's a little tight getting all the big fat wires in there. A little patience and they do fit, however.

Here's the completed unit.
