02 Create an Azure IoT Central app - gloveboxes/AiPoweredPredictiveMaintenance GitHub Wiki
Azure IoT Central provides an easy way to connect, monitor, and manage your IoT assets at scale. Your Azure Sphere device can securely connect and communicate with cloud services. Azure Sphere includes built-in library support for Azure IoT Hub and Azure IoT Central. This walk-through uses Azure IoT Central because it's a fast way to demonstrate the value of IoT. Take a moment to read Your IoT journey: simplified and secure with Azure IoT Central and Azure Sphere.
-
Open the IoT Central web portal by selecting this link Azure IoT Central.
-
Select Build a solution.
-
log in with your Microsoft personal, work, or school account. If you don't have a Microsoft account, then you can create one for free by using the Create one! link.
-
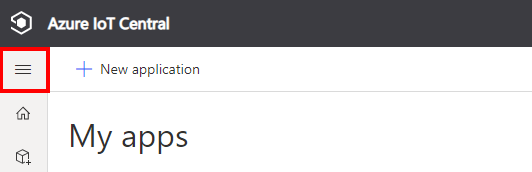
Expand the sidebar menu by selecting the Menu icon.
-
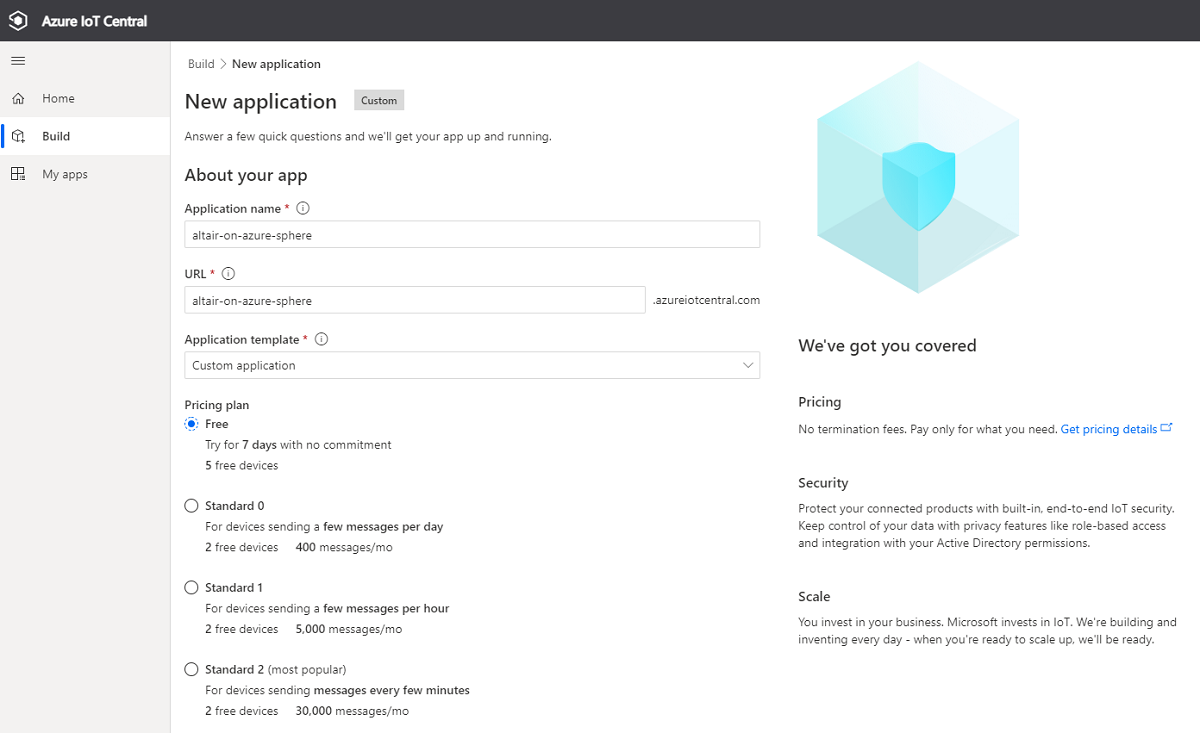
Navigate to Build, select Custom app, then select Create app.
-
Specify the Application name and URL.
-
Select the Free pricing plan. You can migrate to a standard plan with two free devices after seven days.
-
Select Create.
Once your IoT Central application has been created, you must enable trust between your Azure Sphere tenant and your Azure IoT Central application. Trust is enabled by sharing your Azure Sphere tenant Certificate Authority certificate with your IoT Central application.
When trust is enabled, any device claimed into your trusted Azure Sphere tenant will be enrolled when it first connects to IoT Central.
Follow these steps to enable trust.
-
Open a command prompt.
-
Log in to your Azure Sphere tenant. From the command prompt, run:
azsphere login -
Make a note of the current folder. You'll need the name of this folder in the next step.
-
Download the Azure Sphere tenant certificate authority (CA) certificate. From the command prompt, run:
azsphere ca-certificate download --destination CAcertificate.cer
-
From the IoT Central web portal, select the hamburger button on the top-left corner of the screen to expand the sidebar menu.
-
Select Permissions, then Device connection groups.
-
Select + New.
-
Name the enrollment group Azure Sphere.
-
Leave group type set to IoT devices.
-
Select Certificates (X.509) from the Attestation type dropdown.
-
Select Save.
-
Select + Manage primary.
-
Select the folder icon next to the Primary box and navigate to the folder where you downloaded the certificate. If you don't see the .cer file in the list, set the view filter to All files (*). Select the certificate and then select the gear icon next to the Primary box.
-
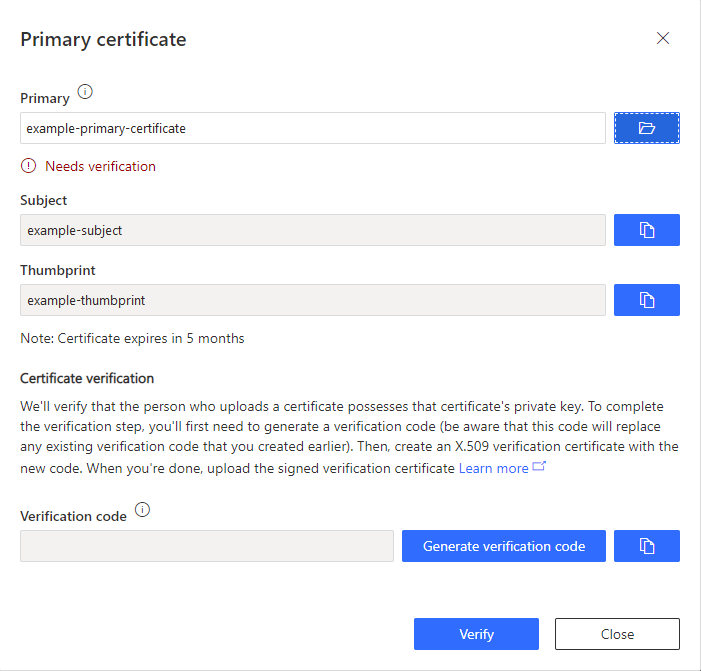
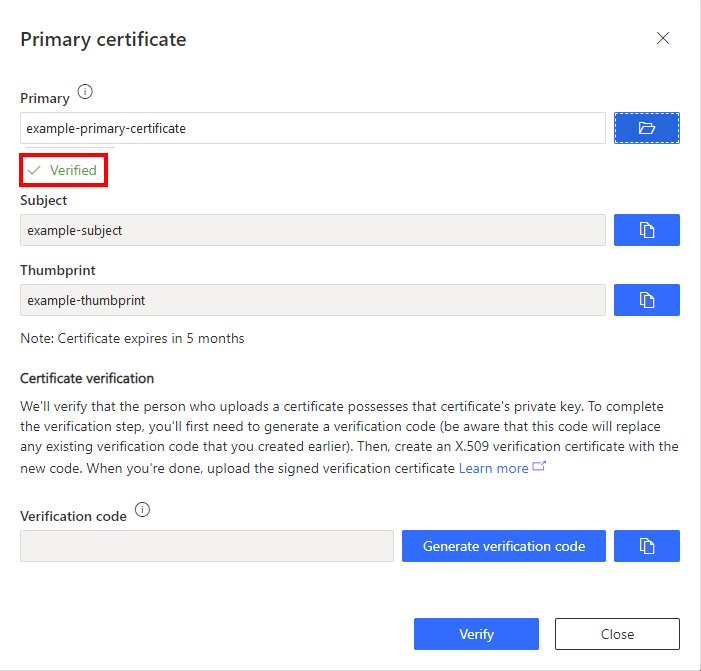
The Primary Certificate dialog box appears. The Subject and Thumbprint fields contain information about the current Azure Sphere tenant and primary root certificate.
-
Select the Generate verification code.
-
Copy the verification code to the clipboard.
-
Download a validation certificate that proves you own the Azure Sphere tenant CA certificate. Replace <code> in the command with the verification code you copied to the clipboard. From a command prompt, run:
azsphere ca-certificate download-proof --destination ValidationCertification.cer --verification-code <code>The Azure Sphere Security Service signs the validation certificate with the verification code to prove that you own the Certificate Authority (CA).
-
Return to Azure IoT Central and select Verify.
-
When prompted, select the validation certificate that you generated in the previous step. When the verification process is complete, the Primary Certificate dialog box displays the Verified message.
-
Select Close to dismiss the box.
-
Select Save.
Azure Sphere applications are secure by default, including hardware and network endpoints. You must declare your IoT Central network endpoints, otherwise, your Azure Sphere application will not be able to connect to IoT Central.
Follow these steps to list the network endpoints of your IoT Central application.
-
Open a command prompt.
-
Clone the Azure Sphere samples as you will need the ShowIoTCentralConfig tool.
git clone https://github.com/Azure/azure-sphere-samples.git -
Navigate to the azure-sphere-samples folder.
- On Windows, navigate to the Samples\AzureIoT\Tools\win-x64 folder.
- On Linux, navigate to the Samples/AzureIoT/Tools/linux-x64 folder. On Linux, you may need to explicitly set execution permissions for the ShowIoTCentralConfig tool. From a terminal, run
chmod +x ShowIoTCentralConfigto add execution permissions for the tool.
-
When you run the ShowIoTCentralConfig tool, you'll be prompted for the following information:
Prompt Response Are you using a legacy (2018) IoT Central application (Y/N) Respond N. IoT Central App URL The IoT Central URL can be found in your browser address bar. For example, https://apps.azureiotcentral.com API token The API token can be generated from your Azure IoT Central application. In the Azure IoT Central application, select Administration, select API Tokens, select Generate Token, provide a name for the token (for example, "AzureSphere"), select Administrator as the role, and select Generate. Copy the token to the clipboard. The token starts with SharedAccessSignature. ID Scope In the Azure IoT Central application, select Administration > Device Connection and then copy the ID Scope. -
Run the ShowIoTCentralConfig tool and follow the prompts.
Note, your organization might require consent for the ShowIoTCentralConfig tool to access your Azure IoT Central data in the same way that the Azure API requires such consent.
-
Copy the output from the ShowIoTCentralConfig tool to your preferred text editor as you will need the information to configure the predictive maintenance app.
"CmdArgs": [ "--ScopeID", "0ne0099999D" ],
"Capabilities": {
   "AllowedConnections": [ "global.azure-devices-provisioning.net", "iotc-9999bc-3305-99ba-885e-6573fc4cf701.azure-devices.net", "iotc-789999fa-8306-4994-b70a-399c46501044.azure-devices.net", "iotc-7a099966-a8c1-4f33-b803-bf29998713787.azure-devices.net", "iotc-97299997-05ab-4988-8142-e299995acdb7.azure-devices.net", "iotc-d099995-7fec-460c-b717-e99999bf4551.azure-devices.net", "iotc-789999dd-3bf5-49d7-9e12-f6999991df8c.azure-devices.net", "iotc-29999917-7344-49e4-9344-5e0cc9999d9b.azure-devices.net", "iotc-99999e59-df2a-41d8-bacd-ebb9999143ab.azure-devices.net", "iotc-c0a9999b-d256-4aaf-aa06-e90e999902b3.azure-devices.net", "iotc-f9199991-ceb1-4f38-9f1c-13199992570e.azure-devices.net" ],
   "DeviceAuthentication": "--- YOUR AZURE SPHERE TENANT ID---",
}