Basic Nodes - gemell1/ComfyUI_GMIC GitHub Wiki
First, we'll start with the requirements. You'll want to make sure you have everything installed, as mentioned in the Quickstart section. Then, you'll open your ComfyUI and load the workflow.

You'll see two types of nodes:
- The G'MIC Cli node is for advanced users. It has a box where you can type commands to make your image look however you want.
- The G'MIC-Qt node is recommended for beginners. When you use this one, a new window will pop up, and you'll be able to use a more user-friendly interface to change your image.
There are also some options on the Qt node, which are there just in case you need them. They don't do anything right now, but they might be useful later on: a reapply_first option that lets you apply the same filter to multiple images in a row, and a layers option that lets you add multiple images as layers to work on.
Let's talk about a simple task you can do with the node. This is a great way to understand how it works.
- Start by loading an image through a Load Image node. This is required for the G'MIC-Qt node, but not for the G'MIC Cli node, as you will see later.
- Next, we'll set a G'MIC-Qt node. Connect the Load Image node to the G'MIC-Qt node.
- Connect the output of the G'MIC-Qt node to a Preview Image node.
If you run the generation, it will stop and open a window called "G'MIC-Qt." This window is a user-friendly interface to change your image. Scroll down to the Artistic category and choose Bokeh as your filter. Once you see the image transform in the Preview box, hit the OK button. The processed image then will appear in your ComfyUI, through the Preview Image node.
Note
The "G'MIC-Qt" interface has an Apply button. This will apply the effect without sending the result back to ComfyUI. This is useful if you want to keep experimenting with different filters on the same image.
This is similar to the last one, but this time we're applying the effect twice.
-
Insert a G'MIC-Cli node between the G'MIC-Qt node and the Preview Image node.
-
Similar to the previous workflow, but before hitting the OK button, press the Copy Command button in the upper right corner of the parameter.
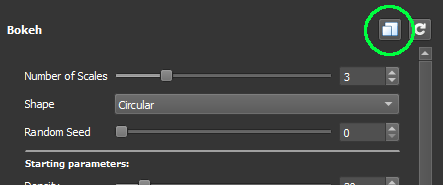
-
Paste the command in the Cli node command box.
If everything goes well, the process should run smoothly, and you'll see the effect rendered twice. This is just for demonstration and to help you learn.
The first command you learned is fx_. It's used for artistic effects on an image.
Note
Remember that you can add multiple Qt and Cli nodes in multiple passes. Every processed image will output its processed result until it reaches its final destination output. This is useful for more advanced image manipulations.
A bit like the Basic FX one, but loads a batch of 4 images. It will be processed, one by one, by the nodes in the workflow, and allows you to process multiple images in a chain.
Note
There's a less spaghetti way to do image processing chaining. G'MIC has a powerful language for scripting and creating custom commands tailored to your needs.
Previous section shows while the G'MIC-Qt node is great for beginners, it has limitations. To access more features, you need a raw method like the Cli node.
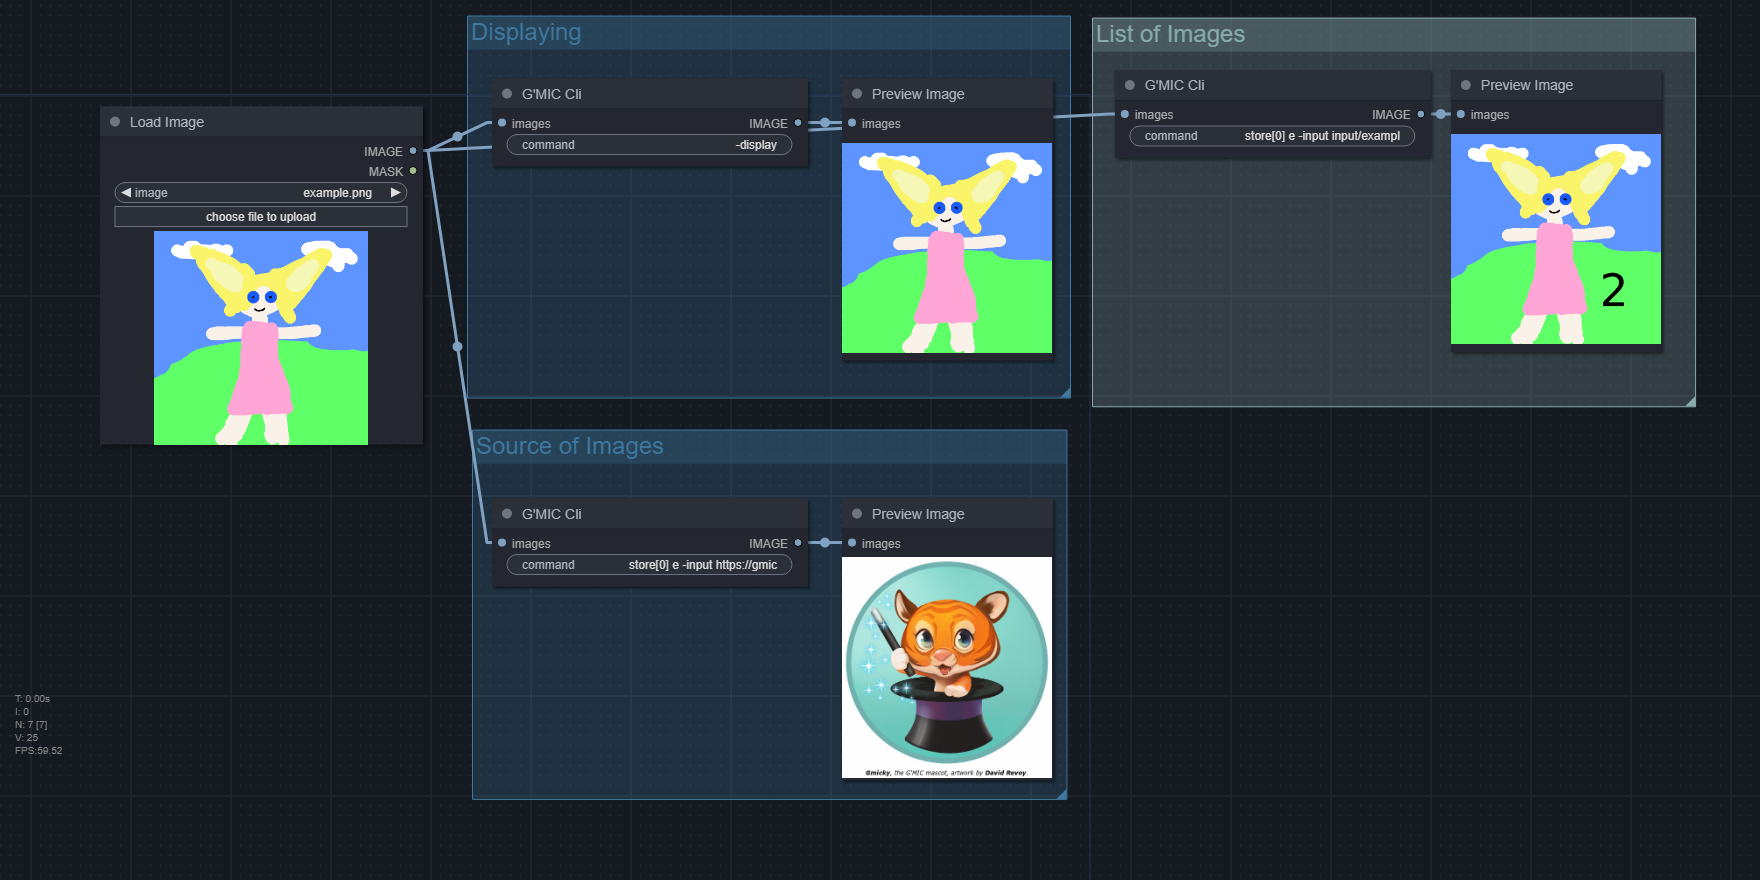
Let's talk about what happening under the hood from a simple connection between the nodes. First, an image from a Load Image node is sent to a G'MIC Cli node. Then G'MIC Cli node processes the command supplied, in this case, -display. The processed image is then displayed in its dedicated window. After that, the processed image is sent again to a Preview Image node.
Pipeline:
- Load the image (loadImage node)
- Display the image (G'MIC Cli node)
- Preview the processed image (previewImage node)
-display Displays the image in dedicated G'MIC window.
Note
In the Display window, use '1-0' key to Zoom. Drag the wheel mouse button to move the image. Use 'c' to reposition the image and 'n' to toogle normalization.
Now here’s the thing. The image in the Load Image and Preview Image nodes work as "placeholders", as they require an image to be present. Really understanding this concept will provide a clear understanding of the pipeline flow.
Pipeline:
- Load the required image (loadImage)
- Display the image (G'MIC Cli)
- Preview the required processed image (previewImage)
In fact, you can use the -input command to add more images, but you have to follow specific rule. You need one input image and one output image, and both must be single image. If you don't follow these rules, you'll get an error. The reason for this is the way, by design, ComfyUi has structured its image functions.
So we will temporarily hide the required image with a -store command.
New pipeline:
- Load required image (loadImage)
- Remove required image (G'MIC Cli)
- Add new image (G'MIC Cli)
- Display the image (G'MIC Cli)
- Preview required processed image (previewImage)
With G'MIC command:
-store[0] e -input input/example.png -display
-store Remove the input from image list
-input Add new input
Or lets try the following step to help you understand which image is which. We'll use a command to draw on the new image.
Pipeline:
- ... remove req (G'MIC Cli..)
- Add new image
- Draw text on new image
- Display the processed image
- Save the processed image to disk
- Preview req (previewImage)
In the command:
-store[0] e -input input/example.png text 2,72%,62%,25% -display -output input/example2.png
This command not only display the new image with text but also saves it to your input directory.
-text Draw a colored text string on the image
-output Save the image to a specified location
Now refresh ComfyUI and look at the Load Image file list. You should see a new image called "example2.png". Or simpler:
-store[0] e -input input/example2.png -display
That's it! We're removing the first image, adding a new image directly from the G'MIC Cli node, and the result goes to the Preview Image node.
G'MIC can load images in many ways. Here are the three main ways:
- Path of image or URL:
-
input/example.pngImage file in ComfyUI input directory -
https://gmic.eu/img/sample_gmicky.pngImage file from G'MIC website
-
- Image dimension:
-
512,512,1,3A black 512x512 image
-
- Image data:
-
(255^255^255)A white 1x1 pixel image
-
G'MIC can also accept other types of input, and it's good to know about all the options that might be helpful for your specific needs.
Note
You might be also interested to what Images are.
G'MIC has a language to organize your processing steps. This "pipeline" is similar to the ComfyUI nodes system. You create your workflows by piping commands, or nodes just like in ComfyUI, but it's all text-based.
For example, let's say we have our "Basic FX" command:
fx_bokeh 3,8,0,30,8,4,0.3,0.2,210,210,80,160,0.7,30,20,20,1,2,170,130,20,110,0.15,0,50,50
and our "List of Images" commands:
-store[0] e -input input/example.png text 2,72%,62%,25% -display -output input/example2.png
Now, we can combine these commands to create a new pipeline:
-store[0] e -input input/example.png text 2,72%,62%,25% fx_bokeh 3,8,0,30,8,4,0.3,0.2,210,210,80,160,0.7,30,20,20,1,2,170,130,20,110,0.15,0,50,50` -display -output input/example3.png
The image will be processed, displayed, and saved to your ComfyUI input directory.
Note
You can find many G'MIC commands to use for specific image processing tasks, and you can organize them in pipelines.
So far so good, but this long line of custom command might look untidy, so let's find a way to make it more elegant.
Now you know how to create long line of custom commands together. It's called Riffs, by the way, in official tutorial terms. For maintainability, we then create a G'MIC file (.gmic) by writing Riffs to it. This file is basically a text file, so you can edit it in your favorite notepad or text editor. Let’s make one.
# Teh basic_bokeh_combined script for ComfyUI-GMIC custom nodes

bbc:
    # remove required image (G'MIC Cli)
    -store[0] e

    # add new image
    -input input/example.png

    # label the image
    -name. img

    # draw text on new image
    text[img] 2,72%,62%,25%

    # add artistic effect
    fx_bokeh[img] 3,8,0,30,8,4,0.3,0.2,210,210,80,160,0.7,30,20,20,1,2,170,130,20,110,0.15,0,50,50

    # display the processed image
    -display[img]

    # save the processed image to disk as native G'MIC image
    -output[img] output/example.gmz
Save this Riffs as "bbc.gmic" to your ComfyUI input directory, and then simply call it from G'MIC Cli node:
command input/bbc.gmic bbc
The final saved image will be in the .gmz format, which is a native G'MIC image file that retains the complete image data, allowing you to open it flawlessly anytime you want.
-name Apply a label/collection to the image
command Import custom commands
Note
It's beneficial to have more than one custom command in a .gmic file, especially when you have a long and complex image processing technique. This way, you can easily reuse your custom commands and organize your image processing workflows.
We've been gathering some shortcuts to make your image exploration more efficient, And before you go, we're thrilled that you've used ComfyUI-GMIC custom node and hope your image-processing journey has been an adventure. Bon Voyage!
Warning
For the sake of brevity, the -store[0] e command (for removing req image) is not written.
-
Resize image
r 512,512 -
Crop image half center (percentage cordinate)
-crop 25%,25%,75%,75%,0 -
A/B compare two images
-input input/example.png -input output/example.gmz -display -store[0,1] ee -input $ee append[0,1] x -
Make tiles from images in folder
input_glob input append_tiles 3,3 -
Generate a reproducible plasma fractal
512,512,1,3 -srand -1 plasma normalize 0,255 -
Create montage from image splited by single color
-input input/example.png split_colors 0,3,8 montage X -
Otsu threshold on forced gray mode image
-input input/example.png to_gray otsu 6 mul. 255 negate print -
Dilate mask created by interactively croping interactively-thresholding forced-gray-mode image :O
-input input/example.png x_crop to_gray negate x_threshold negate dilate 9 negate normalize 0,255