Deployment - fuseumass/dashboard GitHub Wiki
If you've made it this far congratulations. You're just a few steps away from being able to have thousands of people access your instance of dashboard! This page is going to start off with only instructions. If you're following along just keep reading. If you are an advanced user and want to use a non-standard configuration please scroll down to the appendix section of this page. There we'll explain alternative deployment solutions that you can use.
We use heroku to host our application. You should start by making an account at heroku.com. Once you've logged in, click the new button in the top right hand corner. In the dropdown select the app option. Call this whatever you'd like. Something like yourhackathonname-dashboard will do fine.
Once you've created the app. You should download and install the heroku command line interface. Run heroku login from your terminal to log into the cli.
At this point you can navigate to the dashboard directory in your terminal and run our handy deployment script. Run deploy.sh and then provide your app name (yourhackathonname-dashboard). The first time you run the script it'll warn you that the heroku git remote doens't exist. Type y to allow the script to create a new git remote for heroku. Then type y again when asked if you want to migrate the production database and y again for the feature flags.
The y options only need to be passed in the first time you run this script. Subsequently you can just type n for the remote, migration, and feature flags. The only time you may need to re-run the migration is if you update dashboard. We will document in the release notes if a migration is required.
Now you should be able to navigate to yourhackathonname-dashboard.herokuapp.com and view the dashboard login page. At this point you can create an account and log in. You'll be an attendee so let's make you an admin.
Open a terminal and run:
heroku run -a yourhackathonname-dashboard bashrails c-
User.allthis should print a list of all the users, find your account and look for theid -
u = User.find(1)Or whatever your user ID was in the previous line u.user_type = "admin"u.save()
Refresh the page. You should be an admin now!
In order to change the domain to which this points to, you must configure an SSL. Follow the instructions under SSL in settings under the heroku app, and either manually or automatically generate a security certificate (preferred). We suggest hosting your website through Clouldflare, which assists manual SSL set up.
If you want to collect resumes from your participants you'll need a place to store them. This is what Azure is for. In addition Azure will store images that your participants upload as a part of their mentorship requests or project submissions. Much like AWS you'll recieve a 12 month free trial when you first sign up for an account.
After creating an account at https://azure.microsoft.com/, please open the portal.
Click the green + sign in the top left hand corner to "Create a new resource". You should be greeted with a screen like the one below.
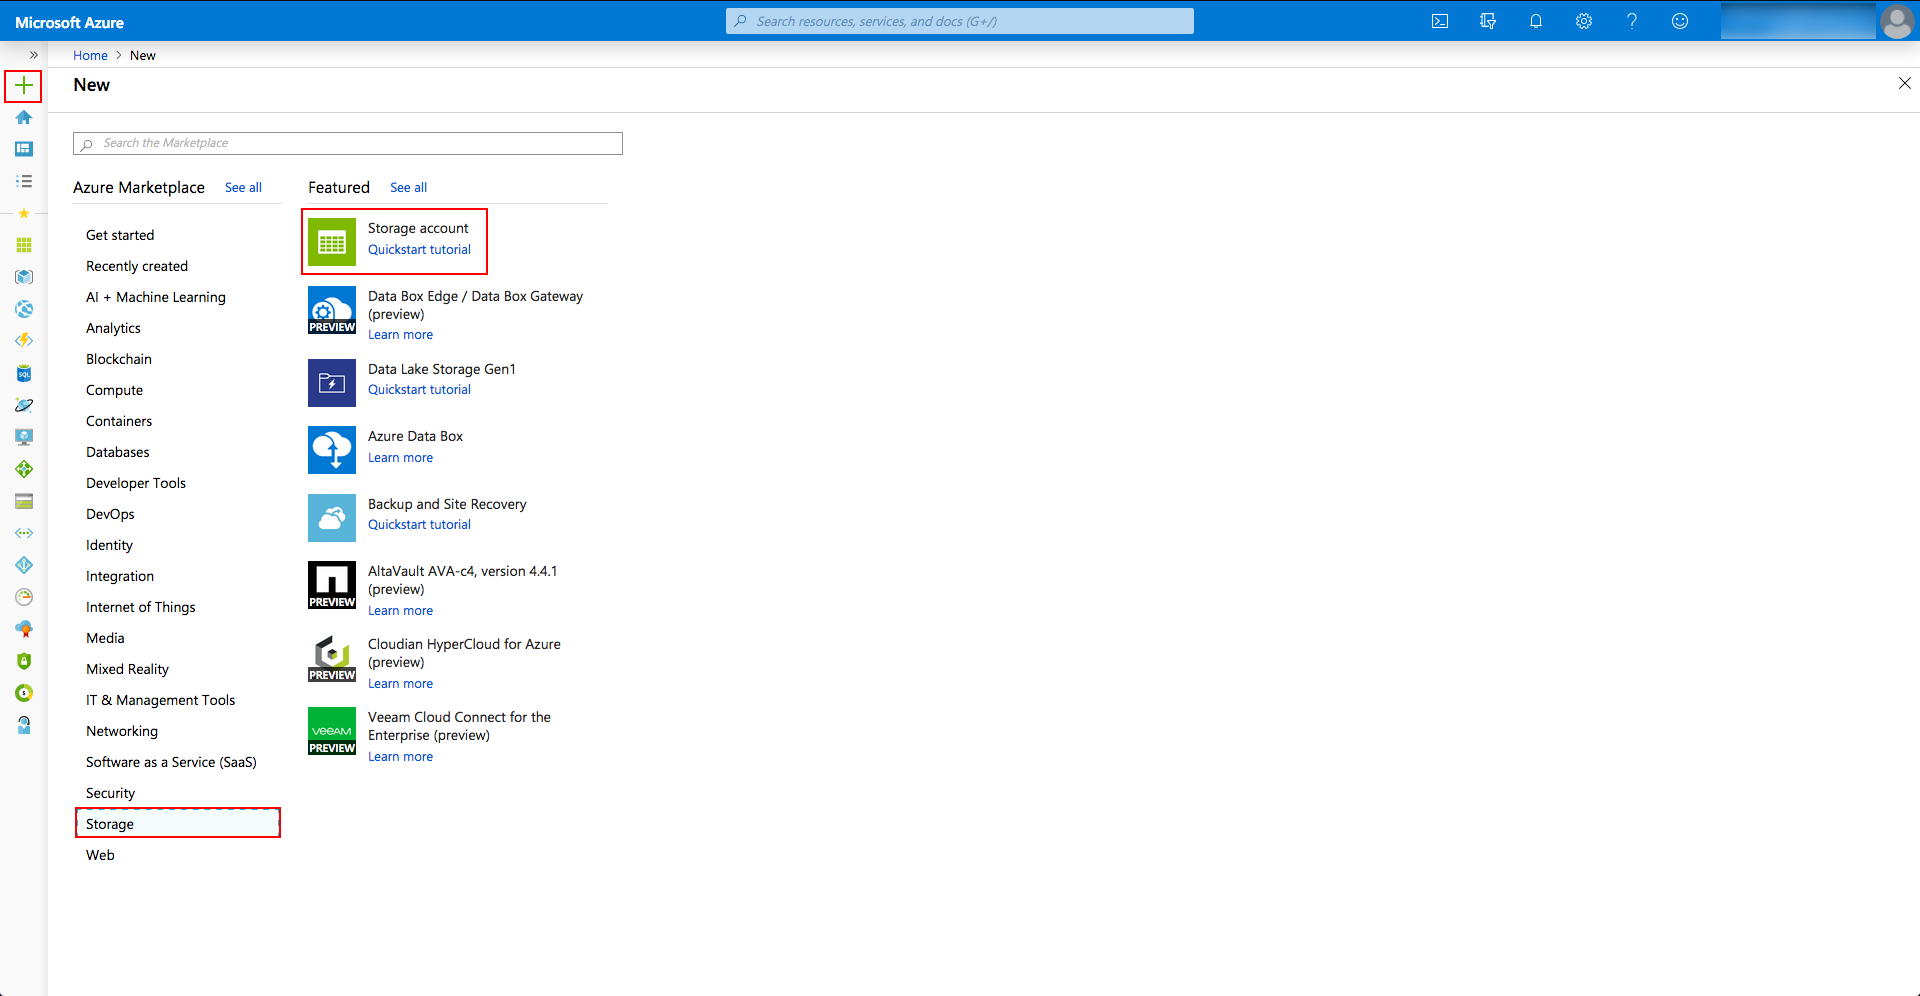
Choose 'storage' and then 'storage account'. Then create a new resource group (just name it after your hackathon), and also fill in the storage account name (again, I'd just use your hackathon name).
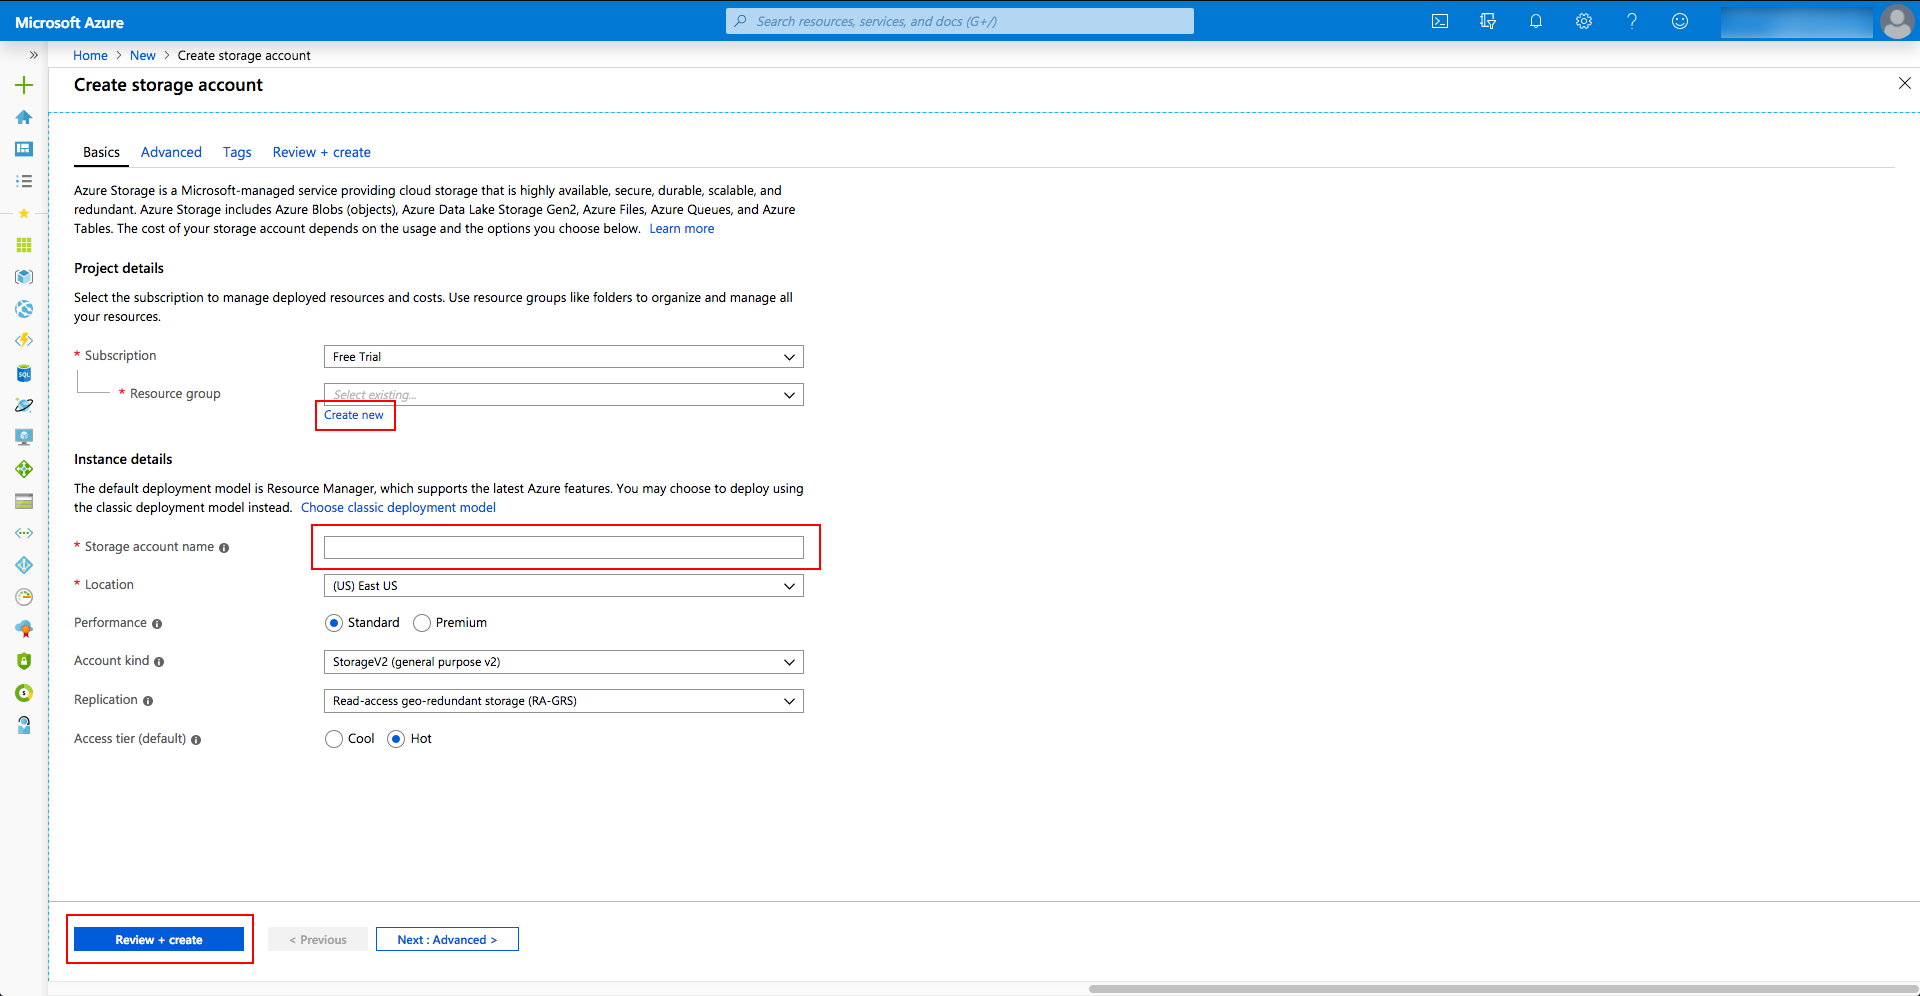
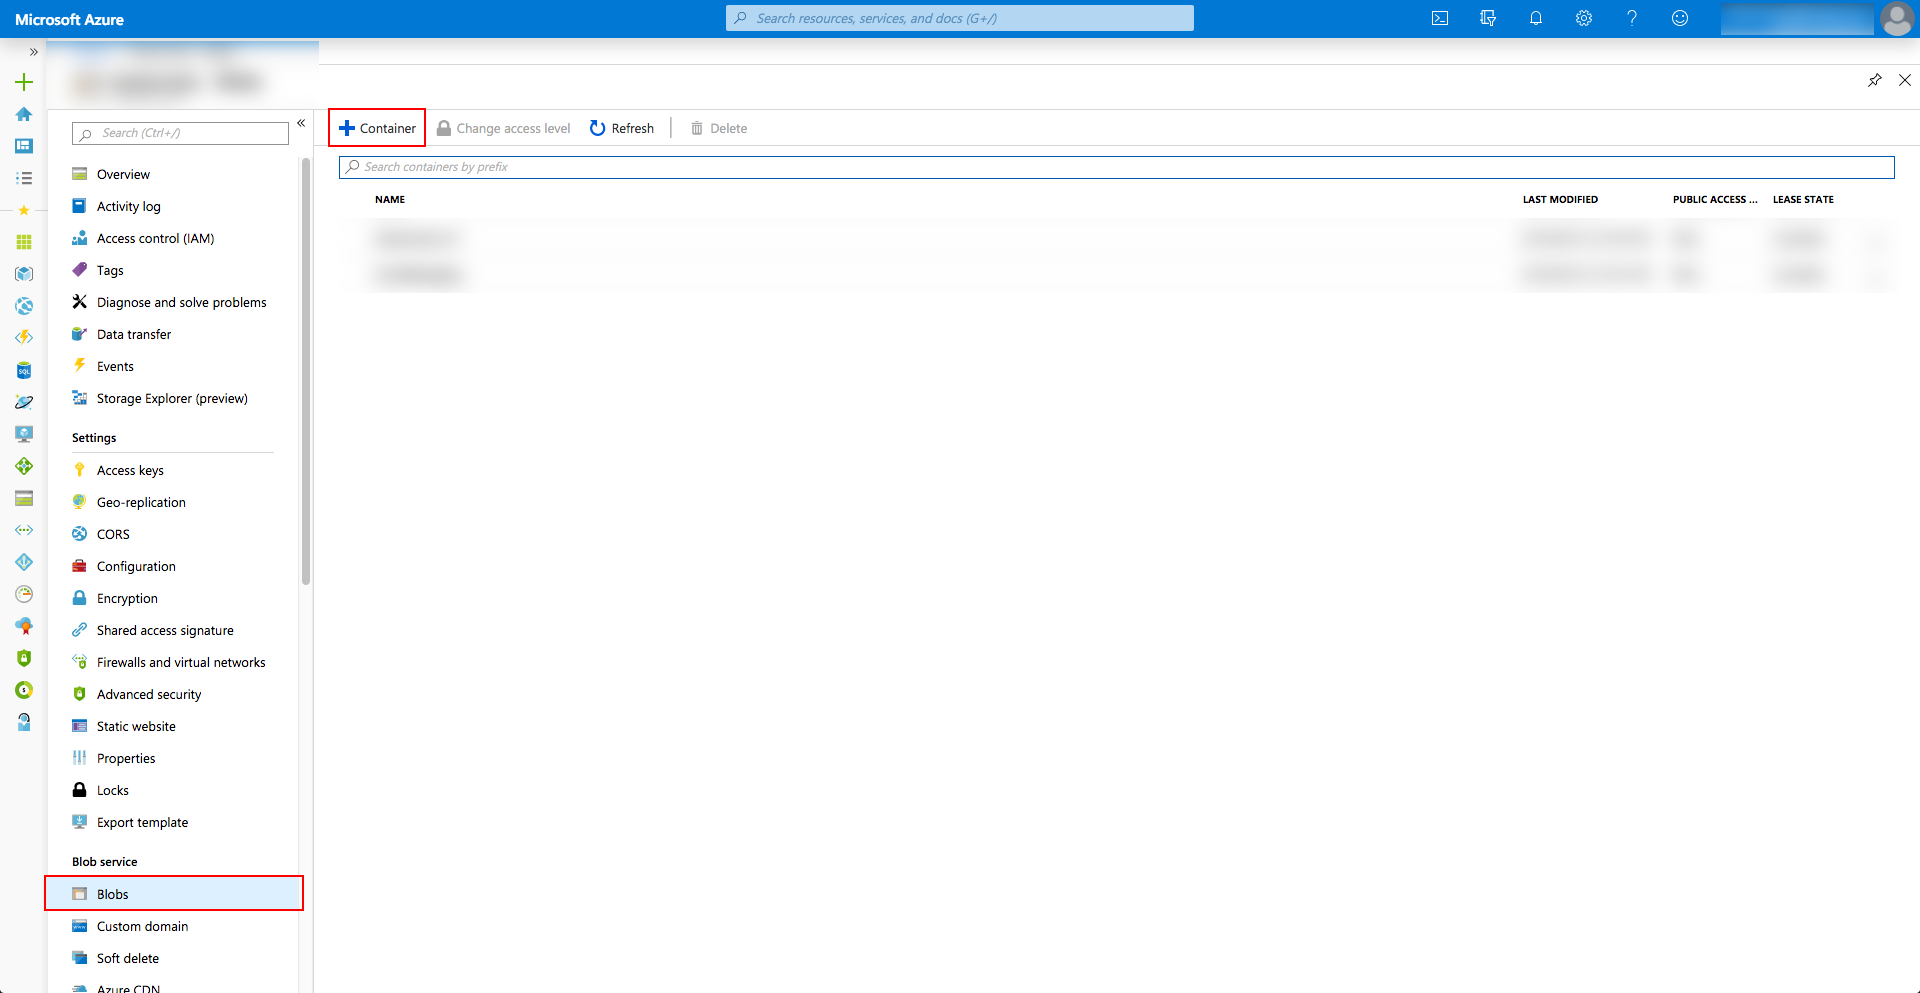
Click 'review + create' to make your storage account. Once it's created, go to the home page and click on your storage account. You'll want to click on the 'blobs' service (or search for it) in the column on the right hand side. Then you need to make a new container. Name it whatever you want, and set the access level to blob.
Once you've created your container. You will need to copy the secret key into heroku. The same way you did for SES. Navigate to the 'access keys' menu to find your keys. You only need 1 of the 2 on the page.
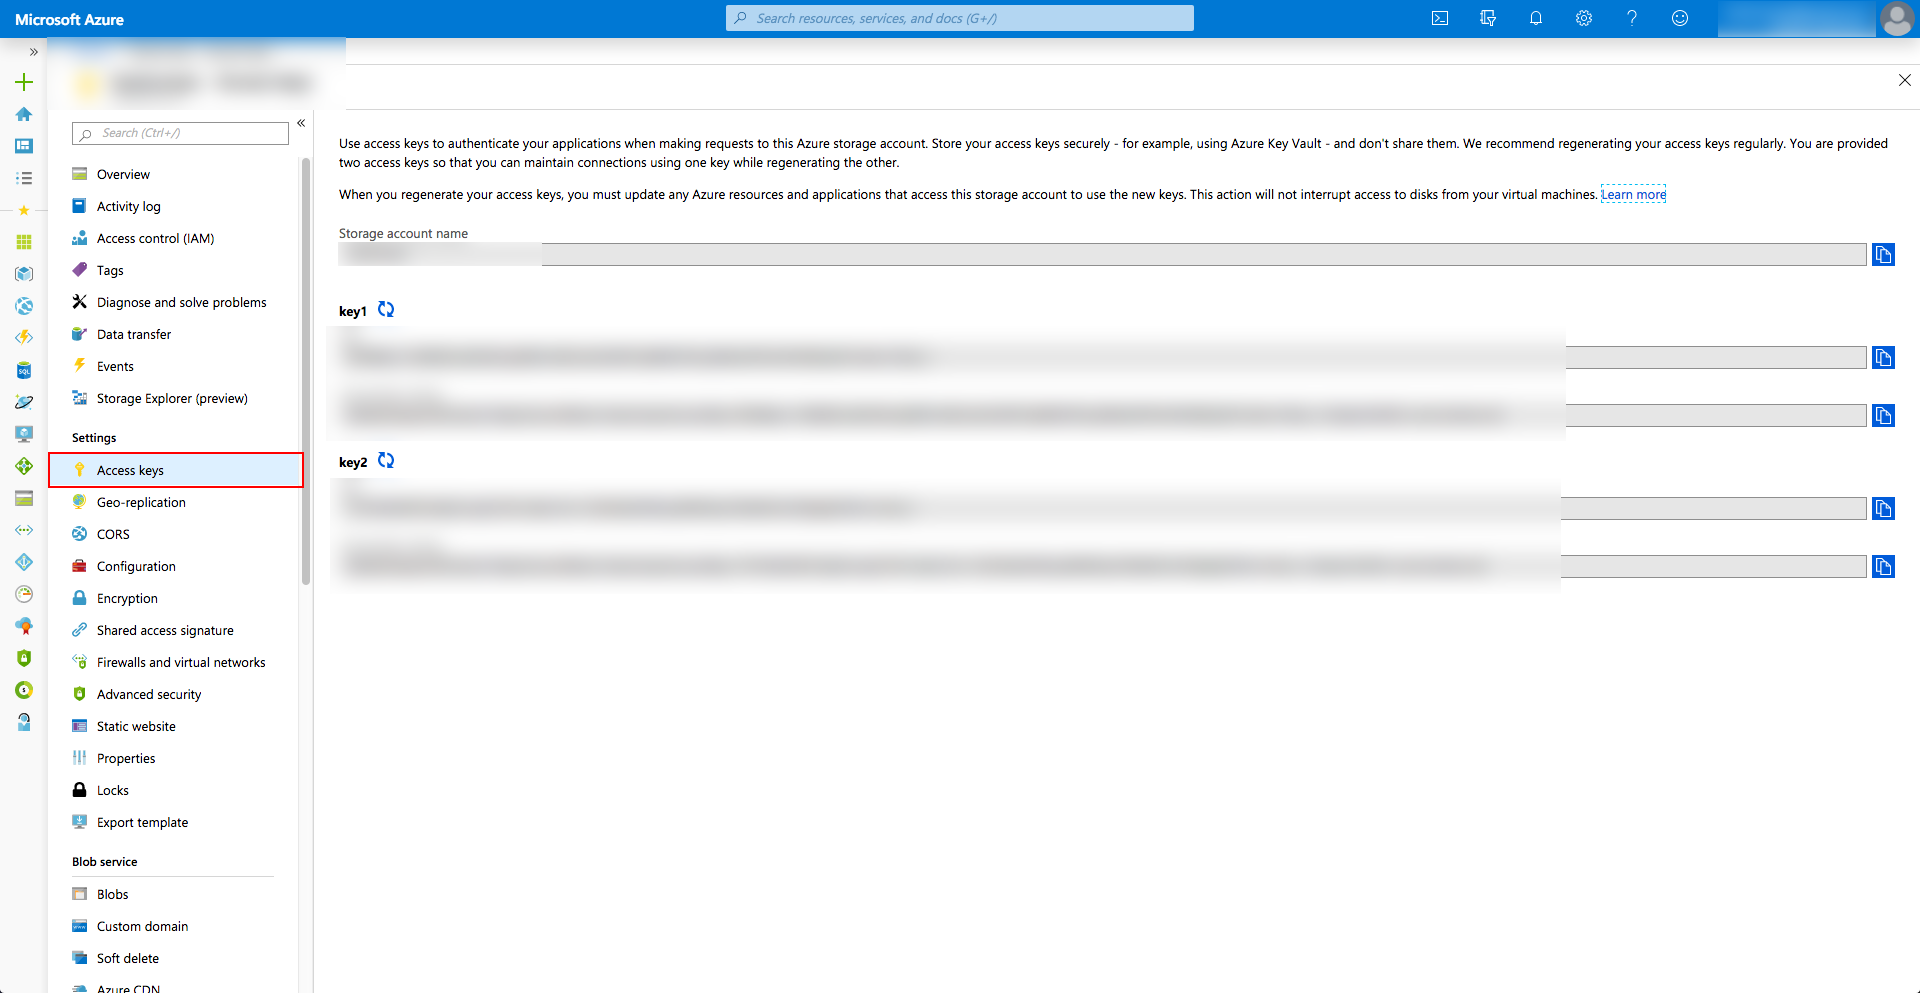
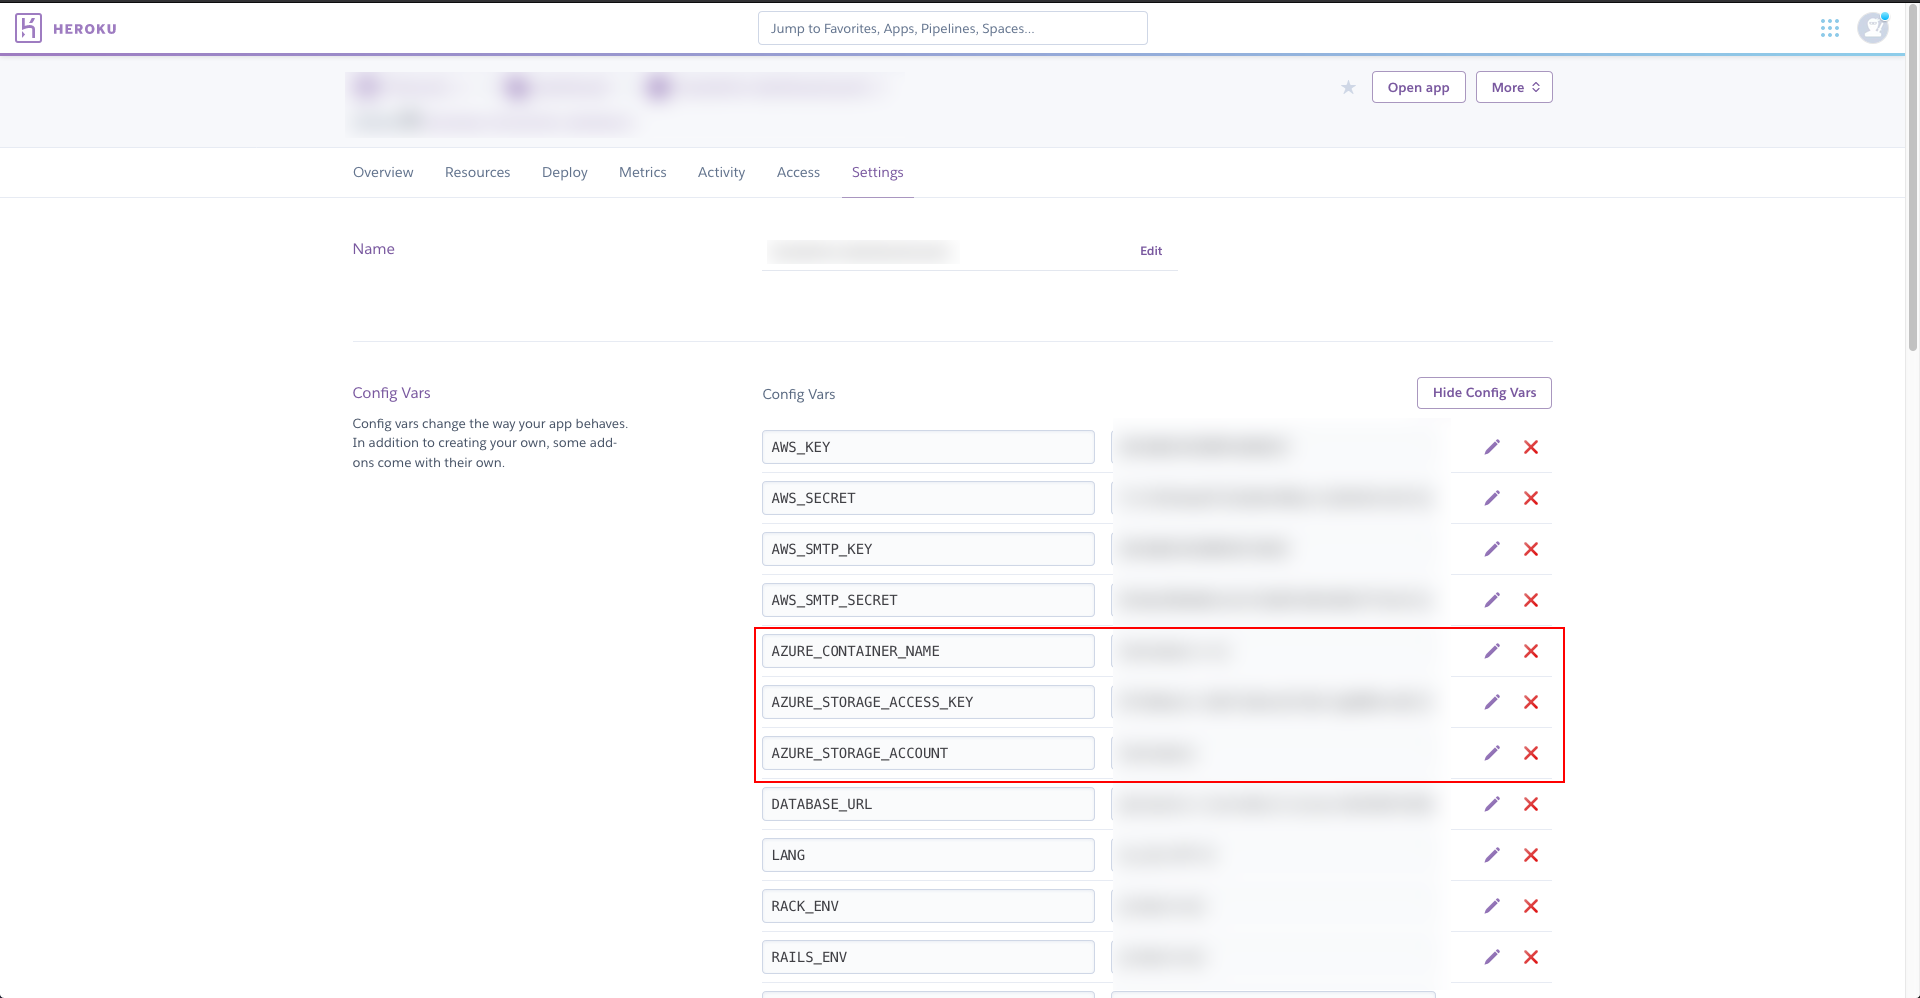
Next go to heroku and fill out the following config vars: AZURE_CONTAINER_NAME, AZURE_STORAGE_ACCESS_KEY and AZURE_STORAGE_ACCOUNT.
Now you should be able to upload files to dashboard. Enable the event application, create a participant account and give the application a try! You should see the files show up in the Azure container from where you can download them.
For information on setting up the Slack integration, please see: https://github.com/fuseumass/dashboard/wiki/Slack-Integration-Setup
All told you shouldn't be paying very much for hosting all of this stuff. Here's a breakdown of the pricing for what we've configured above.
| Service | Price |
|---|---|
| Heroku | $7/month |
| Azure | $0.0208 per GB |
All told, you should be paying no more than $8-10 dollars a month. If you leave your heroku app on the paid plan all year round, you'll max out at around $120/year. You can lower these costs even more by switching your heroku app to the free plan during the off season (only using the paid plan from registration till after your event).
The heroku free plan works like this: Your app goes to sleep after 30 minutes of inactivity. If it's sleeping the first page load will take up to 1 minute to load. You have a total of 1000 hours of activity (uptime) per month for free. It makes sense to downgrade to this plan if you're in the offseason.
Amazon AWS Simple Email Service (DEPRECATED, SendGrid's Heroku add-on is now a better option because AWS SES won't allow us deliver emails anymore.)
Next we're going to set up an Amazon AWS account to use their Simple Email Service (SES). The reason we use SES over heroku's built in sendgrid addon is because the emails delivered by Amazon are signed and verfied in such a way that our emails don't go to spam.
When you make an AWS account for the first time you'll get a free 12 month trial that you can use. After this you'll have to pay per email you send but it shouldn't be too expensive. See the costs section for more details.
After signing up for an AWS account you should file a support ticket to increase your sending limit right away. This process can take up to 48 hours so we'd recommend doing it ASAP. Follow this link to get started.
Next you'll need to verify your email address. This is the important part! It's what makes sure your emails never get marked as spam! Follow this link and either verify your hackathons domain (for example yourhackathonname.com or just a single email address [email protected]). This is the address that you will need to set in donotreply setting of the configuration file. If you verify a domain, any address @ that domain will work.
Next you'll want to obtain your SMTP user and password. Follow the instructions here to do that.
Once you have the SMTP username and password. Go to your app page on heroku and click on the settings tab. You should be greeted with a view like this:
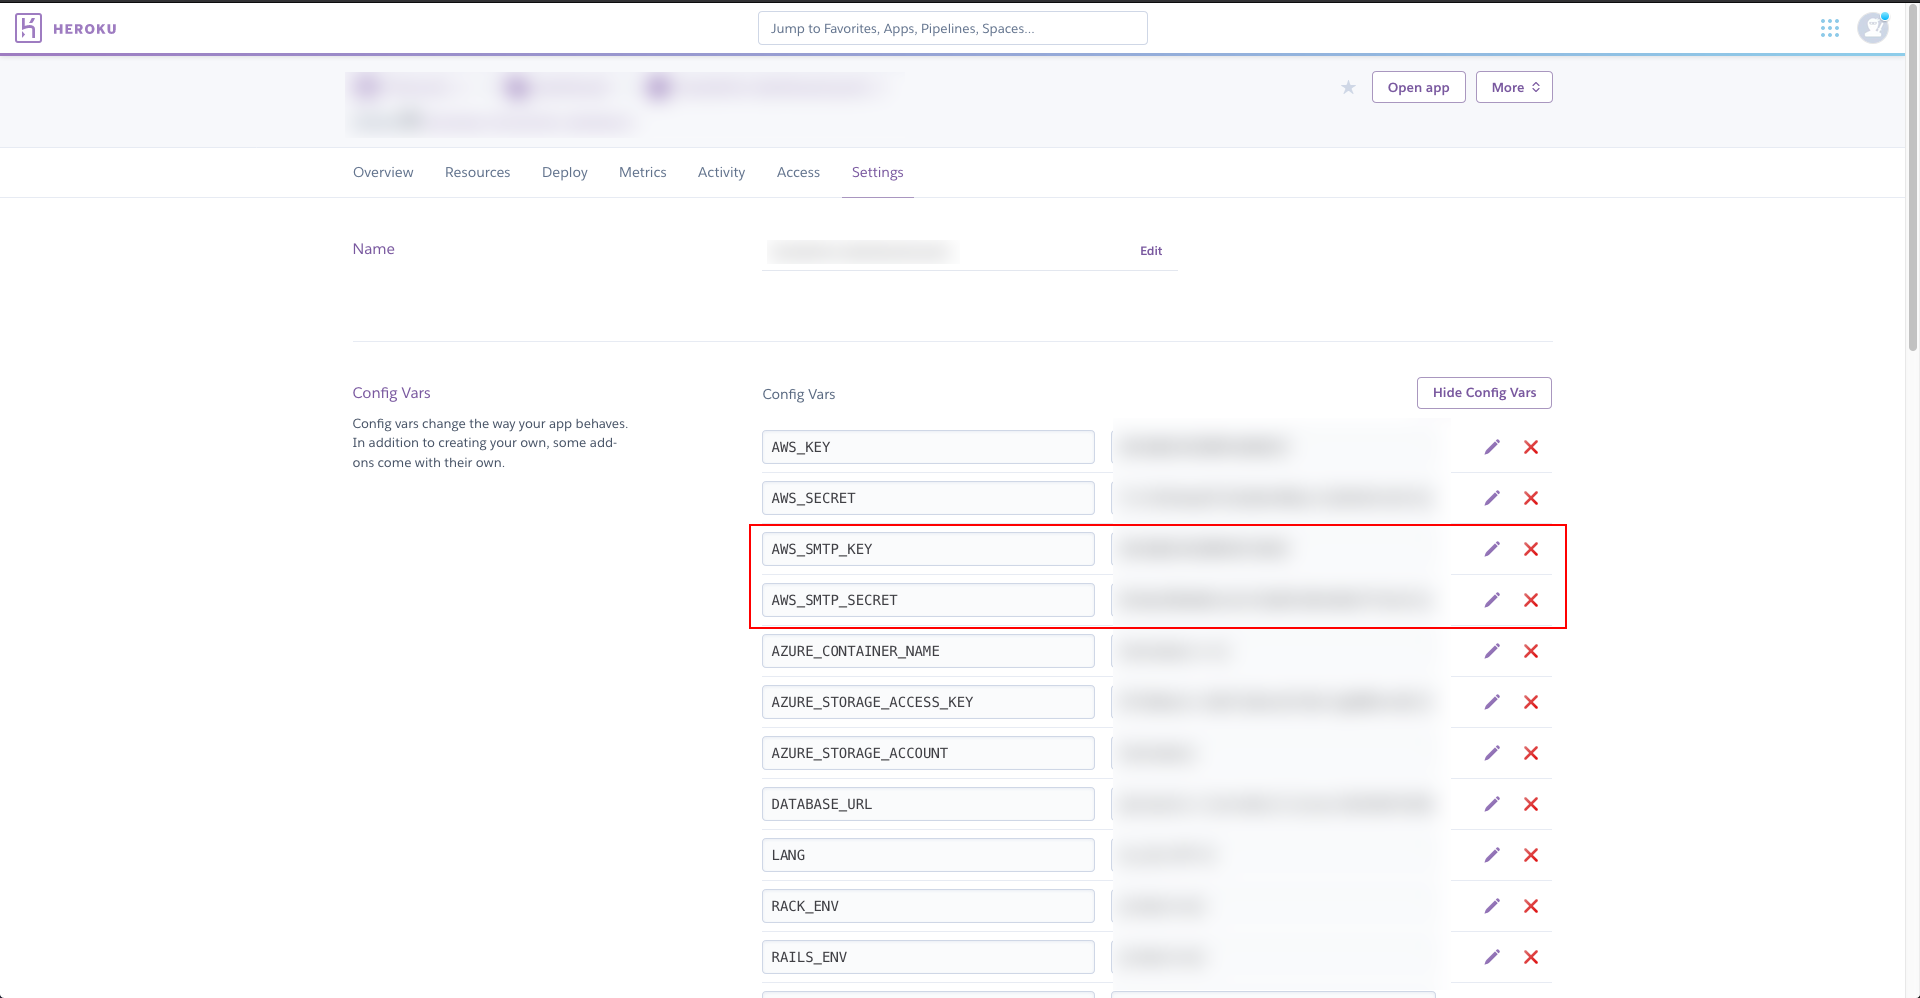
On this page, click reveal config vars and add the following vars. AWS_SMTP_KEY and AWS_SMTP_SECRET. This is your SMTP user and password respectively. Just paste the values into the second column of the heroku interface and click save. When you're done it should look like the screenshot above.
At this point, you can test out the email functionality by signing up for a new account. You should recieve an email with the copy you've specified in the config repo!
As an alternative to the Azure containers you can also use Amazon S3 buckets. This requires a lot more configuration steps so we don't currently recommend it, but it is an option.