OLD Requirement management tools - ftsrg-edu/swsv-labs GitHub Wiki
ProR
ProR is a tool for requirements engineering that supports the ReqIF 1.0.1 Standard natively. It is part of the Eclipse RMF project.
Getting ProR
The ProR editor application is called ReqIF Studio and it can be downloaded from the formalmind website. It is free, but a registration is required.
Using ProR
Creating a sample project with a RIF file
- After starting ReqIF Studio, a workspace folder has to be selected, where the projects will be stored. Select a location you prefer!
- Close the welcome screen!
- Create a new project by clicking File / New / Project... and selecting Project in the General folder. In the next step give the project a name, e.g., SampleProject and click Finish.
- Right-click on the project and select File / New / Reqif Model. Give the file a name, e.g., Sample.reqif.
- Inspect the file: a RIF file has some general information under Document Properties (Figure 1). Give the file a title!
- A RIF file also contains a number of so-called specifications, which are views on your data under Specifications. Initially, there is only one specification that is generated by default (named Requirements Document). Double-click to open the specification.
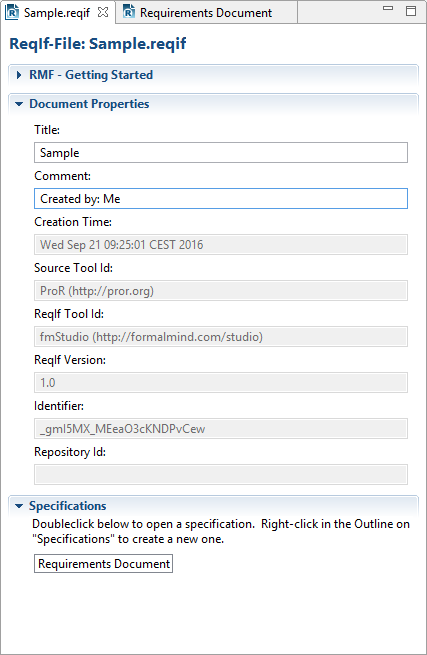
Figure 1: Main page of a RIF file.
Adding requirements
- Inspect the opened specification: in ProR, every line represents a requirement. There is already one requirement generated in the specification by default.
- A new requirement can be added by right-clicking on the first one and selecting New Sibling / SpecObject (Requirement Type). Double-click in the second line to edit the requirement. When a requirement is selected, pressing Ctrl + Enter adds a new requirement under the current one. Add some more requirements (at least 5)! Requirements can be rearranged by drag-and-drop.
- ProR also supports nested requirements by right-clicking a requirement and selecting New Child / SpecObject (Requirement Type). You can see that it is nested by its number and also by its indentation. Add some nested requirements (at least 3)! Your specification should look similar to the one in Figure 2.
- Requirements can also be copied and pasted, but note that these are only references. Therefore, changing for example the description will affect all of the copies.
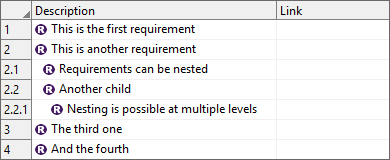
Figure 2: Adding some sample requirements.
Adding new attributes
- Currently, requirements only have a Description and a Link attribute (columns). Requirements usually also have an identifier (ID) so let's add an attribute for that. In order to add new attributes, select Studio / Datatype configuration in the menu. Expand SpecTypes and also Requirement Type (Spec Object) where you can see the Description attribute.
- Right-click on Description and select New Sibling / Attribute Definition String to add a new attribute with string type. In the bottom part of the window you can give the attribute a name: ID. Also select Editable to be true and Type to be String (Figure 3).
- The new attribute did not appear in the main window yet, but if you click on a requirement you can see the ID attribute in the Properties window at the bottom. Click Studio / Column Configuration in the menu and then add a new column with the label ID. Columns can also be rearranged by drag-and-drop. Give the requirements some ID (e.g., Figure 4).
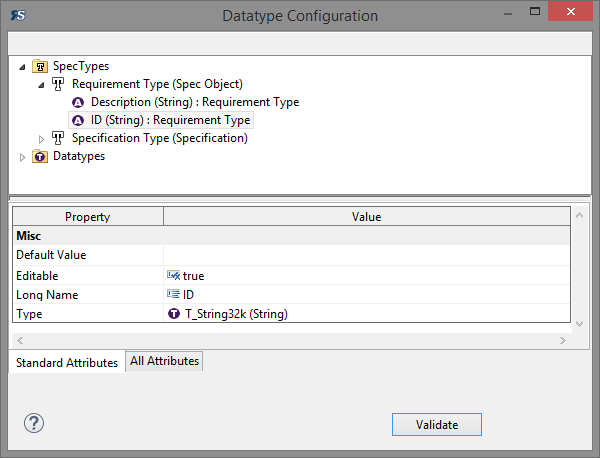
Figure 3: Datatype configuration.
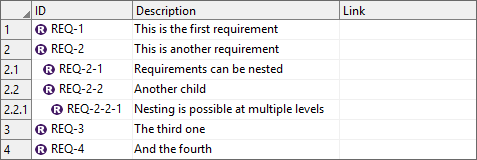
Figure 4: Adding the ID column.
Linking
- Requirements can be linked by holding down Ctrl + Shift while dragging one requirement on top of another. Link some requirements together! The Link column shows for each requirement the number of incoming (left side) and outgoing (right side) links.
- If you also want to see the requirements linked together, select Toggle all Links from the Studio menu.
- Now, the Description of the linked requirements can be seen. If you want to see a different attribute (for example ID), go back to the main file and go to General Configuration in the Studio menu. Currently there is a Default Label with Description. Double click on this line to edit. Add ID as a label (Figure 5). This way, ProR will use ID as a label if it is not empty, otherwise it will use Description (Figure 6).
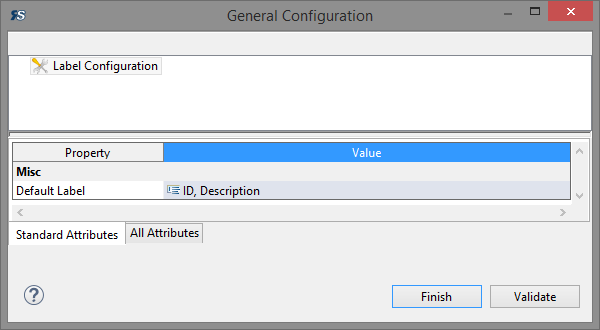
Figure 5: Label configuration.
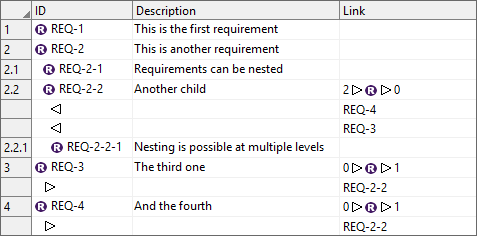
Figure 6: ID as label.
Check: create a screenshot of the main page of your RIF file and the requirements. The ID column and the link should also be visible. You should have at least 8 requirements with 3 of them nested.