robot bumper creation.html - frc971/website GitHub Wiki
This page is a set of tips for how to design bumpers for our FRC robots. Here is a photo album showing bumper fabrication from 2014-2016 seasons.
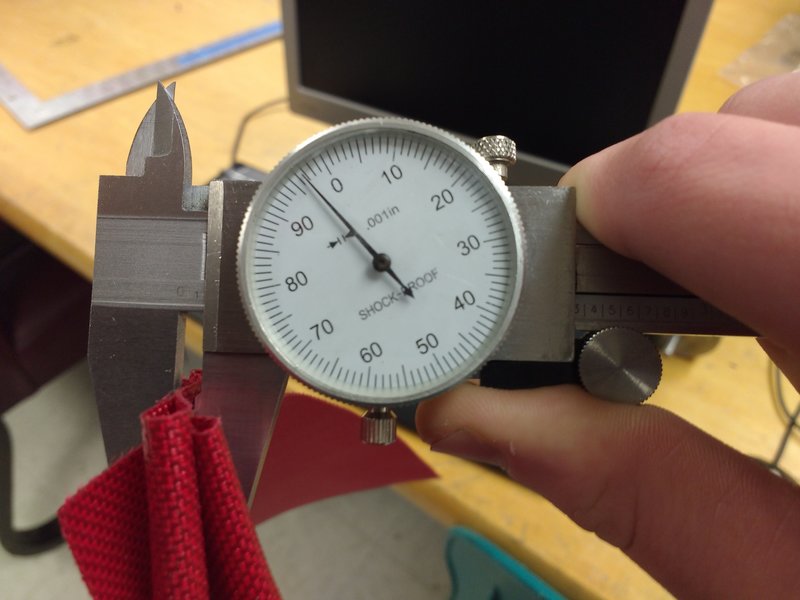
On the 2016 (Stronghold) Third Robot, we had an octagonal bumper design. We found that in the corners of the bumper, there would most likely be 5 layers of fabric coming together at maximum. We measured 5 layers of fabric to be about 0.090 inches thick. With 0.01 inches of buffer added in to make fitting the bumper on easier, we found that a reasonable distance from the robot side tubes to the wood in the bumpers is 0.1 inches.
5 Layers of bumper fabric is 0.095 inches thick.
Bahar provided pictures of this step in bumper assembly during the assembly of the 2016 Third Robot.
Here are some steps to putting the fabric on. We sew numbers on before putting on the robot.
Secure the noodles to the wooden bumpers by some acceptable method (the no tape year we tied them on and removed the string after putting the fabric on :P) Note on noodles and corners: It turns out that you can have the fabric wrap around the corners but you have to be careful not to run afoul of the noodle compression rules. You are not allowed to overly compress the noodles - I guess for competitive advantage? Anyway, when you get a nice tight fit for the fabric, it can cause the noodles to get a little squished at the corners. Depending on the inspector, they can give you a bad time. We are going to try putting a noodle in the corner in the future to try and rectify this. You could mitre the fabric in the corners but we're not a huge fan.
Sew the fabric pieces together. On years without a split base, we guess how tight to make them and then try them on the bumper. Someone would test the tightness and then if it wasn't tight enough, we'd make each of the seams a little bigger until we got the right fit. When it was where we liked it, We lay the seam down and top stitch it for added strength (as opposed to opening the seam). In 2017, we measured around the middle of the bumper with pool noodles over the tape and this seemed to give a nice tight fit the first time - no adjustment needed.
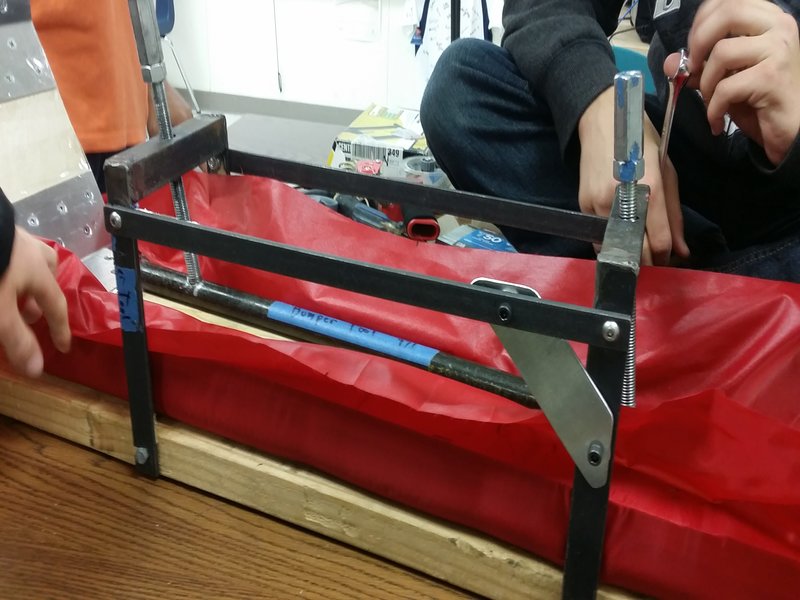
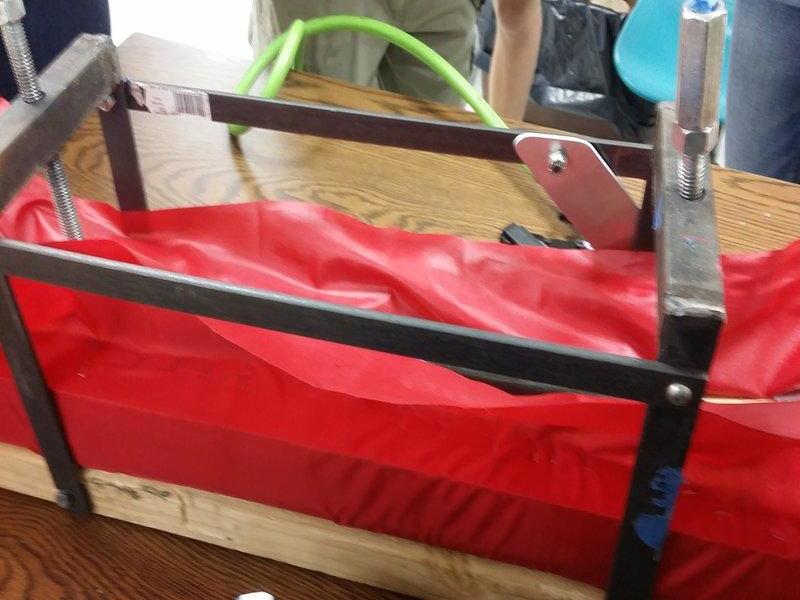
Once we got the fabric to the right size, we used the "bumper tool" for compression. There are pictures above and in the photo album linked to at the top of this page. The bumper tool just compresses the noodles enough so that we get a tight fit on the fabric. We then use a staple gun on the edges. The noodles don't actually end up compressed much at all. Before the tool, we used to have students stand on the bumpers while someone stapled the fabric. The bumper tool was made many years ago by a mentor and his daughter. You can use gaffer tape on the inside edges to make a smooth finish.
There are some style issues on making the bumper fabric look nice and getting the inside folds to lay flat that you can kind of see in the photos. #1 caveat, don't trim the fabric too close to the staples or it will fray - not that we know this from experience or anything - ;). Fix for that is Fray Check. Actually Fray Check is available at fabric stores and is useful to put around the edges of the numbers. #2 caveat, find students who care about how the bumpers look to work on this. It can go very badly otherwise. #3 caveat, if you make a one piece bumper, allow for the thickness of the fabric when you size the wood. The thickness is significant and can make it not fit. There are some guidelines above. It turns out that leaving tolerance for the fabric is a difficult concept and usually there is not enough spacing - especially when newer students get assigned to designing the bumpers (see #2 caveat) This is actually important even if the bumper is split. There is usually one dimension where it works best if sized properly.
You can see the corners get folded in carefully. If needed, some of the fabric can get cut out to make it lay flat. Not too much or there will be uncovered edges that can fray. We have had success with just cutting off the corner of the drive base to make room for the fabric. This is probably only feasible for tubestock drive bases.
We have cut numbers out of white canvas or other white fabrics, iron them on with fusing material and zigzag the edges. In 2017, we used blackout curtain fabric for the numbers and it seemed to work well. It doesn't fray. (note: turns out that blackout curtains are black tight weave fabric covered in white. Therefore when scratched, it doesn't look good)
There is stuff you can buy at Jo-Ann's (or a local fabric store) that is called fusible webbing or something like Heat'n Bond Lite Fusible Web. It is some stuff that you iron on that has paper on the back. It is usually used for appliques. This will iron on to any fabric and then you peel the backing off and it is a sticker. I buy the lighter stuff and use it mostly to hold the fabric in place until I use a sewing machine to zigzag the edges down. If you get the heavier bonding stuff, it is very hard to sew on - it gums up the needle. I have never tried just using the heavier fusing and not sewing. Because the bumper fabric can have a bit of a finish on it, I don't trust it to stick well enough without stitching.
The steps to make numbers are as follows
- Lay the numbers out in Inkscape or some other graphics program, outline only. After printing, we trace the number on to the fusing paper - they need to be backwards on the fusing paper.
- Cut them out and lay them on the fabric after peeling the paper off.
- Iron them onto the number fabric.
- Cut the numbers out.
- Align them on the bumper fabric - We usually cut 4 pieces that are a little bigger than they need to be and then put the numbers in the center of the piece. This seems to work well. Since the fabric we purchase comes in 60" widths, making the strips 15" wide allows us to get 4 strips per fabric. Two yards makes two sets of bumpers. It makes sense not to have seams on the corners because that will cause more fabric in the corners.