RMA Apps local development setup - fnrfarid/excel-rma GitHub Wiki
Prerequisites
Install these apps on your PC
- nest js
- Angular
- Node
- NVM
- Npm
- Docker-compose
- Mongo-v4.4.11
How to start RMA Server
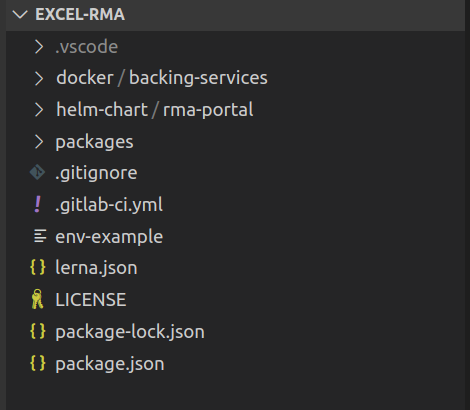
Let's get an understanding of the project and how things are structured.
Let's begin with cloning the project and open this in a text editor.
git clone https://gitlab.com/castlecraft/excel-rma
What is this?
RMA-Server
Excel-RMA is a project meant for warranty management and extending features of ERPNext
- Here we would work with the backend part.
- Lies in packages/rma-server
- A Rest-API server built with NestJS.
- Uses MongoDB as its database.
What do we need?
For rma-server to start we would need 2 things.
- Get a MongoDB container running.
- Create 2 users on mongo
- a user for rma-server to maintain a Database.
- a user for shared token-cache, so services can have a common cache.
Where to begin?
Start with creating a .env file on the root of the project and inside docker/backing_services. i.e. inside excel-rma/.env
Copy env-example as .env. Using this we will provide an environment to create our MongoDB container.
DB_USER=root
DB_PASSWORD=admin
DB_NAME=admin
MONGODB_ROOT_PASSWORD=admin
MONGODB_PASSWORD=admin
CACHE_DB_NAME=cache-db
CACHE_DB_USER=cache-db
CACHE_DB_PASSWORD=admin
SERVER_DB_NAME=rma-server
SERVER_DB_USER=rma-server
SERVER_DB_PASSWORD=admin
SITES=rma.example.com
[email protected]
MYSQL_ROOT_PASSWORD=admin
MARIADB_HOST=mariadb
VERSION=v12
Update Mongodb Version
nano docker/backing-services/docker-compose-mongo.yml
replace with following yml
version: '3'

services:
  fix-mongodb-permissions:
    image: busybox
    user: root
    command: chown -R 1001:1001 /bitnami
    volumes:
      - mongo-vol:/bitnami

  mongo:
    image: bitnami/mongodb:4.2.8
    restart: on-failure
    environment:
      - MONGODB_USERNAME=${DB_USER}
      - MONGODB_PASSWORD=${DB_PASSWORD}
      - MONGODB_DATABASE=${DB_NAME}
      - MONGODB_ROOT_PASSWORD=${MONGODB_ROOT_PASSWORD}
      - MONGODB_PRIMARY_ROOT_USER=root
      - CACHE_DB=${CACHE_DB_NAME}
      - CACHE_USER=${CACHE_DB_USER}
      - CACHE_DB_PASSWORD=${CACHE_DB_PASSWORD}
      - SERVER_DB=${SERVER_DB_NAME}
      - SERVER_USER=${SERVER_DB_USER}
      - SERVER_DB_PASSWORD=${SERVER_DB_PASSWORD}
    ports:
      - "27017:27017"
    volumes:
      - mongo-vol:/bitnami
      - ./files/docker-entrypoint-initdb.d:/docker-entrypoint-initdb.d
    depends_on:
      - fix-mongodb-permissions

volumes:
  mongo-vol:
Use this command to compose/start a container.
docker-compose -p excel-rma -f docker/backing-services/docker-compose-mongo.yml up -d
You should see something like following :
Creating network "excel-rma_default" with the default driver
Creating volume "excel-rma_mongo-vol" with default driver
Creating excel-rma_fix-mongodb-permissions_1 ... done
Creating excel-rma_mongo_1                   ... done
To check if MongoDB is running use
docker ps
let's test and login as root (environment that we gave in our last .env). this should log you into mongoDB.
mongo -u root --authenticationDatabase admin -p admin
run show dbs; and you must see something like this :
> show dbs
admin   0.000GB
config  0.000GB
local   0.000GB
Something went wrong?
Note. if you see errors flagging possible reason could be. invalid or miss placed .env file and where your running docker-compose command from try to debug.
worst case try to reset docker and try again. to clean up your docker.
docker stop $(docker ps -a -q)
docker system prune -f && docker volume prune -f
Now let's go to rma-server and try to run it.
1st we have to create a new .env file for our app so it could connect to mongoDB.
Copy env-example to .env file inside packages/rma-server/.env
cd packages/rma-server
cp env-example .env
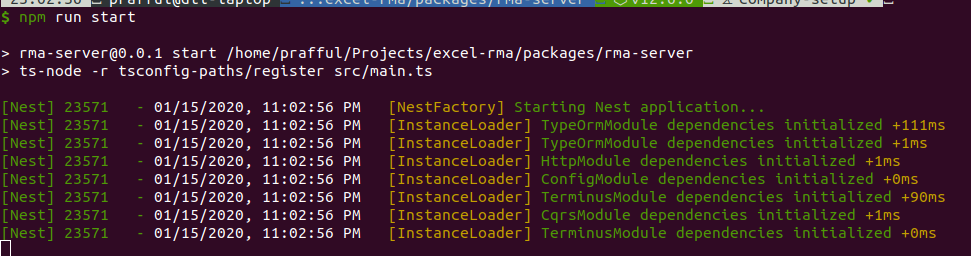
Next, let's run our server.
npm i
npm run start:debug
Note:
If you see something like this
Possible reasons could be invalid mongo user or .env. you can create a mongo user by: change that constants with your environment accordingly.
mongo rma-server \
        --host localhost \
        --port 27017 \
        -u $MONGODB_PRIMARY_ROOT_USER \
        -p $MONGODB_ROOT_PASSWORD \
        --authenticationDatabase admin \
        --eval "db.createUser({user: 'rma-server', pwd: '$MONGODB_PASSWORD', roles:[{role:'dbOwner', db: 'rma-server'}], passwordDigestor: 'server'});"

mongo cache-db \
        --host localhost \
        --port 27017 \
        -u $MONGODB_PRIMARY_ROOT_USER \
        -p $MONGODB_ROOT_PASSWORD \
        --authenticationDatabase admin \
        --eval "db.createUser({user: 'cache-db', pwd: '$MONGODB_PASSWORD', roles:[{role:'dbOwner', db: 'cache-db'}], passwordDigestor: 'server'});"
You should see something like this, we are good to go, it's done.

Restore mongo database [rma-server only] and configure
Download link Database
Download the mongo database, extract it to some local folder. There you will find a folder named rma-server
Run this command from terminal to restore the mongo database.
mongorestore --db rma-server /path_to/dump/rma-server -u rma-server -p admin
- Now, let's update the server_settings. Login to mongo,
use rma-serverdatabase - Run the command, change the variables as required. Before running this, generate the
serviceAccountApiSecretagain for the account and replace it. As we are restoring database, frontend/backend client id doesn't change but make sure to check them again from ERPNext, service account already exists, check the erpnext site name and then run this.
db.server_settings.updateOne({},{
    $set:{
	"appURL" : "http://rma.localhost:4700",
	"warrantyAppURL" : "http://warranty.localhost:4800",
	"frontendClientId" : "644702c6d2",
	"backendClientId" : "fdc50c40ef",
	"serviceAccountUser" : "[email protected]",
	"serviceAccountSecret" : "Admin123",
	"authServerURL" : "http://excel_erpnext.localhost:8000",
	"serviceAccountApiKey" : "0769d0840946134",
	"serviceAccountApiSecret" : "##################",
	"profileURL" : "http://excel_erpnext.localhost:8000/api/method/frappe.integrations.oauth2.openid_profile",
	"authorizationURL" : "http://excel_erpnext.localhost:8000/api/method/frappe.integrations.oauth2.authorize",
	"tokenURL" : "http://excel_erpnext.localhost:8000/api/method/frappe.integrations.oauth2.get_token",
	"revocationURL" : "http://excel_erpnext.localhost:8000/api/method/frappe.integrations.oauth2.revoke_token",
	"posAppURL" : "http://pos.localhost:4900"
}
})
-
Now, go to oAuth client list of the restored erpnext site and change the URIs from testrma.excelbd.com/testwarranty.excelbd.com to rma.localhost:4700, warranty.localhost:4800, pos.localhost:4900 etc. Make sure the write the URIs one after one with just a space, not line by line.
-
Once oAuth clients are updated, mongo server_settings is updated, let's go ahead and start frontend [rma.localhost]
What about frontend(s)?
This app has 2 frontends
- packages/rma-frontend
- packages/rma-warranty
How to start rma-frontend?
cd packages/rma-frontend
npm i
npm run start
rma.localhost:4700 now should redirect to erpnext.localhost:8000 successfully. Make sure to login to erpnext except root administrator and service account.
How to start rma-warranty?
cd packages/rma-warranty
npm i
npm run start
Setup Webhooks
Delete all webhooks from ERPNext and then send a post request to create the webhooks again with localhost. To get the bearer token, you have to login to rma.localhost and from browser developer tool, application tab > storage > IndexedDD> excel-rma > key pair values
POST http://rma.localhost:4700/api/settings/v1/setup_webhooks
Headers:
{
  "Authorization": "Bearer <system manager token>"
}
Now Everything should run properly, you can create invoices or other things and start working on the apps.
follow this method for blank database site configuration
Setup RMA Server
Make sure the server and frontend under development is running
You will need access to an ERPNext instance for this, you can setup one locally
rma-serverruns on port 8800.rma-frontendruns on port 4700.rma-warrantyruns on port 4800.
Setup Server
Request URL:
POST http://rma.localhost:4700/api/setup
Request Body:
{
  "appURL" : "http://rma.localhost:4700",
  "warrantyAppURL" : "http://warranty.localhost:4800",
  "frontendClientId" : "e1c60f6992",
  "backendClientId" : "d4f775e6f4",
  "serviceAccountUser" : "[email protected]",
  "serviceAccountSecret" : "<create  a service account>",
  "authServerURL" : "https://erpnext.localhost",
  "serviceAccountApiKey" : "<created account>",
  "serviceAccountApiSecret" : "<created account>"
}
After this setup, you can login on http://rma.localhost:4700 should work via the site that its setup against. e.g. https://erpnext.localhost
For setting up other defaults you can go to Menu > Settings > Server and setup necessary things. Warehouse and Debtor Account needs Default Company to be set first.
Setup everything except for Warehouse and Debtor Account and logout. After logging in again, Warehouse and Debtor Account will show a dropdown list. Select warehouse and account and update settings.
If you have any error on login/redirect please check your client and API credentials and try to setup again.
To reset settings, Follow these steps.
Go to MongoDB
mongo -u root --authenticationDatabase admin -p admin
Select your database and drop server_settings collection.
> show database;

admin                0.000GB
cache-db             0.000GB
config               0.000GB
local                0.000GB
rma-server           0.097GB

> use rma-server;
> db.server_settings.drop();
or to drop databases

> use rma-server;
> db.dropDatabase();
> use cache-db;
> db.dropDatabase();
You can now re-setup from beginning.
Setup Webhooks
POST http://rma.localhost:4700/api/settings/v1/setup_webhooks
Headers:
{
  "Authorization": "Bearer <system manager token>"
}
This will create Webhooks in ERPNext synchronously. If it fails, delete the created webhooks from ERPNext and make this request again.
For local development of webhooks you can setup local tunnel with localtunnel or ngrok.
OR setup ERPNext locally and set host in webhook url as http://172.17.0.1:8800, requires good performance development laptop/computer.