room amplifier - fcorthay/RPi-multiroom-audio GitHub Wiki
For the RPi multiroom system, the different rooms can be fitted with a receiver amplifier.
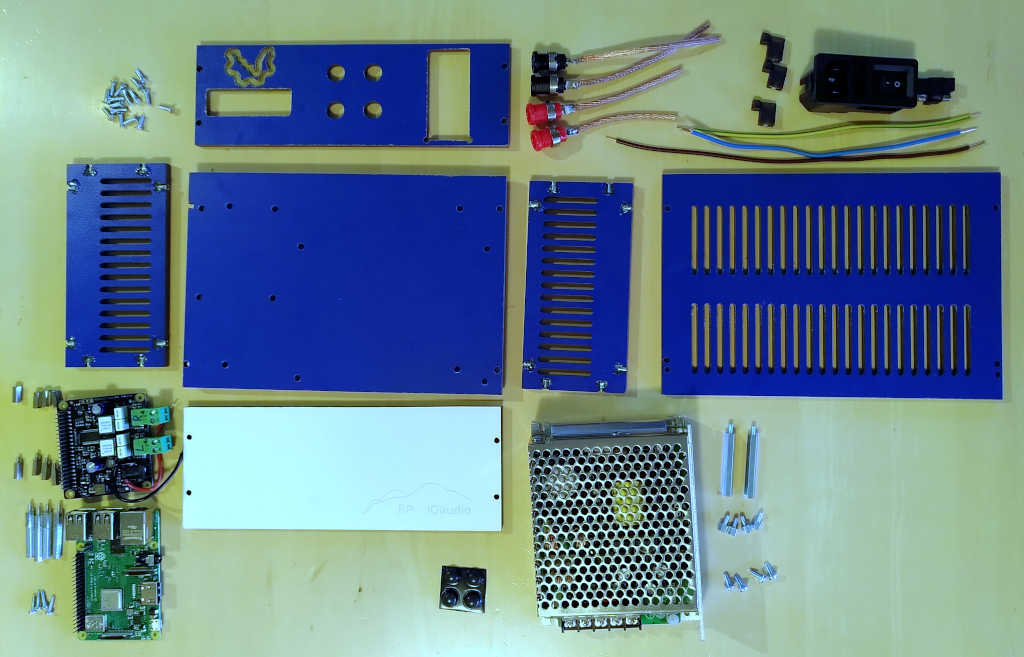
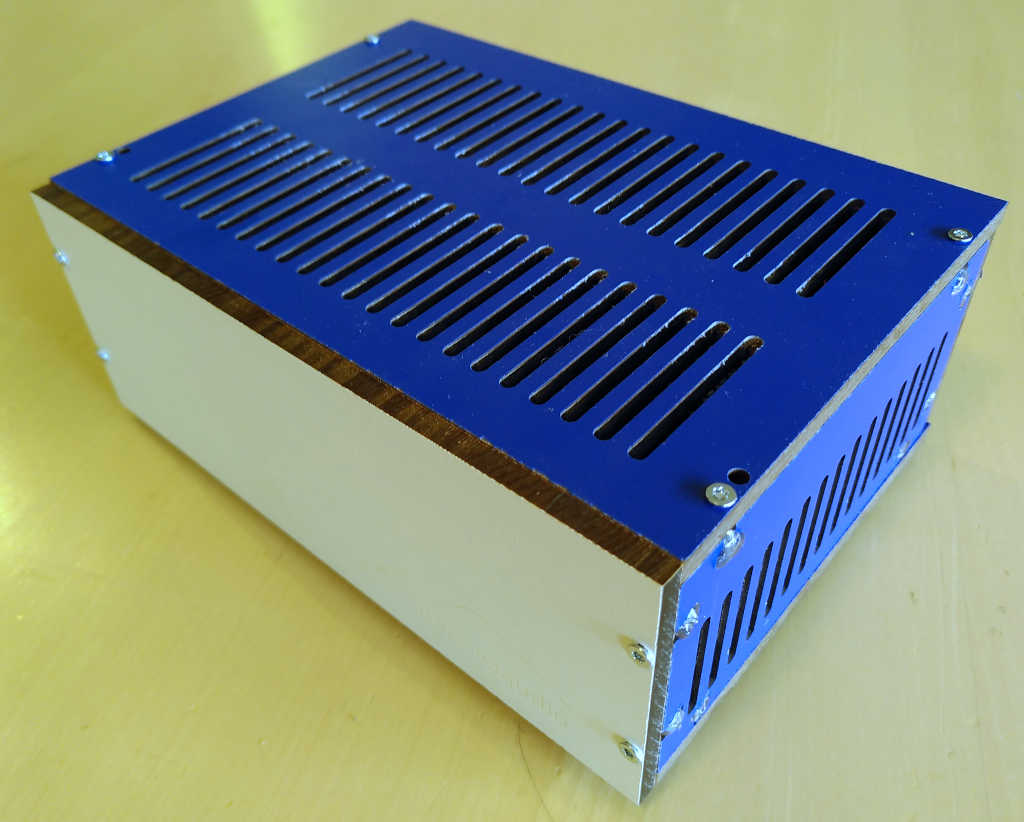
The rooms can be fitted with an A5-shaped simple amplifier. It is made out of a power supply, a RPi 3 and a 30 W stereo amplifier hat.
The necessary hardware can be to a great extent purchased from Mouser (prices vary):
| description | product id | quantity | unit price | total |
|---|---|---|---|---|
| Raspberry Pi 3 - Model B+ | SC0073 | 1 | 32 | 32 |
| SD card - 64 GB | SDCS2/64GBCA | 1 | 12 | 12 |
| amplifier hat | 1 | 90 | 90 | |
| 24 V power supply | TXM 075-124 | 1 | 50 | 50 |
| right-angle HDMI connector | P142-000-UP | 0 | 8 | 8 |
| spacers M3x5 | 971050321 | 4 | 0.5 | 2 |
| spacers M3x40 | 971400361 | 2 | 1 | 2 |
| spacers M2.5x10 | 971100151 | 4 | 0.5 | 2 |
| spacers M2.5x11 | 971110154 | 4 | 1 | 4 |
| spacers M2.5x20 | 971200151 | 4 | 1 | 4 |
| hex nuts M2.5 | 9603 | 4 | 0.1 | 0.4 |
| power entry module | 4304.6063 | 1 | 10 | 10 |
| FastOn terminal 90° | 9-520132-2 | 3 | 0.5 | 1.5 |
| 0.5 A fuse | 0617.500MXP | 2 | 0.2 | 0.2 |
| banana jack - black | BU-P72930-0 | 2 | 3 | 6 |
| banana jack - red | BU-P72930-0 | 2 | 3 | 6 |
| rubber feet | SJ-5003 (BLACK) | 4 | 0.1 | 0.4 |
| 230 | ||||
The housing is of A5 (148 x 210 cm2) bottom shape and 8 cm high.
I have made my room amplifiers using 0.6 mm resopal plates. One could imagine building them out of a nice wood such as larch.

Prepare base plate, electronics, screws and spacers:
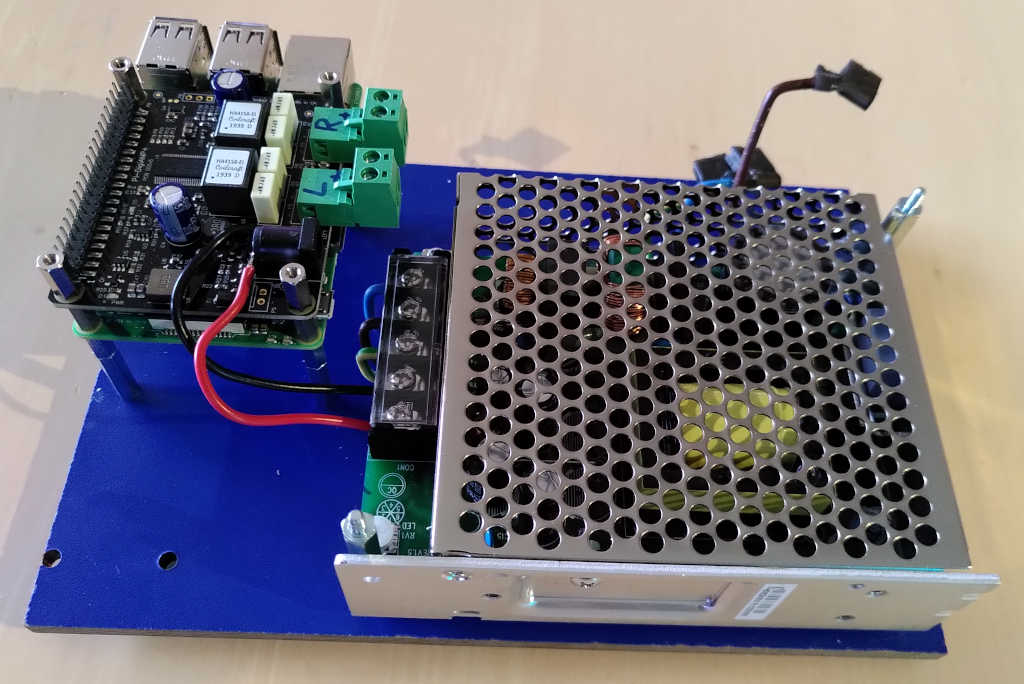
Mount the power supply on the base plate and the connectors on the backplate:

Mount the RPi:
Connect the entries of the backplate:
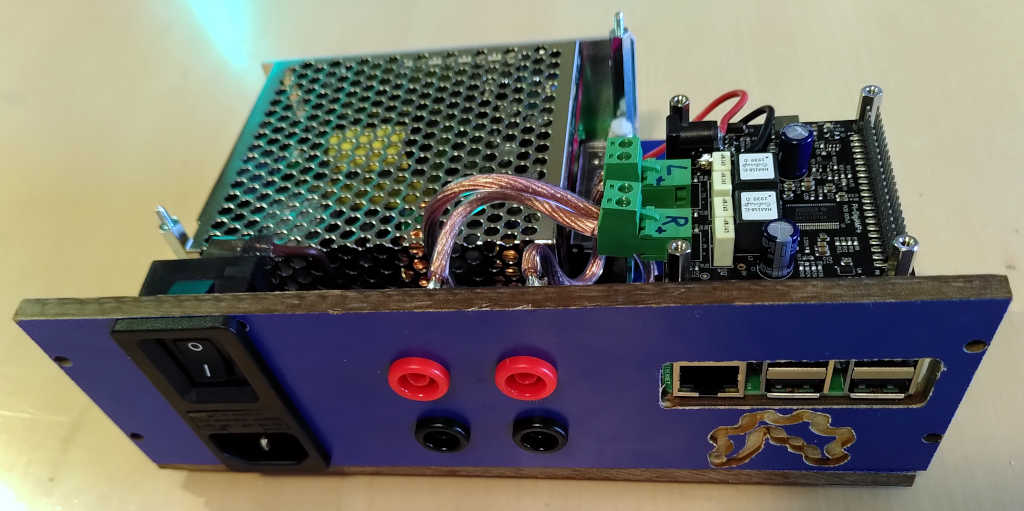
Time for a first test.
fix the lateral plates onto the bottom plate:
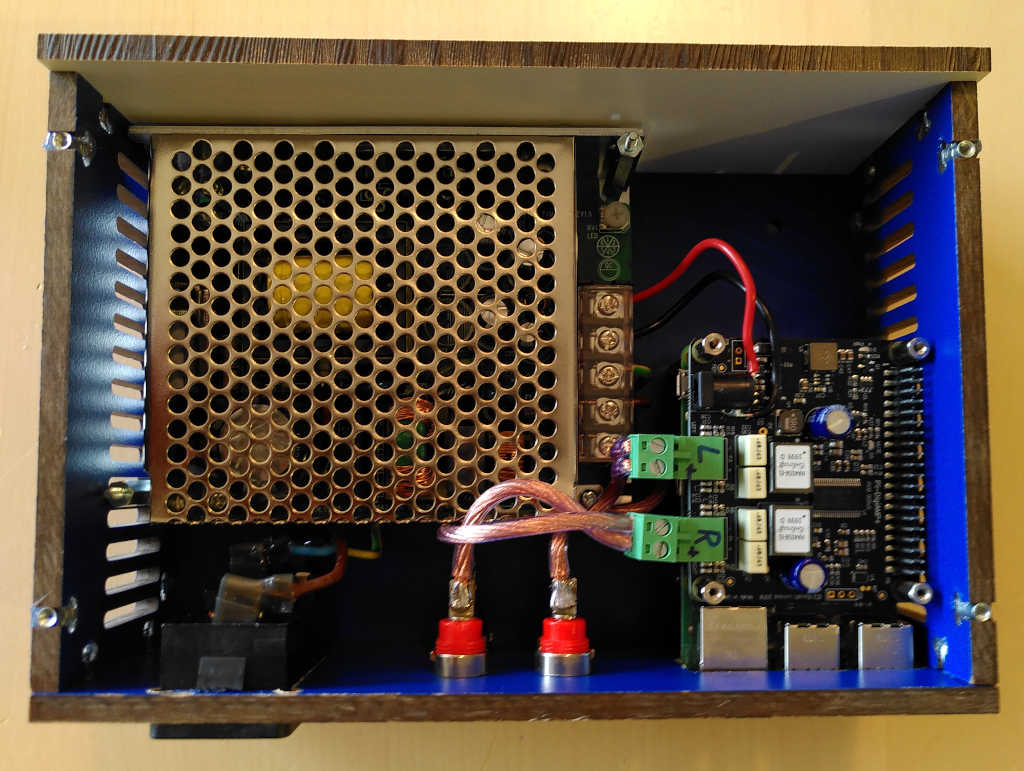
Fix the top plate.
Done.
For a few dollars more (and indeed a few Watt more), one can drive a stereo system with 2 amplifiers, each having a Wondom JAB5 2 x 200 W amplifier working in parallel bridge-tied load mode.
The 2 amplifiers are basically made out of a 24 V or 36 V power supply, a RPi 3, an USB to I2S converter and a JAB5 stereo amplifier. Both receive the multiroom music. One processes the left channel, splits it into low frequency (bass) and high frequency (treble) parts and amplifies them separately to drive the left-side loudspeaker. Similarly, the other one processes the right audio channel.
One mono amplifier requires the surface of an A4 sheet.
It requires a double output power supply (or 2 supplies) : one for the RPi 5 V and one for the amplifier 24 V or 36 V. The negative (common) voltage of both supplies should be grounded. My experience shows that the USB to I2S converter has to be electrically isolated from the RPi : inserting an USB isolator nicely does the job.
The Wondom USB to I2S converter provides a 2 channel, 16 bit, 48 kHz soundcard.
We will take the example of a DEM audio Les Combins louspeaker.
It requires the 2 ways crossover to split at 2.5 kHz.
The treble driver also wants a 6 dB attenuation compared to the bass.
This is been taken care of in the mixers part of the configuration file.
Designing a Bessel crossover of order 16 is done by:
$AUDIO_BASE_DIR/Crossovers/crossover-iir.py -v -t bessel -o 16 -c 2500 -f 2
Obviously, one can play with the parameters and observe the result in the generated bessel.png file.
The designed filters information can be copied from the freshly created Crossovers/bessel.yaml
to CamillaDSP/Configuration/Configurations/crossoverBessel.yaml.
Also, the following setup has to be set:
samplerate: 48000device: "dmix:UCM"format: S16LE
ln -sf $CAMILLA_CONFIGURATIONS_DIR/crossoverBessel.yaml $CAMILLA_CONFIGURATION_DIR/camillaconfig.yaml
sudo service camilladsp restart
The Bessel filter provides a good phase response but has a dip in the crossover region.
A Butterworth crossover provides a -3 dB attenuation at both the lowpass and the highpass filters cutoff frequencies and, as such, a more continuous transition in the crossover region.
The filter order can be pushed up to 30. Over this value, two of the poles have an imaginary part so close to zero that the design script doesn't provide a proper result. This is seen by the indication, in the verbose output, that the filter has real poles. Remember that we want an even filter order as we are using biquads.
$AUDIO_BASE_DIR/Crossovers/crossover-iir.py -v -t butterworth -c 2500 -o 30
Copy crossoverBessel.yaml to crossoverButterworth.yaml, edit it with the new filters description,
and run it on the amplifier:
ln -sf $CAMILLA_CONFIGURATIONS_DIR/crossoverButterworth.yaml $CAMILLA_CONFIGURATION_DIR/camillaconfig.yaml
sudo service camilladsp restart
On a RPi 3, this signal processing takes about 1% CPU.
A Linkwitz–Riley crossover provides a totally flat transition.
As is it made out of the serial connection of 2 Butterworth filters, both in the lowpass and the highpass part of the crossover,
it is simply implemented by doubling all the filter list in the pipeline section of the CamillaDSP configuration file.
If latency is not a concern, a Nuttall crossover of order 4095 is designed with:
$AUDIO_BASE_DIR/Crossovers/crossover-fir.py -v -t Nuttall -c 2500 -o 4095
Move the coefficient files to the CamillaDSP environment:
lowpassFile=`ls -t -A1 $AUDIO_BASE_DIR/Crossovers/ | head -n 3 | tail -n 1`
mv $AUDIO_BASE_DIR/Crossovers/$lowpassFile $CAMILLA_COEFFICIENTS_DIR/
highpassFile=`ls -t -A1 $AUDIO_BASE_DIR/Crossovers/ | head -n 2 | tail -n 1`
mv $AUDIO_BASE_DIR/Crossovers/$highpassFile $CAMILLA_COEFFICIENTS_DIR/
Edit CamillaDSP/Configuration/Configurations/crossoverNuttall.yaml
and use the same device settings as for the IIR crossover, but define the freshly generated FIR filter coefficients.
With this, define the Nuttall filter as the processing to be done:
ln -sf $CAMILLA_CONFIGURATIONS_DIR/crossoverNuttall.yaml $CAMILLA_CONFIGURATION_DIR/camillaconfig.yaml
sudo service camilladsp restart
As on can restart CamillaDSP on the fly while the music is playing, it is possible to live switch between different crossovers for the comparison.