Pen tip width test - euphy/polargraph GitHub Wiki
See also this article about the relationship between pen width and pixel size.
You can change the pen width on the setup tab, by changing the value of pen tip size and clicking send pen tip size. The tip size is not saved in the machine, it needs to be resent every time the machine is restarted, which is why the value is pre-loaded in the queue when you restart the controller.
##Calibration
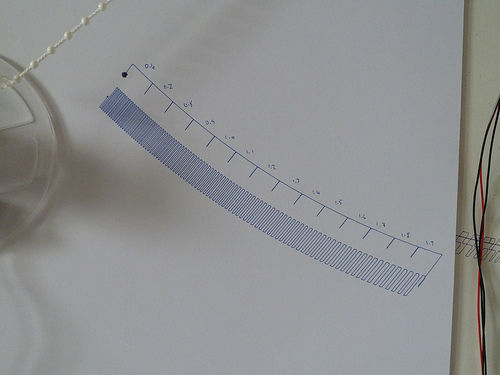
Rather than rely on manufacturers descriptions of pen tip width, there is a kind of calibration function to test pen widths too, this draws a sequence of pixels at maximum density, but it increments the pen width setting between each one, so you can try to narrow down what pen tip thickness gives you the deepest density you want.
There are three settings on that setup tab that control the size of the test swatch:
- Pen test start tip - this is the tip size for the very first square and should be low.
- Pen test end tip - this is the biggest tip size the machine will try.
- Pen test inc size - this is the size of the increments that the machine will make to get from the start tip size to the end tip size.
If it was set to start=0.6, end=2.0 and increment=0.1, the machine will draw the first pixel as if it has a 0.6mm sized pen, then draw more, each time incrementing by 0.1mm, until it is 2mm.
Once you've decided which square you want to be your darkest, set the pen tip width to the setting required and save properties.