1 Creating A First Test - essenius/FitNesseFitSharpUiAutomation GitHub Wiki
Creating a First FitNesse Test with the UI Automation Framework
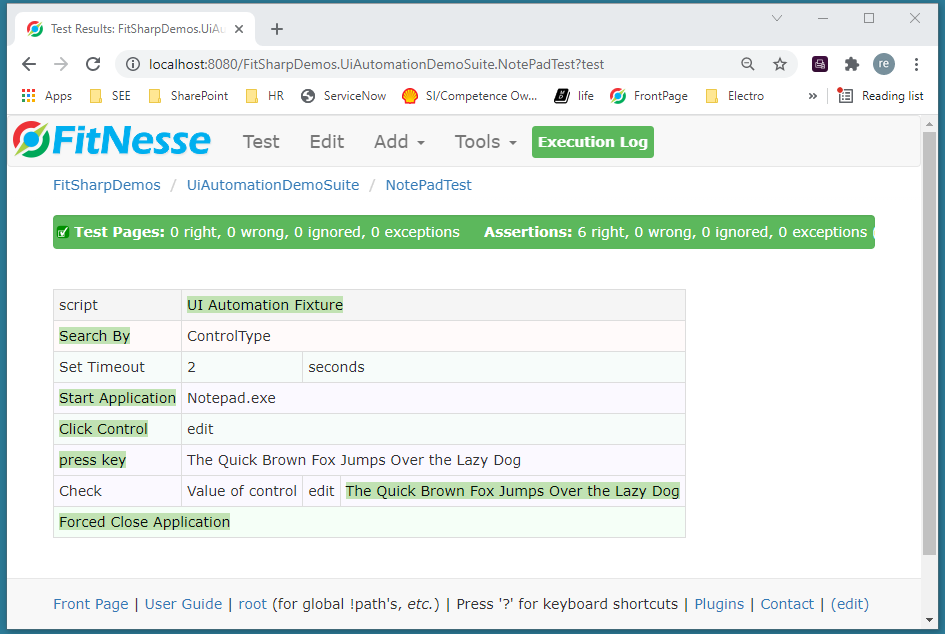
We start by showing how to use the standard Notepad application. Go to http://localhost:8080/FitSharpDemos.UiAutomationDemoSuite.NotePadTest?edit in your browser. Ensure that you see the following content:
!|script          |UI Automation Fixture                                            |
|Search By        |ControlType                                                      |
|Set Timeout      |2               |seconds                                         |
|Start Application|Notepad.exe                                                      |
|Click Control    |edit                                                             |
|press key        |The Quick Brown Fox Jumps Over the Lazy Dog                      |
|Check            |Value of control|edit|The Quick Brown Fox Jumps Over the Lazy Dog|
|Forced Close Application                                                           |
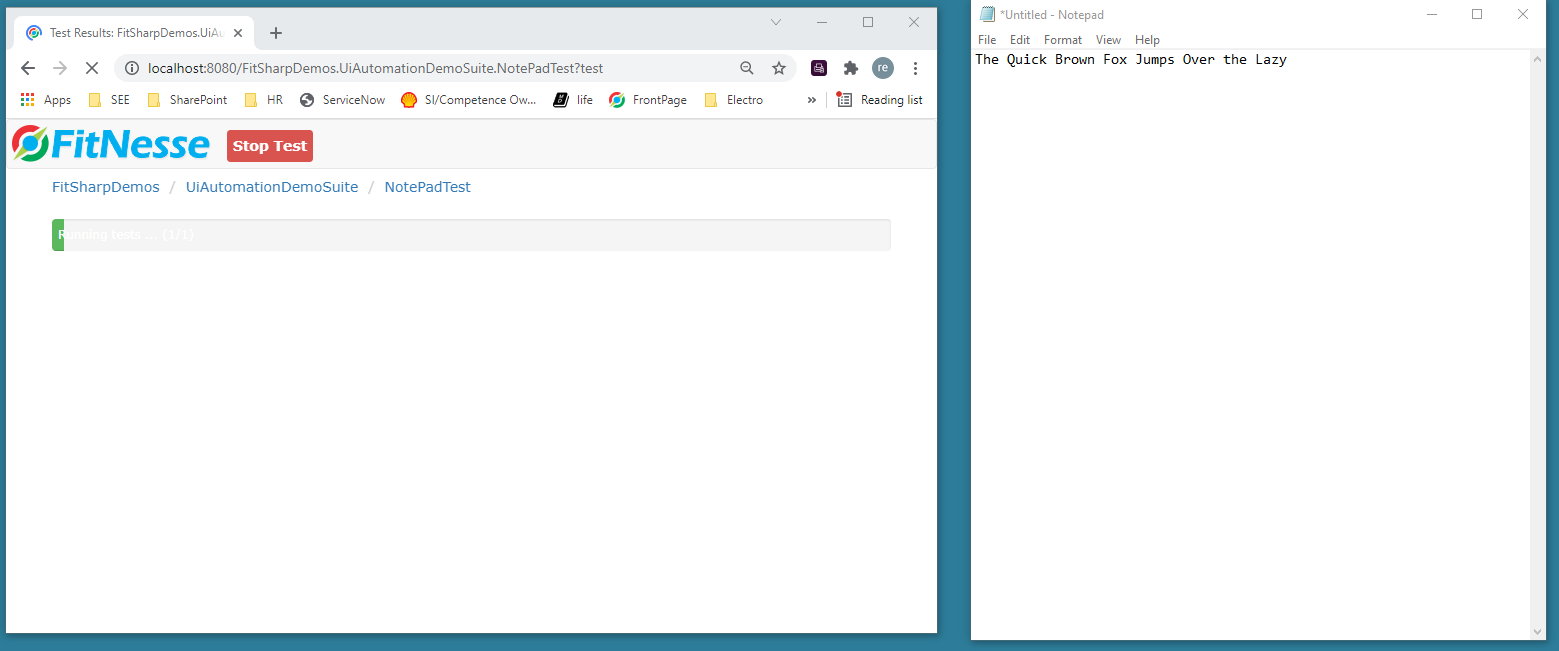
When you run this, it should start Notepad, and then enter the above text.
Let’s go through the test line by line. The line !| Script | Ui Automation Fixture | lets FitNesse know we are going to create a test case script using the UiAutomationFixture class. The following lines in the table are all method calls to the fixture class.
|Search By|ControlType| tells the fixture that the default search type is by Control Type. Then we set the timeout for instructions to 2 seconds. We need this later on. Then we start Notepad and click a control type Edit (of which there is only one: the pane in which you can type text. That's what we do next. Then we validate that the text is present, and we close Notepad. We use the forced close, because Notepad will ask for a confirmation. This is also why we set the 2 second timeout: it will wait for this confirmation for 2 seconds, and then it will force a close.
You may wonder how you can find out how to identify the different controls in a user interface. If you create the application yourself that is easy, but if you have to do black box testing without knowledge of the inner workings of the application that's a different matter. Here's how we tackle that.
Using Accessibility Insights
Accessibility Insights is a desktop tool to test accessibility of Windows applications. We'll use it to inspect the Calculator app and find out how to access its controls.
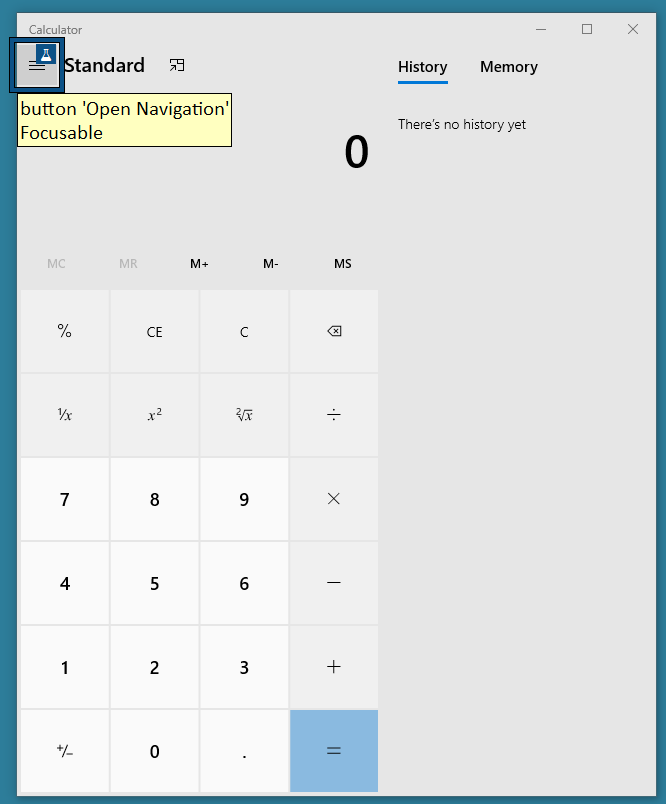
Install Accessibility Insights, start it and then and start Calculator. Ensure it is the active window. Now over over the three horizontal lines in the top left corner. Accessibility Insights will now show you the name of the control:
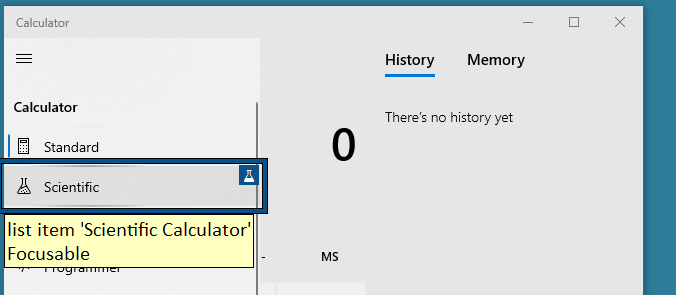
Click it, and then hover over the Scientific option:
Elements don't always have a name; but sometimes they have AutomationIds instead. We can also use those. Hover over the DEG control and have a look at the Accessibility Insights window.
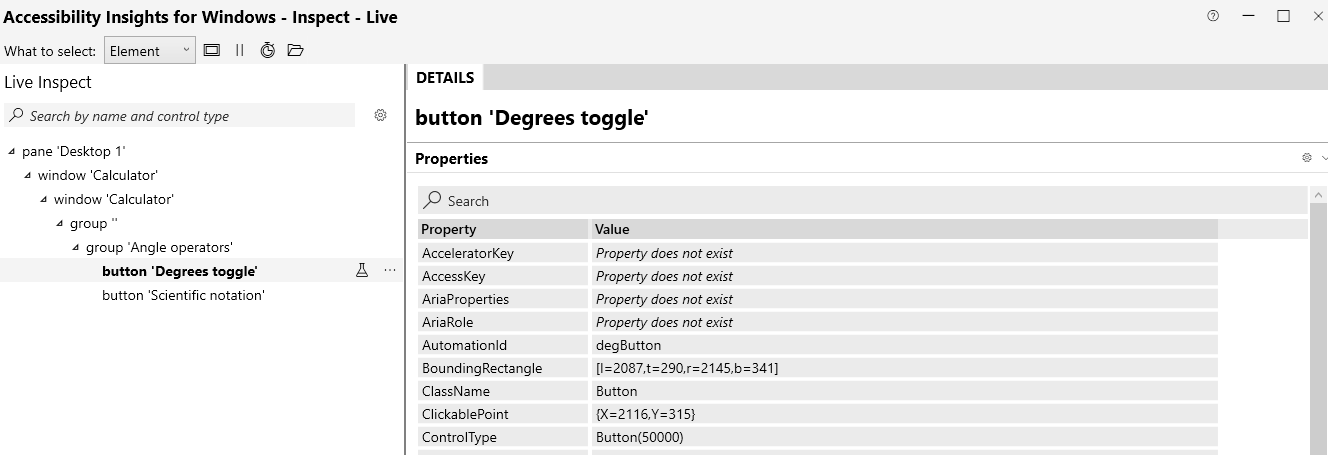
Click it and watch it chage into a RAD button. Notice how this button has automation ID radButton.
Next, we have a look at the digit buttons. They have names Zero to Nine. We also have the negate (+/-) button, which has the automation ID negateButton. Next, we want to click the Trigonomy button which as automation ID trigButton. Clicking that opens the trigonometry functions, of which we want to use sin which has the name Sine. We also want to know how we can check the result, so we hover over the result element to find out that its automation ID is CalculatorResults. Note how the Name is less useful for automation, since it displays the result of the last calculation, initially Display is 0.
Now go back to the menu (the three lines) and inspect the Standard option by hovering over it. It has an access key entry called Alt 1, implying that you can also select the Standard option by pressing the Alt and 1 keys simultaneously.
There is one peculiarity we need to clarify. Calculator is a UWP application which starts another application under the hood. So we will need to cater for that. We do this by not automatically switching to the application that we start, then waiting for the calculator process to appear, and then switching to that new process.
Knowing all this, we can create a simple Calculator workflow:
!define Standard {%1}
!define Menu {name:Open Navigation}

!|script           |UI Automation Fixture  |
|Set Timeout       |5       |seconds       |
|Search By         |Name                   |
|no automatic switch to started application|
|Start Application |Calc.exe               |
|wait for process  |Calculator             |
|switch to process |Calculator             |
|Press Key         |${Standard}            |

!|script                                                                 |
|Click Control   |${Menu}                                                |
|Wait for Control|Scientific Calculator|and Click                        |
|Click Control   |id:DegButton                                           |
|Wait for control|id:RadButton                                           |
|Click Control   |One                                                    |
|Click Control   |Two                                                    |
|Click Control   |Three                                                  |
|Click Control   |id:negateButton                                        |
|Check           |Value Of Control     |id:CalculatorResults|-123        |
|Toggle Control  |id:TrigButton                                          |
|Wait for control|Sine                 |and click                        |
|Check           |Value Of Control     |id:CalculatorResults|~=0.45990349|
|Forced Close Application                                                |
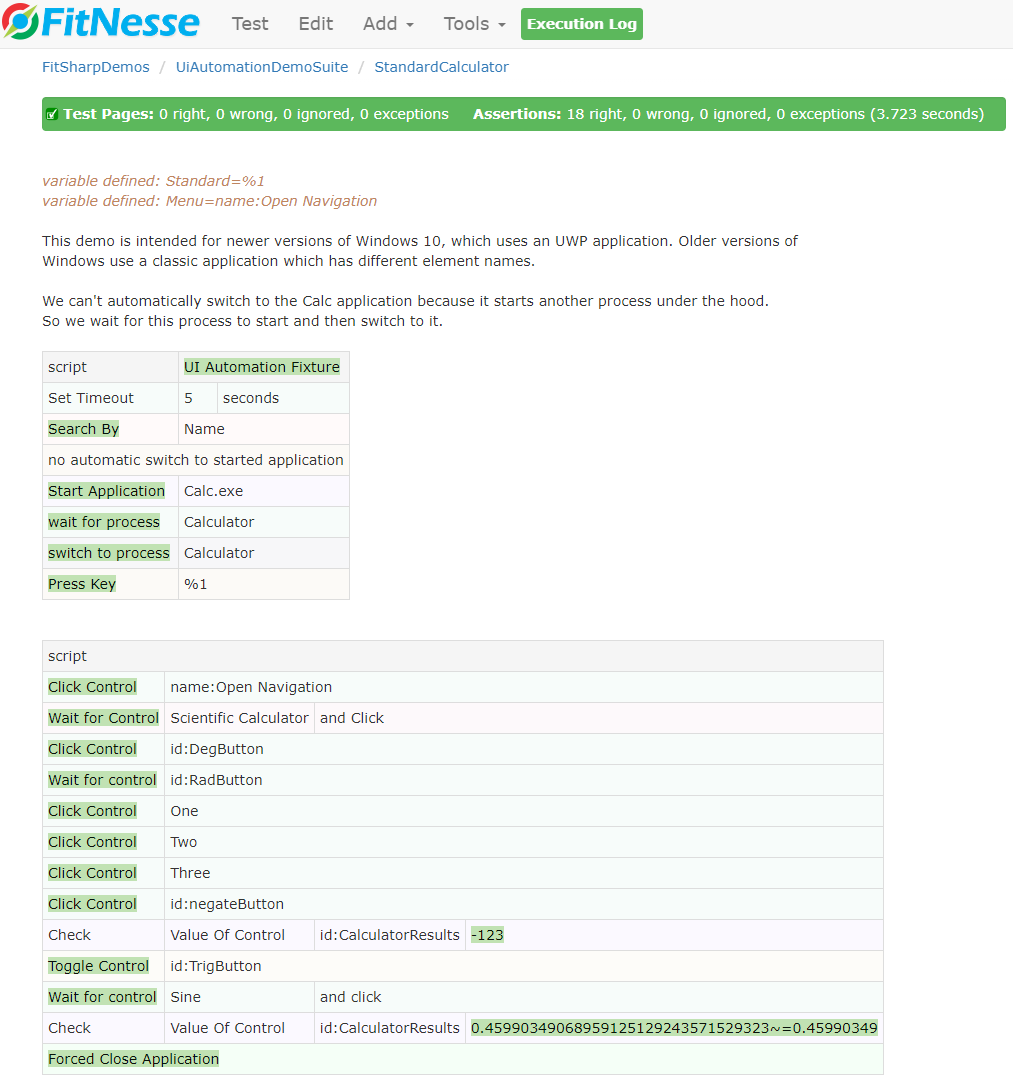
Note how the tests sets the default search mechanism to name so you don't have to specify Name: if you search by name, but you do need to specify id: if you search by automation ID.
This page showed a couple of quite simple examples. If you want to learn more about the capabilities, have a look at the demo pages by installing FitNesse with the UIAutomation fixture yourself as explained in the readme and checking out the demo suite. That also shows how to interact with list boxes and combo boxes, how to do drag & drop, window operations, how to take snapshots, and how to handle grids.