Getting started - dvirby20/BotIt GitHub Wiki
In this page you will get all the necessary preperations so you can program your first bot.
Step 1: Create a bot
-
Open Telegram on your computer using Telegram Web or Telegram Desktop.
-
Search "BotFather" and press on the first option.
-
Press the "/start" command on the lower part of the chat (or just send "/start" to it).
-
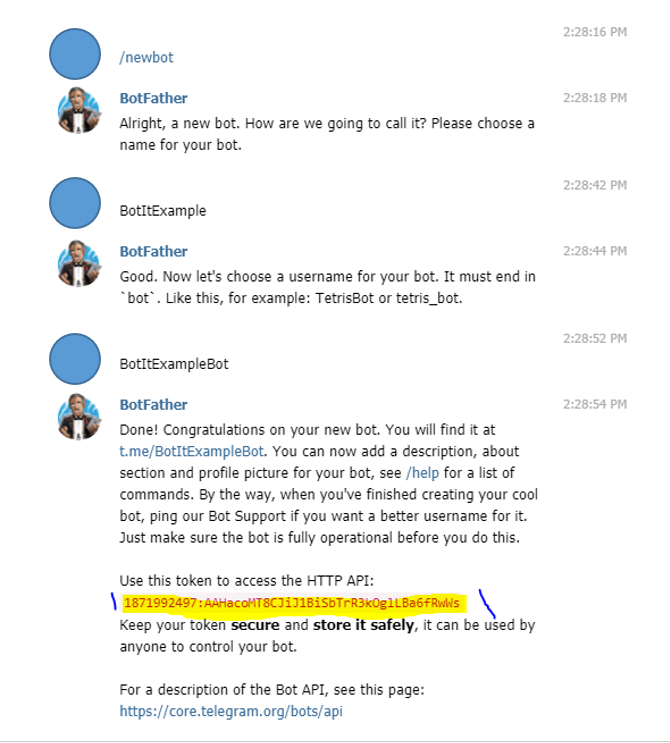
Send "/newbot" command to the bot and choose a bot name and username (note that the username must end with
bot). -
Now a message like the one below will be sent to you. Copy the text in red after HTTP API (your text is going to be different, that's okay).
-
Well done! You created your first bot! Soon you can start coding it.
Step 2: Download PyCharm 2019
To code our bot we need a proper programming software. Our code works only with pyCharm 2019. It doesn't work on other programming software or other versions of PyCharm.
-
Search "PyCharm" on google and press on the first result.
-
Press "DOWNLOAD".
-
On the side, press "Other versions".
-
Scroll down to "Version 2019.1" and download it.
-
Well done!
Step 3: Download Python 3.8
Our API works only with Python 3.8, so make sure to have it downloaded before you start coding.
-
Search "Download Python" on google and press on the first result.
-
Press
ctrl+fand search "Python 3.8.0". -
Press "DOWNLOAD".
-
Scroll down to the bottom and choose "Windows x86-64 executable installer" for windows and "macOS 64-bit installer" for mac.
-
Open the file you downloaded and press "Install now".
Step 4: Downloading MongoDB
MongoDB is the database that our bot uses to save his users details and groups.
-
On google search "download mongodb" and press on the first result.
-
On the right press "DOWNLOAD" (the version doesn't matter).

-
Open the file that was downloaded and install MongoDB as you like.
-
After you installed it, open the folder in which it was installed. Press server > YOUR_VERSION > bin > mongod.exe
-
In the same place, press mongo.exe. This will open the command line.
-
In the command line paste the following code, but with your name and password:
db.createUser(
  {
    user: "YOUR_NAME",
    pwd: "YOUR_PASSWORD",
    roles: [ { role: "userAdminAnyDatabase", db: "admin" } ]
  }
)
- Remember these details, you will need them later.
Step 5: Downloading our API
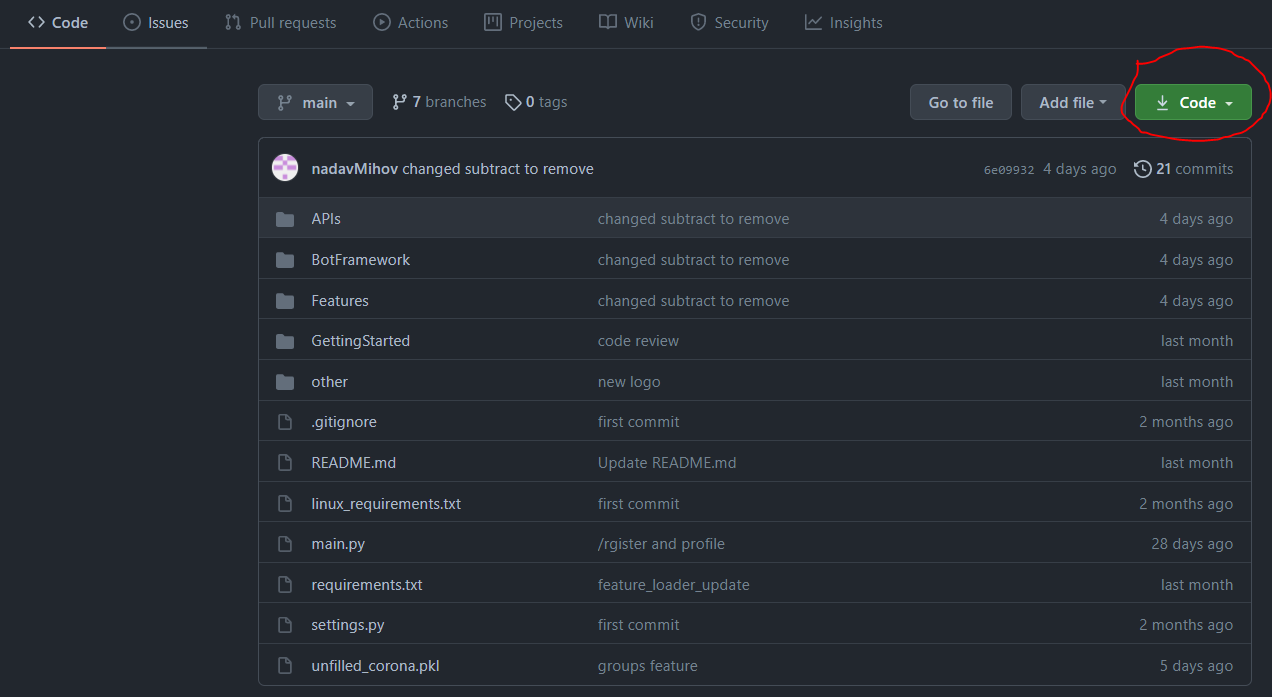
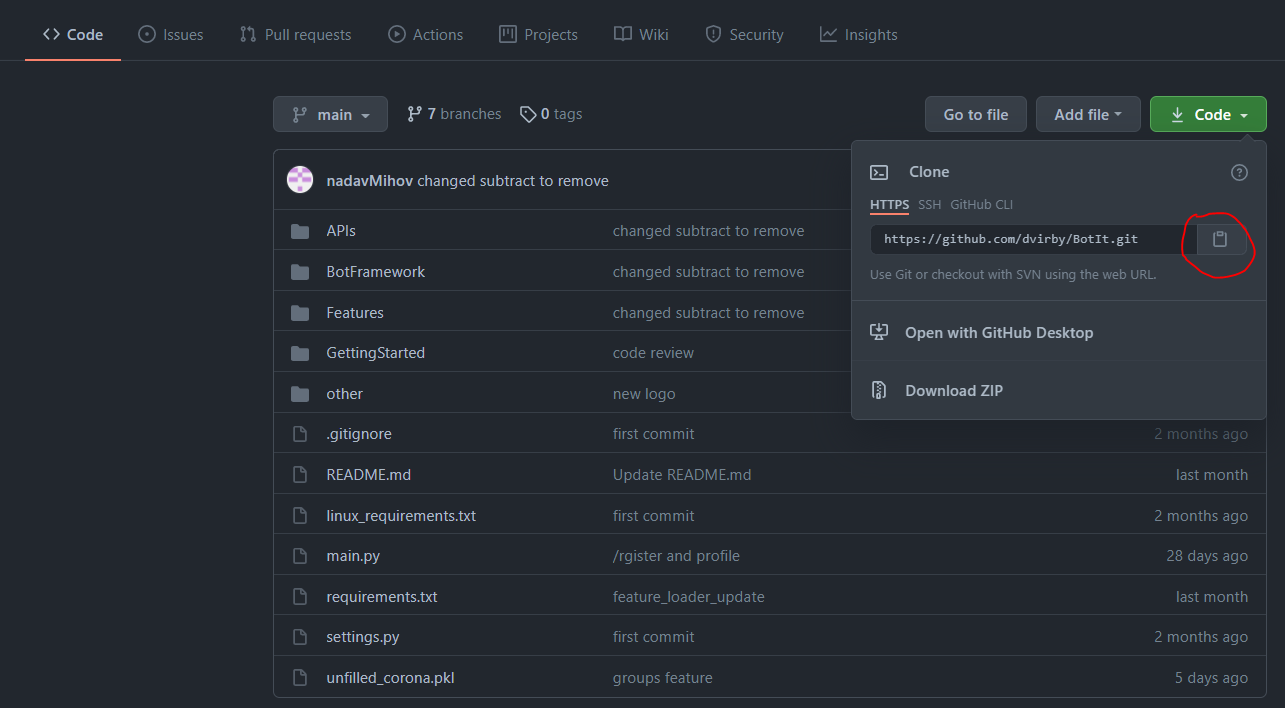
- Go to <> Code section in our git

- Press Code and then copy the url it prompts to you.
-
On file explorer, create a new folder. This will serve as the folder for you to get our API in.
-
Open the folder and then double click on the top right where it shows the folder location.

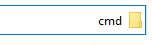
- Write "cmd" in there and press 'Enter'.
- Write "git clone " and the url that you copied before in the pop-up window. Press
Enter.
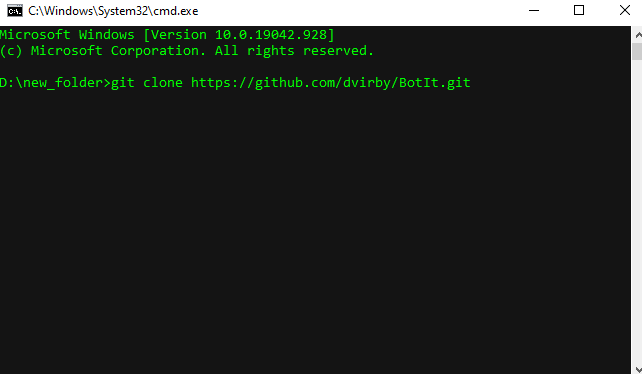
- Congratulations! You have saved our API in your folder!
Configure Python
-
Open PyCharm. On the top left press file open and open the folder (named BotIt) that you downloaded in the previous step.
-
Open the main.py file and wait a while. On the top of the screen you will see a yellow rectangle which says you need to install requirments. Press "install requirments".
-
After all the requirements are downloaded, on the upper side of the screen press "add configuration".
-
Click on Python Interpreter and then "show all".
-
Press the one with Python 3.8 and BotIt.
-
Press "apply".
-
Double press
shifton your keyboard and search "settings". -
Enter the first option.
-
On the get_credentials() function, change the user name and password to your MongoDB username and password.
-
On get_bot_token() function change the string after the return to your bot token that you got from the bot father.
-
You are ready to build your first feature! Create your first feature.