Uploading the Custom Docker Image - dteck/Mediawiki-GCP-CR GitHub Wiki
Getting Started
Now that we have our image we need to make sure it is named properly and upload it to our Artifact Registry and Repository. This means we need to set up a method to authenticate ourselves with Google Cloud so it will allow us to upload our images.
Methods for Authenticating with Google.
Google has documentation on the various methods that you can use to set up authentication which can be found here: Artifact Registry Authentication As of this writing the main optns available are
- gcloud credential helper Configure your Artifact Registry credentials for use with Docker directly in gcloud. This is the simplest authentication method, but can be slower than the standalone credential helper.
- Standalone Docker credential helper This option is primarily for configuring your credentials for use with Docker in the absence of Google Cloud CLI. It is significantly faster than the gcloud credential helper and uses Application Default Credentials (ADC) to automatically find credentials in the your environment.
- Access token You can generate a short-lived access token for a service account and then use the token for password authentication. Since the token only valid for 60 minutes, it is a safer option than a service account key.
- Service account key A user-managed key-pair that you can use as a credential for a service account. Because the credential is long-lived, it is the least secure option of all the available authentication methods.
Recommendation for Authenticating with Google.
for me the easiest method was to install the Google Command Line Interface (CLI) Then enable the authentication for the region my artifact registry was in using the following command.
gcloud auth configure-docker [Region]-docker.pkg.dev
for me I was using the us-central1 region so I replaced [Region] with us-central1
Proper Image Naming
One of the peculiar things about most repositories is that when uploading images they use the image name to indicate which repository they belong to. If oyu followed the previous steps and build the image yourself you should already have the correct name for the image. If however, you pulled the image from DockerHub then you will need to rename the image using the same format we would for building from scratch.
To rename the image you can use the following command from your command prompt
docker image tag [Region]-docker.pkg.dev/[Project Name]/[Repository Name]/[Image Name]:[Image Tag]
You will need to replace the items in brackets with your projects details Example:
- Region = us-central1
- Project Name = wiki
- Repository Name = modified-mediawiki
- Image Name = mediawiki-google
- Image Tag = Ver1
docker image tag us-central1-docker.pkg.dev/wiki/modified-mediawiki/mediawiki-google:Ver1
Uploading or "Pushing" the Image
With the image now the proper name and our authentication set up we can use the Docker "push" command from our command prompt to upload the image to our Artifact Registry and Repository.
The command to upload the image is
docker push [Region]-docker.pkg.dev/[Project Name]/[Repository Name]/[Image Name]:[Image Tag]
Where again you replace the items in the brackets with your details. Example:
- Region = us-central1
- Project Name = wiki
- Repository Name = modified-mediawiki
- Image Name = mediawiki-google
- Image Tag = Ver1
docker push tag us-central1-docker.pkg.dev/wiki/modified-mediawiki/mediawiki-google:Ver1
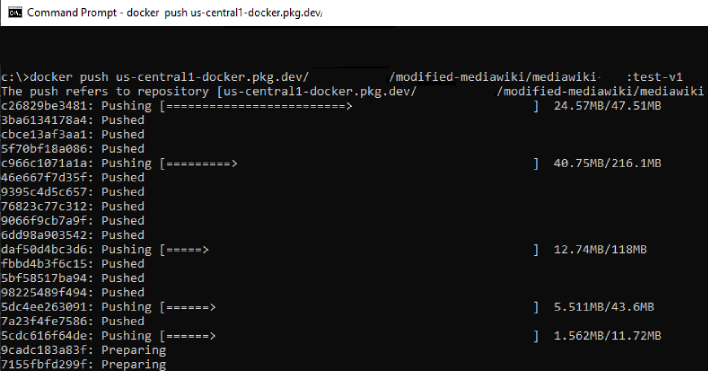 You will see progress bars on the screen as docker works to push your image up to Google. When this is done you will be able to see your new image inside of your artifact registry.