Setting Up your Wiki - dteck/Mediawiki-GCP-CR GitHub Wiki
Getting Started
Now that we have set up our infrastructure it is time to build the MediaWiki tables and set our configuration options. MediaWiki makes this easy for us by putting itself into setup mode when it cannot find a file called LocalSettings.php. This setup mode will help us build the LocalSettings file that we will then store in our configuration bucket.
Navigate to MediaWiki Setup
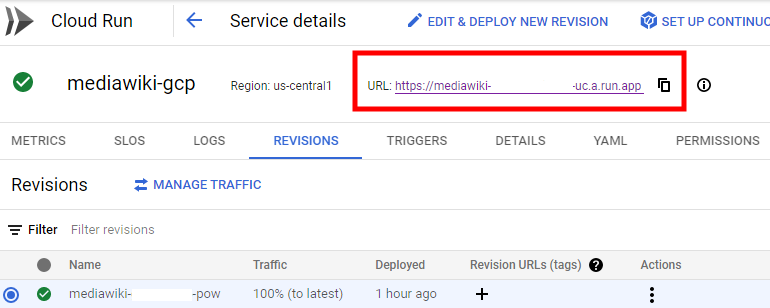
From the cloud Run page you will be shown the URL to access your service. Clicking on this will take you to your Mediawiki installation page.
Setup Landing Page
Since the MediaWiki installation cannot find a copy of LocalSettings.php it will display this error page. Which at the bottom contains a link to "set up the wiki". We will want to follow this link
Language Settings
The first step is to tell the installer what language you speak and what language you want your wiki to be displayed in.
Environment checks
Here the installer will check to make sure the system it is running on is capable of serving the wiki pages. Since our service runs from a container published by MediaWiki itself we know that these checks will pass.
Connecting to your Database
On this page you will be asked to enter what type of database you are using. We created a MySql database so we will select that option. Next you will need to enter the the Database host which is the IP Address of your database. This can be found on the overview page of your Cloud SQL page. You will need to set a name for the database that will be created in your Cloud SQL server. I have used the default value of "my_wiki". You can also set a prefix for your tables if you want to be able to run more than one wiki on the same Cloud SQL server. Finally you will be asked to provide the Username and Password for your database. When you click continue the page will attempt to connect to your database just to make sure the credential you provided work. If they fail it will ask you to reenter them before moving on.
Database User Settings
The installer will ask you if you would like to use the same account to run your database day to day as you do fore building the tables. This is meant to add a layer of security by allowing you to use one account to build tables and another that cannot build or delete tables to read and write to them in normal operations.
In our case once we secure our Cloud SQL server it will not be as important to separate these permissions. So I am opting to use the same account for installation as I am for running the day to day.
Name, Namespace, and Administrative Accounts
You will now be asked to provide a name for your wiki. This will be how it references itself and for our purposes it will also create the Namespace we have it operate in. If you are unfamiliar with namespacing I suggest leaving it as the default option of using the project name as the namespace.
You will also be asked to create an administrator account for the wiki. You need to provide a Username and Password that you would like to use. Attaching an email address is optional so I left mine out.
At this point you can tell the installer that you are finished and it will generate your tables and configuration file with default options. I however want to see the rest of the the installer steps and so I select the "Ask me more Questions" option before continuing.
User Rights
Here we need to select fi we want the wiki to be public so that anyone who can access it can read and write to it. Or if we want to restrict access in some way like allowing people to read it but not to write to it, or even making it so they cannot read any pages without being logged in.
Since in my case I want to make this accessible over the internet but it should be used only by people who work in my organization. I am going to set it to "private". This means that people could navigate to the page but will not be able to see any of the contents without first logging in.
Copyright
Since wikis are designed for sharing knowledge you can attach a copyright to each page. Again since I plan on using this for internal work I am going to skip adding a copyright to the pages.
To learn more about the differnet copyrights you can go here: creativecommons.org
Email Notifications
MediaWiki can be set up to send you notifications for different events. This will require an email server that it can send messages though. I have this option disabled in my setup as I do not want to receive emails about any changes happening on my wiki.
Page Themes
Mediawiki ships with three different default themes you can choose from. I personally like the look of MonoBook. So that is what I will use. Each of the options has links to screenshots with it so you can look at the layouts before selecting the one you like best.
Special Pages
For example Nuke is a mass deletion tool for administrators to allow them to roll back all recent changes.
And Replace Text is a tool that allows administrators to search and replace text across ALL pages in a wiki at once. I prefer to enable all of these to give myself the most options for administering the wiki later.
Page Editors
This is where you can set what user interface people see when editing pages. I personally prefer Code Editor which requires that Wikieditor be enabled as well.
A word of caution for enabling Visual Editor is that in its current state there may be errors generated when attempting to use it. Some people have found solutions in forums on how to make sure the visual editor operates normally. I will be leaving it disabled.
Parser Hooks
Parser Hooks can be thought of as extensions that add abilities to your page. Again I like to add all of them to give myself more options. But One I specifically recommend is the SyntaxHighlight which will allow you to add code blocks to your page and define the coding language. It will then highlight the language keywords like an IDE does.
Media Handlers
There is only one option listed here and that is for an extension to allow MediaWiki to handle PDF files. I dont forsee the use of PDFs on my wiki but in case the users want to add them I am including it here.
Spam Filters
Again since MediaWiki assumes you will be operating publicly they allow you to add extensions to help decrease the amount of spam edits that might happen. Things like making you confirm an edit before it gets posted, or backlisting certain titles or keywords. as I plan to restrict access to the pages I will not be enabling these extensions. I would recommend them if you are not forcing users to log in.
API
This extension will allow you to make an API call to get an image of an entire page. I am enabling this in case there is ever a need for archiving the pages. I don't foresee it being necessary but again I want to have the option available.
Additional Extensions
Here there are a few miscellaneous extensions that you can enable. I am enabling all of them except for the OAuth which does require additional set up. Things like the TextExtract allow you to pull all of the text off of a page. Multimedia Viewer opens images in a preview box instead of hard linking to the image, etc.
Enable Uploads and set a logo
Here you are able to set the option to allow users to upload files and images or not. We went thought he trouble if connecting our storage buckets to our cloud Run instance so that we could allow users to upload files and images. So we will enable this option and leave the folders at the default locations.
We will set the logo location when we make our edits to the configuration file so for now you can leave it as is.
Cache
Here you can set different options for Caching pages and images. If you are not familiar with caches I recommend leaving these options as their default. I will also be leaving it at the default of letting PHP handle my caches.
Confirm setup
With all of the options set you will be asked to confirm your choices before the installer builds your database tables
Installation Progress and confirmation
You will be shown a page where you can watch the installation progress and see confirmation of the completion of each step.
Download Configuration File
The installer will have generated a configuration file (LocalSettings.php) for you based on the options you selected during the setup process. You will need to save this file to your computer so that we can make a few modifications and then add it to our configuration buckets.