Capacitive_Touch_Key_Pad_16_keys - dimaatmelodromru/techdoc GitHub Wiki
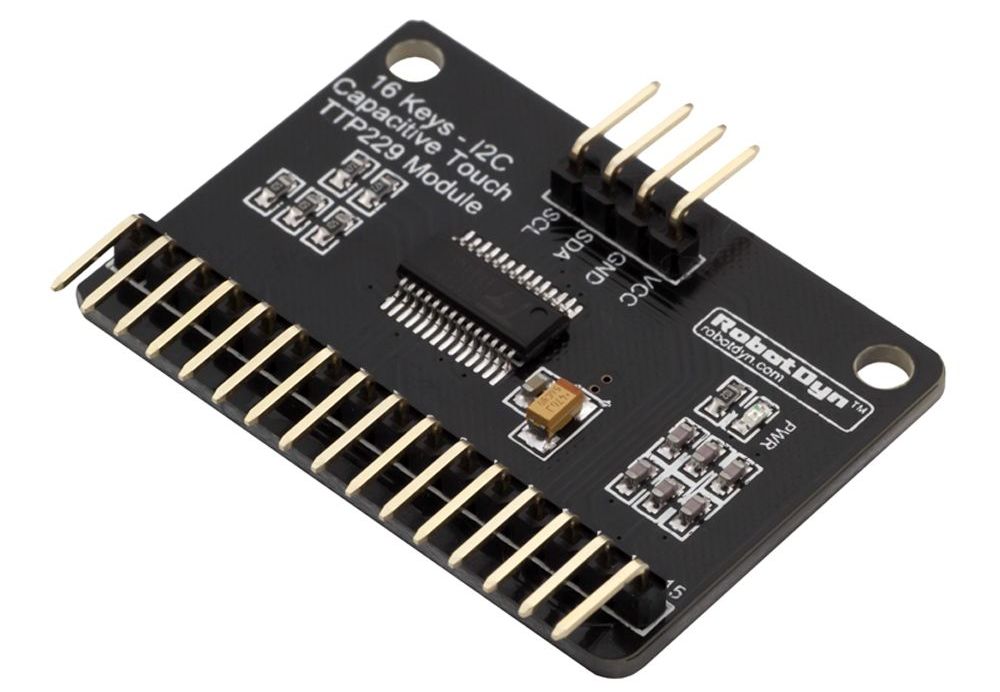
Capacitive Touch Key Pad 16 keys (https://robotdyn.com/capacitive-touch-key-pad-16-keys.html) features 16 4x4 touch buttons. This compact, inexpensive keyboard can connect to any capacitive touch module. It is a full-featured touch keyboard that can be easily integrated into a professional control system or microcontroller application. Touch panels are numbered 1 to 16 and can be marked with a felt-tip pen. Included: board and jumper and FF wires 150 mm long.

Consider connecting a keyboard to an Arduino board. To connect, we will use a 16-key capacitive touch TTP229 I2C module, which is connected to the microcontroller via the I2C bus .
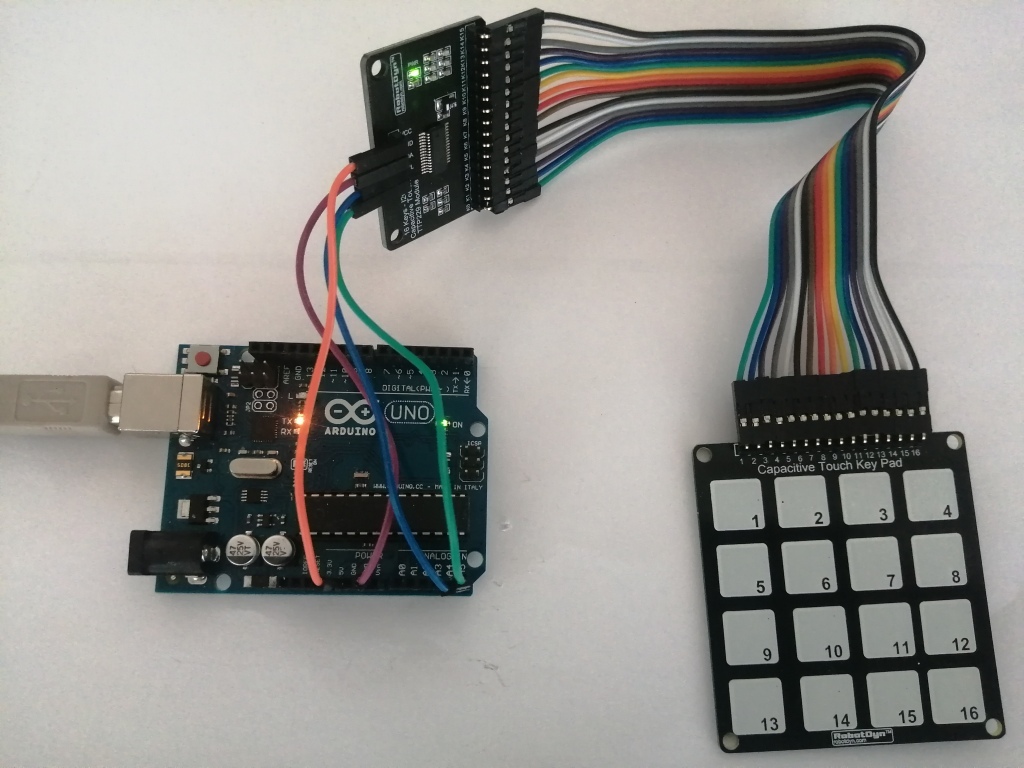
 Connection according to the connection diagram:

TT_TouchKeypadTTP229 library can be downloaded from the link
https://github.com/TinkerYpsi/TT_TouchKeypadTTP229/archive/master.zip
The library must be copied to the libraries folder of the Arduino IDE.
This library uses the standard Wire.h library, which must be included in the sketch.
#include <Wire.h>

#include <TT_TouchKeypadTTP229.h>
Let's write a sketch to determine which keys are pressed on the touch keyboard and output to the serial port. When writing a sketch, we use the TT_TouchKeypadTTP229 library. Sketch Content:
// library connection
#include "Wire.h"
#include <TT_TouchKeypadTTP229.h>
// create an instance
TT_TouchKeypadTTP229 touchpad;
void setup() {
Serial.begin(9600);
}
void loop() {
byte aa, bb = 0;
// receive data from Capacitive touch TTP229 I2C module
touchpad.getKeys(&aa, &bb);
// print received values
printByte(aa);
printByte(bb);
Serial.println();
delay (1000);
}
// byte output function
void printByte(byte bytePrint) {
// pass through the received bits
for (unsigned int mask = 0x80; mask; mask >> = 1) {
If (mask & bytePrint) {
Serial.print ('1');
}
else {
Serial.print('0');
}
}
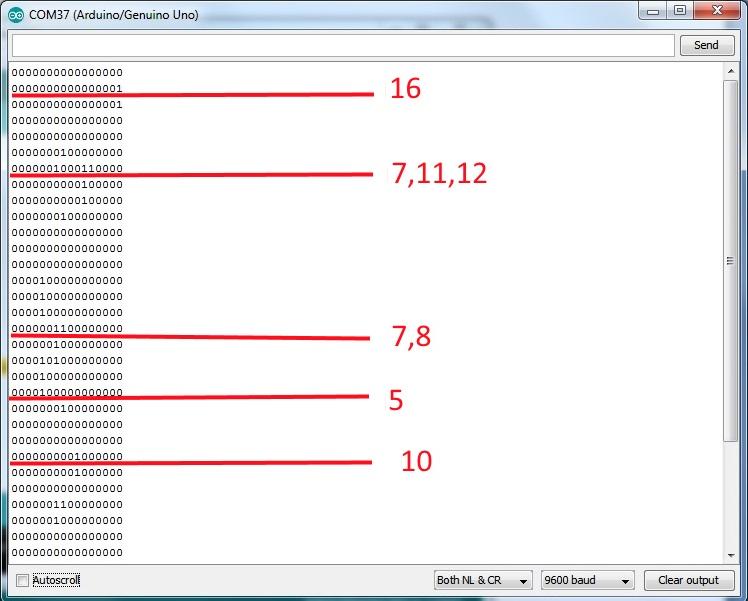
}We load the sketch onto the Arduino board, open the serial port monitor and look at the keyboard status output using the 1-16 button (1 - pressed, 0 - pressed):
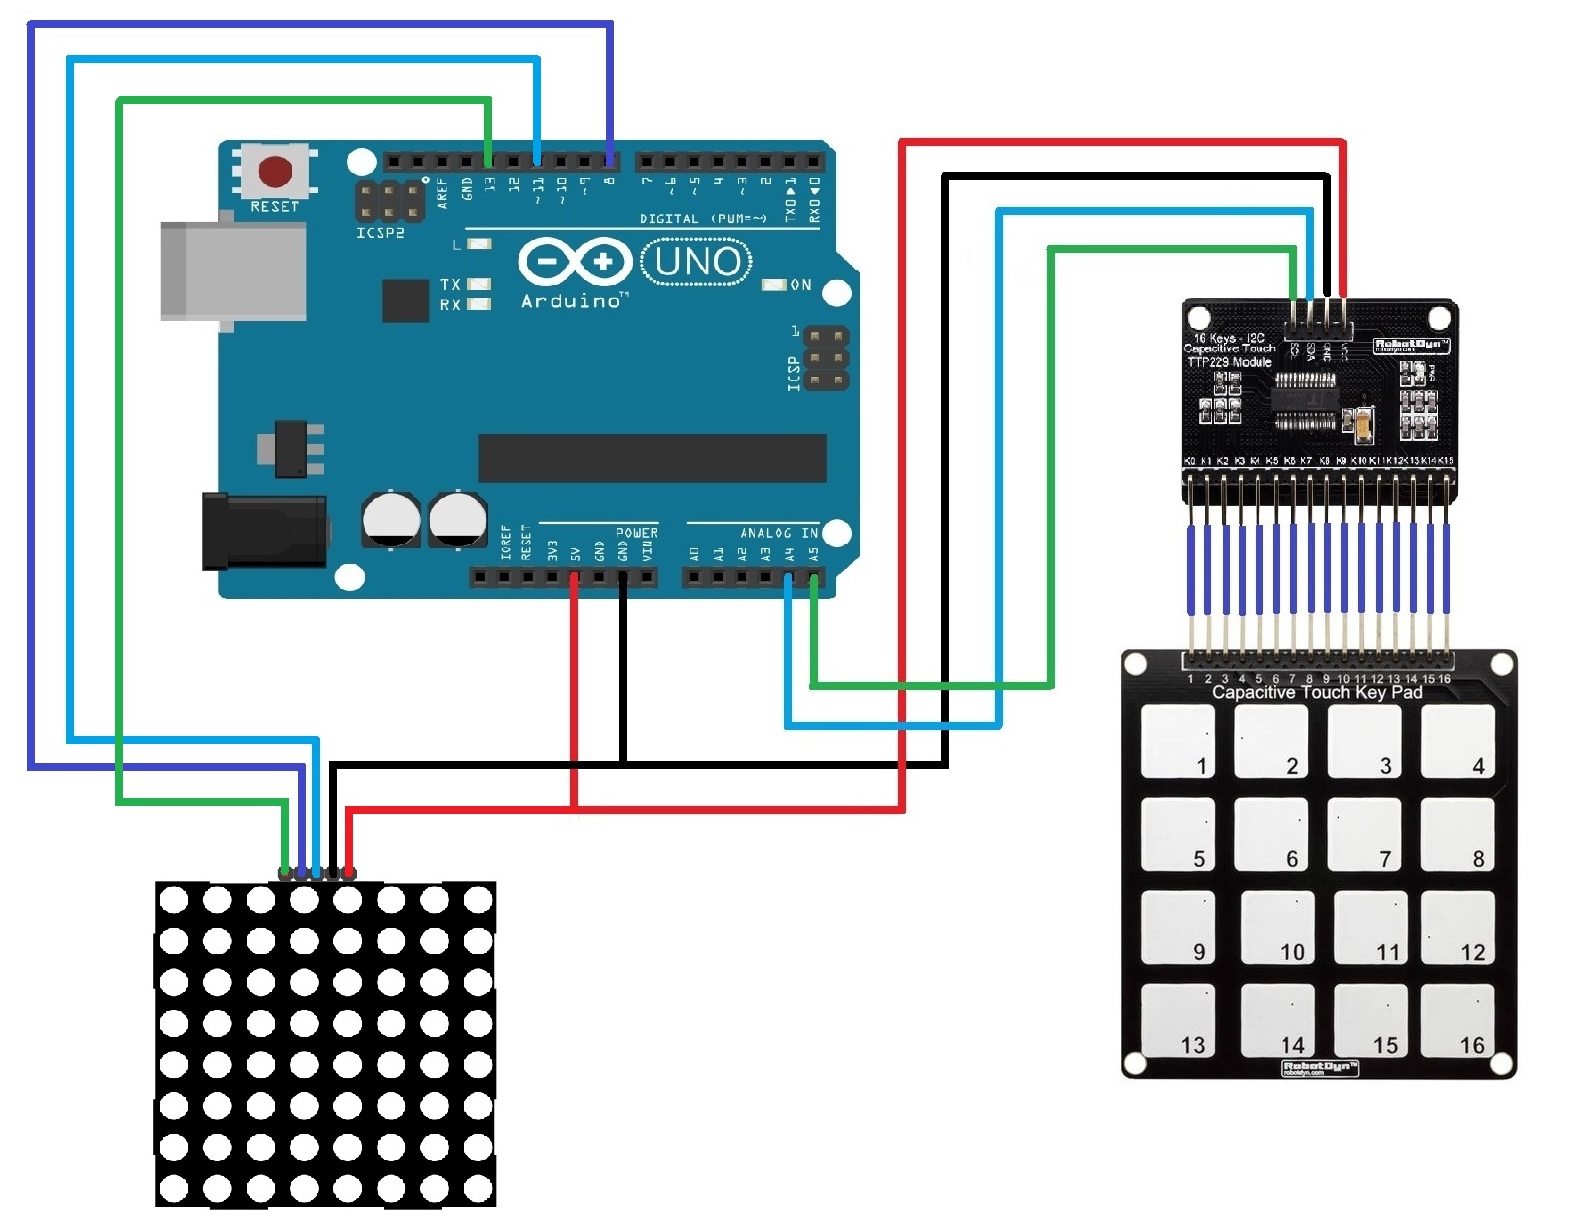
As an example of use, we create a visualization project on an LED matrix of keyboard touches.
We will use the following components:
-
Arduino UNO board - 1;
-
Keyboard Capacitive Touch Key Pad 16 keys - 1;
-
16 Keys Capacitive touch TTP229 I2C module - 1;
-
LED matrix 8x8 - 1;
-
Jumper wires - 9.
Component connection diagram:

We will use the Max72xxPanel library (http://arduino-kit.ru/scetches/arduino-Max72xxPanel-master.zip). In addition, you need to install the Adafruit-GFX-Library, which is necessary for displaying graphic primitives on displays.
Each key corresponds to a 2x2 square on the matrix screen. The coordinates will be stored in an array.
// array of display space matching
// keyboard keys
struct KOORD {
int x;
int y;
};
KOORD koords[][4]={{{0,0},{0,1},{1,0},{1,1}},
{{2,0},{2,1},{3,0},{3,1}},
{{4,0},{4,1},{5,0},{5,1}},
{{6,0},{6,1},{7,0},{7,1}},
{{0,2},{0,3},{1,2},{1,3}},
{{2,2},{2,3},{3,2},{3,3}},
{{4,2},{4,3},{5,2},{5,3}},
{{6,2},{6,3},{7,2},{7,3}},
{{0,4},{0,5},{1,4},{1,5}},
{{2,4},{2,5},{3,4},{3,5}},
{{4,4},{4,5},{5,4},{5,5}},
{{6,4},{6,5},{7,4},{7,5}},
{{0,6},{0,7},{1,6},{1,7}},
{{2,6},{2,7},{3,6},{3,7}},
{{4,6},{4,7},{5,6},{5,7}},
{{6,6},{6,7},{7,6},{7,7}}
};
After reading the status of the keyboard from the 16 Keys Capacitive touch TTP229 I2C module, we display the squares corresponding to the keys pressed. Sketch Content:
// library for TP229
#include "Wire.h"
#include <TT_TouchKeypadTTP229.h>
// create an instance of the object
TT_TouchKeypadTTP229 touchpad;
// libraries for the matrix
#include <SPI.h>
#include <Adafruit_GFX.h>
#include <Max72xxPanel.h>
// pin CS
int pinCS = 8;
// number of matrices horizontally
int numberOfHorizontal = 1;
// number of matrices vertically
int numberOfVertical = 1;
// create an instance of the object
Max72xxPanel matrix = Max72xxPanel(pinCS, numberOfHorizontal, numberOfVertical);
// array of display space matching
// keyboard keys
struct KOORD {
int x;
int y;
};
KOORD koords[][4]={{{0,0},{0,1},{1,0},{1,1}},
{{2,0},{2,1},{3,0},{3,1}},
{{4,0},{4,1},{5,0},{5,1}},
{{6,0},{6,1},{7,0},{7,1}},
{{0,2},{0,3},{1,2},{1,3}},
{{2,2},{2,3},{3,2},{3,3}},
{{4,2},{4,3},{5,2},{5,3}},
{{6,2},{6,3},{7,2},{7,3}},
{{0,4},{0,5},{1,4},{1,5}},
{{2,4},{2,5},{3,4},{3,5}},
{{4,4},{4,5},{5,4},{5,5}},
{{6,4},{6,5},{7,4},{7,5}},
{{0,6},{0,7},{1,6},{1,7}},
{{2,6},{2,7},{3,6},{3,7}},
{{4,6},{4,7},{5,6},{5,7}},
{{6,6},{6,7},{7,6},{7,7}}
};
void setup() {
// brightness from 0 to 15
matrix.setIntensity (6);
}
void loop () {
byte aa, bb = 0;
unsigned int aabb;
// receive data from Capacitive touch TTP229 I2C module
touchpad.getKeys(& aa, & bb);
// print received values
aabb = (aa << 8) + bb;
printByte(aabb);
// display output
printMatrixAll(aabb);
// pause before the next request
delay(500);
}
// function to output keyboard data to the matrix
void printMatrixAll(unsigned int bytePrint) {
// pass through the received bits
int i = 0;
for (unsigned int mask = 0x8000; mask; mask >> = 1) {
If (mask & bytePrint) {
PrintMatrixOne (i, 1);
}
else {
PrintMatrixOne (i, 0);
}
i++;
}
// output all pixels to the matrix
matrix.write();
}
// data output function for one key per matrix
void printMatrixOne(int pos, int data) {
// 4 positions from the array
for (int i = 0; i <4; i ++) {
// set the pixel value
matrix.drawPixel(koords[pos][i].x, koords[pos][i].y, data);
}
}Download the sketch to the Arduino board, and check the operation of the program.