AVR HV2 Software - dilshan/avr-hv2 GitHub Wiki
AVR-HV2 Software can be used to read, write MCU memories, change configuration bits, and read calibration bytes. It is designed with GUI and works on both Windows and Linux operating systems. The latest AVR-HV2 binaries are available to download at the release section of the GitHub repository.
To avoid permission issues, in the Linux platform, make sure to execute this software with superuser privileges.
Connect and disconnect the programmer
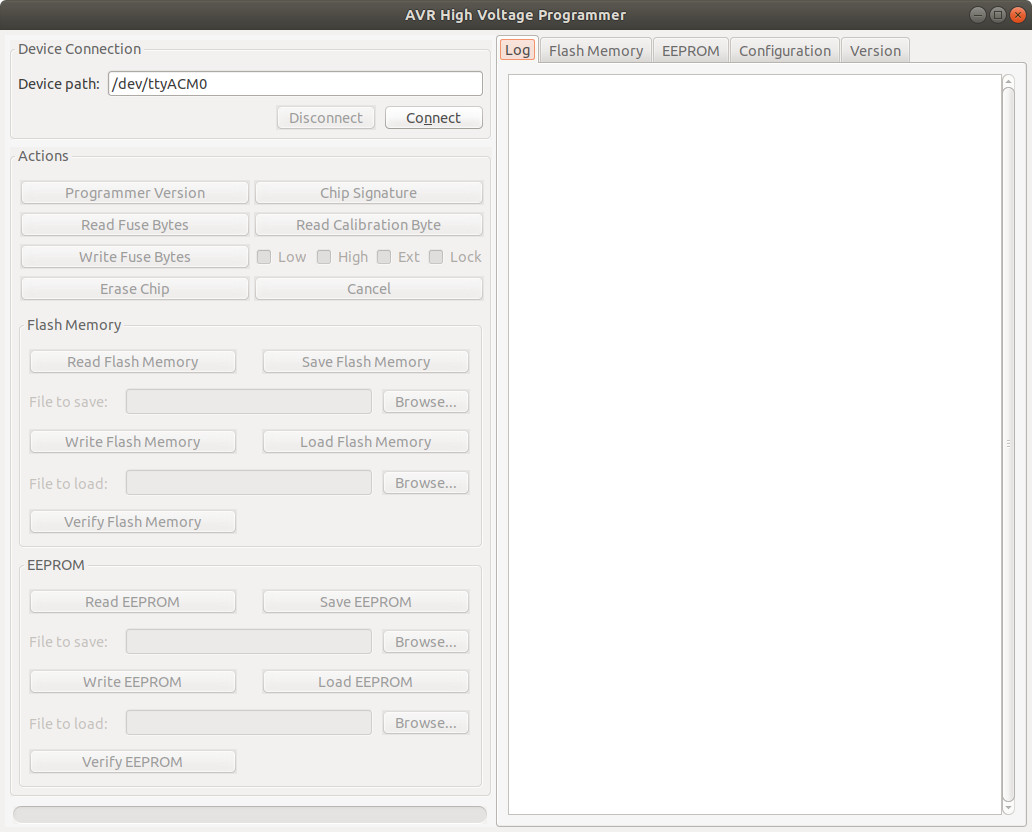
Before connecting with the programmer specify the COM port path into the "Device Path" text box.
In Linux operating systems the COM port path can be obtained using the following command:
dmesg | grep tty
In most of the systems path should appear similar to the following format:
[10636.887671] cdc_acm 3-6:1.0: ttyACM0: USB ACM device
When specifying the device path make sure to insert the full device path as follows:
/dev/ttyACM0
After specifying the path, press the "Connect" button to establish a connection with the programmer. Usually, the software may need several seconds to discover the communication link.
After a successful connection, the following messages should appear in the log section:
  Connecting with the AVR High Voltage Programmer...
  Received acknowledgement from the programmer
If the connection is not establishing, retry to connect with one of the following steps:
- Disconnect the programmer and connect it again.
- Verify that the Arduino IDE is properly closed.
- Check the application and port permissions.
- Use good quality USB 2.0 cable.
To disconnect the session press the "Disconnect" button.
Getting the firmware version
The firmware version of the programmer can be obtained by pressing the "Programmer Version" button. The version details appear in the log section of the programmer.
  Connecting with the AVR High Voltage Programmer...
  Received acknowledgement from the programmer
  Version: 01.00.00
Reading the chip signature
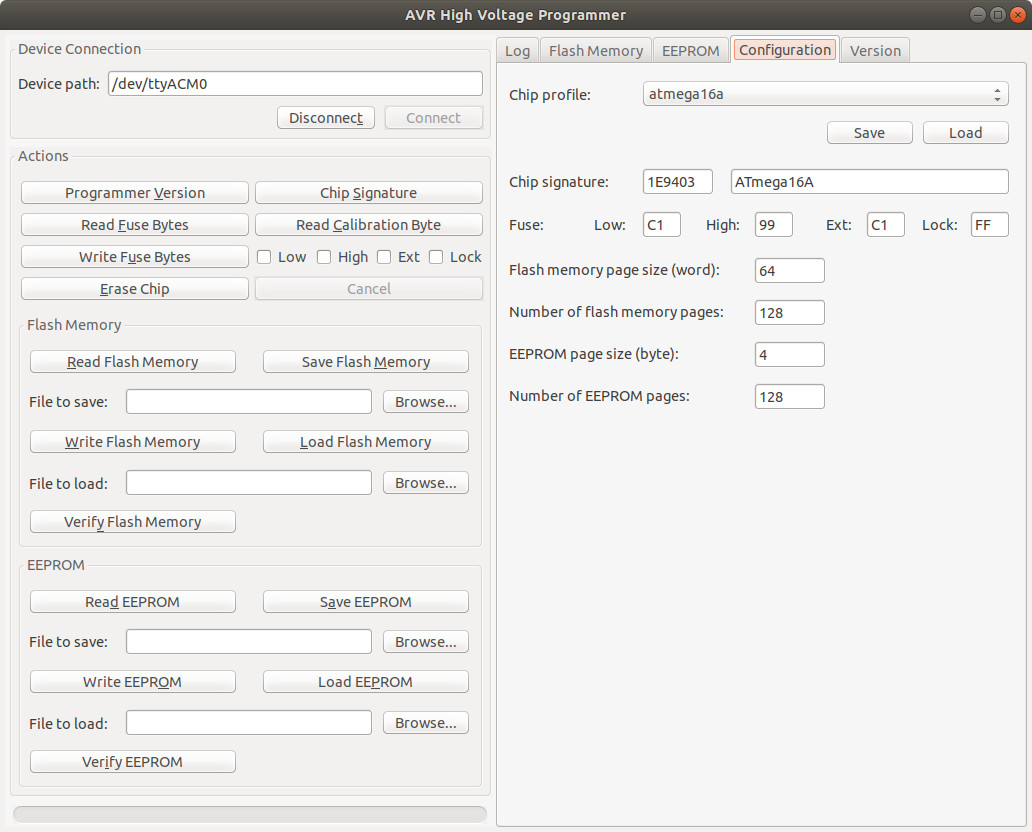
To read the chip signature, press the "Chip Signature" button. The signature obtained from the chip is presented on the log section and configuration sections of the UI.
  Connecting with the AVR High Voltage Programmer...
  Received acknowledgement from the programmer
  Chip signature: 1e9403 - ATmega16A
For the known chips the configuration profile is automatically loaded into the system.
Reading the calibration byte
The action associated with the "Read Calibration Byte" button can use to obtain the calibration byte value from the AVR MCU. The acquired value is displayed in the log section of the AVR-HV2.
  Connecting with the AVR High Voltage Programmer...
  Received acknowledgement from the programmer
  Calibration byte: ac
Reading the fuse values
To get the AVR MCU fuse values, press the "Read Fuse Bytes" button. This operation reads the values of the following fuses and updates both the log and configuration section of the AVR-HV2.
- Low fuse byte
- High fuse byte
- Extended fuse byte
- Lock fuse byte
Note: Ignore the value of extended fuse byte if it is not available in the target MCU.
  Connecting with the AVR High Voltage Programmer...
  Received acknowledgement from the programmer
  Fuse and lock bytes configuration:
   - Low: c1
   - High: 99
   - Extended: c1
   - Lock: ff
Changing the fuse bytes
AVR-HV2 programmer can use to update the following fuse values of the AVR MCUs:
- Low fuse byte
- High fuse byte
- Extended fuse byte
- Lock fuse byte
With the current version of AVR-HV2 software, the user can update an individual or a combination of the above fuses.
To update the fuse bytes, first, change the values of the corresponding fuses in the configuration tab. As a next step, mark fuse checkboxes that need to update and press the "Write Fuse Bytes" button.
Erasing the content
Press the "Erase Chip" button to erase the content of the flash memory and EEPROM. During this operation, the values of the fuse bits are not going to reset. In most of the MCUs, the lock bit values are changed after the successful erase operation.
If EESAVE fuse is programmed, then the content of the EEPROM is not erased with this operation. For more details refer to the MCU datasheet.
Reading the flash memory
To get the content of the flash memory, press the "Read Flash Memory" button. Before executing this operation, make to select the appropriate chip profile from the configuration section of the UI.
The accurate value of the flash memory page size and number of flash memory pages are essential to the success of this operation.
Programming the flash memory
To write content into flash memory, first, fill the content into AVR-HV2 buffer by press the "Load Flash Memory" button.
After the content and chip profile are set, press the "Write Flash Memory" button to start the programming process.
The duration of the programming process depends on the length of the content and the speed of the MCU write operation. Comparatively, the write operations are slow in AVR-HV2 and its current writing status is displyed on the progress bar located at the bottom of the window.
If flash memory of the MCU is not clear, always erase the chip using the "Erase Chip" command.
Verify the flash memory
The verification functionality provided in the AVR-HV2 is helpful to match MCU flash memory with a supplied data file. This operation examines each bit of the memory with the supplied data file and reports the first 10 mismatches in the log section.
To start the flash memory verification, set the chip profile from the configuration section and press the "Verify Flash Memory" button.
  Connecting with the AVR High Voltage Programmer...
  Received acknowledgement from the programmer
  Chip signature: 1e9403 - ATmega16A
  Finished reading flash memory
  Start verifying memory content...
  Verification successful
Reading the EEPROM
To get the content of the EEPROM, press the "Read EEPROM" button. Before executing this operation, make to select the appropriate chip profile from the configuration section of the UI.
The accurate value of the EEPROM memory page size and number of EEPROM memory pages are essential to the success of this operation.
Programming the EEPROM
To write content into EEPROM, first, fill the content into AVR-HV2 buffer by press the "Load EEPROM" button.
After the content and chip profile are set, press the "Write EEPROM" button to start the programming process.
If EEPROM of the MCU is not clear, reset the EESAVE fuse and perform a chip erase using the "Erase Chip" button.
Verify the EEPROM
The verification functionality provided in the AVR-HV2 is helpful to match MCU EEPROM with a supplied data file. This operation examines each bit of the memory with the supplied data file and reports the first 10 mismatches in the log section.
To start the EEPROM verification, set the chip profile from the configuration section and press the "Verify EEPROM" button.
  Connecting with the AVR High Voltage Programmer...
  Received acknowledgement from the programmer
  Chip signature: 1e9403 - ATmega16A
  Start reading EEPROM...
  Finished reading EEPROM
  Start verfying EEPROM...
  Finished reading EEPROM
  Start verifying memory content...
  Verification successful
Save memory data into files
To save flash or EEPROM data, press "Save Flash Memory" or "Save EEPROM" buttons in the relevant section. This operation saves captured memory content as Intel hexadecimal object file format.
Loading memory content from files
AVR-HV2 supports importing flash memory or EEPROM content from Intel hexadecimal object files. To import contents, press "Load Flash Memory" or "Load EEPROM" buttons.
During this operation, the existing flash/EEPROM buffer of the AVR-HV2 got overwrite with the file data.