URDF Model - dhanushshettigar/Getting-Started-With-ROS2 GitHub Wiki
ROS TF and URDF Demo
This demo will walk you through installing, launching, and exploring a robot model using URDF and TF in ROS.
Table of Contents
- Step 1: Install URDF Tutorial Package
- Step 2: Navigate to URDF Tutorial Files
- Step 3: Explore the URDF Files
- Step 4: Run the Sample URDF File
- Step 5: Rotate and Explore the Model
- Step 6: Disable/Enable the Grid
- Step 7: Disable the Robot Model
- Step 8: Expand the TF Section
- Step 9: Expand Frames
- Step 10: Enable/Disable Frames and Explore Connections
- Understanding TF Frames and Trees
Step 1: Install URDF Tutorial Package
The first step is to install the urdf_tutorial package. This package contains various example models and tools to help you learn how URDF (Unified Robot Description Format) works in ROS.
sudo apt install ros-jazzy-urdf-tutorial
Step 2: Navigate to URDF Tutorial Files
The tutorial package is installed in the ROS installation directory. Navigate to the URDF tutorial folder where all the launch files and examples are stored:
cd /opt/ros/jazzy/share/urdf_tutorial
This folder contains several launch files that help visualize and load robot models in RViz.
Step 3: Explore the URDF Files
URDF (Unified Robot Description Format) is an XML format used to describe a robot's structure, including joints, links, sensors, and actuators. Navigate to the folder where these files are stored:
cd urdf
In this folder, you’ll find several sample .urdf and .xacro files that define the robot’s shape, size, and components.
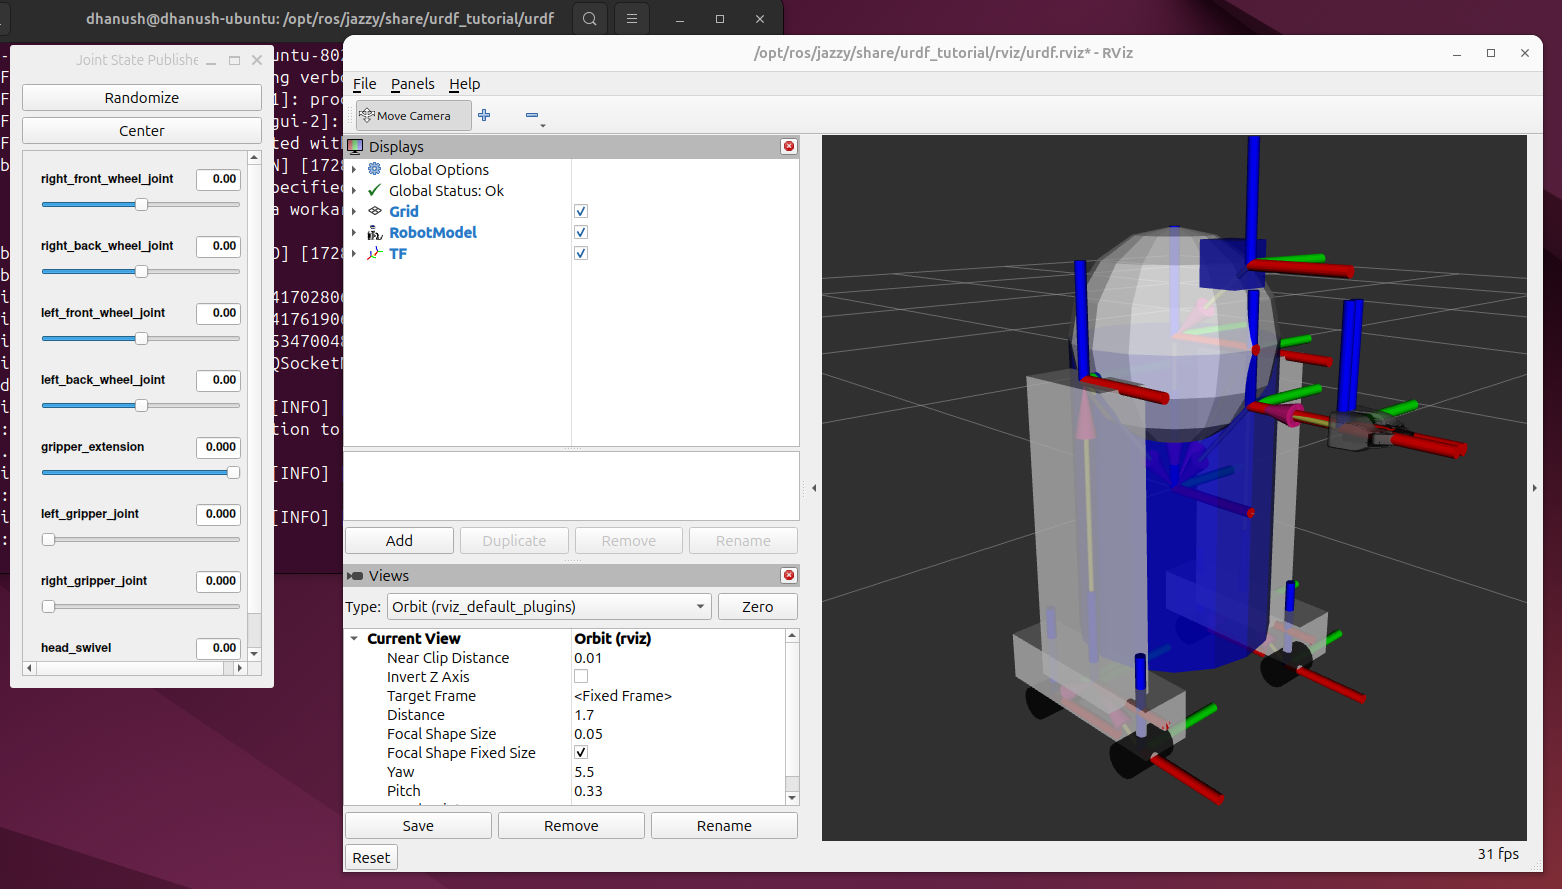
Step 4: Run the Sample URDF File
To display a sample robot model, use the following command. It launches a robot model from a URDF file using a ROS launch file:
ros2 launch urdf_tutorial display.launch.py model:=/opt/ros/jazzy/share/urdf_tutorial/urdf/08-macroed.urdf.xacro
This command opens a robot model in RViz, a 3D visualization tool for ROS. The model will appear as a 3D rendering in RViz, which you can interact with.
Step 5: Rotate and Explore the Model
Once the robot model appears in RViz, you can rotate and zoom in/out using the mouse. You can also use the Display Palette on the left-hand side to change the view and interaction settings.
Step 6: Disable/Enable the Grid
In RViz, a grid is displayed by default to provide reference for the ground plane. You can toggle the grid on or off by clicking the checkbox next to "Grid" in the Display Palette. This is useful for focusing only on the robot model.
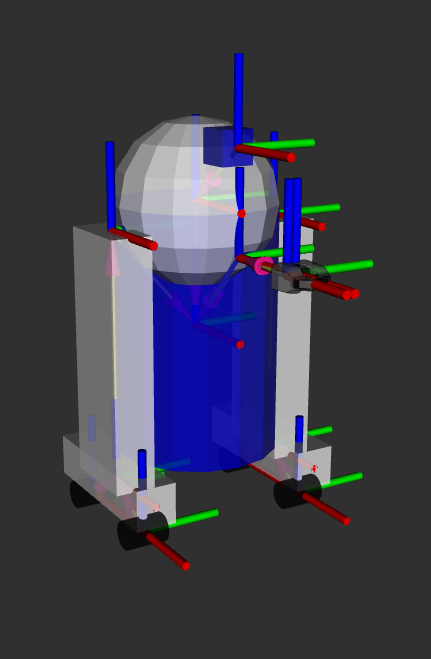
Step 7: Disable the Robot Model
You can also hide the robot model by unchecking "RobotModel" in the Display Palette. This allows you to focus on the TF tree (which shows the coordinate frames used for tracking the robot’s different parts).
Step 8: Expand the TF Section
TF (Transform) frames represent the relative positions and orientations of the robot’s components. Expand the TF section in RViz to reveal the transform frames linked to the robot model.
Step 10: Enable/Disable Frames and Explore Connections
You can toggle individual frames on or off to see how they are connected. For example, you can hide or display the "base_link" or "joint" frames to understand how different parts of the robot relate to each other. Each frame has a parent-child relationship, forming a "tree" of transformations (the TF tree).
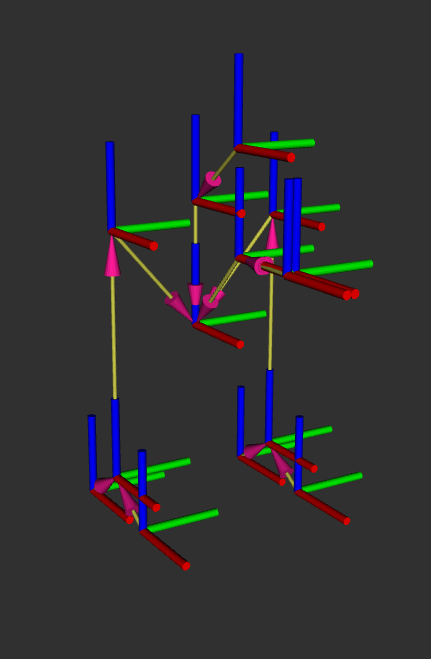
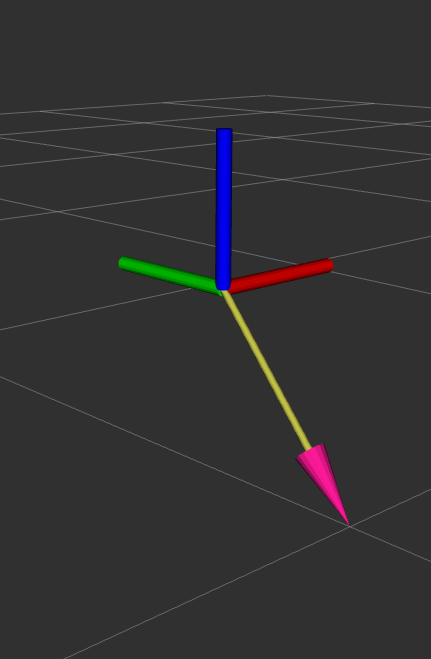
Understanding TF Frames and Trees
- TF Frames: A frame represents a coordinate system attached to a specific part of the robot, such as the base, wheels, or sensors.
- TF Tree: The tree shows the hierarchy and relationships between frames. It starts from a root (often the "base_link") and branches out to other parts of the robot (joints, sensors, etc.). The tree structure allows the robot to keep track of its own movement and the positions of all its components.