Add a Sensor in Gazebo - dhanushshettigar/Getting-Started-With-ROS2 GitHub Wiki
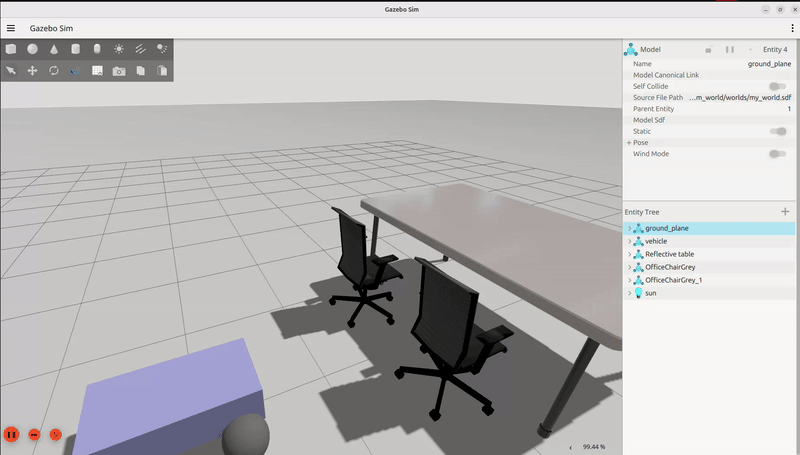
This guide explains how to integrate a camera sensor into your robot model in Gazebo and how to set up the sensor for ROS 2, including live feed configuration. By the end of this guide, you will have a robot model equipped with a camera sensor streaming data into ROS 2.
- Introduction to Camera Sensor Integration
- Modify the Robot Model
- Add Camera Bridge Information in Launch File
- Setup Live Feed
In ROS 2 with Gazebo, sensors like cameras are added as links in the robot model and configured to publish data on specific topics. The integration requires modifications to:
- The robot's model file (URDF or SDF).
- ROS 2 launch files for bridging Gazebo and ROS topics.
Navigate to your robot package:
cd ~/ros2_ws/src/diff_robot_custom_world && code .Edit your robot's SDF (model) file to include the following XML snippet:
<link name="camera">
    <pose>0.25 0 0.2 0 0 0</pose>
    <inertial>
        <mass>0.3</mass>
        <inertia>
            <ixx>0.005</ixx>
            <ixy>0</ixy>
            <ixz>0</ixz>
            <iyy>0.005</iyy>
            <iyz>0</iyz>
            <izz>0.005</izz>
        </inertia>
    </inertial>
    <visual name="visual_camera">
        <geometry>
            <box>
                <size>0.3 0.3 0.1</size>
            </box>
        </geometry>
        <material>
            <ambient>0.7 0.7 0.7 1</ambient>
            <diffuse>0.7 0.7 0.7 1</diffuse>
            <specular>0.3 0.3 0.3 1</specular>
        </material>
    </visual>
    <sensor name="camera" type="camera">
        <camera>
            <horizontal_fov>1.047</horizontal_fov>
            <image>
                <width>320</width>
                <height>240</height>
            </image>
            <clip>
                <near>0.1</near>
                <far>100</far>
            </clip>
        </camera>
        <always_on>1</always_on>
        <update_rate>30</update_rate>
        <visualize>true</visualize>
        <topic>camera</topic>
    </sensor>
    <collision name="collision_camera">
        <geometry>
            <box>
                <size>0.3 0.3 0.1</size>
            </box>
        </geometry>
    </collision>
</link>

<joint name="camera_joint" type="fixed">
    <parent>chassis</parent>
    <child>camera</child>
</joint>
- Link Properties: Defines the camera's position, mass, and visual appearance.
- Sensor Configuration: Specifies the camera's parameters such as FOV, resolution, and topics.
- Joint: Attaches the camera link to the robot's chassis.
To stream the camera data from Gazebo to ROS 2, add the following configuration to your launch file:
def generate_launch_description():
    bridge = Node(
        package='ros_gz_bridge',
        executable='parameter_bridge',
        arguments=[
            '/model/vehicle/cmd_vel@geometry_msgs/msg/[email protected]',
            '/model/vehicle/odometry@nav_msgs/msg/[email protected]',
            '/camera@sensor_msgs/msg/[email protected]',
            '/camera_info@sensor_msgs/msg/[email protected]',
        ],
        parameters=[{
            'qos_overrides./model/vehicle.subscriber.reliability': 'reliable',
        }],
        output='screen'
    )

return LaunchDescription([bridge])-
'/camera@sensor_msgs/msg/[email protected]':
- This bridges the camera's image data from Gazebo to ROS 2.
- Gazebo Topic: /camera
- Message Type: gz.msgs.Image (Gazebo-specific message type).
- ROS 2 Topic: /camera
- Message Type: sensor_msgs/msg/Image (standard ROS 2 message for image data).
- Purpose: Enables ROS 2 nodes to subscribe to the camera image feed.
-
'/camera_info@sensor_msgs/msg/[email protected]':
- This bridges camera metadata (e.g., intrinsic calibration, resolution, etc.) from Gazebo to ROS 2.
- Gazebo Topic: /camera_info
- Message Type: gz.msgs.CameraInfo.
- ROS 2 Topic: /camera_info
- Message Type: sensor_msgs/msg/CameraInfo.
- Purpose: Provides ROS 2 nodes with essential metadata about the camera for tasks like image processing or SLAM.
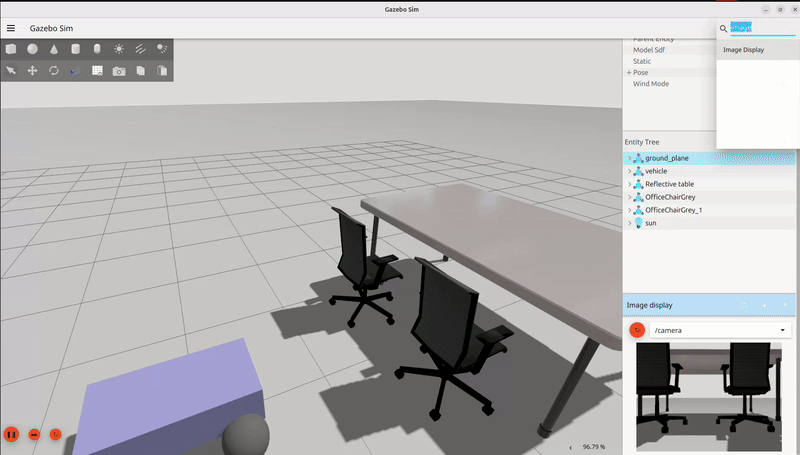
To visualize the camera feed in ROS 2:
To Control the robot add teleop:
Edit your robot's SDF (model) file to include the following XML snippet:
        <link name='lidar'>
            <pose>0.2 0 0.35 0 0 0</pose>
            <inertial>
                <mass>0.1</mass>
                <inertia>
                    <ixx>0.001</ixx>
                    <ixy>0</ixy>
                    <ixz>0</ixz>
                    <iyy>0.001</iyy>
                    <iyz>0</iyz>
                    <izz>0.001</izz>
                </inertia>
            </inertial>
            <visual name='visual_lidar'>
                <geometry>
                    <box>
                        <size>0.2 0.2 0.1</size>
                    </box>
                </geometry>
                <material>
                    <ambient>0.9 0.2 0.2 1</ambient>
                    <diffuse>0.9 0.2 0.2 1</diffuse>
                    <specular>0.5 0.5 0.5 1</specular>
                </material>
            </visual>
            <sensor name='gpu_lidar' type='gpu_lidar'>
                <topic>lidar</topic>
                <update_rate>10</update_rate>
                <lidar>
                    <scan>
                        <horizontal>
                            <samples>640</samples>
                            <resolution>1</resolution>
                            <min_angle>-1.396263</min_angle>
                            <max_angle>1.396263</max_angle>
                        </horizontal>
                        <vertical>
                            <samples>16</samples>
                            <resolution>1</resolution>
                            <min_angle>-0.261799</min_angle>
                            <max_angle>0.261799</max_angle>
                        </vertical>
                    </scan>
                    <range>
                        <min>0.08</min>
                        <max>10.0</max>
                        <resolution>0.01</resolution>
                    </range>
                </lidar>
                <alwaysOn>1</alwaysOn>
                <visualize>true</visualize>
            </sensor>
            <collision name='collision_lidar'>
                <geometry>
                    <box>
                        <size>0.2 0.2 0.1</size>
                    </box>
                </geometry>
            </collision>
        </link>

        <joint name='lidar_joint' type='fixed'>
            <parent>chassis</parent>
            <child>lidar</child>
        </joint>
To stream the lidar data from Gazebo to ROS 2, add the following configuration to your launch file:
   bridge = Node(
       package='ros_gz_bridge',
       executable='parameter_bridge',
       arguments=[
           '/model/vehicle/cmd_vel@geometry_msgs/msg/[email protected]',
           '/model/vehicle/odometry@nav_msgs/msg/[email protected]',
           '/camera@sensor_msgs/msg/[email protected]',
           '/camera_info@sensor_msgs/msg/[email protected]',
           'lidar@sensor_msgs/msg/[email protected]',
           '/lidar/points@sensor_msgs/msg/[email protected]',
       ],
       parameters=[{
           'qos_overrides./model/vehicle.subscriber.reliability': 'reliable',
       }],
       output='screen'
   )