GStreamer setup for Yocto Project - cu-ecen-aeld/final-project-ajsanthosh14 GitHub Wiki
Overview
This page includes the procedure involved in setting up the Yocto build to fetch the necessary contents required to support the GStreamer framework within the Yocto project. Once the build is successful with the GStreamer packages and plugins installed, it can be verified with some command-line examples and scripts provided in the test section of the page.
Introduction
GStreamer
GStreamer is a library for constructing graphs of media-handling components. The applications it supports range from simple Ogg/Vorbis playback, audio/video streaming to complex audio (mixing) and video (non-linear editing) processing.
GStreamer is released under the LGPL. The 1. x series is API and ABI stable and supersedes the previous stable 0.10 series. Both can be installed in parallel.
It works with all major operating systems like Linux, Windows, Android, and iOS. GStreamer uses its plug-ins to provide codecs, support for multiple container formats, filters, etc.
This page content is related to the build and use of GStreamer in Yocto Project distribution running on an ARM hardware architecture i.e, BeagleBone Black
This example deals with:
- Yocto Project (hardknott)
- GStreamer 1.0
Build a custom Linux distribution with Yocto Project to support the GStreamer multimedia framework
Step 1: Setup Yocto build environment
Since we already have a Yocto build environment setup from Assignment-6, we'll just clone the working Assignment-6 repository locally or continue with the Assignment-6 local repository (if there is no modifications have occurred later Assignment-6)
Clone meta-layers of utility
$ git clone — branch hardknott https://github.com/openembedded/meta-openembedded.git
$ git clone — branch hardknott https://github.com/openembedded/openembedded-core.git
$ git clone — branch hardknott https://github.com/meta-qt5/meta-qt5.git
This adds the meta-layer which supports running Qt cross-platform applications on the device
Note: We can find all the multimedia recipes inside poky/meta/recipes-multimedia
Step 2: Source Poky and the necessary layers to build the GStreamer
$ cd ..
$ source poky/oe-init-build-env
Step 3: Modify the content of the 'bblayers.conf' file inside the 'conf' directory
vim conf/bblayers.conf
Modify the content as shown below and replace {PATH} with absolute path to your poky directory
# POKY_BBLAYERS_CONF_VERSION is increased each time build/conf/bblayers.conf
# changes incompatibly
POKY_BBLAYERS_CONF_VERSION = "2"

BBPATH = "${TOPDIR}"
BBFILES ?= ""

BBLAYERS ?= " \
  /home/{path}/poky/meta \
  /home/{path}/poky/meta-poky \
  /home/{path}/poky/meta-yocto-bsp \
  /home/{path}/poky/meta-openembedded/meta-oe \
  /home/{path}/poky/meta-qt5 \
  /home/{path}/poky/meta-openembedded/meta-multimedia \
  /home/{path}/poky/meta-openembedded/meta-networking \
  /home/{path}/poky/meta-openembedded/meta-python \
  /home/{path}/poky/meta-aesd \
  "
Step 4: Modify build.sh to specify the features
To create a bootable image in the format WIC.bz2.
IMAGE="IMAGE_FSTYPES = \"wic.bz2\""

cat conf/local.conf | grep "${IMAGE}" > /dev/null
local_image_info=$?

if [ $local_image_info -ne 0 ];then
    echo "Append ${IMAGE} in the local.conf file"
	echo ${IMAGE} >> conf/local.conf
else
	echo "${IMAGE} already exists in the local.conf file"
fi
To add wifi support:
DISTRO_F="DISTRO_FEATURES:append = \" wifi\""

cat conf/local.conf | grep "${DISTRO_F}" > /dev/null
local_distro_info=$?

if [ $local_distro_info -ne 0 ];then
    echo "Append ${DISTRO_F} in the local.conf file"
	echo ${DISTRO_F} >> conf/local.conf
else
	echo "${DISTRO_F} already exists in the local.conf file"
fi
Add GStreamer supported packages and plugins required to support GStreamer pipeline elements in the built Yocto Image:
IMAGE_ADD="IMAGE_INSTALL:append = \"	v4l-utils python3 ntp wpa-supplicant
							  fbida fbgrab ffmpeg imagemagick gstreamer1.0
            				  gstreamer1.0-plugins-good gstreamer1.0-plugins-base
            				  gstreamer1.0-plugins-ugly gstreamer1.0-libav gst-player
            				  gstreamer1.0-meta-base gst-examples gstreamer1.0-rtsp-server\""

cat conf/local.conf | grep "${IMAGE_ADD}" > /dev/null
local_imgadd_info=$?

if [ $local_imgadd_info -ne 0 ];then
    echo "Append ${IMAGE_ADD} in the local.conf file"
	echo ${IMAGE_ADD} >> conf/local.conf
else
	echo "${IMAGE_ADD} already exists in the local.conf file"
fi


#Licence
LICENCE="LICENSE_FLAGS_WHITELIST = \"commercial\""
#this is required so that gstreamer1.0-plugins-ugly can be added to the image
LICENSE:append = " commercial_gstreamer1.0-plugins-ugly commercial_mpg123"

cat conf/local.conf | grep "${LICENCE}" > /dev/null
local_licn_info=$?

if [ $local_licn_info -ne 0 ];then
    echo "Append ${LICENCE} in the local.conf file"
	echo ${LICENCE} >> conf/local.conf
else
	echo "${LICENCE} already exists in the local.conf file"
fi
Most of the plugins required for the basic video transmission pipelines are in gst-plugins-good and gst-plugins-ugly package.
Read more about plugins here.
If any plugins are missing from the packages we installed above.
The individual plugins can be installed as below.
Here we are installing three such plugins required for our pipeline i.e., x264, voaacenc, and RTMP.
x264:
# Adding required gstreamer Package_configs for x264 to local.conf file
cat conf/local.conf | grep "x264" > /dev/null
local_licn_info=$?

if [ $local_licn_info -ne 0 ];then
    echo "Append x264 PACKAGECONFIG to local.conf file"
         echo "PACKAGECONFIG_append_pn-gstreamer1.0-plugins-ugly = \" x264\"" >> conf/local.conf
else
         echo " x264 package congigurations already exists in local.conf"
fi
VOAACENC:
# Adding required gstreamer Package_configs for voaacenc to local.conf file
cat conf/local.conf | grep " voaacenc" > /dev/null
local_licn_info=$?

if [ $local_licn_info -ne 0 ];then
    echo "Append voaacenc PACKAGECONFIG to local.conf file"
         echo "PACKAGECONFIG_append_pn-gstreamer1.0-plugins-bad = \" voaacenc\"" >> conf/local.conf
else
         echo " voaacenc package congigurations already exists in local.conf"
fi
RTMP:
# Adding required gstreamer Package_configs for rtmp to local.conf file
cat conf/local.conf | grep " rtmp" > /dev/null
local_licn_info=$?

if [ $local_licn_info -ne 0 ];then
    echo "Append rtmp PACKAGECONFIG to local.conf file"
         echo "PACKAGECONFIG_append_pn-gstreamer1.0-plugins-bad = \" rtmp\"" >> conf/local.conf
else
         echo " rtmp package congigurations already exists in local.conf"
fi
To add meta open embedded layer to the build. Since we are using multimedia and other such supported sub-layers from meta openembedded. We need to add these layers to the build.
#Add meta-oe from openembedded
bitbake-layers show-layers | grep "meta-oe" > /dev/null
layer_oe_info=$?

if [ $layer_oe_info -ne 0 ];then
	echo "Adding meta-oe layer"
	bitbake-layers add-layer ../meta-openembedded/meta-oe
else
	echo "meta-oe layer already exists"
fi
To add a meta networking layer to the build.
#Add meta-networking from openembedded
bitbake-layers show-layers | grep "meta-networking" > /dev/null
layer_networking_info=$?

if [ $layer_networking_info -ne 0 ];then
	echo "Adding meta-networking layer"
	bitbake-layers add-layer ../meta-openembedded/meta-networking
else
	echo "meta-networking layer already exists"
fi
Note: Complete build.sh script.
Yocto will look for these packages in the meta-layers specified in bblayer.conf and perform several tasks upon them, in the end, adding these as ready to use in the Yocto Image.
Step 5: Build the Yocto Image
Run the build script to build the Yocto Image
./build.sh
Step 6: Deploy the .wic Image file to the micro SD card
Copy the Yocto .wic image file locally and deploy the image to the micro SD card
sudo dd if=/build/tmp/deploy/images/beaglebone-yocto/core-image-aesd-beaglebone-yocto.wic of=/dev/sdx
*WARNING: replace /dev/sdx with your sdcard device
Test GStreamer
On successful boot we should see the login window, as below:

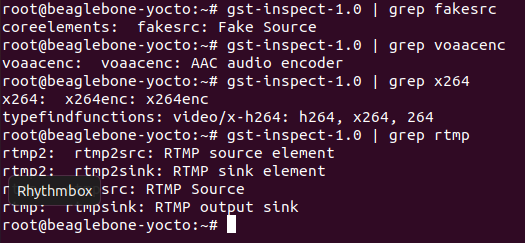
1. Verify the plugins
We can able to verify the presence of the required elements for the gst-pipelines with the gst-inspect command as below:
gst-inspect-1.0 | grep fakesrc
2. Fakesink test
We can verify the GStreamer pipeline working model with a basic pipeline with a fakesrc and a fakesink.
root@beaglebone-yocto:~# gst-launch-1.0 -v fakesrc silent=false num-buffers=3 ! fakesink silent=false
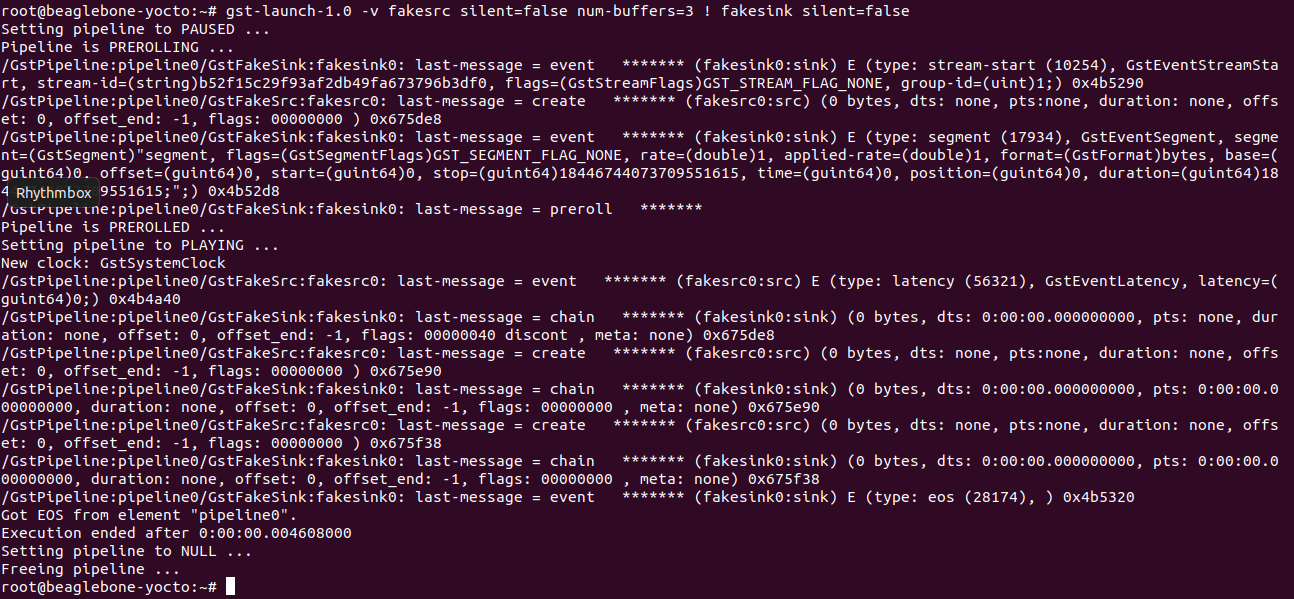
If the output looks similar, then GStreamer is running correctly.
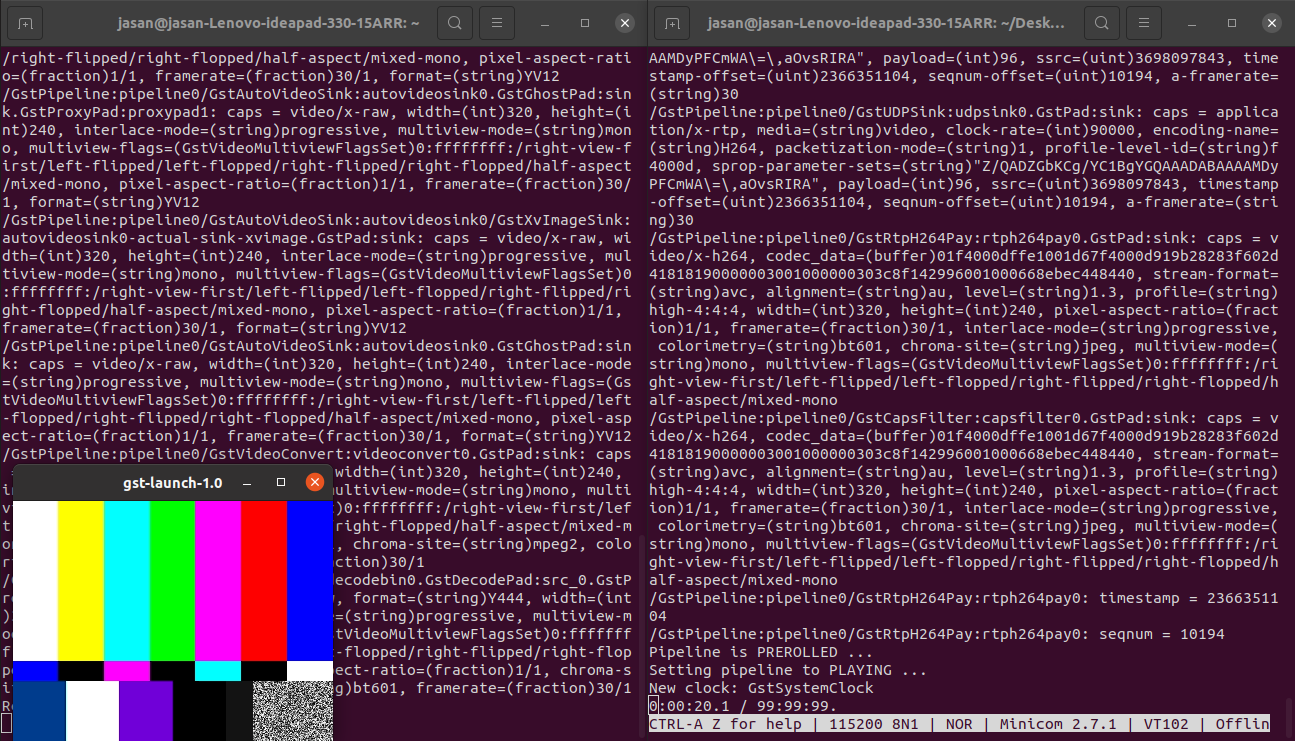
3. Test with GStreamer test video
Server (on BeagleBone Black):
$ gst-launch-1.0 -v videotestsrc ! decodebin ! videoconvert ! x264enc ! video/x-h264 ! rtph264pay ! udpsink host=IP port=5000
Note: replace IP with TARGET IP ADDRESS
Client (on PC):
$ gst-launch-1.0 -v udpsrc port=5000 caps="application/x-rtp, media=video, clock-rate=90000, encoding-name=(string)H264, payload=(int)96" ! rtph264depay ! decodebin ! videoconvert ! autovideosink sync=false
This will start viewing the streamed video from Beaglebone Black with openGL as shown below:
4. A Simple example to test a video only pipeline with openGL
We can also use a custom video source by modifying the above server pipeline as below:
$ gst-launch-1.0 -v filesrc location={PATH-TO-VIDEO} ! decodebin ! videoconvert ! x264enc ! video/x-h264 ! rtph264pay ! udpsink host=IP port=5000
Note: replace {PATH-TO-VIDEO} by path to the video file.
An example is shown below:

5. Link to explore more examples
Example 1: Video + Audio streaming
- Server script
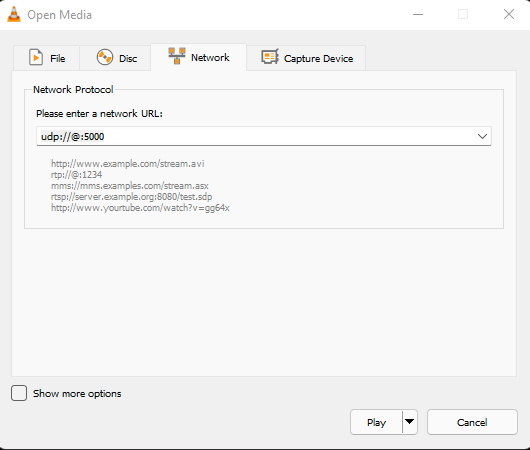
- Client: We can setup VLC to view the video on PC
Step 1: (In VLC) Media -> Open Network Stream
Step 2: Enter udp://@:PORT
As shown below:
Example 2: We can also use application to stream video
-
Client: VLC (Setup as explained above)
Read more about application development