7. Tierod Construction - crunchysteve/TriceratopsTwo GitHub Wiki
Parts Details
The tierods are what leans the front wheels, relative to the lean on the main frame. While the steerer assembly, where the crossmember pivots on the main, or centre, frame to create the directional component of the steering, the tierods tilt the wheels as the frame tilts to keep cornering forces perpendicular the the wheel axes and, where applicable, maintain road contact on edges of the front tyres, where tread is often slightly more aggressive. You'll need the following for your two tierods...
- 4x internally threaded, preferably round, not hex, coupler nuts. I'm using M8x10 round coupler nuts, but M6 will suffice. As per these. (Click link for image).
- 4x M8 or M6 hex nuts for locking nuts.
- 4x M8 or M6 flexible couplers, such as these rose joints (click for image), or these ball joints. (Click for image.) I'm using M8 rose joints.
- 2x 175mm lengths of steel tubing with an internal diameter of neat or slight interference fit to your coupler nuts. If you're using M8 threaded parts, like me, and round coupler nuts, the tubing you need will be approximately 10mm to 11mm internal diameter. A "tight-ish" fit will make welding tuer and easier. My couplers are M8x12 with an OD of 12, so I'm using 12.7x1.2 EHS for my tierods, which has an internal diameter of 10.3, which will clamp nicely for tacking, before completing the weld all the way around the tube and coupler nut
- Several M8 or M6 bolts and nuts, as well as 2x 75mm lengths of 25mmx3 steel angle with an 50mm M8 or M6 dimensioned slot in its top face. These will be welded to the main frame, across from the tierod mounts on the tilt brackets.
Construction
While this is probably the simplest part, in concept, it does need a high degree of precision. The 175mm length for the tierod tubes is approximate, you may need a little more, or less, depending on how far you can get your coupler nuts in. My old beast of a dutch cargo bike has tierods between the handlebar head and the for head. The rig looks imprecise and floppy, but the steering is very positive, if a little slow due to the slack head angle and long wheelbase. The tierods are even and well balanced, and this makes the steering easy.
You may find it preferable to assemble the frame parts of your trike, square everything up, clamp it fit the ball or rose couplers then measure between half the thread on the flexible couplings at each end to decide on your tubing length. Measure twice, cut once. If you get about a few millimetre difference each side, average the lengths to get the tierod tube length. If it's more, check the square of your assembled and propped frame. If you've built everything so far to my dimensions, the 175mm tube length should be fine.
If your coupler nuts are a snug fit in the tube, use some gentle pressure to push them into each end of the 2 tubes, about half the length of the coupler nuts. If they're a slightly loose fit, push them in half their length and clamp the tube onto them.
Before doing a tack weld, check they protrude from the tubes straight and parallel. Another way to ensure they're true in the tubes is to screw them onto a length of threaded bar and slide the whole assembly into the tube, then clamp and tack. Once tacked, remove any clamps and threaded bar before welding all the way around the tube to fasten the coupling nuts in place.
Assembly
Next, thread each rose or ball joint screw with a locknut, so that about half the thread protrudes through the locknut, then thread the one flexible joint onto each end of each tierod. Don't fuss too much at this stage, as there will be an alignment process to run through at the assembly-for-testing stage. You should now have 2 tierods that each look something like this...
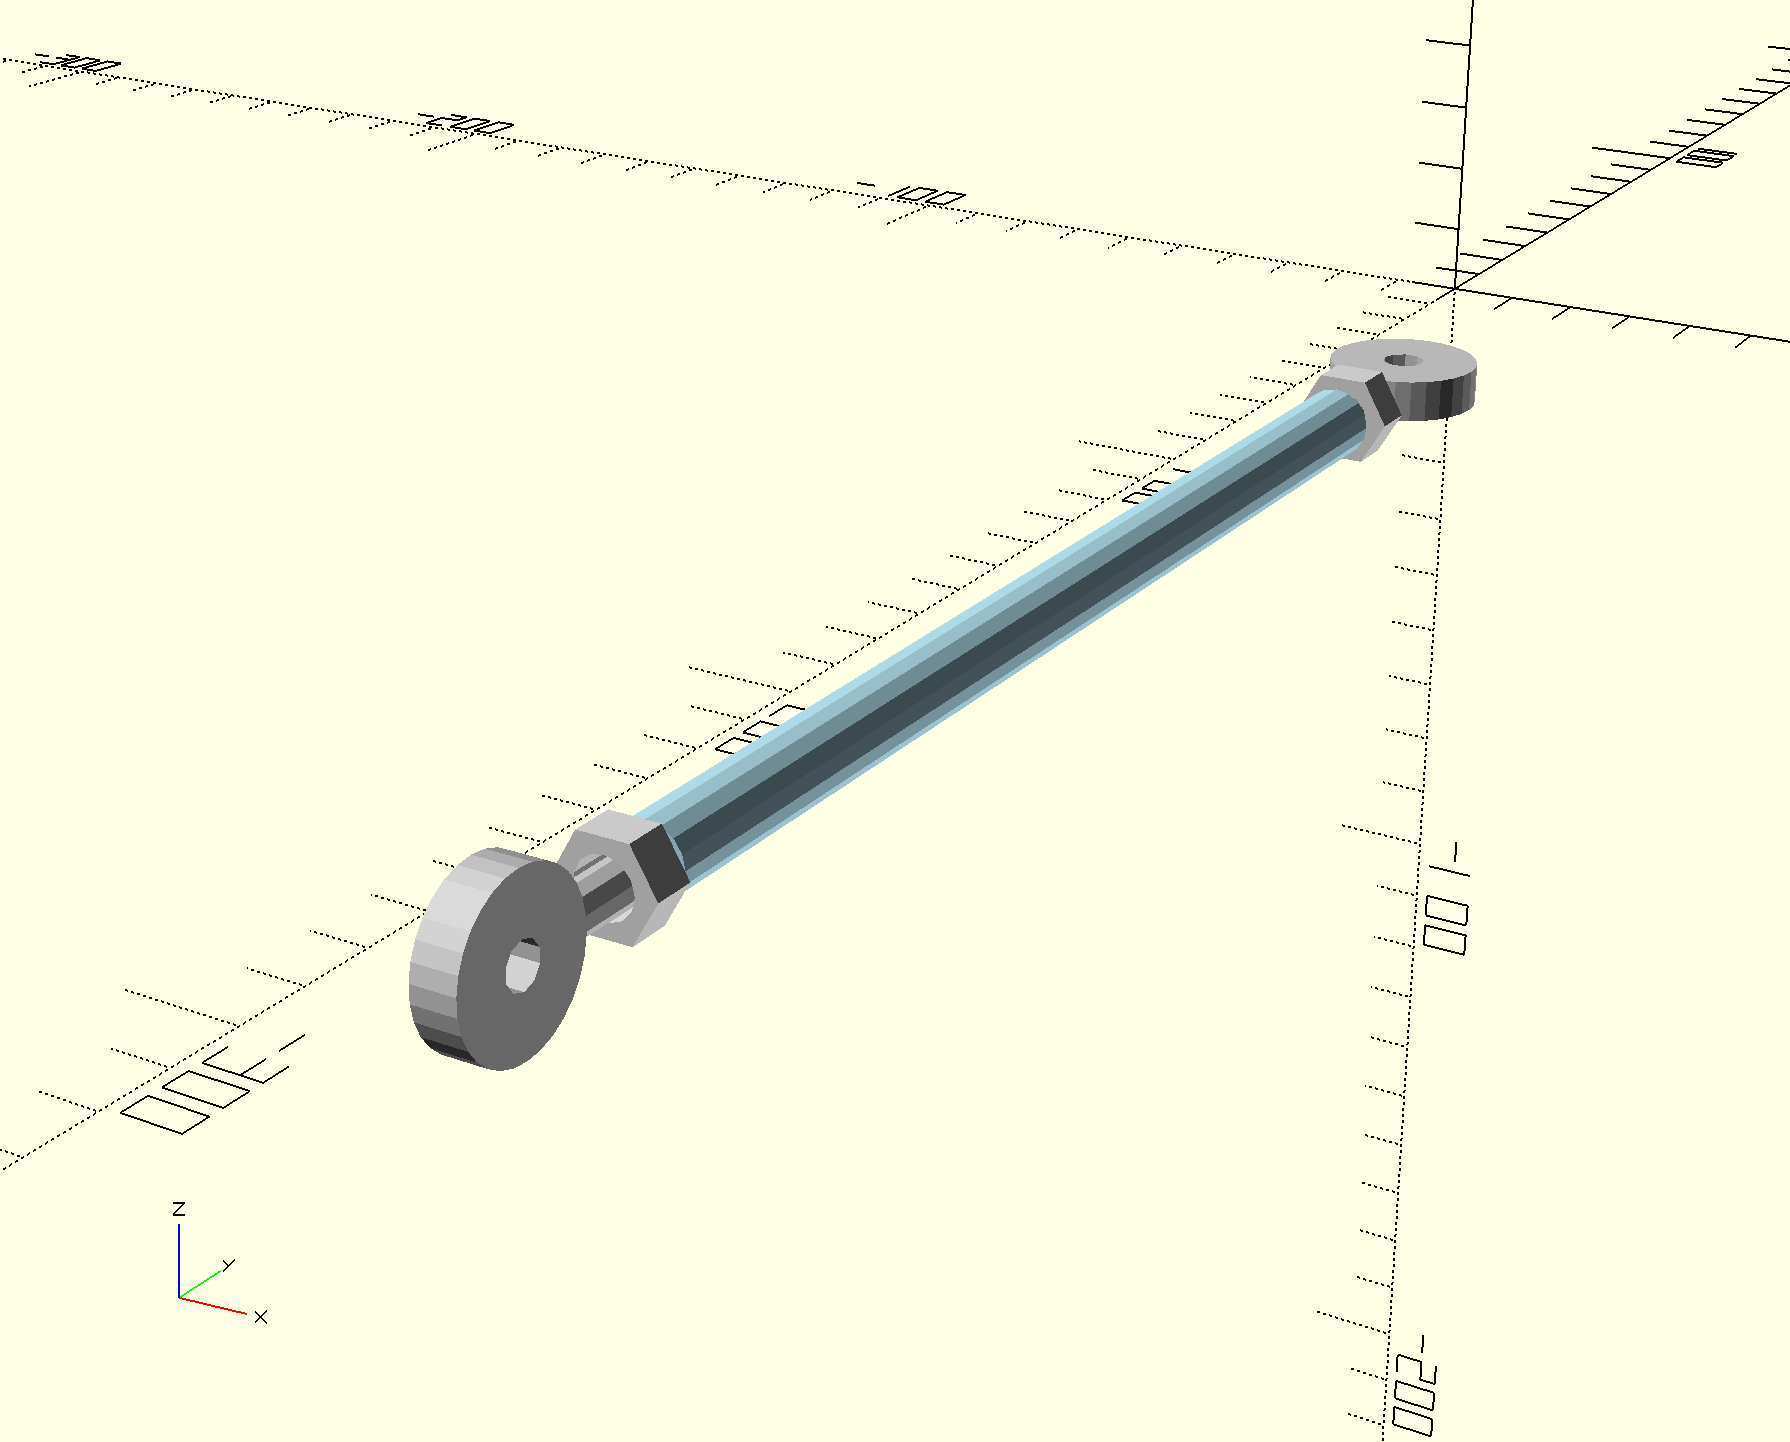
That are built from these...
