5. Set up GitHub Actions - clarelgibson/tableau-public-autorefresh GitHub Wiki
GitHub Actions (GHA) is a platform that allows you to automate the deployment of your code. Within the context of this project, this means that you can use GHA to run your R scripts on a schedule of your choosing, so that your Google Sheet file will contain the latest data at all times, even when you are not around to run the R script yourself. GHA is free to use for all public repositories.
There are some great resources out there to help you learn about GitHub actions in more detail, many of which are described in this article.
Open your repository in RStudio and run the following command from the console, which will do all the set up needed to get GHA running in your repository.
usethis::use_github_actions()If you don't already have the
usethispackage installed, you will need to install it usinginstall.packages().
One of the things that use_github_actions() does is to create a folder called .github in your repository. This folder contains its own .gitignore file and a subfolder called workflows. The workflows folder is where your GHA workflows are stored, in the form of YAML files. By default, the function will include a YAML file called R-CMD-check.yaml in your workflows folder. You won't need this file for this project. It is only required if your repository is an R package. You can go ahead and delete it, or modify it according to the steps detailed later in this section.
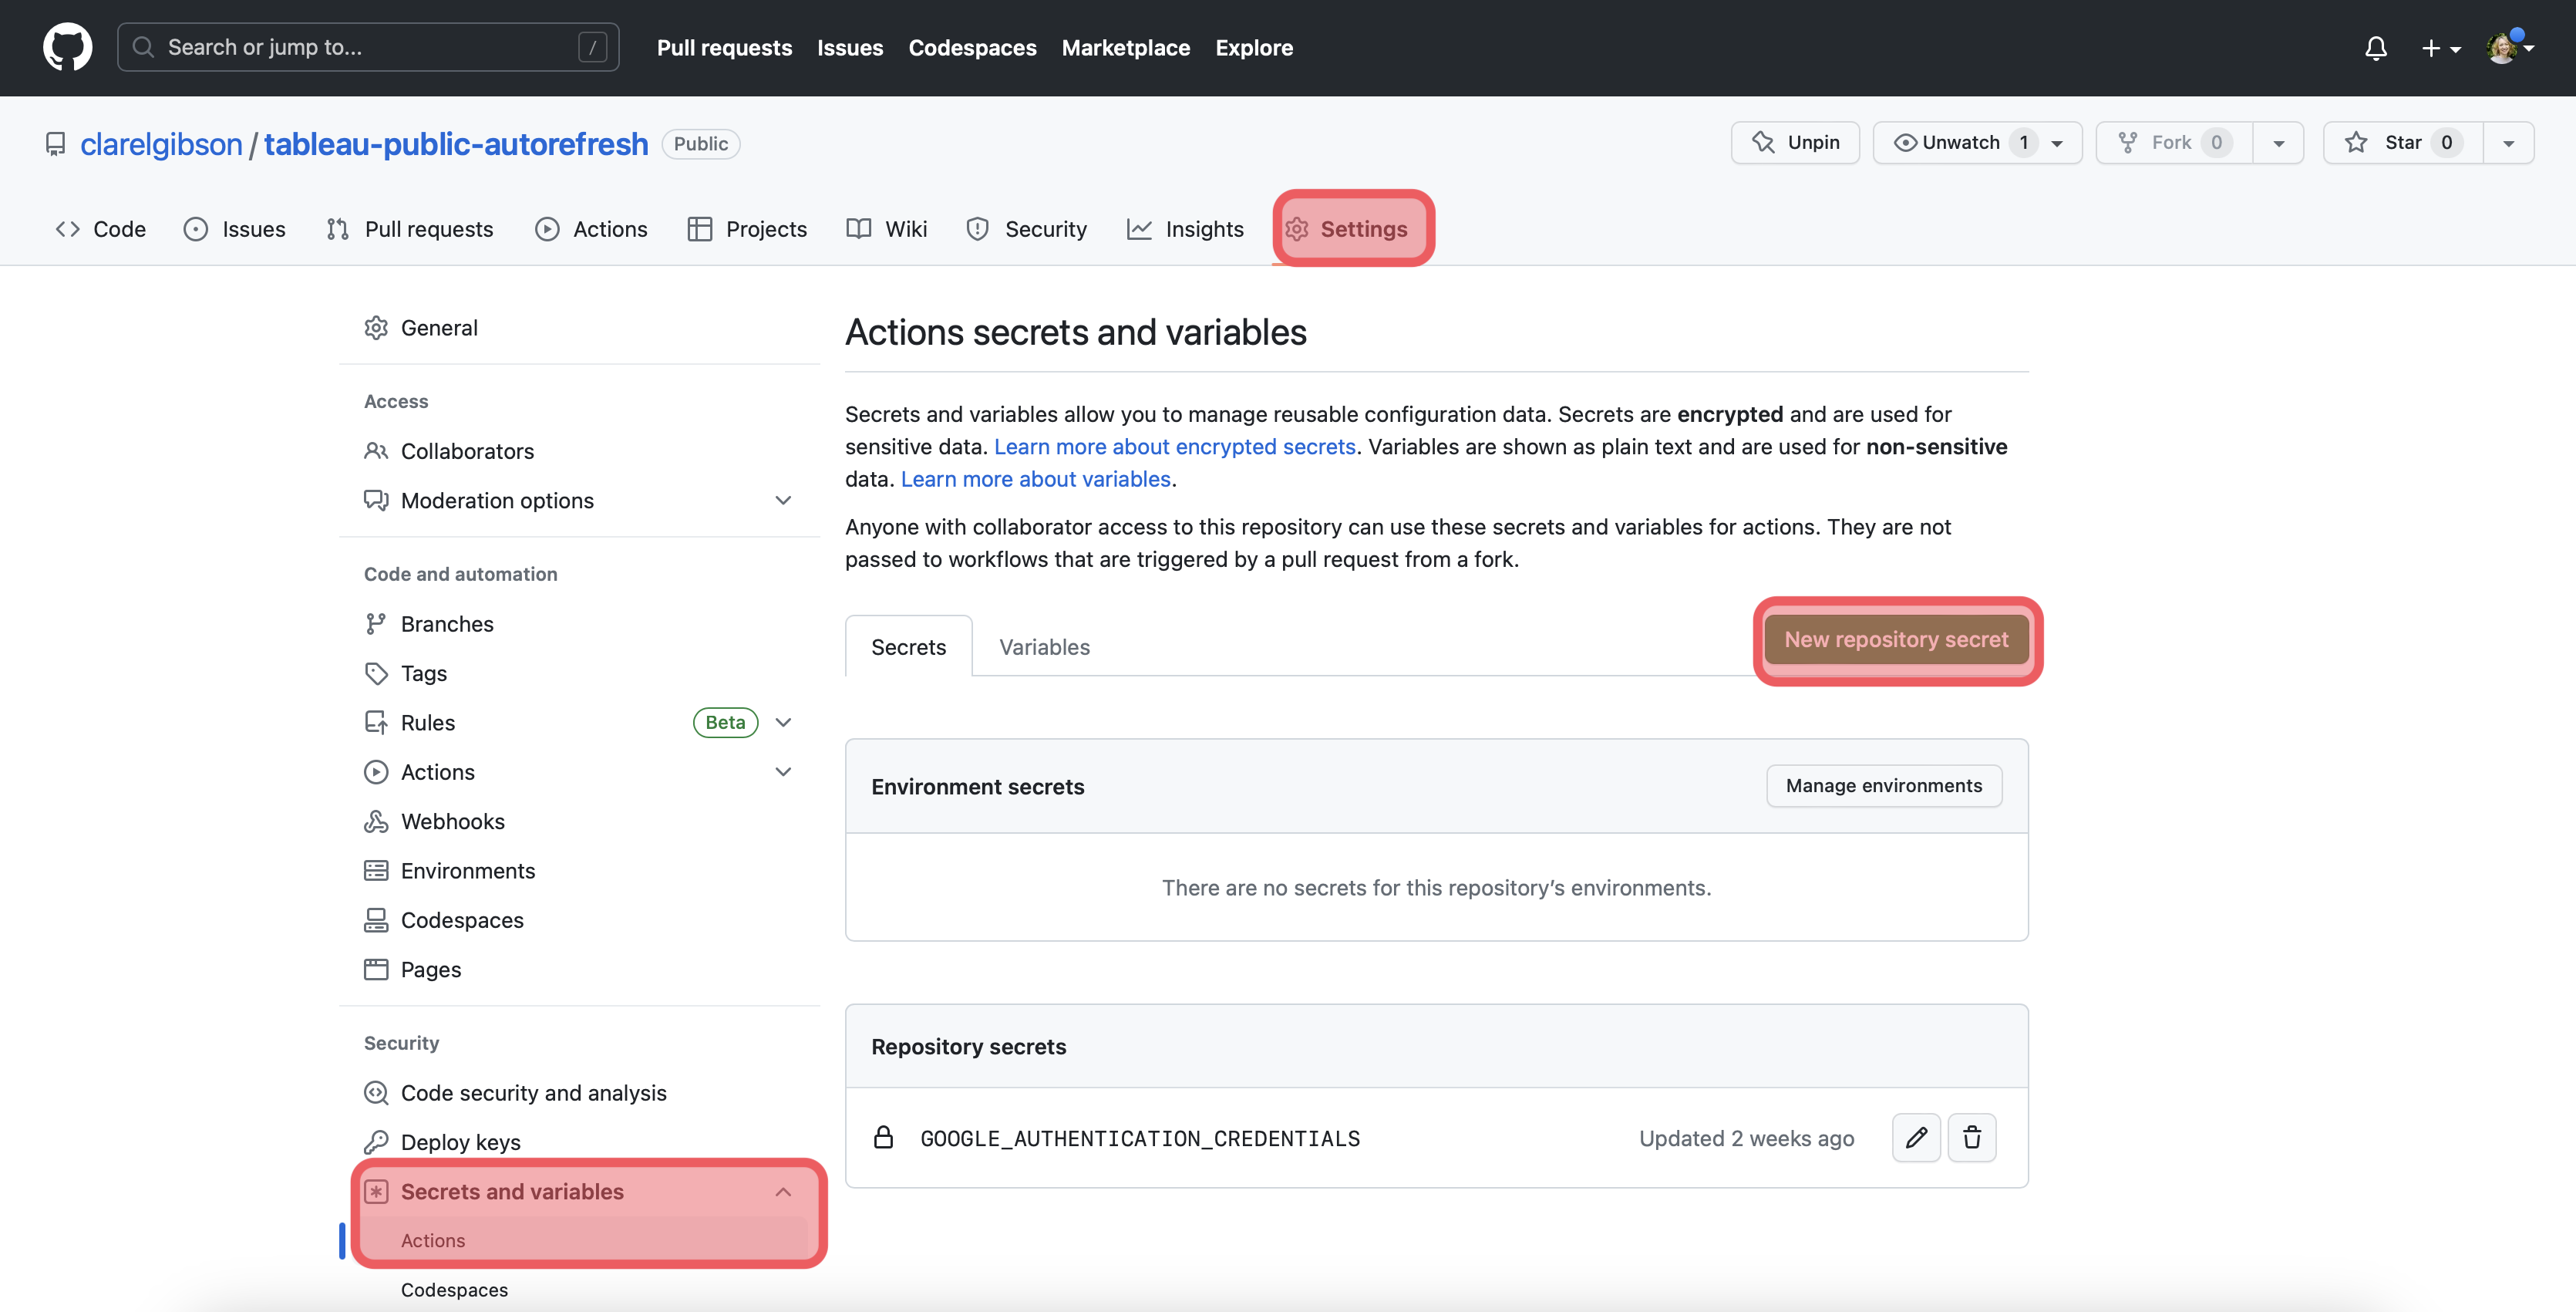
Navigate to your GitHub repository and go to Settings > Secrets and variables > Actions and select Create a new repository secret.

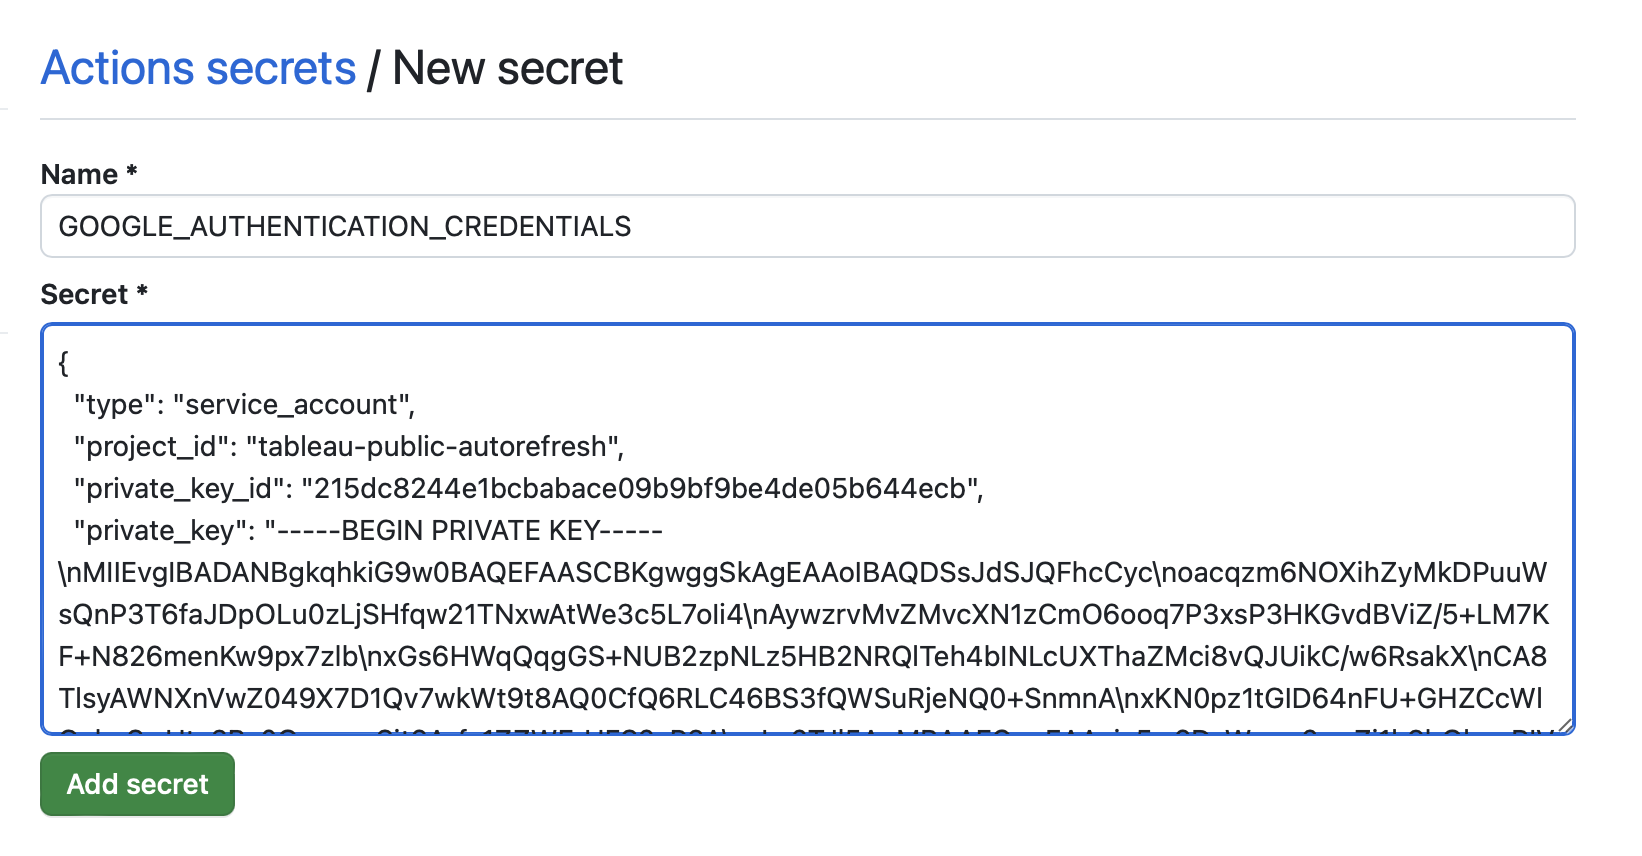
Give your secret a name such as GOOGLE_AUTHENTICATION_CREDENTIALS. Then copy and paste the contents of the JSON file that you downloaded earlier into the Secret text box.

Next, you need to create the workflow YAML file in your .github/workflows/ directory. This is the file that will give GHA instructions on what it needs to do. You can use the one in this repository as a template that you can amend as necessary for your project.
To help you understand what is going on in the YAML file, the sections below explain each part of the code.
The first line of the YAML file includes a name for the workflow.
name: tableauPublicAutorefreshThis section of the YAML file defines the actions that will trigger your workflow to be run. In my file, I set the workflow to run on every git push, on every pull request to the main branch and on a schedule (once per day at 23:50) using POSIX cron syntax.
on:
  push:
    branches: [ "**" ]
  pull_request:
    branches: [ "main" ]
  schedule:
- cron: '50 23 * * *' # run once per day at 23:50This section of the YAML file defines the job name and the runner to use. You can edit the job name as you like, but leave the runs-on: line as is.
jobs:
  tableau-public-autorefresh:
    name: Tableau Public Auto-refresh
runs-on: ubuntu-latestThis section defines the environment variables. If you used a different name for your Google Authentication secret you should replace the text below with the name you used. You may need to alter the RENV_VERSION: line with the applicable version of renv for your project.
    env:
      GOOGLE_AUTHENTICATION_CREDENTIALS: ${{ secrets.GOOGLE_AUTHENTICATION_CREDENTIALS }}
      RENV_PATHS_ROOT: ~/.local/share/renv
RENV_VERSION: "0.17.3"This section defines the steps to be executed in the job. The first part instructs the workflow to checkout your repository and set up R on the virtual machine. You shouldn't need to edit these parts, unless you get a warning that a more recent version of any of the actions in available.
    steps:
      - uses: actions/checkout@v3

      - uses: r-lib/actions/setup-r@v2

      - name: Install libcurl and libssl on Linux
        run: 'sudo apt-get -y install libcurl4-openssl-dev'
shell: bashThis section will set up a cache on the VM that will make running future workflows quicker by storing a copy of all of the packages you have in your renv.lock file. This means they won't have to be reinstalled each time the workflow is run. You don't need to change anything here.
      - name: renv package cache
        id: cache-renv
        uses: actions/cache@v3
        with:
          path: ${{ env.RENV_PATHS_ROOT }}
key: ${{ runner.os }}-${{ matrix.r-version }}-${{ hashFiles('**/renv.lock') }}This block will activate renv and install all of the required R packages as defined in your renv.lock file.
      # Use renv to manage package installation
      - name: Install and activate renv
        run: |
          install.packages("renv@${{ env.RENV_VERSION }}")
          renv::activate()
        shell: Rscript {0}

      # Will automatically look for renv.lock in the root of the project
      - name: Install dependencies
        run: renv::restore()
shell: Rscript {0} The last code block instructs the workflow to run your R scripts. If you have more than one script you may need more than one code block. Ensure that the name of the script referenced matches the one you want to source.
      - name: Run prepData script
        run: |
          source('R/prepData.R')
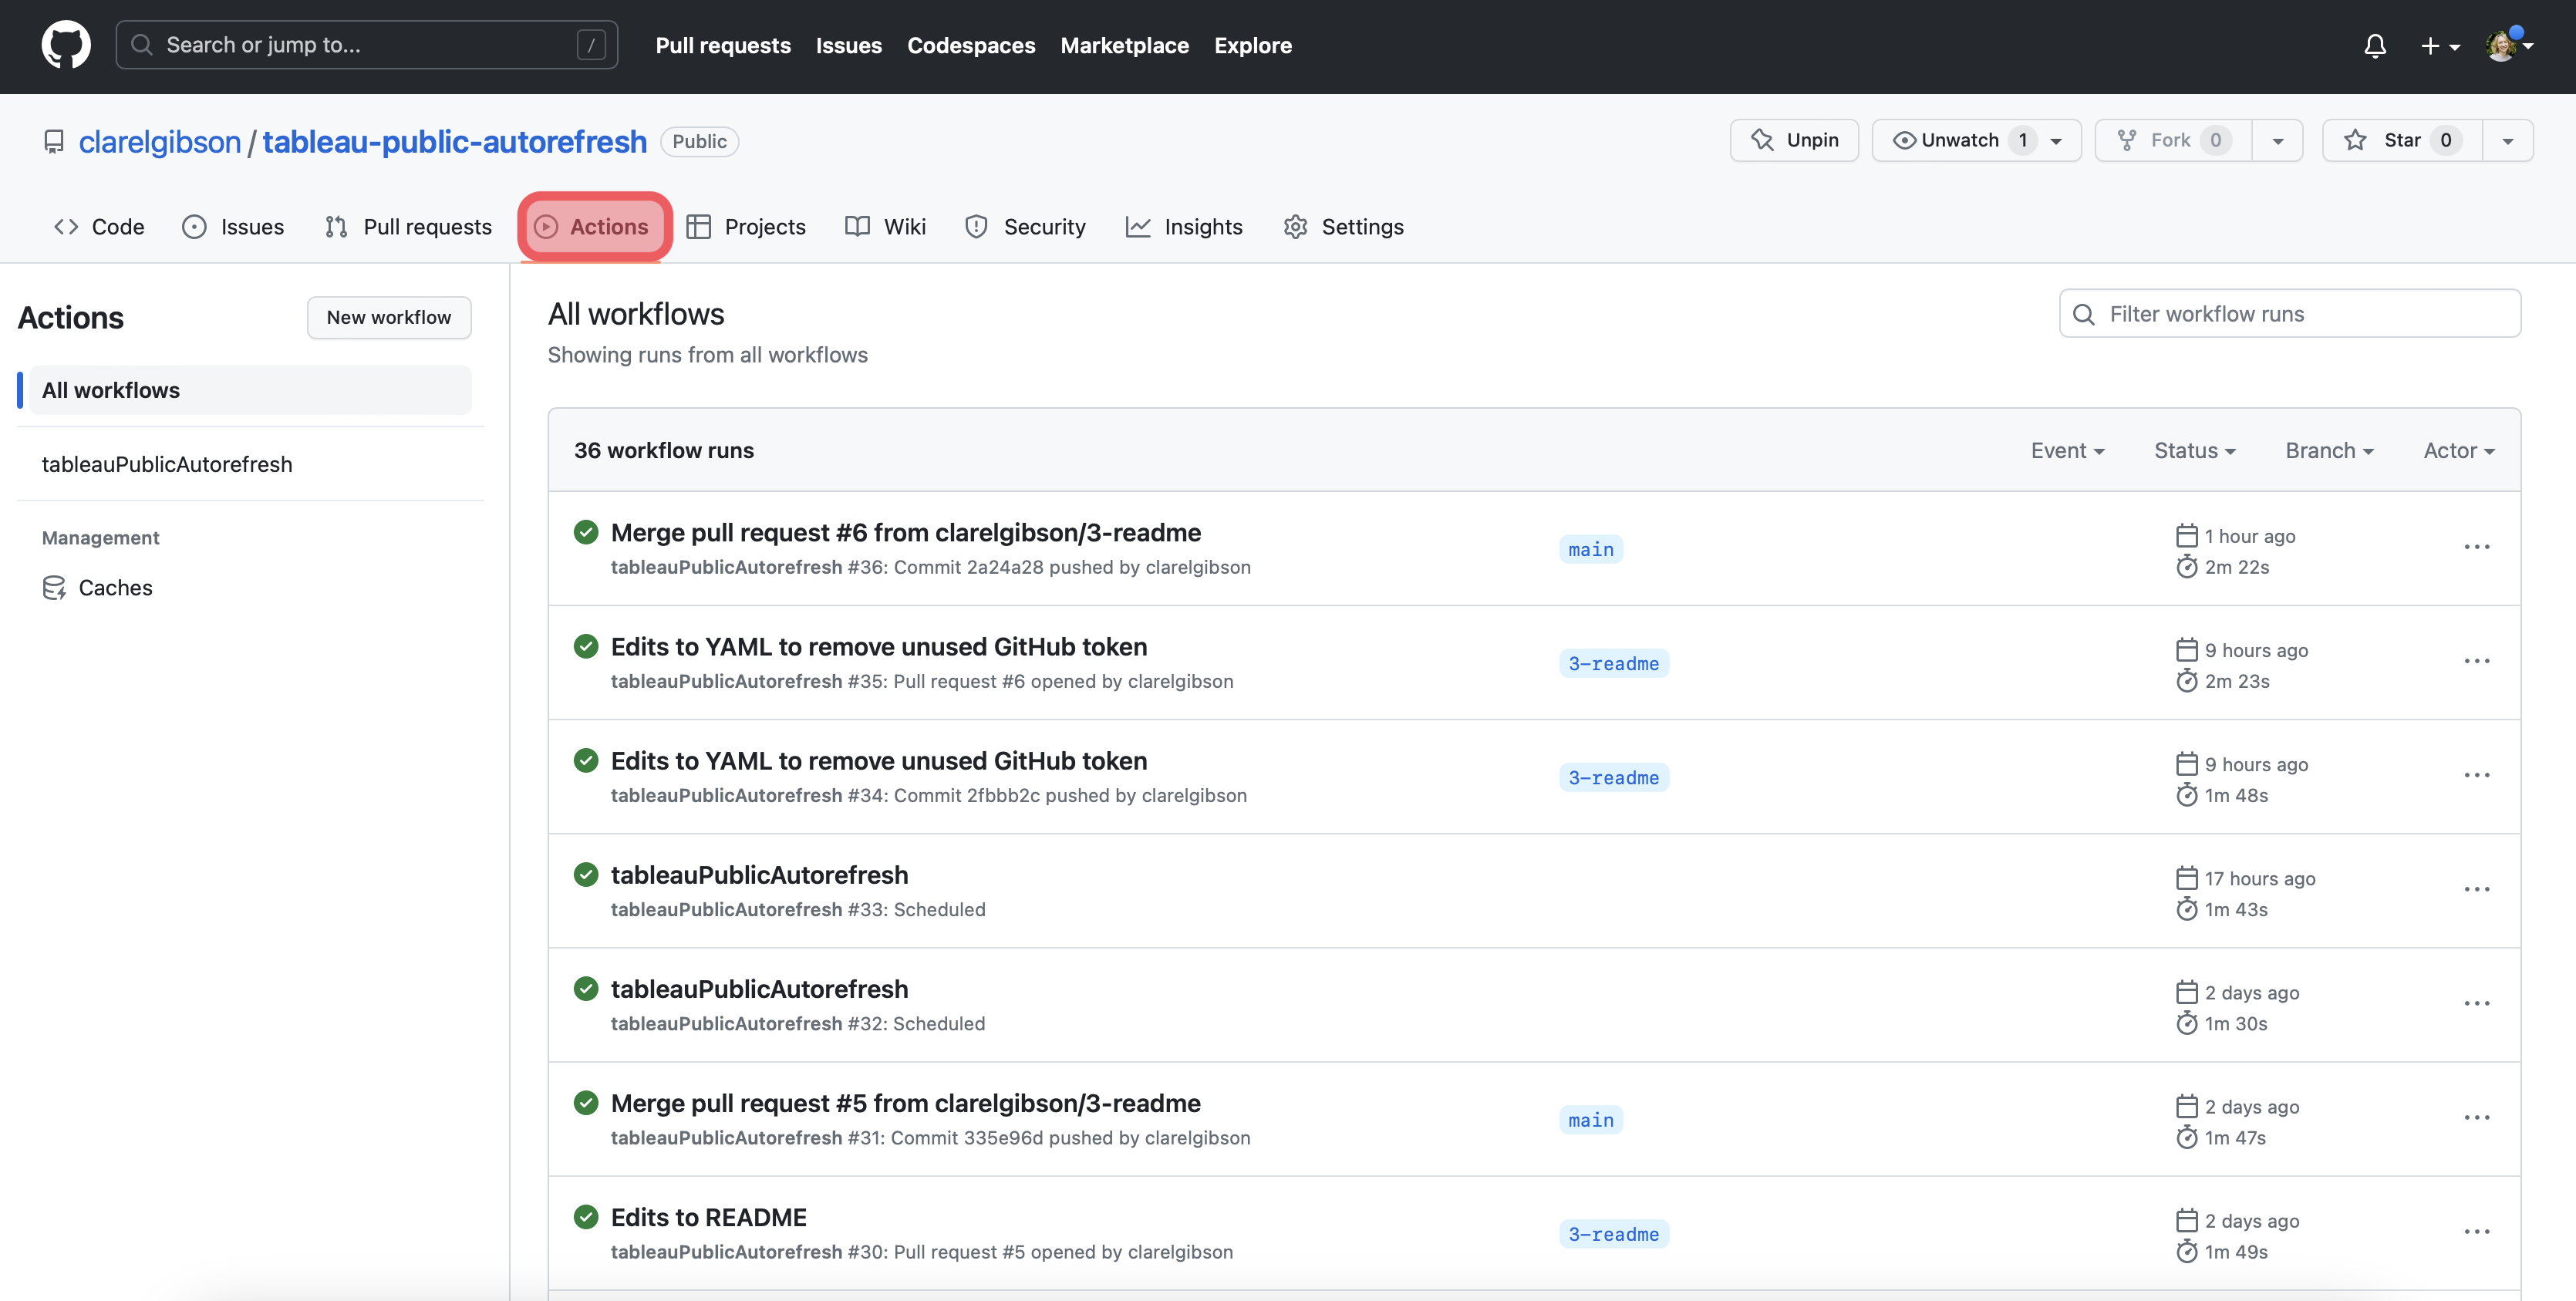
shell: Rscript {0}Once you have completed and saved the YAML file, go ahead and push your changes to GitHub to test your workflow. You can see the progress of the test by going to the Actions tab of your GitHub repository.

Once you have a successful workflow run you can move on to the next step.