Calibration - chrisribe/OrcaSlicer GitHub Wiki
- Flow rate
- Pressure Advance
- Temp tower
- [Advanced calibration]
- [Max Volumetric speed]
- [VFA]
NOTE: After completing the calibration process, remember to create a new project in order to exit the calibration mode.
Flow rate
 Calibrating the flow rate involves a two-step process.
Steps
-
Select the printer, filament, and process you would like to use for the test.
-
Select
Pass 1in theCalibrationmenu -
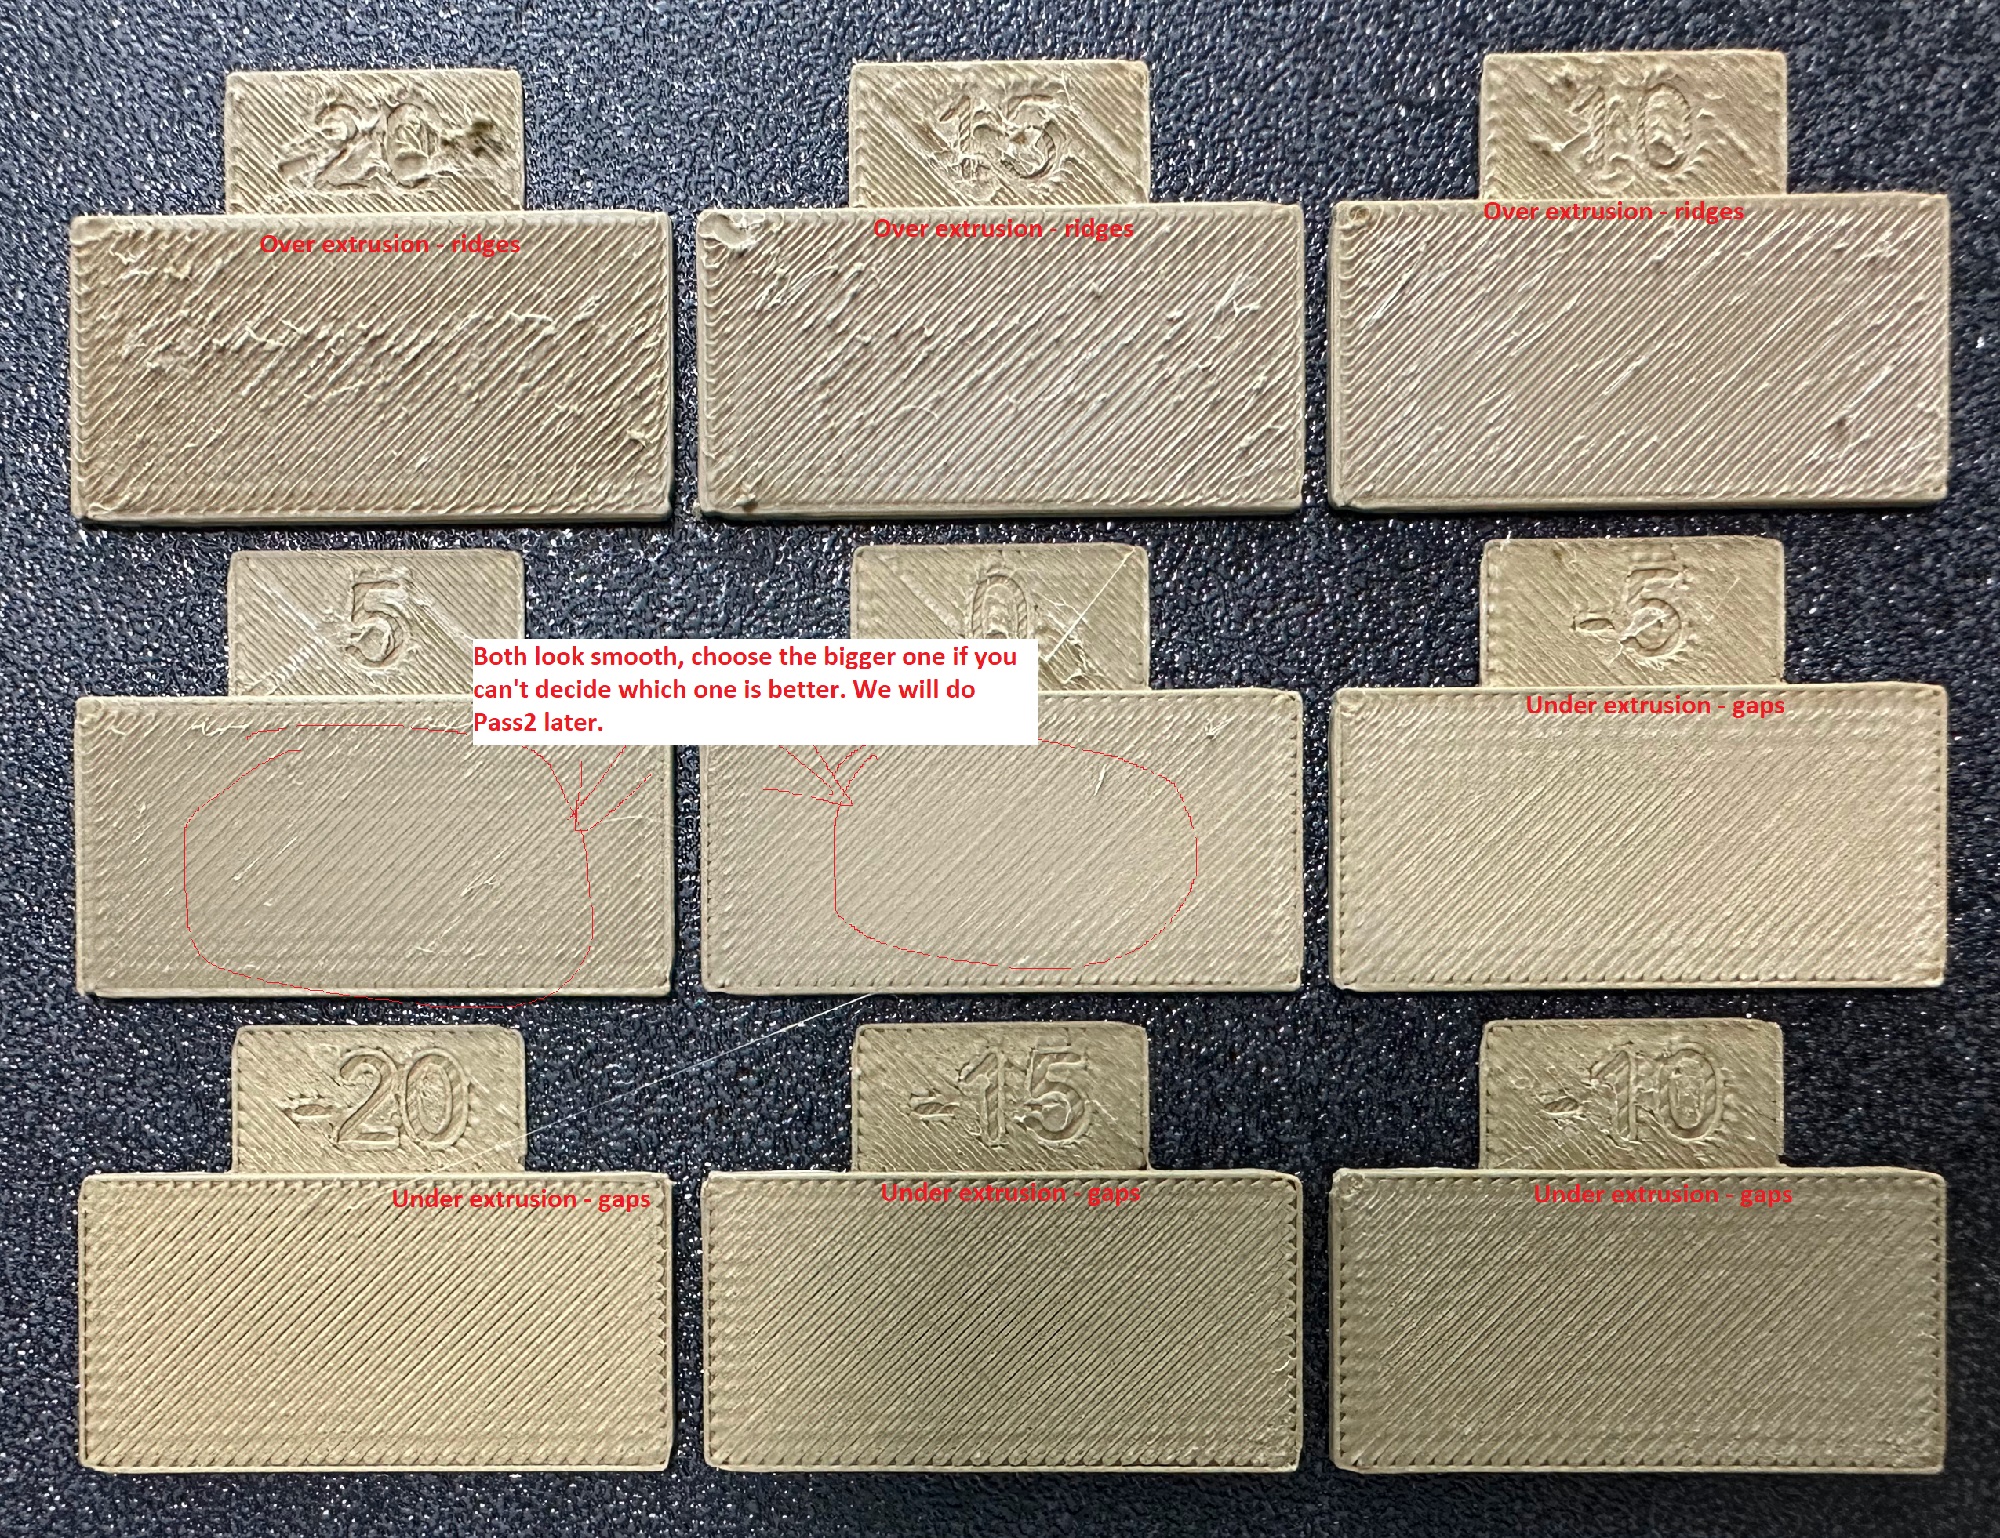
A new project consisting of nine blocks will be created, each with a different flow rate modifier. Slice and print the project.
-
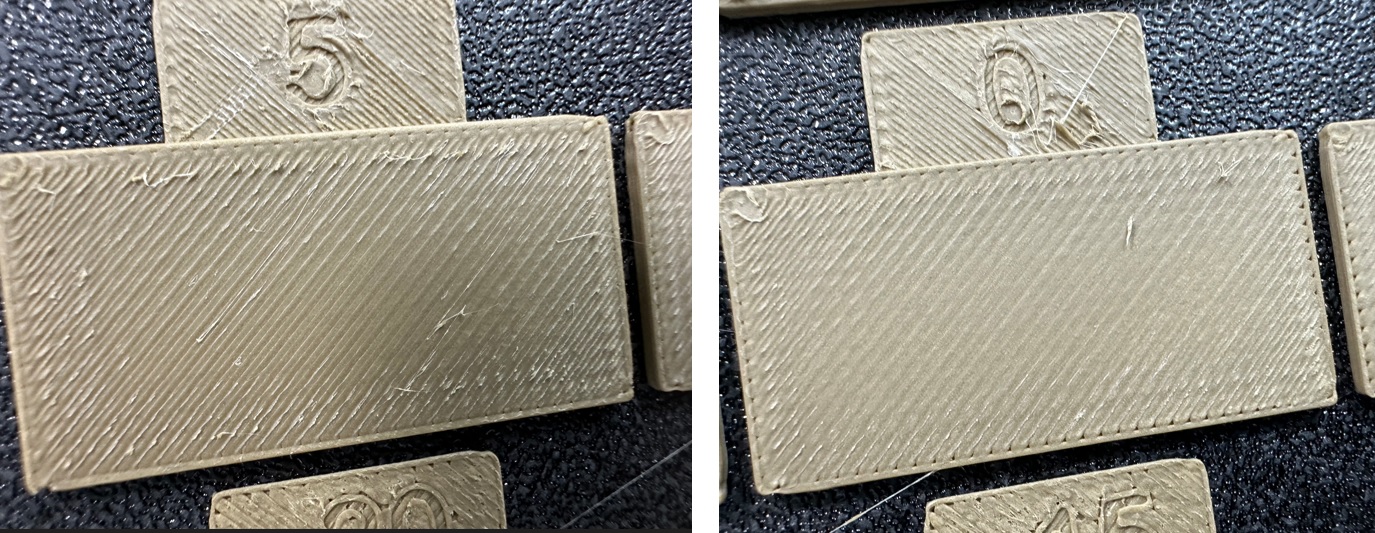
Examine the blocks and determine which one has the smoothest top surface.
-
Update the flow ratio in the filament settings using the following equation:
FlowRatio_old*(100 + modifier)/100. If your previous flow ratio was0.98and you selected the block with a flow rate modifier of+5, the new value should be calculated as follows:0.98x(100+5)/100 = 1.029. ** Remember** to save the filament profile. -
Perform the
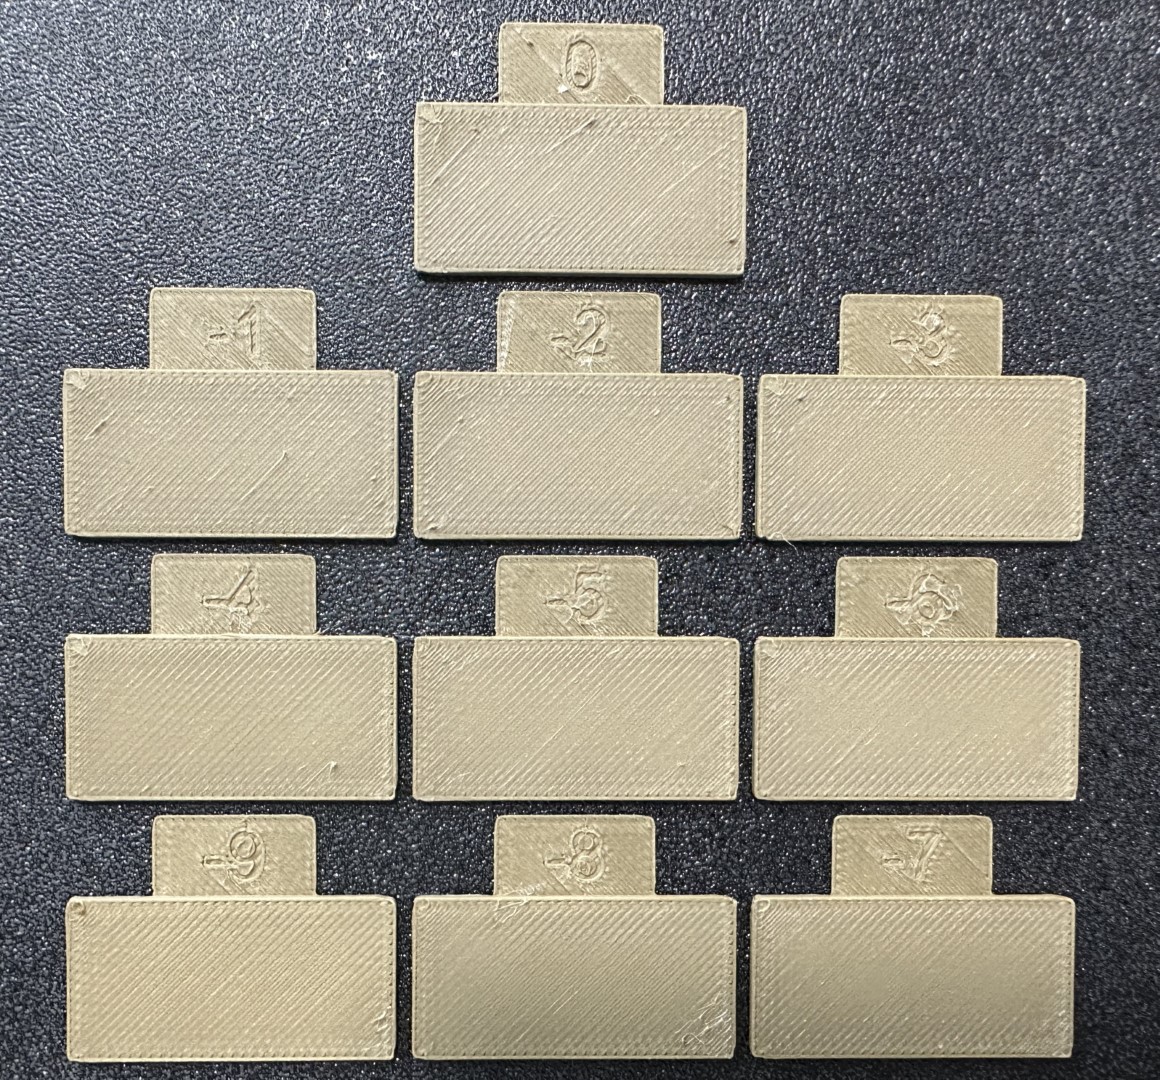
Pass 2calibration. This process is similar toPass 1, but a new project with ten blocks will be generated. The flow rate modifiers for this project will range from-9 to 0. -
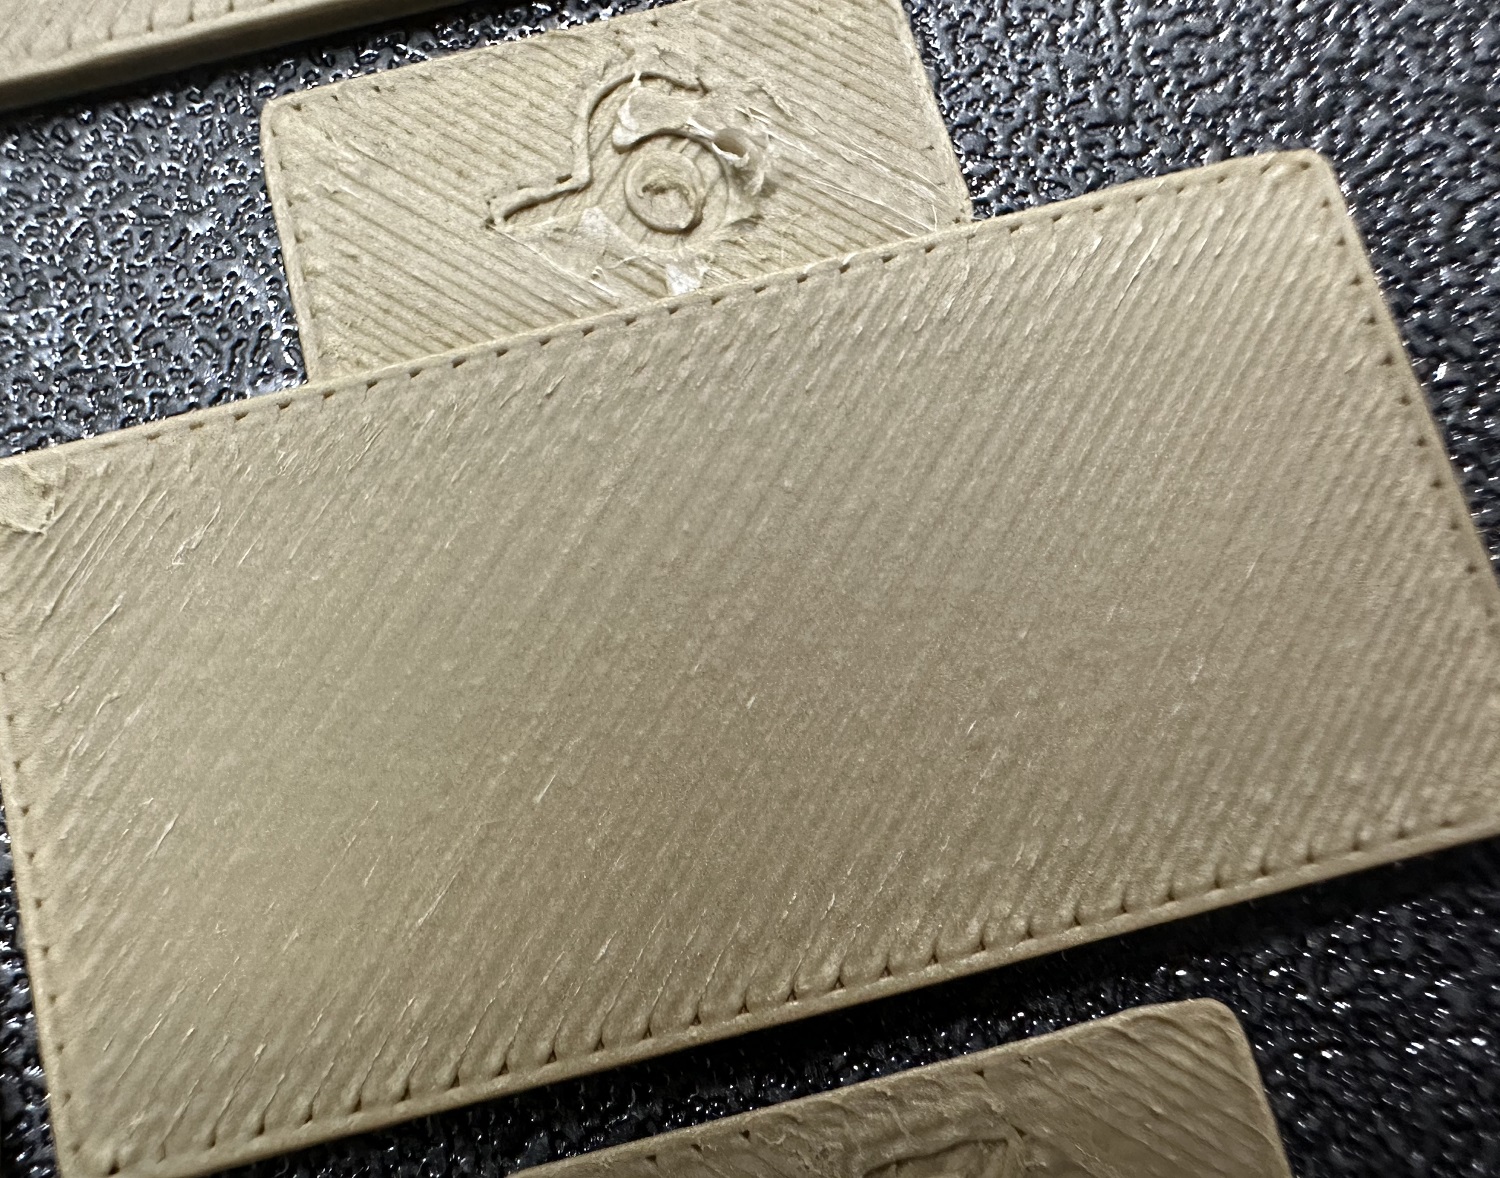
Repeat steps 4 and 5. In this case, if your previous flow ratio was 1.029 and you selected the block with a flow rate modifier of -6, the new value should be calculated as follows:
1.029x(100-6)/100 = 0.96726. ** Remember ** to save the filament profile.

NOTE:
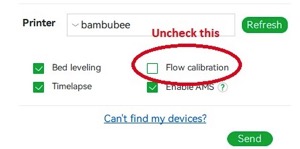
- For Bambulab X1/X1C users, make sure you do not select the 'Flow calibration' option.*
Pressure Advance
I will present two approaches for calibrating the pressure advance value. Both methods have their own advantages and disadvantages. It is important to note that each method has two versions: one for a direct drive extruder and one for a Bowden extruder. Make sure to select the appropriate version for your test.
Line method
The line method is quick and straightforward to test. However, its accuracy highly depends on your first layer quality. It is suggested to turn on the bed mesh leveling for this test. Steps:
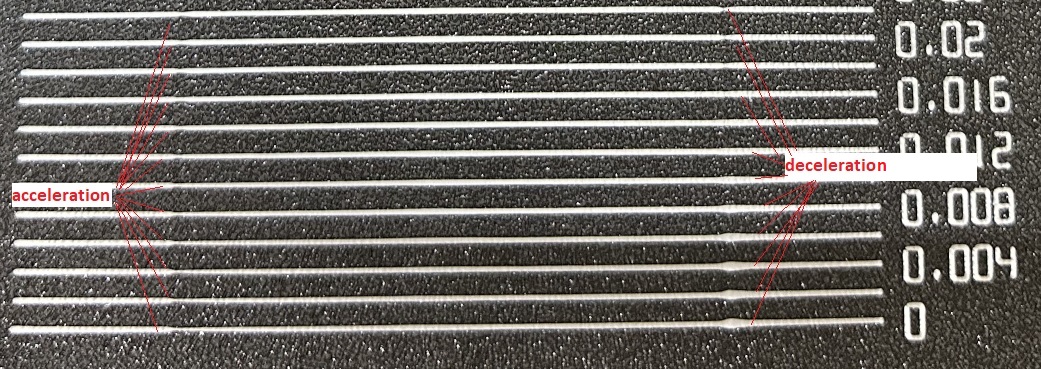
- Select the printer, filament, and process you would like to use for the test.
- Print the project and check the result. You can select the value of the most even line and update your PA value in the filament settings.
- In this test, a PA value of
0.016appears to be optimal.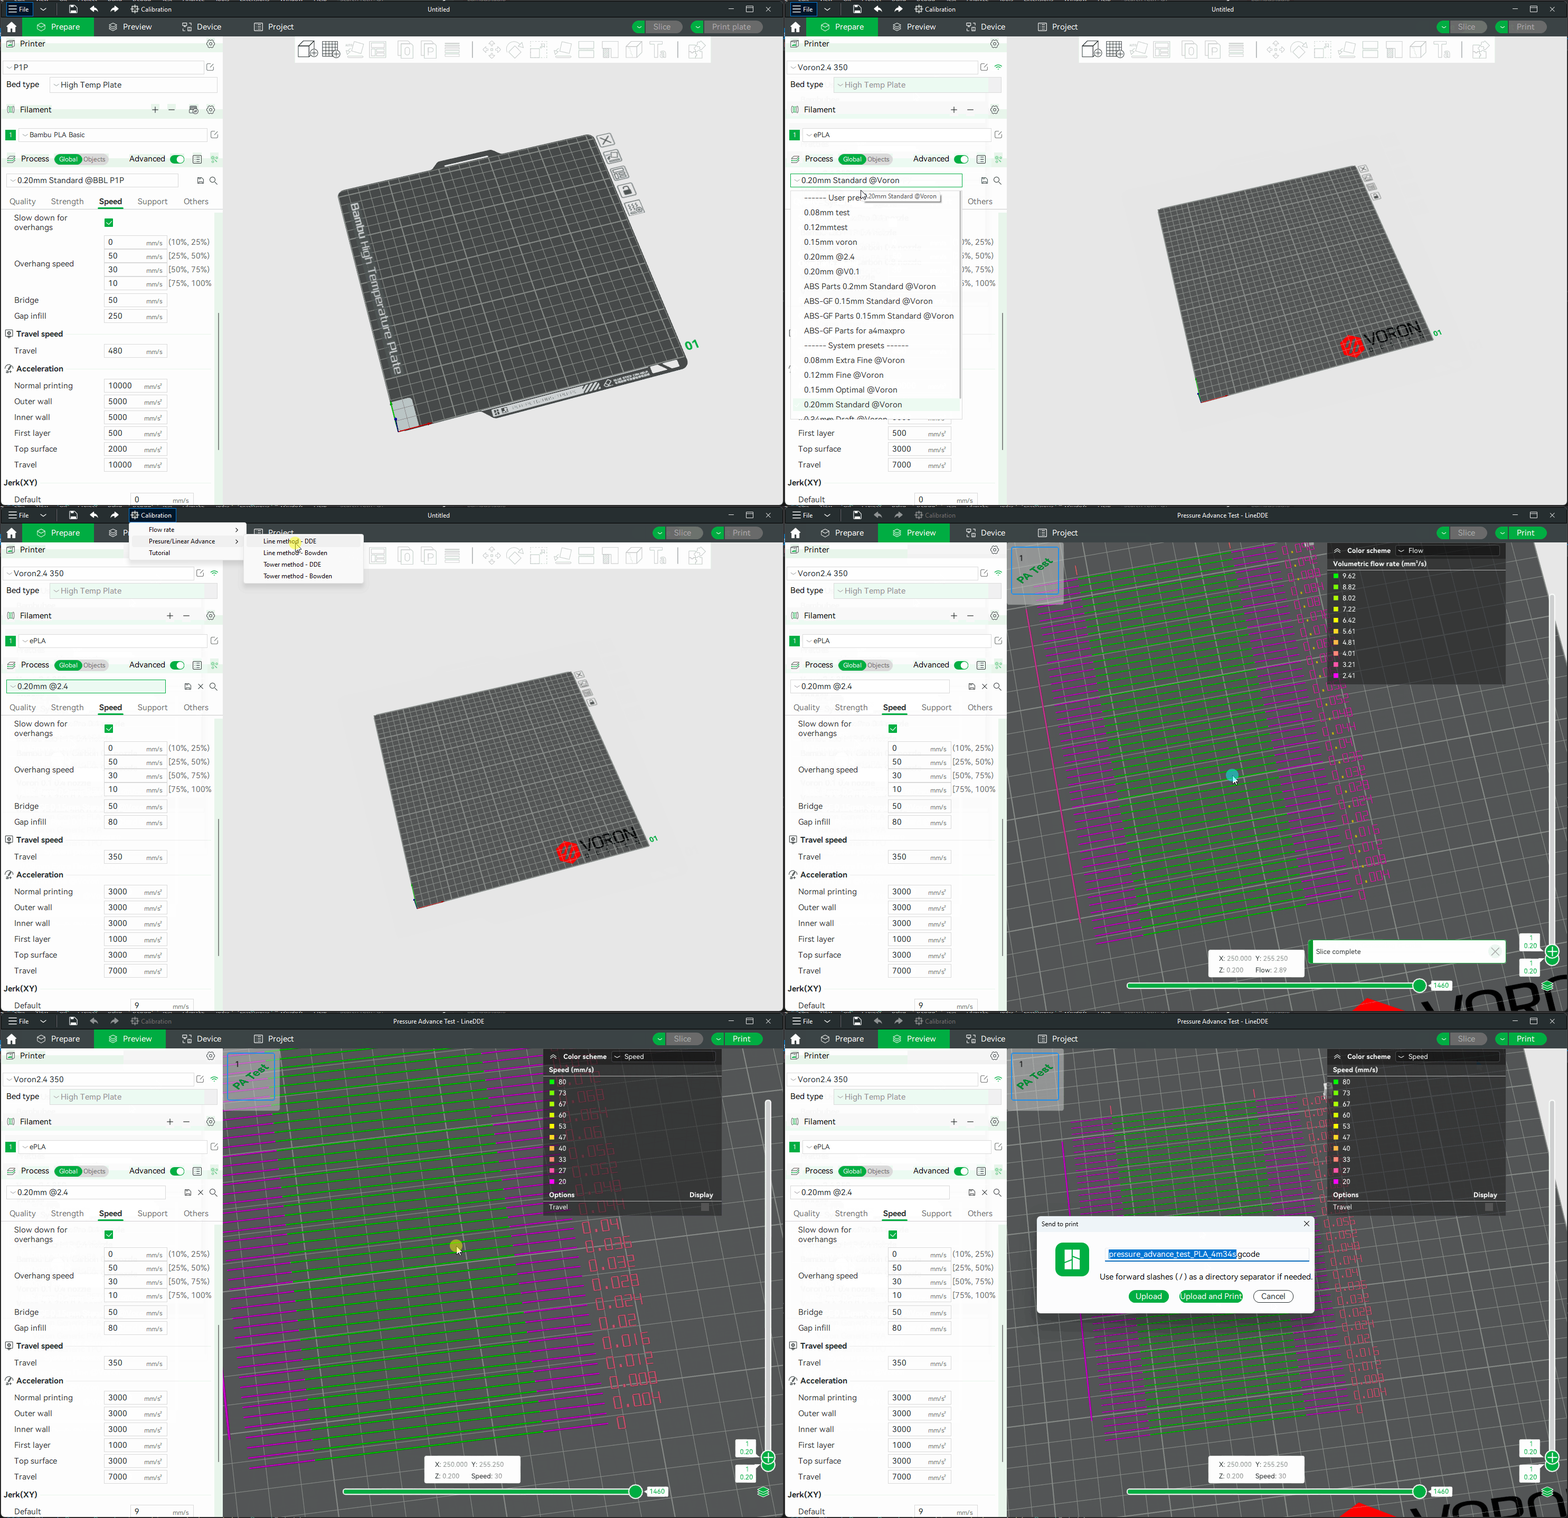

Tower method
The tower method may take a bit more time to complete, but it does not rely on the quality of the first layer.
The PA value for this test will be increased by 0.002 for every 1 mm increase in height. (NOTE 0.02 for Bowden)
Steps:
- Select the printer, filament, and process you would like to use for the test.
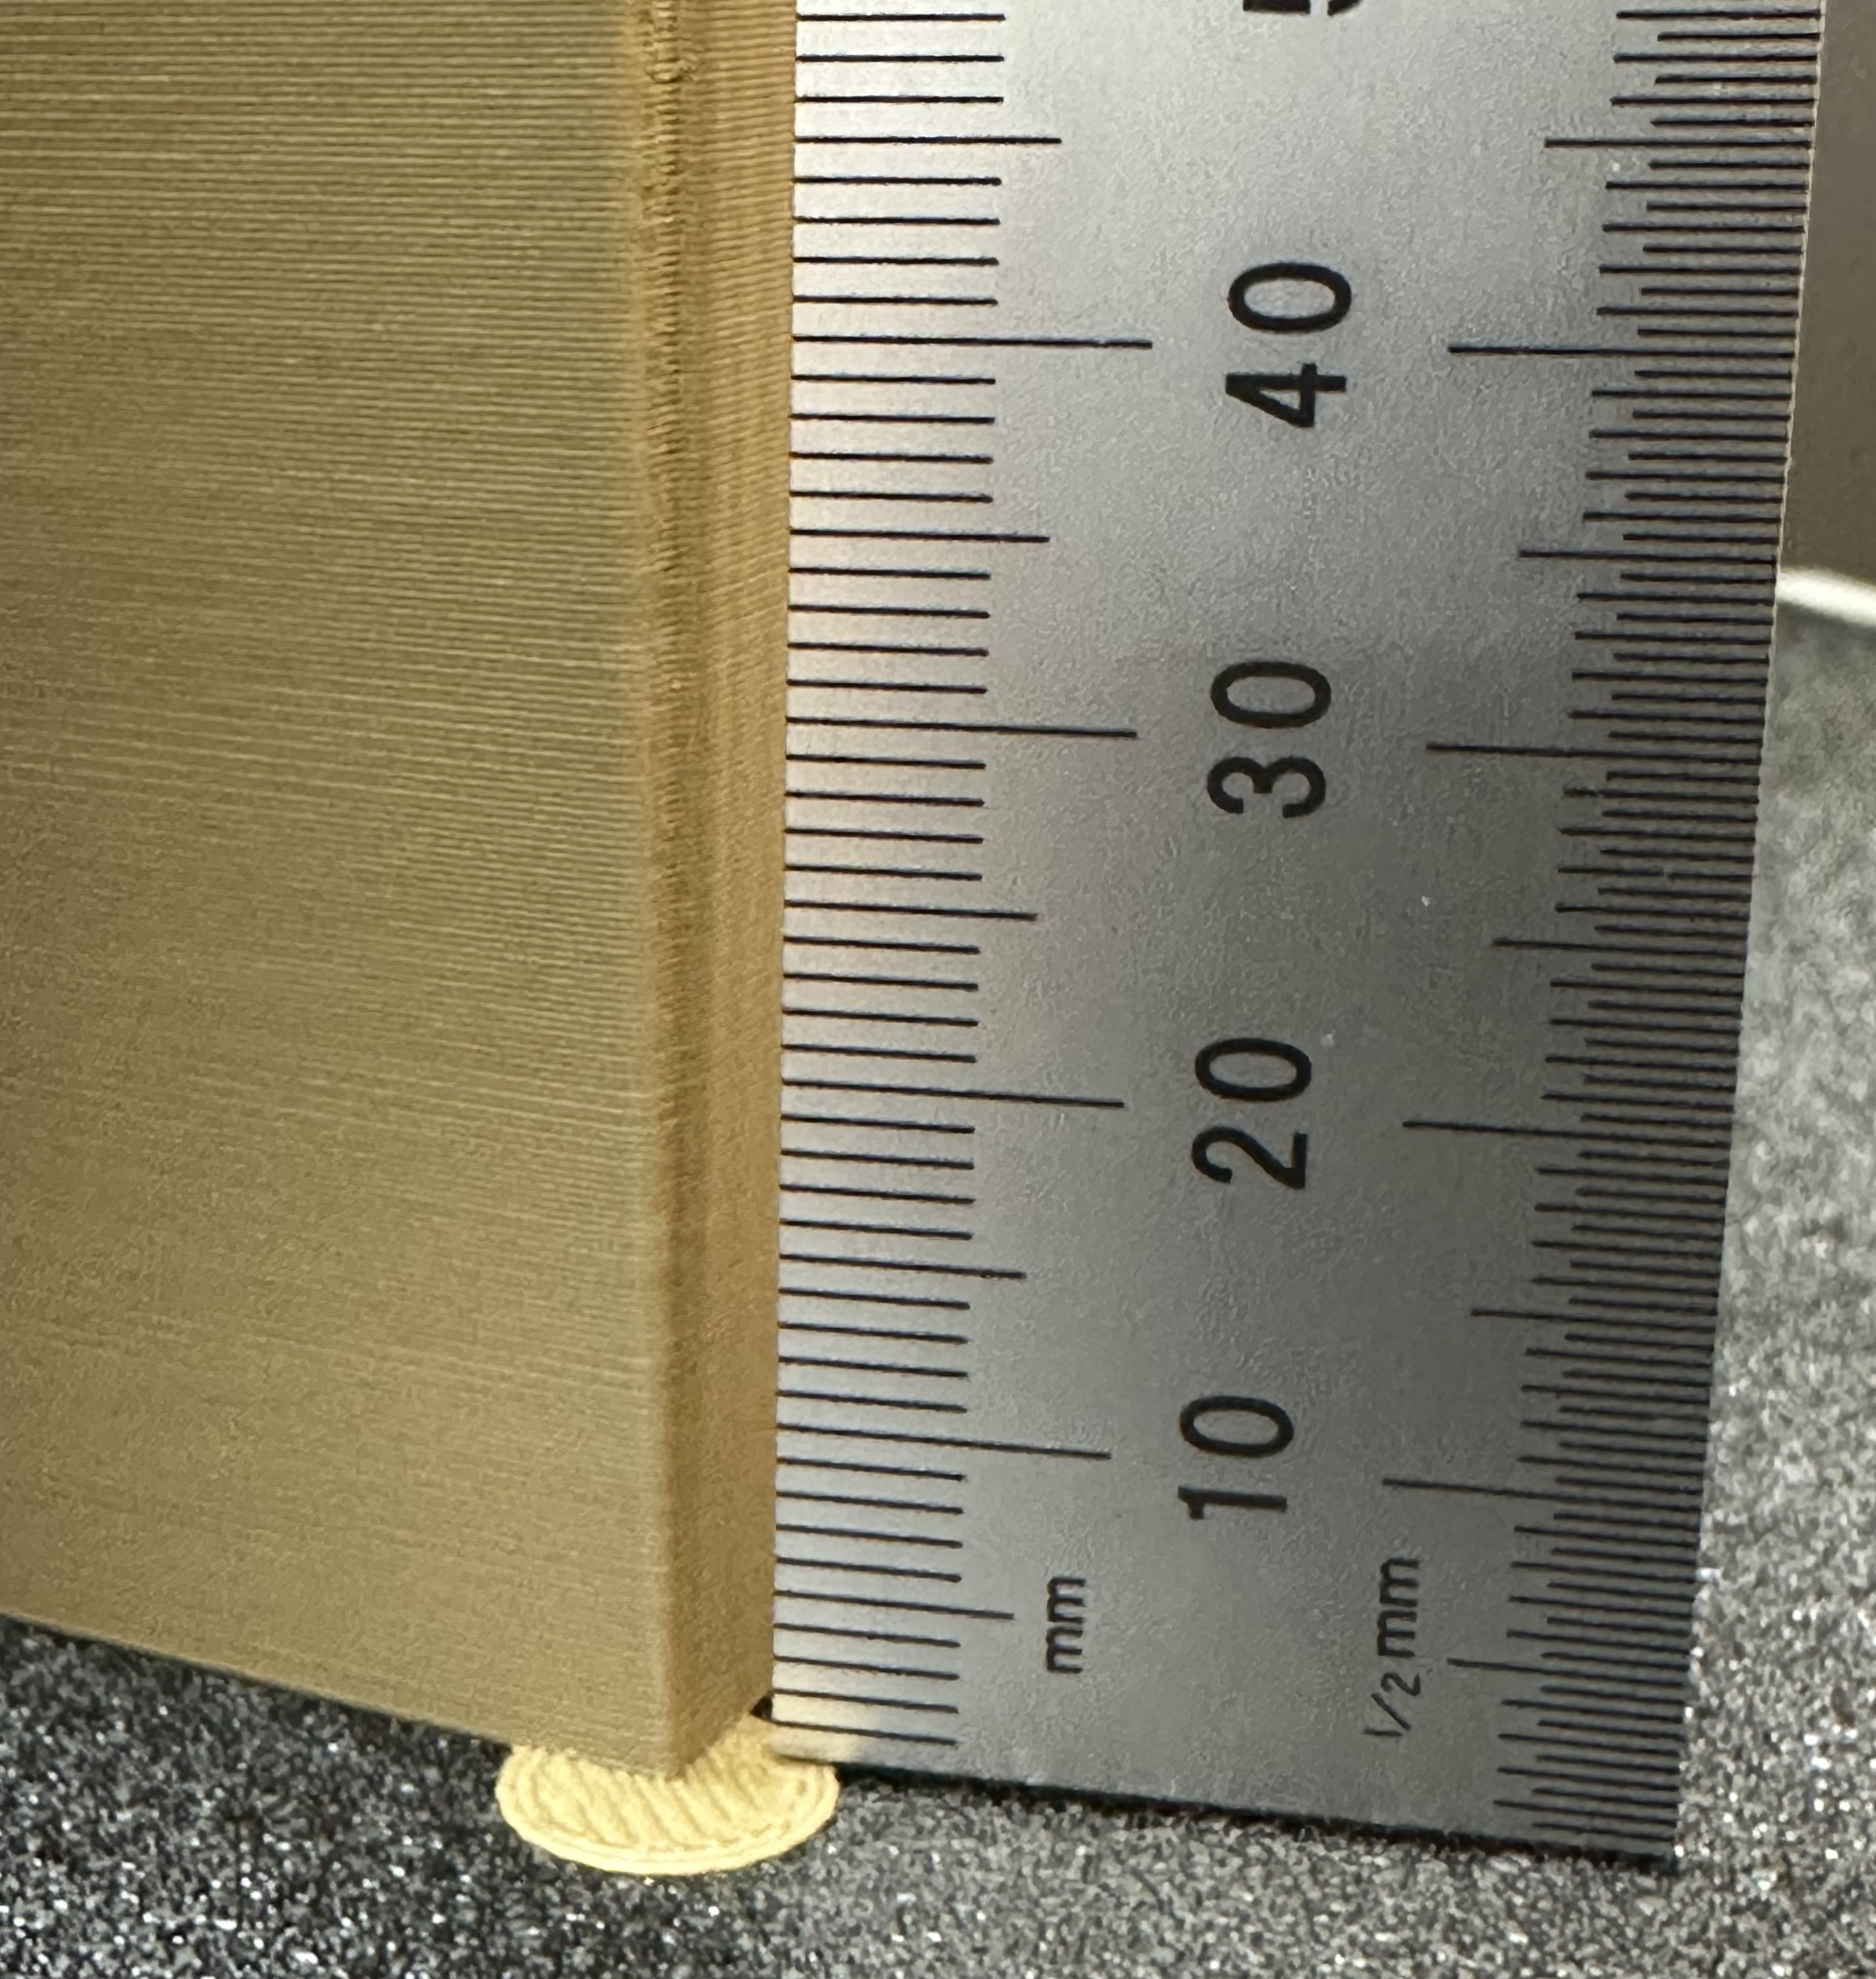
- Examine each corner of the print and mark the height that yields the best overall result.
- I selected a height of 8 mm for this case, so the pressure advance value should be calculated as
0.002x8 = 0.016.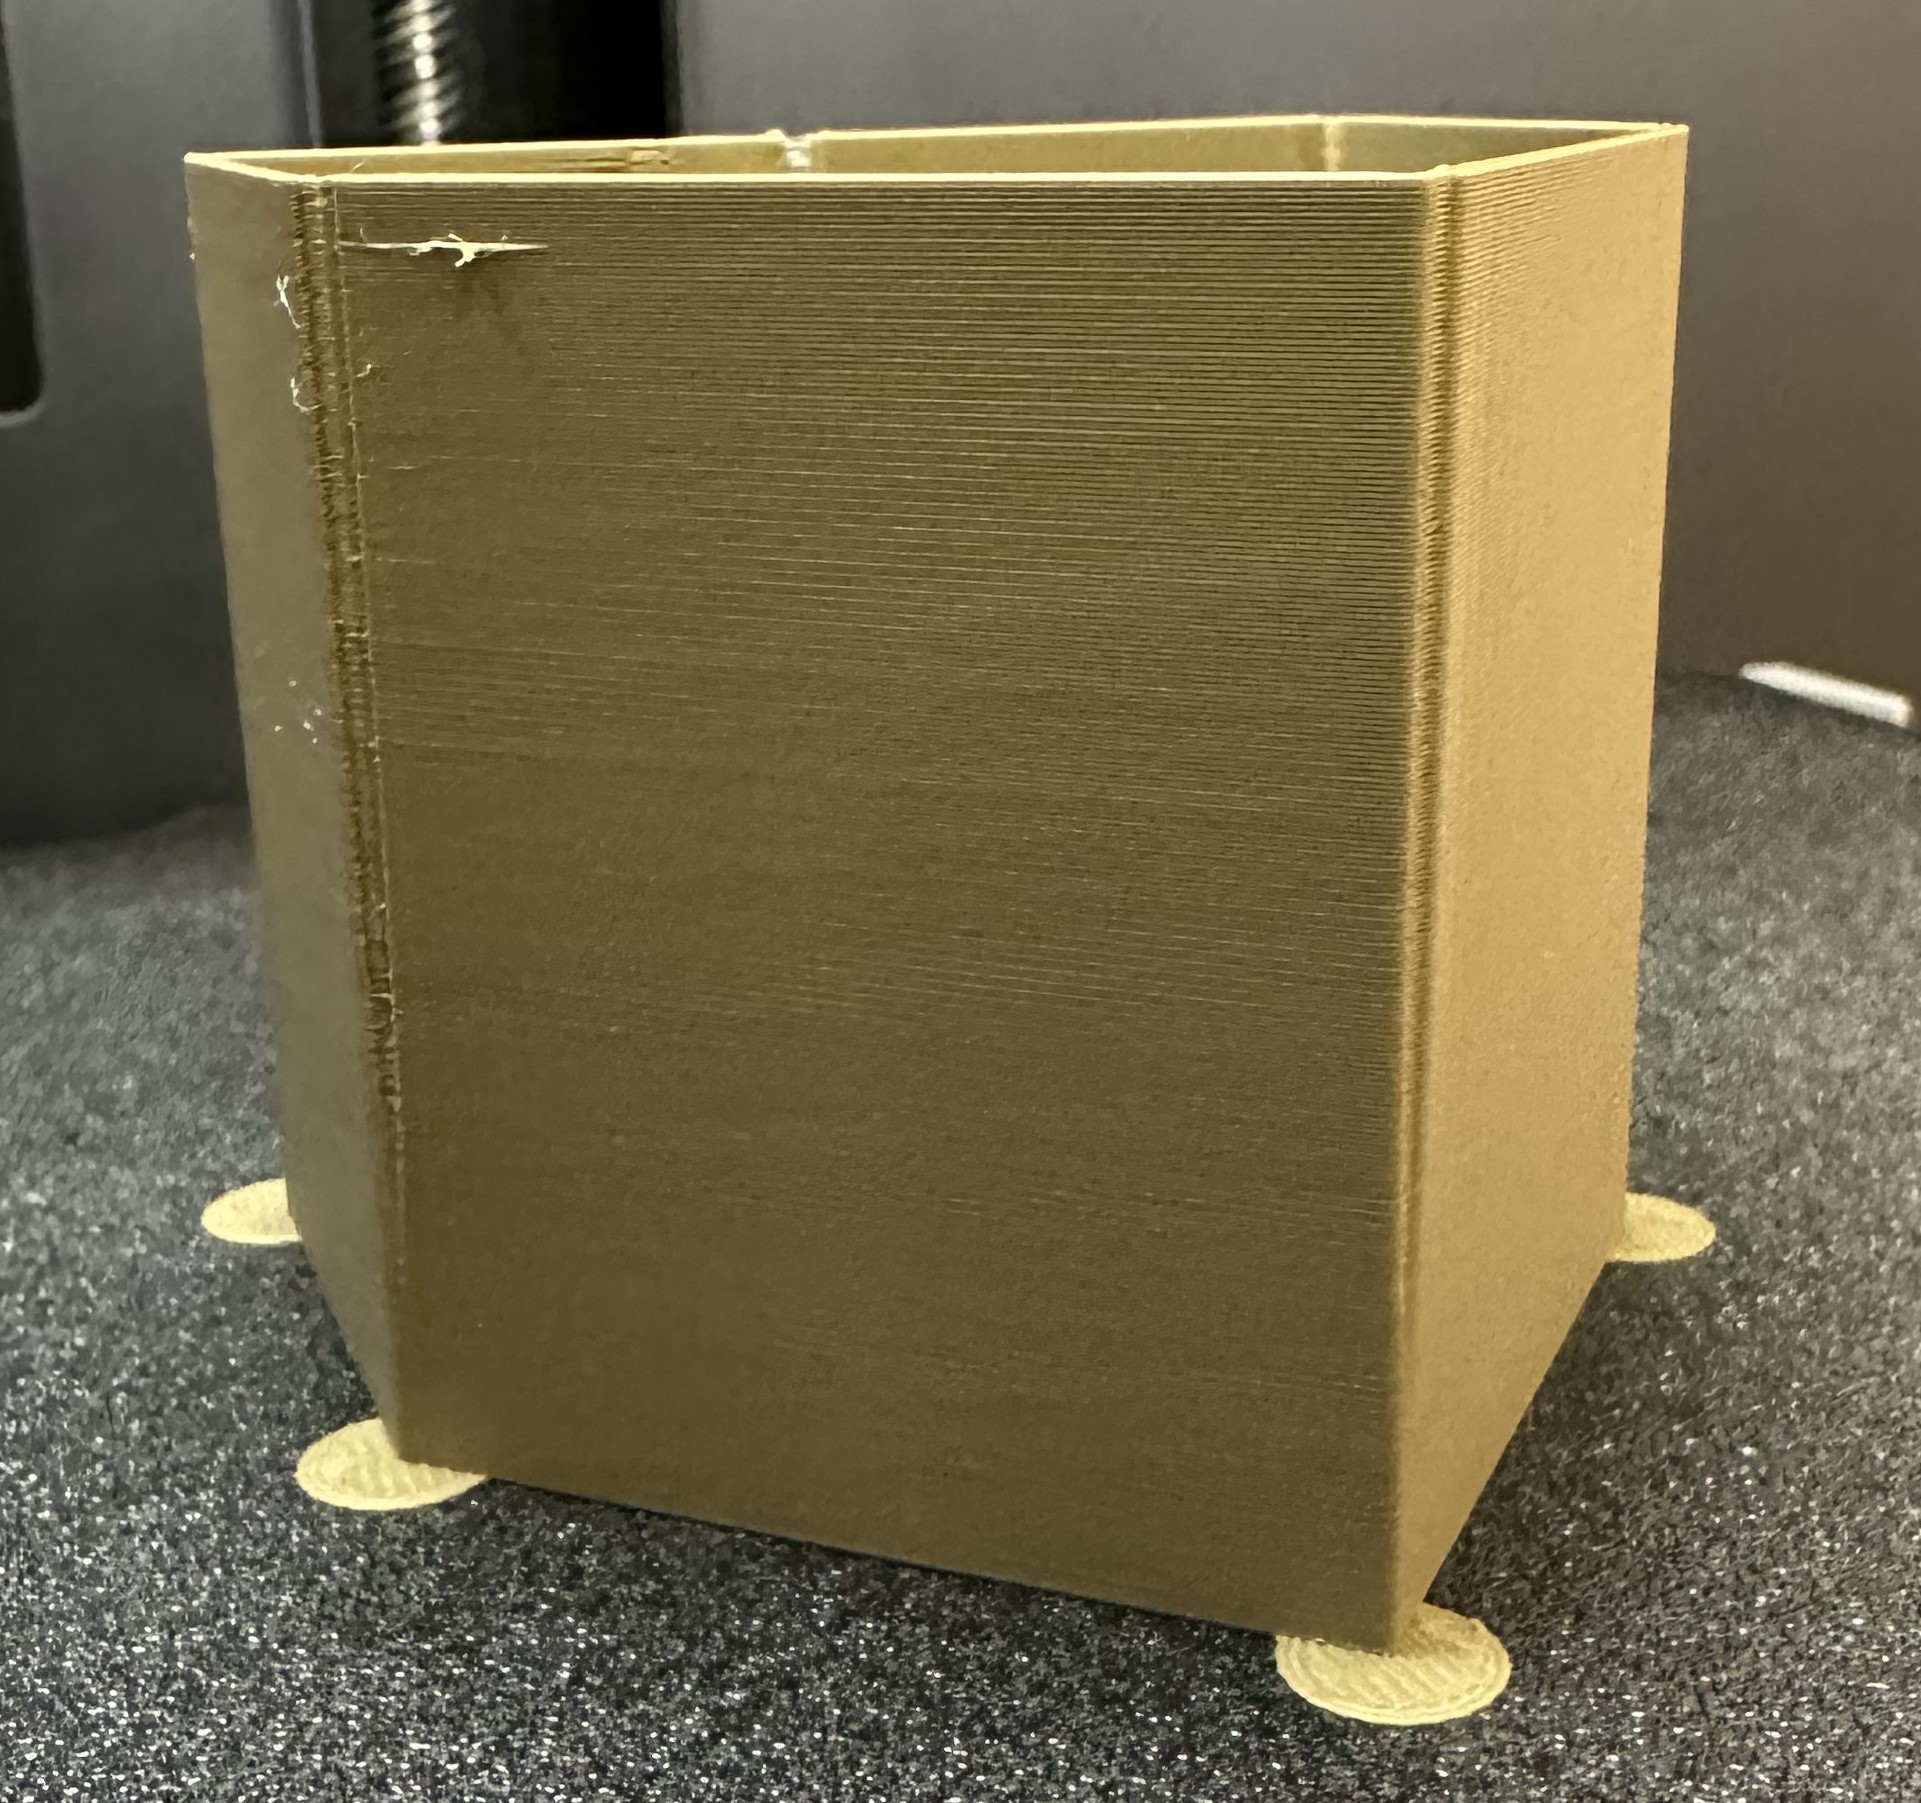
NOTE:
- For Bambulab X1/X1C users, make sure you do not select the 'Flow calibration' option.*

Temp tower
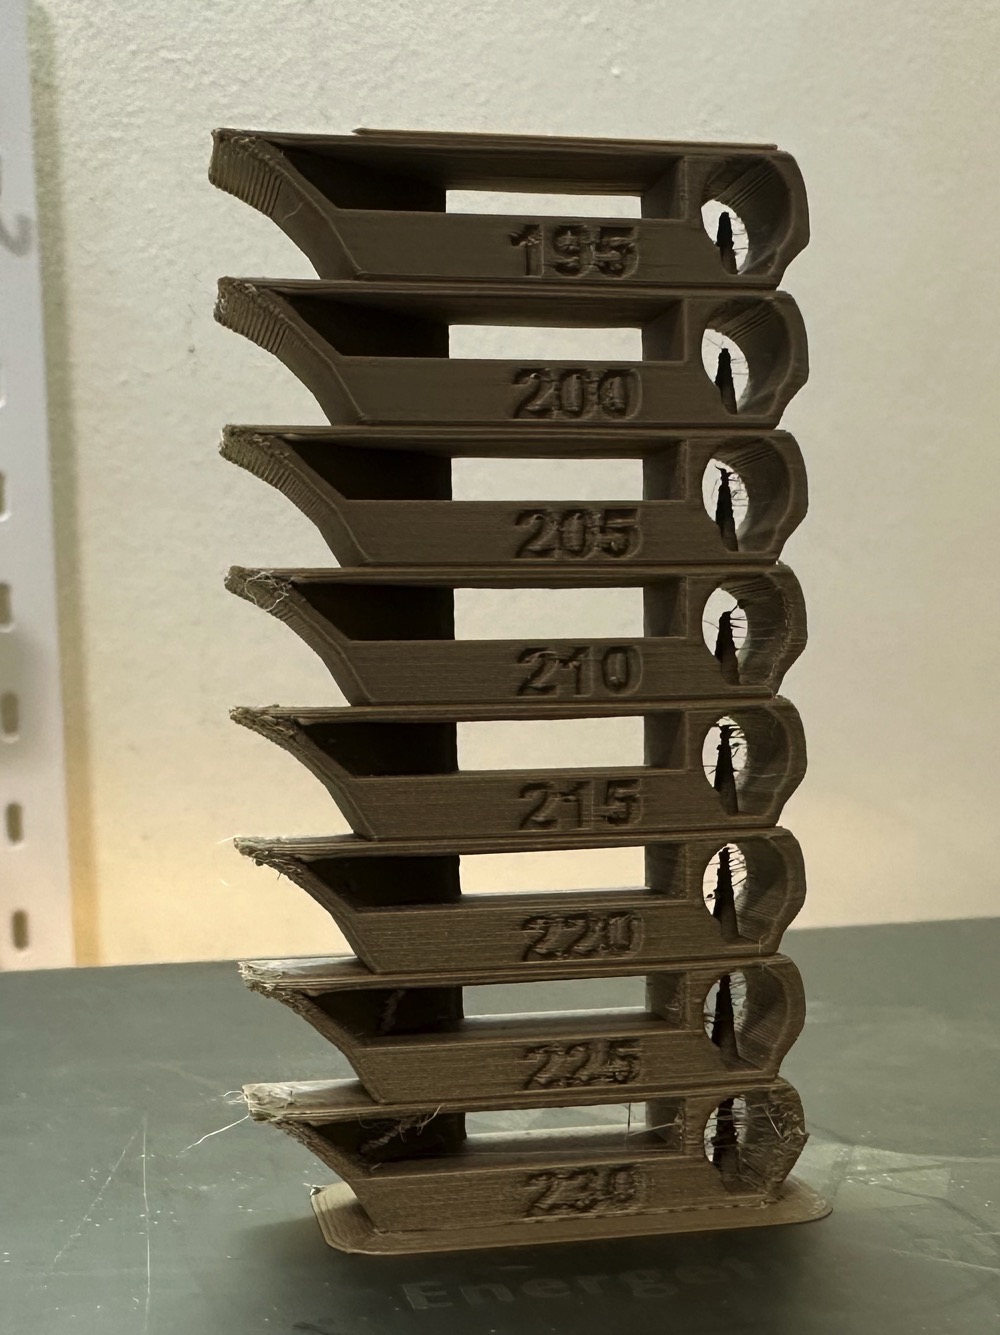
Temp tower is a straightforward test. The temp tower is a vertical tower with multiple blocks, each printed at a different temperature. Once the print is complete, we can examine each block of the tower and determine the optimal temperature for the filament. The optimal temperature is the one that produces the highest quality print with the least amount of issues, such as stringing, layer adhesion, warping (overhang), and bridging.
Credits:
- Flowrate test is inspired by SuperSlicer
- PA Line method is inspired by K-factor Calibration Pattern
- PA Tower method is inspired by Klipper
- *Temp tower model is remixed from Smart compact temperature calibration tower
- chapgpt ;)