Creating the texture file - chocmake/MGSV-Custom-Texture-Path-Hex-Replacer GitHub Wiki

Contents
- Converting and importing the texture
- Making the texture
- Exporting the texture
- Converting back to FTEX
The meat and potatoes of any re-texture mod is obviously the actual re-texturing. For this guide I went for a straightforward color change for the supply box, turning it from green to white.
Something to keep in mind is the lighting of the game and reflectivity of the model's material affect how colors appear in-game. This particularly affects light colors/shades in albedo textures when viewed in-game where they can look blown-out/overexposed if made too light. If you experience this you may need to reduce the lightest parts of a texture's brightness to get a desired look.
Tip: for more technical details about texture files in MGSV refer to this external wiki page.
Converting and importing the texture
- Download and install Nvidia's texture tools for Photoshop.
- Convert the FTEX texture file we identified in the earlier section, contained within the
Originaldirectory, to a usable DDS file for Photoshop by dragging and dropping just the.ftexfile onto FtexTool.exe. A.ddstexture file will appear beside the.ftex.
- Open the DDS file in Photoshop and in the Nvidia DDS Read Properties import window make sure the Load MIP Maps option is unchecked.

- Note: some versions of Photoshop, such as Creative Cloud (CC), don't automatically display the DDS Read Properties window when opening texture files. To access the window in those versions instead first go to save any file as a DDS (see step 1 in the following section) then when the Nvidia export options window appears click the Read Config button, which will open the same options window as seen above.
Tip: if you notice when importing a texture that multiple sizes of the texture appear in the one image this means that the MIP maps are being loaded, which we don't want. See step 3 above for how to disable them being loaded at import.
Making the texture
- In Photoshop make the desired changes to the texture. It can be anything.
- Save to a PSD during this for flexibility, that you save outside of the
Original/Moddeddirectories.
Original texture:
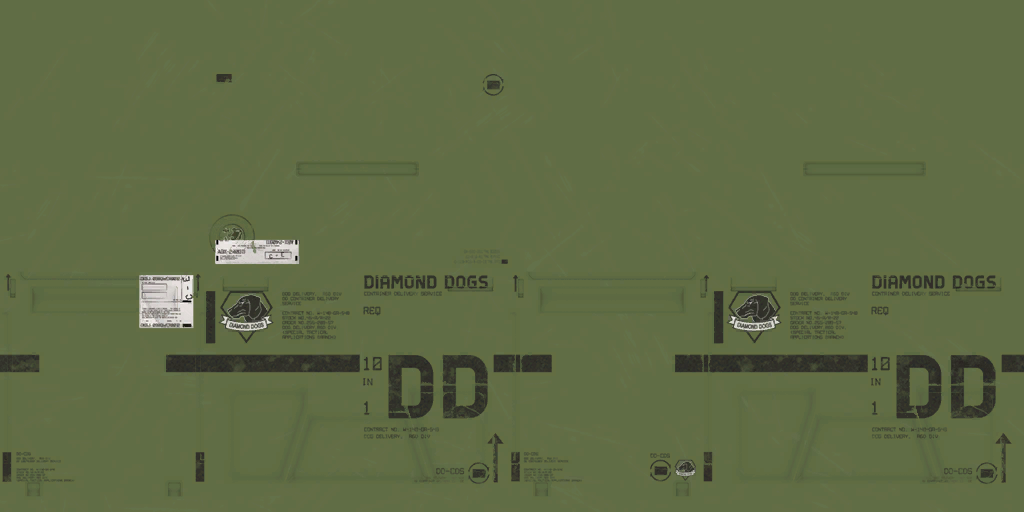
Modified texture:

Notice how relatively dark the 'white' is. As mentioned in the intro to this section this is because after the game has applied reflection data it actually appears lighter.
Keep in mind different textures are wrapped onto in-game models differently, so if the position of a particular graphic you want to add is important it can worthwhile experimenting with trial and error, or using something more advanced like FMDL Studio to import and observe the model and texture.
Exporting the texture
-
In Photoshop save a copy of the file as a DDS (selecting 'DDS' as the format from the Save As drop-down) to the custom path we created in the previous section (in my case a directory named
SupplyBoxVariants).- Choose a filename that's broad enough to describe the retexture so as to allow potential re-texture variants to use the same name (see note at the bottom).
-
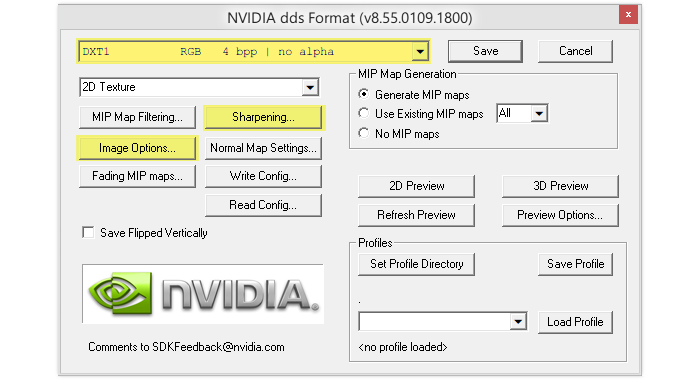
The Nvidia DDS export options window will appear. Change the following options:
- The first drop-down menu set to
DXT1 RGB 4 bpp | no alpha- Note: if you happen to be modding a texture which uses an alpha channel (such as the normal map) instead use the following preset:
DXT5 ARGB 8 bpp | interpolated alpha
- Note: if you happen to be modding a texture which uses an alpha channel (such as the normal map) instead use the following preset:
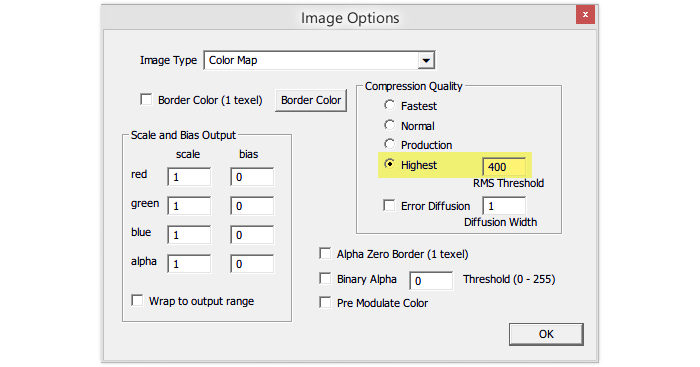
- In the Image Options button settings the Compression Quality set to
Highest - In the Sharpening button settings the first input field under Number of Times to Apply Sharpening per MIP Level set to
0.
- The first drop-down menu set to

Done!
Note: it's pragmatic to pick a custom filename that can be re-used for any variant re-textures, so as to avoid having to re-edit the model file (which we'll get to in the next section) for each variant.
Good example:
Assets\Mods\choc\SupplyBoxVariants\Retexture.ddsBad example:
Assets\Mods\choc\SupplyBoxVariants\White.ddsIf
Whitewas used instead of something more generic the FMDL model file would need to be re-edited for each color variant likeRed, etc. Keeping it generic means you only have to modify the model file a single time and it can be used for all potential re-texture variants.
Converting back to FTEX
Only thing left to change with the texture is converting it back to a format the game recognizes.
- Drag and drop the modded DDS file onto FtexTool.exe to convert from the DDS format back to an FTEX.
- Delete the modded DDS file since we no longer need it, keeping the directory containing just the FTEX and FTEXS files that have been generated by FtexTool.
Ready for the next section!
Next
Tweaking the model file to point to our fancy new custom path.